
Removing body hair in Photoshop has always been one of those tasks where the right technique depends entirely on what you’re trying to achieve. A quick clean-up of a few stray arm hairs for a social media post, needs a completely different approach to professional retouching of a full body shot for a fashion editorial.
Photoshop now has three genuinely distinct methods available – and the fastest one didn’t exist until 2023. The AI-powered Remove Tool can handle light to moderate body hair removal with a single brush stroke in under a minute. For moderate coverage over larger areas, Content-Aware Fill gives you more control. And for dense hair, complex skin textures, or work where the result needs to be indistinguishable from a professional retouch, the manual method using the Clone Stamp and Healing Brush remains the most reliable path.
This guide covers all three, ranked by speed, with clear guidance on when each one is the right call.
Note: this guide is about removing body hair from photos using Photoshop — if you’re looking for physical hair removal methods, this isn’t the right page.
Updated 2026 · Photoshop 2024 & 2025 compatible · Works on body hair, arm hair, chest hair, and facial fuzz
| Difficulty | Beginner (Methods 1 & 2) · Intermediate (Method 3) |
| Time Required | Method 1 (Remove Tool): 1–3 minutes Method 2 (Content-Aware): 5–10 min Method 3 (Manual): 20–40 min |
| Software | Adobe Photoshop 2023 or later for Method 1 All versions for Methods 2 & 3 |
| Best Used For | Portrait retouching, fashion photography, product shots, social media images |
| Key Tools | Remove Tool (AI), Content-Aware Fill, Clone Stamp, Healing Brush, Smudge Tool |
| Key Principle | Always preserve skin texture — the goal is natural, not plastic |
| 📌 James’ Note: A word on ethics before we start: body hair retouching is a legitimate and widely-used technique in professional photography – fashion, beauty, product, and portrait photographers all use it regularly. Like all retouching, the goal should be enhancing the image for the intended purpose, not imposing unrealistic standards. Always retouch to the brief, not beyond it. |
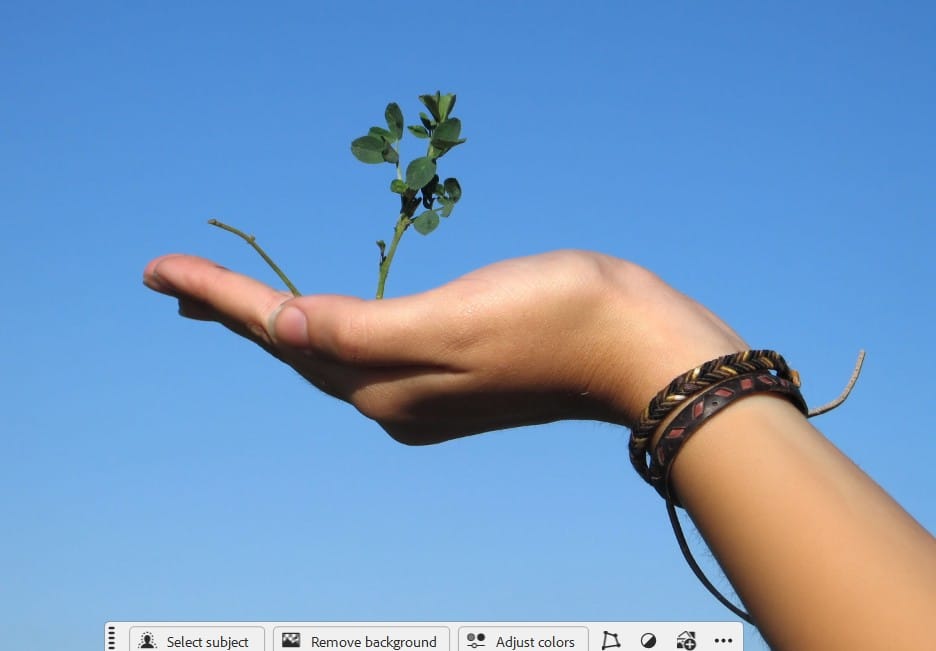
Below is an example of before-after comparison of hair removal:
Before

After

OK Let’s get started!
METHOD 1: PHOTOSHOP’S AI REMOVE TOOL — THE FASTEST APPROACH
Available in: Photoshop 2023 (v24.5) and later, with Generative AI upgrade in Photoshop 2025 · Best for: Light to moderate hair removal, quick social media edits, stray hair cleanup
| ⚡ Speed Rating: This is Photoshop’s built-in AI body hair remover. The Remove Tool uses machine learning to analyse surrounding skin texture and regenerate it over the hair area — it is directly comparable to dedicated ‘AI body hair remover’ apps, but with the advantage of working non-destructively inside your full Photoshop workflow. |
Step 1: Set Up a Non-Destructive Editing Layer
Open your photo in Photoshop. Before touching anything, duplicate the Background layer (Ctrl/Cmd+J) and name it ‘Remove Tool Edit’. Alternatively, create a new empty layer (Ctrl/Cmd+Shift+N) and name it ‘Removal’. Working on a separate layer means you can reduce opacity, mask areas, or delete and restart at any point without touching the original.
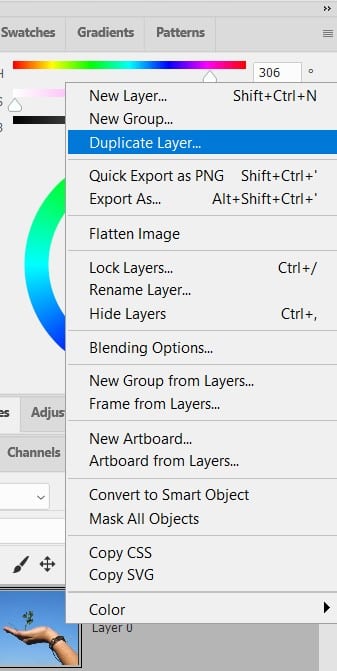
If using the empty layer approach, make sure to enable ‘Sample All Layers’ in the Options Bar — without this, the Remove Tool on an empty layer won’t see the pixels below it and will produce nothing.
| 💡 Pro Tip: Lock the original Background layer by clicking the padlock icon in the Layers panel. This prevents accidentally editing the wrong layer — a common mistake when switching tools quickly. |
Step 2: Select the Remove Tool
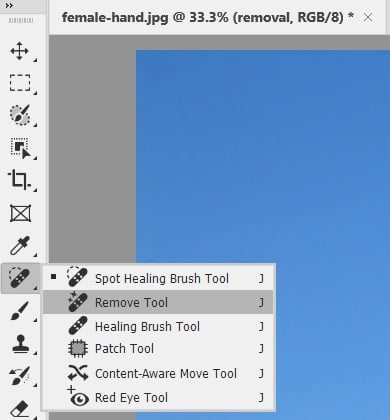
The Remove Tool is nested in the toolbar on the left side of the screen. Click and hold the Spot Healing Brush icon (it looks like a bandage with a starburst) to reveal the flyout menu, then select Remove Tool. Alternatively, press J to cycle through the healing tool group until you land on it.
In the Options Bar at the top, set:
- Brush Size: slightly larger than the width of the hair area you’re targeting — for individual arm hairs, 15–25px; for larger patches, 40–80px.
- Mode: Auto (recommended). This lets Photoshop decide whether to use traditional Content-Aware processing (faster, no internet needed) or Generative AI (slower but better for larger areas). Photoshop 2025 is quite good at making this call correctly.
- Remove after each stroke: leave this ON for individual hair removal. Turn it OFF if you want to paint over a large area with multiple strokes before committing — then click the checkmark to apply all strokes at once.
Step 3: Paint Over the Hair Areas
With your edit layer selected, simply paint over the body hair you want to remove using loose, confident strokes. The Remove Tool works best when you paint slightly beyond the hair area into the surrounding clean skin — this gives the AI more clean skin texture to sample from.
For arm hair or leg hair in a defined direction, paint in the direction the hair grows rather than against it. This gives the AI better context for the fill direction. For scattered or random hair patterns, paint in short overlapping dabs rather than long drags.
When you release the brush stroke (if ‘Remove after each stroke’ is on), Photoshop processes the area and replaces the hair with synthesised skin. On Photoshop 2025 in Generative AI mode, this takes 2–5 seconds per stroke as it connects to Adobe’s Firefly servers. In standard Content-Aware mode it’s near-instant.

| ⚠ Watch Out: If Generative AI mode is producing results that look slightly different from the surrounding skin in colour or texture, switch Mode to ‘Off’ (standard Content-Aware) and try again. For body hair on consistent skin tones — arms, legs, shoulders — Content-Aware mode often produces cleaner results than Generative AI, which is better suited for complex scene removal. |
| 🔍 Why this works: The Remove Tool works so well on body hair because individual hairs are relatively thin and the surrounding skin provides abundant clean texture to sample from. The AI identifies the skin colour, pore pattern, and lighting gradient in the adjacent area and generates matching texture to fill the hair gap. The result is genuinely indistinguishable from a manual clone stamp job for light-to-moderate hair — and significantly faster. |
Step 4: Review and Refine
Zoom to 100% (Ctrl/Cmd+1) and scroll across the treated area systematically. Look for:
- Repeated patterns: the AI occasionally generates a repeating texture patch. If you see a tiled or stamped-looking area, paint over it again to regenerate — each stroke produces a different result.
- Colour mismatch: the filled area looks slightly lighter, darker, or differently tinted than surrounding skin. Use the Healing Brush Tool (not the Remove Tool) to touch up these edges — the Healing Brush blends colour and luminosity from surrounding pixels, which evens out any tone differences.
- Residual hair: fine translucent hairs at the edges of the treated area that the AI partially missed. A single pass with the Spot Healing Brush at small brush size cleans these up in seconds.
| 💡 Pro Tip: Toggle the edit layer on and off (click the eye icon) to compare before and after. If any area looks over-processed or unnatural at the 100% zoom level, that’s a signal to use the Manual Method (Method 3) for that specific area rather than trying to push the AI further. |
METHOD 2: CONTENT-AWARE FILL — TARGETED CONTROL FOR LARGER AREAS
Available in: All Photoshop CC versions · Best for: Larger, more defined patches of hair where you want to control exactly what Photoshop samples from
Content-Aware Fill gives you a dedicated workspace where you can visually control which areas of the image Photoshop uses as the fill source. For body hair removal, this matters when the hair is dense enough that the automatic sampling might accidentally sample from another hair area rather than clean skin. The workspace lets you paint a green sampling mask over only the clean skin zones, guiding the fill to produce a cleaner result.
Step 1: Make a Selection Around the Hair Area
Use the Lasso Tool (L) to draw a loose selection around the body hair area you want to remove. The selection doesn’t need to be precise — leave a 10–20px margin of clean skin around the hair area. This clean-skin margin is what Content-Aware Fill samples from, so including it in the selection boundary is important.
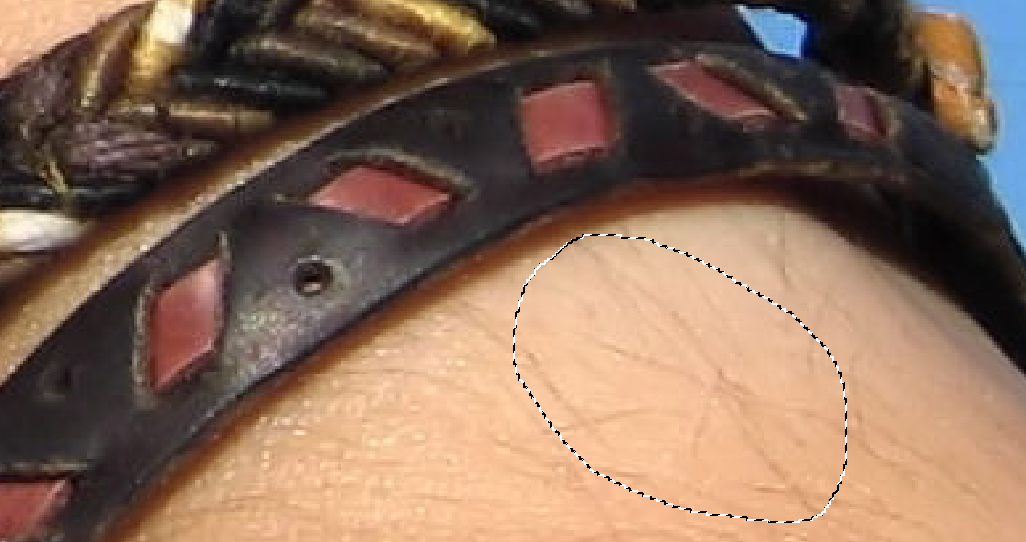
For a large area of hair (like a full forearm), break it into sections — select and fill one third of the arm, then the next third, then the last. This gives the AI a larger proportion of clean skin to sample from on each pass, producing more consistent results than trying to fill the whole area at once.
| 💡 Pro Tip: Add a 2px feather to your Lasso selection (set in the Options Bar before drawing) to avoid hard edges at the fill boundary. A feathered selection blends the fill into the surrounding skin much more naturally. |
Step 2: Open Content-Aware Fill Workspace
Go to Edit > Content-Aware Fill. The dedicated Content-Aware Fill workspace opens, showing your image on the left and the fill preview on the right. The green overlay you see on the image shows which areas Photoshop is sampling from to create the fill.
By default, Photoshop casts a wide sampling net — it may be sampling from hair areas on other parts of the body, which produces poor results. This is where the workspace gives you control the Remove Tool doesn’t:
Select the Sampling Brush Tool in the workspace (the green paint icon on the left toolbar).
Set it to ‘Subtract’ mode and paint over any hair areas that are currently included in the green sampling zone. This tells Photoshop to stop sampling from those areas.
Switch to ‘Add’ mode and paint over clean, hair-free skin areas to confirm Photoshop should sample from there.
Watch the preview on the right update in real time as you adjust the sampling zone.
Step 3: Adjust Fill Settings and Apply
In the Content-Aware Fill panel on the right, adjust:
- Color Adaptation: High. This is critical for skin — it allows Photoshop to adjust the fill’s colour to match the tonal variation of the surrounding skin area, which prevents the flat, slightly-wrong-colour patches that early Content-Aware Fill was notorious for.
- Rotation Adaptation: None or Low. Body hair tends to grow in consistent directions — disabling rotation adaptation prevents Photoshop from sampling from skin areas at the wrong angle.
- Scale: Off. Keeps the sampled texture at the correct scale relative to the surrounding skin pores and detail.
- Output To: New Layer. Always. This places the fill result on a separate layer, keeping the original intact.
Click OK. Photoshop generates the fill. Deselect (Ctrl/Cmd+D) and evaluate the result at 100% zoom. If areas look mismatched, re-enter the Content-Aware Fill workspace (Edit > Content-Aware Fill again with the area re-selected) and adjust the sampling zone further.
METHOD 3: THE MANUAL METHOD — PROFESSIONAL-GRADE RESULTS
Available in: All Photoshop versions · Best for: Dense hair, complex lighting, high-end editorial work, any situation where Methods 1 and 2 produce visible artefacts
The manual method — using the Smudge Tool, Blur Tool, Clone Stamp, and Healing Brush in combination — produces the most natural-looking results because you’re working with the actual skin texture rather than AI-generated fills. It takes longer, but it’s the technique professional retouchers use for hero images where the result will be examined at full resolution.
The key insight that makes this method work: instead of trying to erase or fill the hair, we’re using the Smudge Tool to push and blend existing clean skin texture over the hair areas, preserving the underlying skin’s pore pattern and lighting. The Blur Tool suppresses remaining hair detail, and the Clone Stamp sources clean skin from adjacent areas.
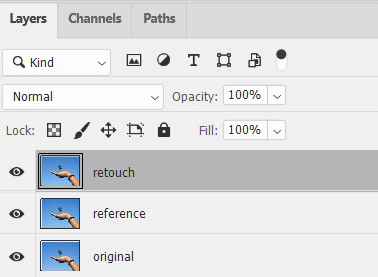
Step 1: Set Up Your Layer Stack
Duplicate the Background layer twice (Ctrl/Cmd+J twice). Name the top duplicate ‘Retouch’ and the one below ‘Reference’. Work exclusively on the ‘Retouch’ layer. Having the ‘Reference’ layer visible below gives you a safety net — if the Retouch layer becomes too processed, you can lower its opacity to blend with the more natural Reference layer below.
Zoom in to 100–150% on the area you’re retouching. Working at lower zoom levels makes it impossible to see whether you’re preserving skin texture correctly — and texture preservation is everything in this technique.
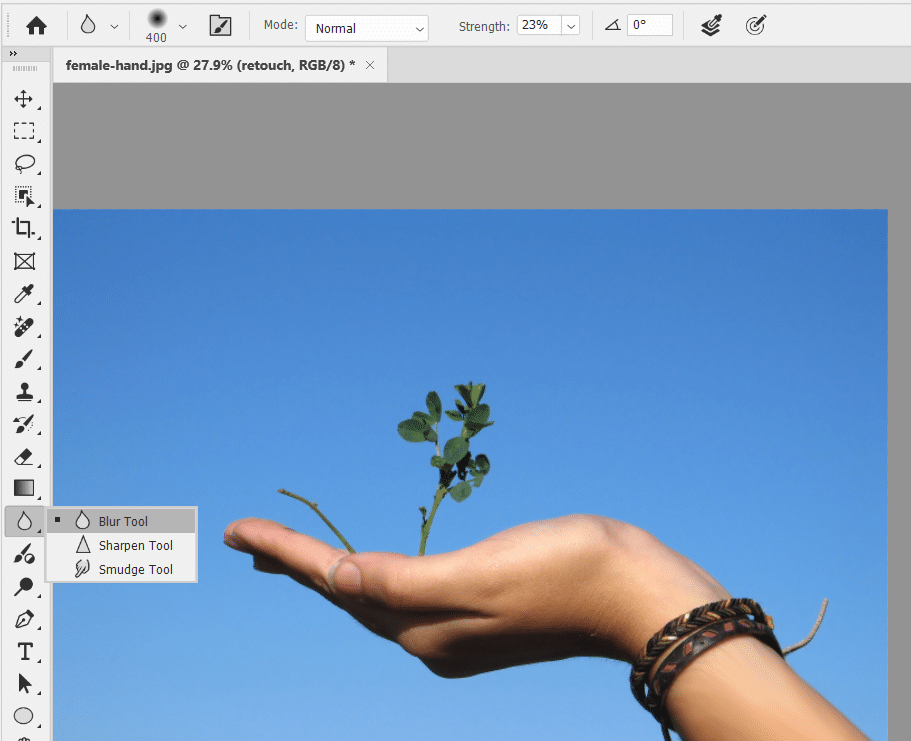
Step 2: Use the Smudge Tool to Push Clean Skin Over Hair
Select the Smudge Tool (found under the Blur Tool group in the toolbar, or press Shift+R to cycle to it).

Configure it as follows:
- Brush: soft round, 0% hardness.
- Size: slightly wider than one hair — typically 8–15px for arm hair, 4–8px for fine facial fuzz.
- Strength: 25–35%. Low strength is critical. High strength (above 50%) smears the skin into an obviously processed, plastic-looking surface.
- Sample All Layers: OFF. Work only on the Retouch layer.
Technique: position the brush at the edge of a clean skin area adjacent to the hair. Stroke in the direction of the skin’s natural texture — typically perpendicular to the hair growth direction. You’re pushing clean skin texture across the hair, not dragging the hair away. Short strokes of 20–40px work better than long drags across the whole area.
Work systematically — start from one edge and work toward the other in overlapping passes. Don’t try to remove every hair in one stroke. Multiple low-strength passes build up naturally without creating obvious brush tracks.
| 🔍 Why this works: The Smudge Tool works for hair removal because it physically displaces pixels rather than filling them algorithmically. When you push clean skin texture across a hair, the underlying skin information was already there — you’re revealing it rather than generating it. This is why the result preserves the skin’s actual pore pattern and lighting, which no AI fill can perfectly replicate. |
Step 3: Suppress Residual Hair Detail with the Blur Tool
After the Smudge passes, fine hair edges and slight smear tracks remain visible at 100% zoom. The Blur Tool (R) softens these without the colour-shifting effect that the Healing Brush sometimes introduces on skin:
- Brush size: 2–3x larger than your Smudge brush — you’re working on the same area but at a wider, softer scale.
- Strength: 20–30%. The goal is to soften hair edges, not to blur the entire skin surface into mush.
- Mode: Normal.
Apply 2–3 passes over the treated area with the Blur Tool. Toggle the layer on/off after each pass to check you’re not losing too much texture detail. The skin should still show natural pore structure at 100% zoom — if it’s starting to look smooth and plastic, you’ve gone too far.
| ⚠ Watch Out: The most common error in manual hair retouching is over-blurring the skin surface. If your result looks like airbrushed porcelain rather than natural skin at 100% zoom, use Edit > Fade Blur (immediately after the blur stroke) to reduce its intensity, or reduce the Blur Tool strength and redo the pass. |
Step 4: Clone Stamp for Dense or Stubborn Areas
For areas where the Smudge Tool hasn’t fully removed the hair — typically dense patches or areas where hairs cross at different angles — the Clone Stamp (S) sources clean skin from a nearby area and paints it directly over the problem zone:
- Brush size: just larger than the hair patch you’re targeting.
- Hardness: 0%.
- Opacity: 60–80%. Working below 100% lets you build up the clone gradually, which blends more naturally than a single full-opacity stamp.
- Aligned: ON. This moves the sample source point in sync with your brush movement, maintaining consistent sampling from the same skin zone.
Alt/Opt+click to set the sample source on a clean skin area as close as possible to the target area — the closer the source, the better the lighting and colour match. Stamp over the problem area in short, overlapping dabs rather than long strokes.
| 💡 Pro Tip: After Clone Stamp work, run a final pass with the Healing Brush (not the Spot Healing Brush) over any edges where the cloned skin meets the surrounding area. The Healing Brush blends the clone’s colour and luminosity into the surrounding skin, eliminating any visible edge where the two skin zones meet. |
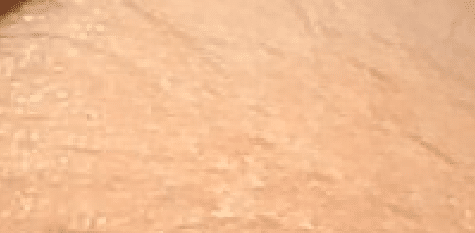
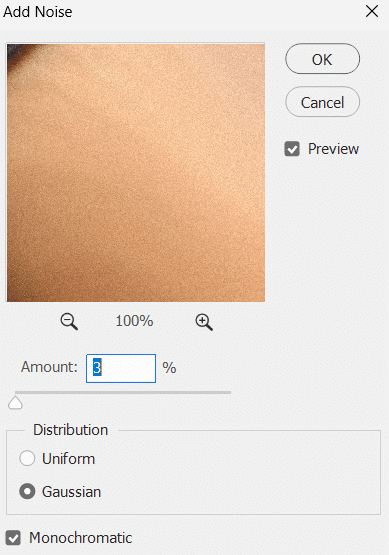
Step 5: Restore Skin Texture with Noise
After significant retouching work, the treated area often looks slightly smoother than the surrounding skin — especially visible on high-resolution images or when viewed at 100%. Adding a small amount of noise restores the micro-texture that makes skin look photographed rather than illustrated.
- Select your Retouch layer.
- Go to Filter > Noise > Add Noise.
- Set Amount to 1.5–3% (start low — this is stronger than it looks on skin).
- Select Gaussian, and check Monochromatic.
- Click OK.
The Monochromatic setting is essential — colour noise on skin creates obvious colour speckles. Monochromatic noise adds luminosity variation only, which reads as natural pore-level skin texture at most viewing distances.
| 📌 James’ Note: Whether and how much noise to add depends on your source image. A photo shot at ISO 800 will have visible grain; your retouch should match it. A studio shot at ISO 100 will be very clean; a tiny amount of noise (1–1.5%) is usually enough. When in doubt, zoom to 50% and compare the treated area to surrounding untreated skin — they should be visually indistinguishable. |
Method Comparison — Quick Reference
| Method | Best Use Case | Speed | Result Quality | Skill Needed |
| 1 — Remove Tool (AI) | Stray hairs, quick edits | ★★★★★ | ★★★★☆ | Beginner |
| 2 — Content-Aware Fill | Larger defined patches | ★★★★☆ | ★★★★☆ | Beginner |
| 3 — Manual (Clone/Smudge) | Dense hair, pro work | ★★☆☆☆ | ★★★★★ | Intermediate |
Troubleshooting — Common Problems
| Problem | Cause | Fix |
| Remove Tool result looks tiled/repeated | AI sampled a single skin patch repeatedly | Paint over again — each stroke regenerates differently. Also try switching Mode from ‘Auto’ to Off (Content-Aware) |
| Fill area has wrong colour/tone | Content-Aware sampled from different skin zone or lighting area | Use Content-Aware Fill workspace to restrict sampling zone. Finish with Healing Brush to blend tones |
| Smudge Tool creating plastic/blurry skin | Strength too high or too many passes | Reduce Strength to 20–25%. Take fewer passes. Use Edit > Fade to dial back the last stroke |
| Hair partially removed but edge still visible | Brush too small or single-pass approach | Work in multiple overlapping passes. Use Healing Brush on remaining edges to blend |
| Clone Stamp leaving visible patch boundary | Source point too far from target area | Sample from closer clean skin. Follow with Healing Brush to blend clone edges into surroundings |
| Result looks over-retouched / unnatural | Too much overall processing | Reduce Retouch layer opacity to 70–85% to blend with original. Add slight noise with Filter > Noise > Add Noise |
| Remove Tool slow / requires internet | Generative AI mode active | Set Mode to ‘Off’ for Content-Aware only — instant results, no internet required. Use Gen AI for larger areas only |
Professional Retouching Principles for Natural Results
After 25 years of Photoshop retouching, these are the principles that separate natural-looking work from obvious over-retouching:
- Always evaluate at 50%, not 100%: 100% zoom is useful for checking technical quality, but final retouching decisions should be made at the viewing distance the image will actually be seen at. At 50%, minor texture inconsistencies disappear; the things that still look wrong at 50% are the ones worth fixing.
- Retain some hair: complete hair removal often looks less natural than partial reduction, especially on areas like forearms and legs where some hair is anatomically expected. For many photos, removing 60–70% of the hair visibility rather than 100% produces a more convincing result.
- Match the light: body hair casts micro-shadows on skin. When you remove dense hair from a lit area, the underlying skin may appear slightly too bright because those shadow micro-tones were part of the overall tonal balance. A light Curves adjustment darkening the midtones slightly in the treated area restores the correct tonal balance.
- Work non-destructively throughout: every editing action should be on a separate layer, not the original. This allows you to reduce opacity, mask specific areas, or discard and redo at any point — a professional standard that saves enormous time when a client requests changes.
- Compare regularly: toggle between the original and your retouched version every few minutes. Tunnel vision is real — stepping back and comparing resets your eye and prevents over-processing.
OK that’s it for this tutorial! Of course the retouch won’t just stop here, there are still plenty of methods you can try out to make the picture even better.
Hope you enjoy it drop me a comment if you have any question, I will try my best to help you out.
Cheers and have a nice day!
16 Comments
It’s amazing ! I will try it …
Thank you
Hi,
Thank you for the tutorial. But I wasn’t too clear on some parts. Specifically, the part where you say Surface Blur, I couldn’t find that on the Photoshop CS3 on Mac. I used a Smart Blur instead, since that seemed to fit the picture you gave. For the step where you add a layer mask, I’m unable to draw anything on the mask. All I can do is erase stuff. Any ideas?
Thanks!
awesome tutorial, i like it…
tnx!
Very Cool. Thanks for posting.
AM
nice tut, thanks for post..
Good tut and understandable. Only problem is you turned a guy into a woman.
Thanks for an interesting lesson. After skin degradation, not bad to add noise for structure restoration. I on a site have many lessons on a retouch
Nice tip! thanks for sharing
sounds easy and effective ! thanks
Awesome thanks! This is exactly what I was looking for.
Very useful tutorial! Thanks very much for sharing!
excatly what I need!
tanx alot ;)
The method is good if you don’t mind the artificial looking result. For complete retouching some technique for adding noise, as ephoto said above, or other “restructuring” of the skin texture would be needed.
its very nice bt it need some realistic look
Very useful. Thanks for sharing
Maybe now that it’s 2017, you can also show us the steps to clean the dirty fingernail :-{