
Learn how to create epic war scenes in Photoshop with this step-by-step tutorial. We’ll cover everything from setting up your canvas to adding realistic details, so you can create stunning battle scenes that will blow your audience away.
This tutorial is perfect for beginners and experienced Photoshop users alike. By the end, you’ll have the skills you need to create your own epic battlefield scenes.
The PSD file of this tutorial is available via the PSD Vault VIP members area.
This is a intermediate level difficulty tutorial and can be a bit tricky to complete, but why not have a try!
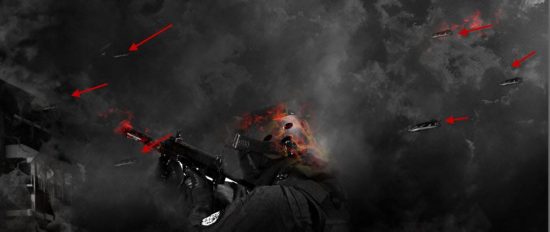
Here is a preview of the final effect I have for this tutorial: (click to enlarge)

PSD File Download
You can download the PSD File for this tutorial via the VIP Members Area for only $6.95/Month (or less)! You will not only get this PSD File, but also 250+ other PSD Files + Extra Goodies + Exclusive Photoshop tutorials there. Signup now and get exclusive!

OK Let’s get started!
To complete this tutorial, you will need the following stocks:
Step 1
Create a new document sized 1440px *780px with black background. Use the cloud filter or a smoke/cloud brush, add some smoke and cloud effect onto the background. Bear in mind the location of the building and the soldier we will be placing later:

After some painting this is my background effect:

Step 2
We will work on creating a severely damaged building in this step. Load the building stock image into Photoshop and select this following portion of the image:

Copy and paste the selection to our document, tidy up its edge so it blends into the background. Use the crack brush to add a few cracks to the building:


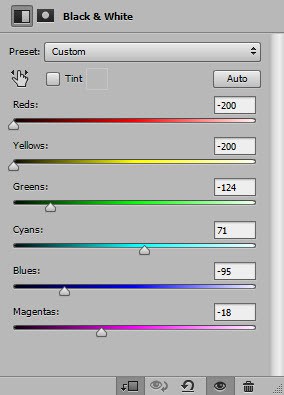
Apply the following image adjustments as clipping masks to the building layer:
Black and White

Levels

and here is the effect so far:

I also added another building on the bottom right with low opacity:

Step 3
We will add crowd into our image in this step. Load the crowd stock image into Photoshop and select the bottom left part of the image:
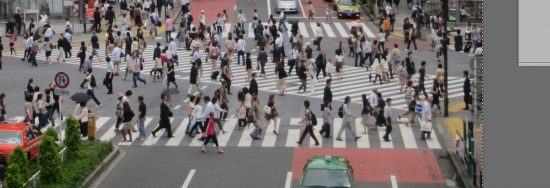
Copy and paste the selection onto our document, use a soft eraser to fade its edge:

Apply the following image adjustments to this crowd layer:
Black and White

Levels

and here is the effect so far:

Step 4
We will add some fire the building. Load the fire stock into Photoshop and use the Lasso Tool with 40px feather, select a small portion of the fire:
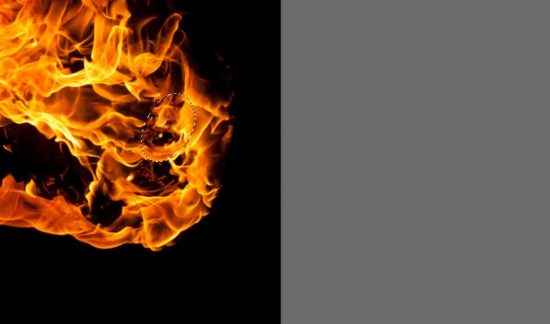
Copy and paste the selection to our document, change the layer blend mode of the new fire layer to “Screen”:

Repeat this process and add a few of the fire effect around the building:

Step 5
Load the solider stock into Photoshop and cut out the solider, paste it into the following position of our document. Use a soft eraser to fade the edge into the background smoke:

Apply the following image adjustment layers as clipping mask to the soldier layer:
Black and White
Levels

Layer mask on the above levels adjustment layer:

Curves

and this is the effect so far:

I added some fiery effect around the helmet using the same method as described in Step 4:

Step 6
Load the spaceship stock into Photoshop and select it:

Copy and paste the spaceship into our document and reduce its size:

Apply the following image adjustments to the spaceship layer:
Black and White

Levels

Add a few more spaceships around the canvas, make sure you adjust their size:
Step 7
We will add some engine light to the spaceships. Use a small soft brush like this:

Paint a dot to one of the spaceships:

Duplicate this dot layer, and free transform it as shown below:

and here is the effect you will have:
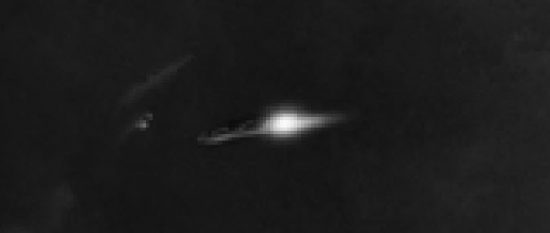
Apply this to all spaceships on our canvas:

Step 8
We’re almost done! To spice up the effect I added some more fire effect to the building top:

Also added some debris around the canvas with the debris brush:

I then flattened the image, duplicate the background layer and apply the following “Film Grain” filter to the duplicated layer:

You will see the image become slightly grainy:

I added some colour with a couple of colour balance adjustment layers. I won’t show the exact adjustment layers here, and would like you to experiment with different colour schemes and form your own design.
Here is the final effect I have: (click to enlarge)
That’s it for this tutorial! Hope you enjoy it and find it useful! If you have any questions about the steps, please contact me or leave a comment below. I will try my best to answer them.
Till next time, have a great day!
1 Comment
你会说中文吗