When Adobe moved Clarity, Dehaze, and Grain from Camera Raw into native Adjustment Layers, every blog on the planet wrote the same article:
“Here’s how to add Clarity. Here’s how to add Grain. The end.”
Boring.
You don’t need another basic tutorial. You need the weird tricks – the undocumented behaviours, the hidden blend modes, the masking hacks that actually save you time.
I’ve been testing these layers for four months. Here are 7 pro tips I wish someone had told me on day one.
Pro Tip #1: The “Invisible” Clarity Hack (Negative Values Work Differently)
Everyone knows dragging Clarity to +50 adds mid-tone contrast. But here’s what Adobe doesn’t explain.
Negative Clarity (-30 to -100) doesn’t just remove contrast—it creates a soft, dreamy glow that’s completely different from Gaussian Blur or the Soft Focus filter.
The Trick:
- Add a Clarity adjustment layer.
- Set it to -40.
- Change the Blend Mode to Screen.
- Lower Opacity to 60%.
What happens: You get a Hollywood “flashback dream sequence” effect in 10 seconds. Try doing that with Camera Raw.
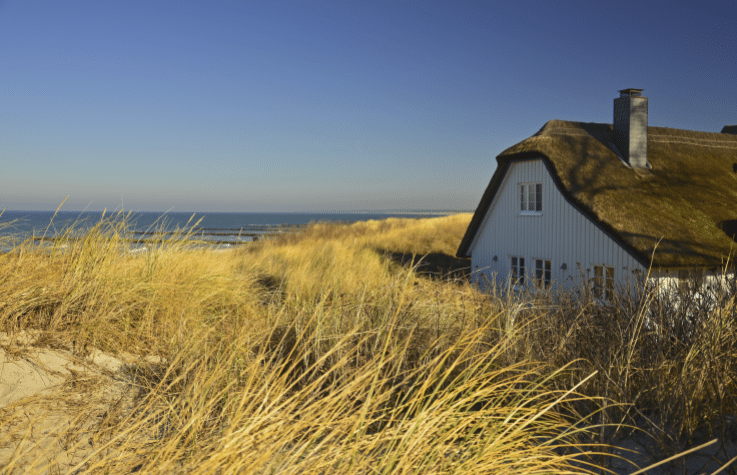
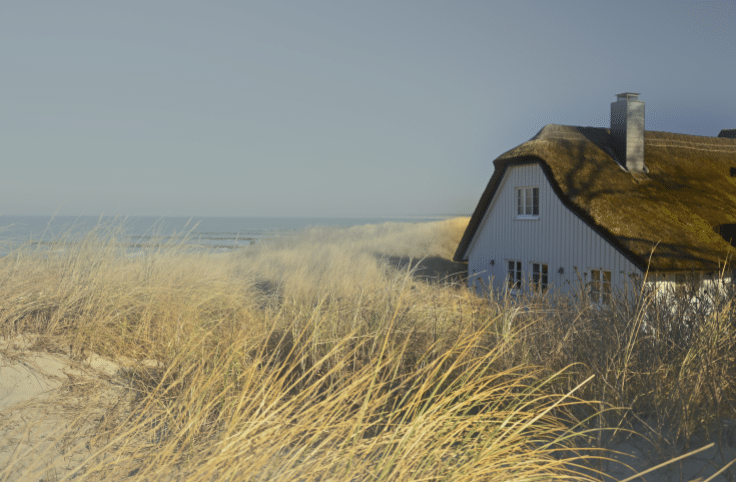
Here is an example before-and-after:
Before

After

Pro Tip #2: Dehaze Works Backwards for Fog & Mist
Dehaze is designed to remove atmospheric haze. But negative Dehaze is the best fog generator in Photoshop.
The Trick:
- Add a Dehaze adjustment layer.
- Set it to -85.
- Add a Layer Mask filled with black.
- Paint white softly over the background only (not the subject).
What happens: Your subject stays sharp. The background looks like a misty morning in London. Perfect for horror or romantic composites.
Here is an example before-and-after:
Before
After
Pro Tip #3: Stack Grain Twice (Yes, Really)
The Grain adjustment layer is good. But stacking two Grain layers with different settings mimics real film stock better than any preset.
The Trick:
- Add Grain Layer #1: Amount 30, Size 1.0, Roughness 40 (fine grain).
- Add Grain Layer #2: Amount 15, Size 3, Roughness 70 (chunky grain).
- Set Layer #2 Blend Mode to Overlay.
Why it works: Real film has multiple grain sizes layered together. Digital single-layer grain looks fake. Two layers look like Kodak Tri-X 400.
Here is an example before-and-after:
Before

After
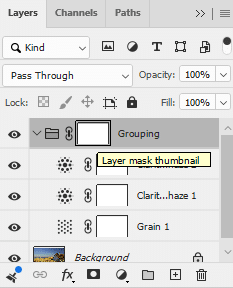
Pro Tip #4: The “Texture Lock” Masking Shortcut (Saves 5 Minutes)
The biggest advantage of these new layers is non-destructive masking. But manually painting on three separate masks is slow.
The Trick:
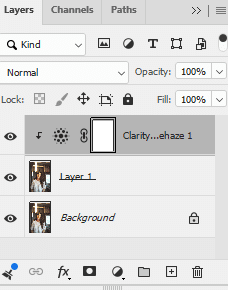
- Add your Clarity, Dehaze, and Grain layers.
- Group them into a folder (select all three, hit Ctrl+G).
- Add a mask to the folder, not the individual layers.
Pro Tip #5: Clarity + Blend If = Perfect Skin Texture
Clarity alone can make skin look like sandpaper at +50. But you want texture without destroying the highlights.
The Trick:
- Add Clarity adjustment layer at +45.
- Right-click the layer > Blending Options.
- Under Blend If (Gray) , drag the top black slider to the right (around 30).
- Hold Alt to split the slider for a smooth transition.
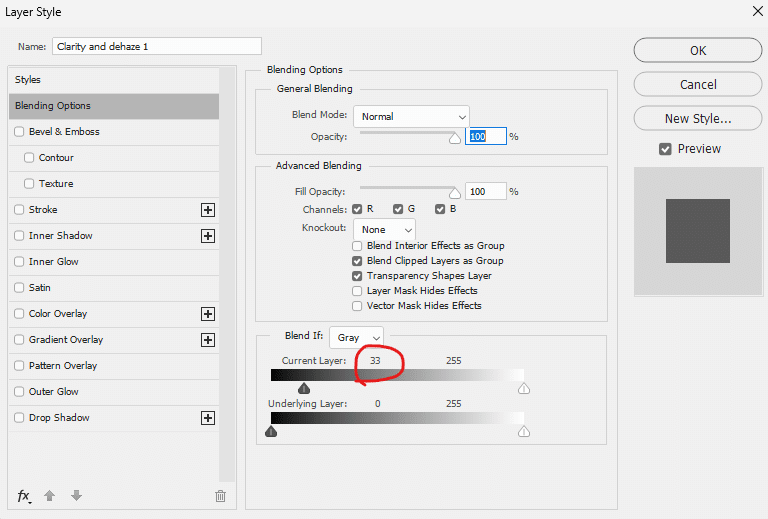
What happens: Clarity stops affecting the dark shadows. Pores stay textured, but shadows remain clean.
Pro Tip #6: Dehaze as a “Contrast Sharpener” (Not Just for Fog)
Most people use Unsharp Mask or High Pass for sharpening. But Dehaze at low values is an incredible edge sharpener that doesn’t create halos.
The Trick:
- Duplicate your background layer.
- Add a Dehaze adjustment layer at +15.
- Clip it to the duplicated layer (Alt-click between layers).
- Set the duplicated layer Blend Mode to Luminosity.
What happens: Dehaze sharpens edges without affecting color. No color noise. No halos around high-contrast edges.
Pro Tip #7: Save Your “Texture Trinity” as a Custom Look (One Click)
You don’t want to rebuild these settings every time.
The Trick:
- After setting up your Clarity, Dehaze, and Grain layers (with blend modes and masks).
- Go to the Adjustment Panel menu (top right).
- Name it “Texture Trinity – Gritty Portrait” (or whatever fits).
- Next time, drag and drop the preset from the Adjustments Panel onto any photo.
Pro move: Create three presets—”Soft Dream,” “Gritty Industrial,” and “Vintage Film.”

Bonus Tip: The “Hidden” Keyboard Shortcut
Adobe didn’t document this.
Hold Alt (Windows) / Option (Mac) while dragging the Clarity, Dehaze, or Grain slider in the Properties Panel.
What happens: The slider moves in increments of 1 instead of 5. Fine control for perfectionists.
Pro Tips Summary Table
| Tip | Layer Used | Key Action | Time Saved |
|---|---|---|---|
| #1 Negative Clarity + Screen | Clarity | Soft dream glow | 2 min |
| #2 Negative Dehaze mask | Dehaze | Add fog to background only | 3 min |
| #3 Stack two Grain layers | Grain (x2) | Realistic film texture | N/A |
| #4 Folder masking | All three | Paint out textures once | 5 min |
| #5 Blend If with Clarity | Clarity | Protect shadows | 4 min |
| #6 Dehaze for sharpening | Dehaze | Halo-free edge sharpening | 2 min |
| #7 Save as preset | All three | One-click reuse | 10 min |
Final Thoughts (From 20 Years of Photoshop)
Here’s the truth Adobe won’t tell you in their release notes:
The Camera Raw Filter isn’t going away. But for texture work—grit, atmosphere, film grain—the new Adjustment Layers are objectively better. They’re faster, lighter, and infinitely more maskable.
The 7 tricks above took me four months to figure out. Now you have them in 6 minutes.
Go make something gritty.