
Sharpening images in Photoshop is one of the most important finishing steps in any editing workflow – and Photoshop now offers four distinct approaches, from a one-click AI filter to a professional High Pass technique that gives you surgical precision. Here’s how to use each one, and exactly when to reach for it.
| Difficulty | Beginner (Methods 1 & 2) · Intermediate (Methods 3 & 4) |
| Time Required | Method 1 (AI Sharpen): 30 seconds · Method 2 (Smart Sharpen): 3–5 min · Method 3 (Camera Raw): 5 min · Method 4 (High Pass): 5–8 min |
| Software | Photoshop 2026 for AI Sharpen (Method 1). All other methods work on any Photoshop CC version. |
| Key Principle | Sharpening enhances edge contrast — it cannot create detail that isn’t there. Always sharpen at 100% zoom and apply as the last step before export. |
| Golden Rule | The best sharpening is the sharpening you can’t see — if it’s obvious, dial it back. |
Why Photoshop has multiple sharpening methods – and Why it Matters
Sharpening images in Photoshop is not a single tool – it’s a family of techniques, each designed for different situations. Picking the wrong one for your image type doesn’t just produce a suboptimal result, it can actively damage the image with visible halos, noise amplification, or unnatural texture on skin.
The reason multiple methods exist comes down to how sharpening works. Every sharpening technique in Photoshop increases contrast at the edges between different tones – making light edges slightly lighter and dark edges slightly darker, which the eye reads as sharper detail. The methods differ in how intelligently they identify those edges, how much control you have over the effect in different tonal ranges, and whether they can handle noise reduction at the same time.
After 25 years of using Photoshop professionally, here’s my honest ranking and guidance on all four methods available in 2026.
📌 James’ Note: One principle that applies to every sharpening method: always work non-destructively. Convert your layer to a Smart Object before applying any filter. This keeps the sharpening editable and reversible at any point. If you’re working on a multi-layer composite, stamp all visible layers to a new merged layer first (Cmd/Ctrl+Alt/Opt+Shift+E), convert that to a Smart Object, and sharpen the merged stamp.
When to Sharpen – and When Not To
Sharpening always goes last. Apply it after all colour grading, retouching, compositing, and adjustment work is complete – because any subsequent editing operation will alter the sharpened edges and can degrade the effect or introduce artefacts.
- Sharpen for output, not for editing: sharpen specifically for how the image will be used. Web images need different sharpening to print. Images at 72ppi for screen need lighter sharpening than images at 300ppi for a magazine spread.
- Don’t sharpen noisy images first: sharpening amplifies noise because it increases micro-contrast across the image, and noise consists of random micro-contrast variations. Always run noise reduction before sharpening. Camera Raw Filter’s Detail panel handles both in the correct order.
- Don’t sharpen if you’re going to resize afterwards: resizing changes the relationship between pixels and can create artefacts from previously sharpened edges. Resize first, then sharpen for the final output size.
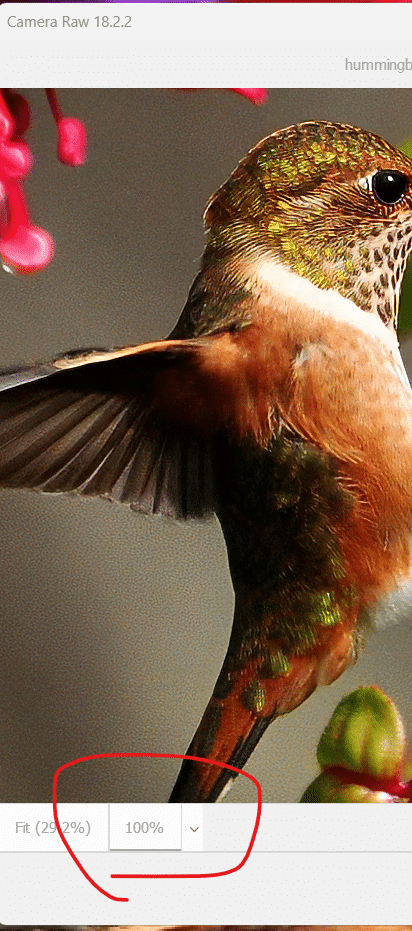
- Evaluate at 100% zoom: sharpening effects at smaller zoom levels are unreliable previews. Always zoom to 100% (Cmd/Ctrl+1) to evaluate the actual pixel-level effect before committing.
METHOD 1: AI SHARPEN (TOPAZ LABS POWERED)
Photoshop 2026+ · Best for: recovering soft or slightly blurry images in seconds · Premium feature (uses generative credits)
Photoshop 2026 introduced a genuinely new kind of sharpening: Filter > AI Sharpen, powered by Topaz Labs’ AI model. Unlike traditional sharpening which boosts edge contrast, AI Sharpen uses machine learning trained on millions of images to detect and restore the actual detail structure of a photograph — reconstructing fine texture that would otherwise be lost.
This makes it qualitatively different from Smart Sharpen or Camera Raw sharpening for recovering soft images. On a portrait with slightly soft skin texture, or a landscape where camera shake introduced slight blur, AI Sharpen can recover detail that traditional methods simply amplify noise trying to reach.
| ⚠ Watch Out: AI Sharpen is a premium feature in Photoshop 2026 and consumes generative credits based on your output file’s megapixel size. Check your Creative Cloud plan’s credit allowance before using it heavily in production. Also note: the current version (v27.x) can occasionally produce unnatural hair texture on portraits — check results carefully on any image with fine strand-level detail. |
Step 1: Open the AI Sharpen Filter
Open your image and make sure you’re working on a flattened or merged version of your layer stack. Go to Filter > AI Sharpen. The filter opens a dialogue showing a before/after preview of your image.

Unlike other Photoshop filters, AI Sharpen applies directly to the current layer – it does not create a new layer or work as a Smart Filter in the traditional sense. Use the History panel (Window > History) to undo if you need to revert.
Step 2: Apply and Review
Click Sharpen to apply. Photoshop connects to Adobe’s servers to run the Topaz AI model — this takes 10–30 seconds depending on file size and connection speed. The maximum supported file size is 56 megapixels.

After processing, zoom to 100% and compare sections of the image in the History panel (toggle between the pre-sharpen and post-sharpen states). Pay particular attention to:
- Fine detail areas like eyelashes, hair strands, fabric weave, foliage — these show the genuine AI restoration most clearly
- Skin texture on portraits — confirm it looks natural rather than over-processed
- Sky and smooth gradient areas — AI Sharpen should not introduce texture in flat tonal areas
| ⭐ Best For: Use AI Sharpen on: slightly soft travel or wildlife shots, scanned film photos needing clarity recovery, low-resolution assets that need enhancement, images where traditional sharpening is producing noise rather than detail. Do NOT use it on images with dense fine hair (may look artificial) or images that are genuinely out of focus (no AI sharpening can fix true focus misses). |
METHOD 2: SMART SHARPEN — THE EVERYDAY WORKHORS
All Photoshop CC versions · Best for: general web and print sharpening on most image types · Free, no credits required
Smart Sharpen is the method I recommend to anyone who wants reliable, professional-quality sharpening without the complexity of High Pass or the credit cost of AI Sharpen. It detects edges intelligently, reduces halos better than Unsharp Mask, and includes separate fade controls for highlights and shadows that prevent the blown-out edges that plague many sharpened images.
For most Photoshop users — photographers, designers, and retouchers working on portraits, landscapes, and products — Smart Sharpen is the right default choice.
Step 1: Set Up Non-Destructively
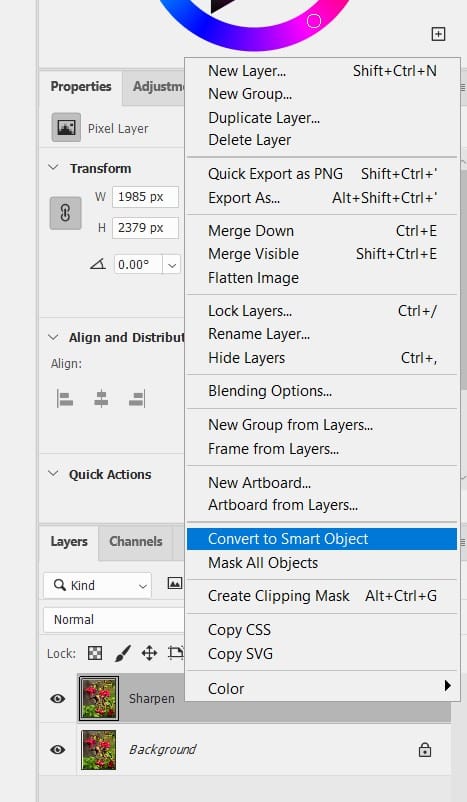
Duplicate your layer (Cmd/Ctrl+J) or stamp a merged copy (Cmd/Ctrl+Alt/Opt+Shift+E). Right-click the layer and choose Convert to Smart Object. Name it ‘Sharpen’. Change the layer’s Blend Mode from Normal to Luminosity — this prevents colour fringing at sharpened edges.
| 🔍 Why this works: Setting Blend Mode to Luminosity before applying the filter means the sharpening contrast boost applies only to the brightness values in the image, not the colour values. Without this, red edges can develop a slight cyan fringe and vice versa — subtle but visible on high-contrast colour edges at 100% zoom. |
Step 2: Apply Smart Sharpen
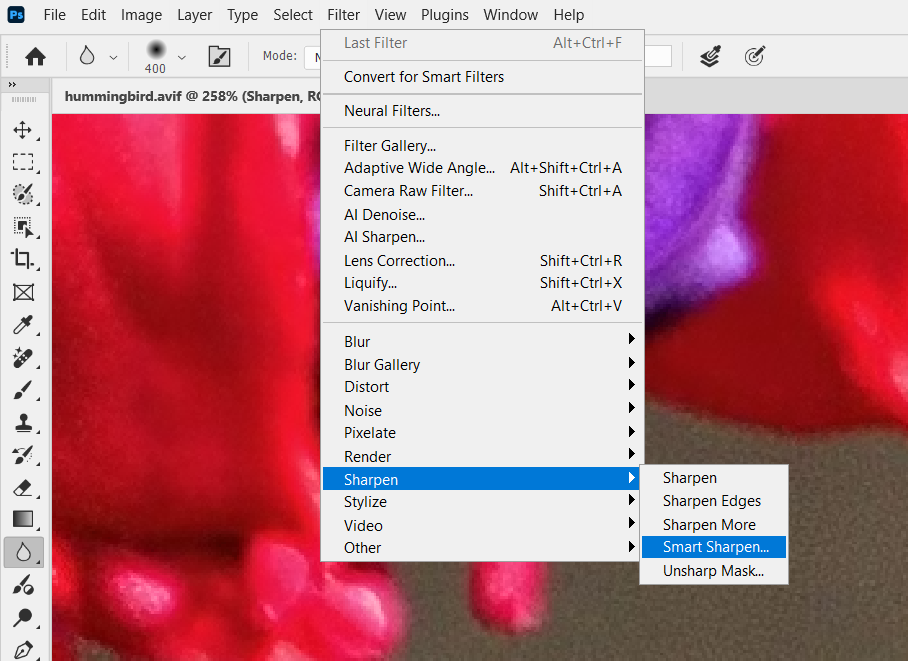
Go to Filter > Sharpen > Smart Sharpen. The dialogue opens with a large preview window. Check the Preview checkbox so you can see changes live on your image as you adjust sliders.
Zoom the preview to 100% using the + button in the dialogue, and navigate to an area with fine detail — the edge of an eye, a strand of hair, fabric texture, or architectural detail. Here are the recommended settings by use case:
| Setting | Web Images | Print / Photo | Portrait Retouching |
| Amount | 80–120% | 120–180% | 60–90% |
| Radius | 0.5–1px | 1–1.5px | 0.5–0.8px |
| Reduce Noise | 10–15% | 5–10% | 20–30% |
| Remove | Lens Blur | Lens Blur | Lens Blur |
| Shadows Fade | 0% | 10–15% | 20–30% |
| Highlights Fade | 10% | 15–20% | 25–35% |
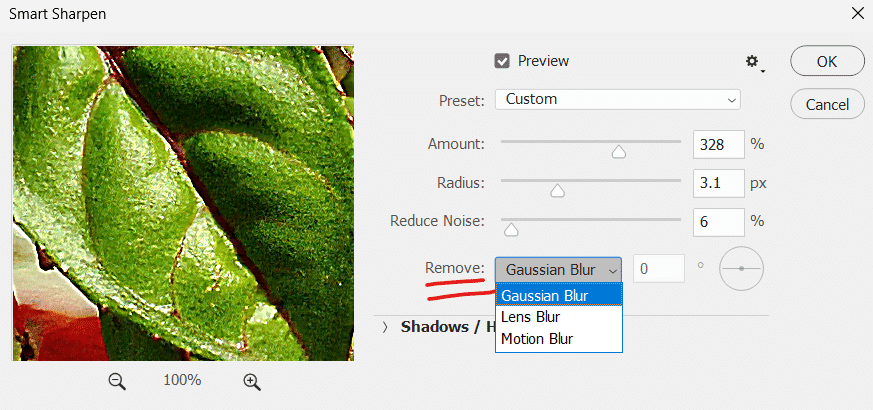
The Remove dropdown offers three options: Gaussian Blur (standard sharpening like Unsharp Mask), Lens Blur (detects edges for finer sharpening with fewer halos — use this almost always), and Motion Blur (for correcting camera shake in a specific direction — enter the angle of blur). Lens Blur is the correct choice for the vast majority of images.
| 💡 Pro Tip: The Shadows/Highlights fade controls are the hidden power of Smart Sharpen that most people never find. Click the Shadows/Highlights triangle to expand them. Fading highlights prevents white edges from blowing out to pure white (a common sharpening failure on bright skies and window light). Fading shadows prevents dark shadow edges from crushing to pure black. Start with Fade Amount at 20% in both and Tonal Width at 50%. |
Step 3: Evaluate and Commit
Toggle the Preview checkbox on and off to compare. The sharpening should feel present but not aggressive — if you can immediately see the effect without looking for it, you’ve probably sharpened too hard. Reduce Amount by 20–30% and reassess.
Click OK. Because you applied this to a Smart Object, you can double-click the ‘Smart Sharpen’ filter entry in the Layers panel at any time to reopen the dialogue and change settings.
METHOD 3: CAMERA RAW FILTER SHARPENING
All Photoshop CC versions · Best for: RAW images, noise reduction + sharpening combined, fine-grained masking control
The Camera Raw Filter approach — the method in the original PSDVault article — remains excellent for one specific scenario: when you need to handle both noise reduction and sharpening in a single, integrated step. Camera Raw’s Detail panel does both in the correct order (noise first, then sharpen) and gives you masking control that protects flat areas like sky and skin from being sharpened unnecessarily.
This is also the natural workflow for photographers who import RAW files — if you’re already in Camera Raw or Lightroom before coming to Photoshop, you’ve likely already done your primary sharpening here.
Step 1: Set Up and Open Camera Raw
Duplicate your layer and convert to Smart Object as described in Method 2. Go to Filter > Camera Raw Filter (Cmd/Ctrl+Shift+A). The Camera Raw workspace opens full-screen.

Navigate to the Detail panel — in Photoshop 2024 and later this is found in the right panel stack. If you’re on an older version, look for the Details tab (the triangle icon). Zoom your preview to 100%.
Step 2: Handle Noise Reduction First (Always Before Sharpening)
Zoom in to 100% (or higher) on a noisy area for accurate preview. Noise reduction should come before sharpening – sharpening amplifies noise if done first.
In the Detail panel:
- Noise Reduction (this is the main Luminance slider):
- 0–20 for clean/low-noise images (studio, low ISO).
- 20–40 for moderate noise (ISO 800–1600).
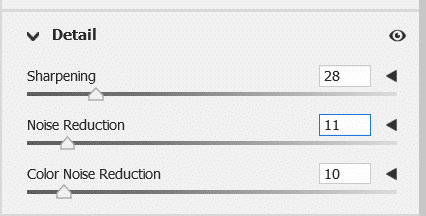
- 40–60+ for high-ISO or noisy shots. Move this until blotchy noise turns into finer, more film-like grain. Your screenshot shows 24, which is a light-to-moderate setting.
- Color Noise Reduction: 10–35 to remove colored speckles (chroma noise) without hurting saturation in fine details. Modern cameras rarely need much here—your screenshot has it at 10, which is a good starting point. Rarely adjust beyond 25–40.
Modern option (highly recommended): Click the Denoise button (or use Photo > Enhance > Denoise) for AI-powered noise reduction. It’s often far superior to the manual sliders for high-ISO images and preserves more detail. Adjust the Denoise amount slider (default around 50) after enabling it.
Pro tip for old manual controls: If you expand Manual Noise Reduction, you’ll see the older Luminance Detail, Color Detail, etc. sliders for finer tweaks.
Step 3: Apply Sharpening with Masking
Still in the Detail panel, under Sharpening:
- Amount: Controls overall sharpening strength.
- 40–60 for web/social media.
- 60–80+ for print.
- 25–50 for portraits/skin (to avoid over-sharpening). Your screenshot shows 67, which is a strong but reasonable value for many images.
- Radius: 0.8–1.2 pixels for most images. Use lower (0.7–1.0) for fine details (macro, feathers, architecture). Slightly higher (1.2–1.5) for softer subjects like portraits or landscapes with less fine texture.
- Detail: 20–50.
- Lower values (20–30) sharpen mainly broad edges.
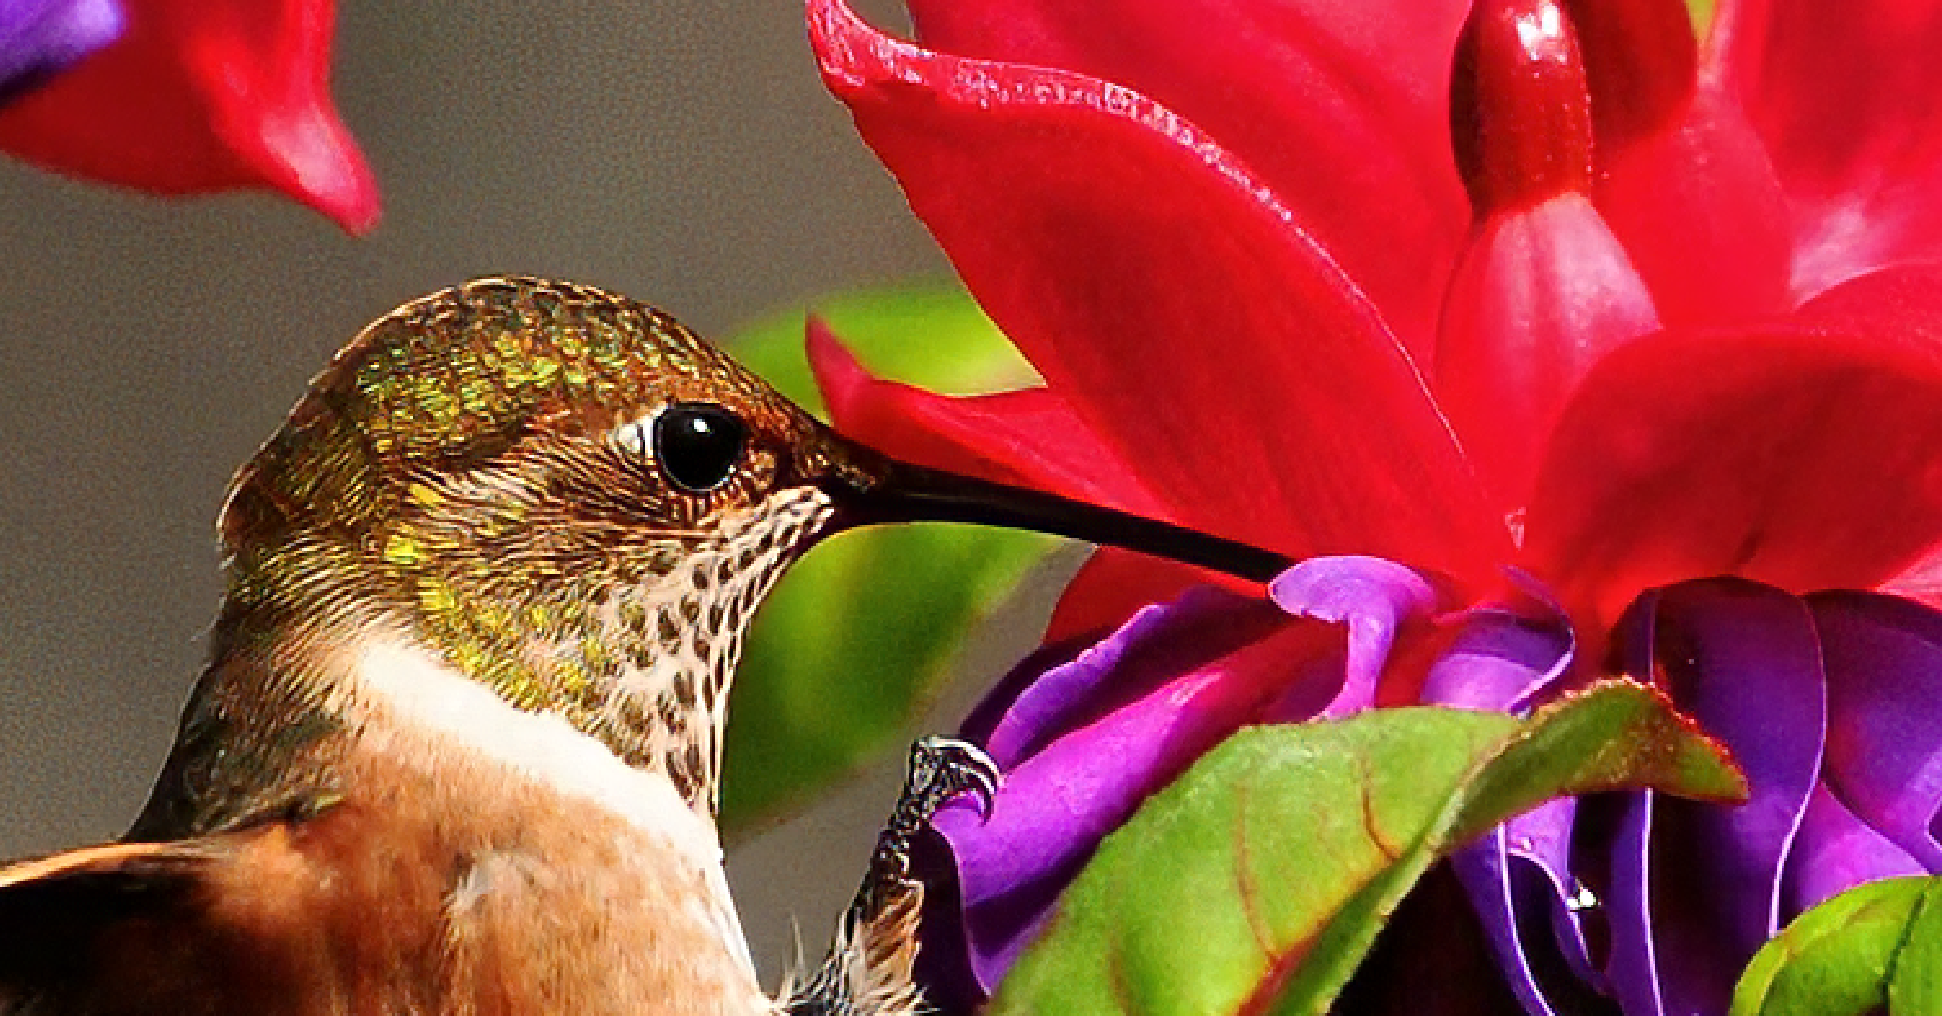
- Higher values (40–50+) also enhance fine textures (like hummingbird feathers, fur, or foliage in your example). Be careful—it can emphasize noise.
- Masking (Camera Raw’s best feature): Hold Alt/Option while dragging the Masking slider.
- White areas = sharpening applied.
- Black areas = protected (no sharpening). Drag right until smooth areas (background, sky, skin, out-of-focus parts) turn mostly black, while edges and textures stay white. This prevents noise amplification in flat zones. Great for your hummingbird shot with a smooth background.
Pro Tips
- Always view at 100% zoom when adjusting Detail panel sliders.
- Hold Alt/Option on any sharpening slider for a live preview mask:
- Detail slider shows an edge map (what’s being sharpened).
- Masking shows the protection mask.
- Workflow order: Noise reduction (or Denoise) first → Sharpening → Masking last.
- Default sharpening in Camera Raw is often around Amount 40, Radius 1.0, Detail 25, Masking 0. You usually need to tweak from there.
- For your hummingbird image: The high Sharpening (67) + moderate Noise Reduction (24) looks appropriate for feather detail without overdoing the smooth background.
| 💡 Pro Tip: The Alt/Opt preview for every Camera Raw sharpening slider reveals what each slider is actually doing as a visual mask. The Detail slider shows a greyscale edge map; Masking shows which areas are sharpened. This preview workflow makes Camera Raw’s Detail panel more transparent and controllable than any other Photoshop sharpening method. |
METHOD 4: HIGH PASS SHARPENING — THE PROFESSIONAL’S PRECISION METHOD
All Photoshop versions · Best for: portraits, selective sharpening with masks, maximum control over sharpening area
High Pass sharpening works on a fundamentally different principle to all other methods. Instead of analysing the image and applying a sharpening algorithm, it extracts only the edge information from the image as a separate layer, then uses a blend mode to merge that edge information back as sharpening. Because it exists as a visible layer, you can paint a layer mask on it to restrict sharpening to exactly the parts of the image that need it — a level of selectivity no filter dialogue can match.
It’s the method professional retouchers and photographers tend to reach for when they need to sharpen specific zones of a portrait (eyes and lips, but not skin), or when they want to check the sharpening effect before committing to it.
Step 1: Create the High Pass Layer
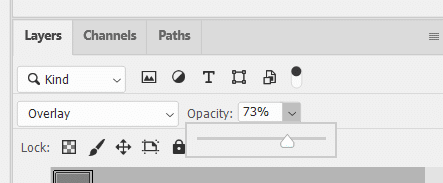
Duplicate your layer (Cmd/Ctrl+J) and name it ‘High Pass Sharpen’. Change this layer’s Blend Mode to Overlay in the Layers panel before doing anything else — this step is important to do before applying the filter, so you can see the sharpening effect updating live as you adjust the filter.
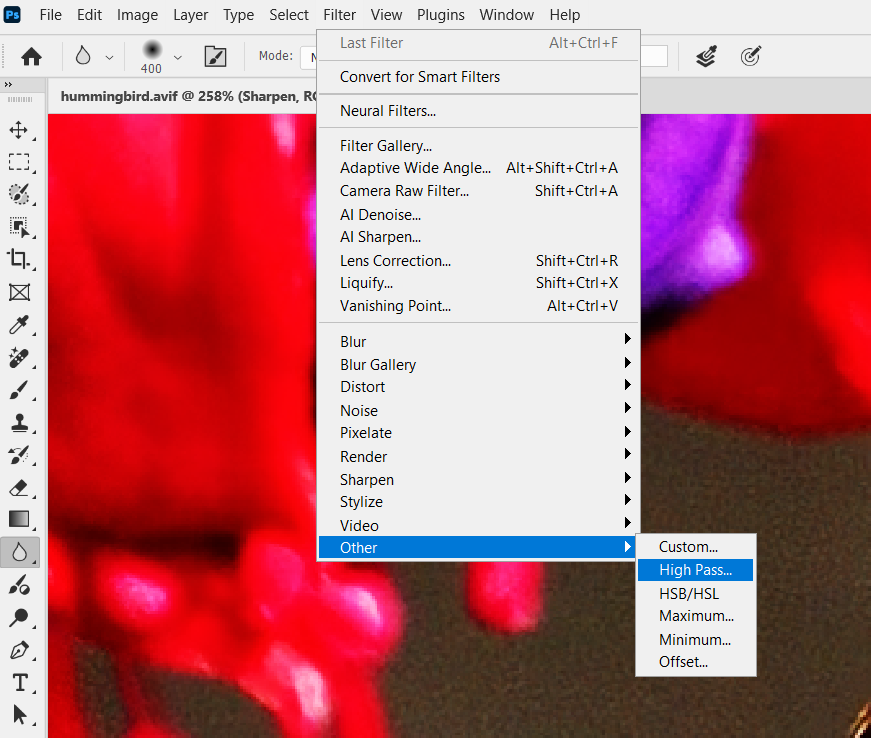
With the High Pass Sharpen layer selected, go to Filter > Other > High Pass. The dialogue shows a grey preview of your image with edges visible as lighter and darker areas against the grey background.
Step 2: Set the Radius
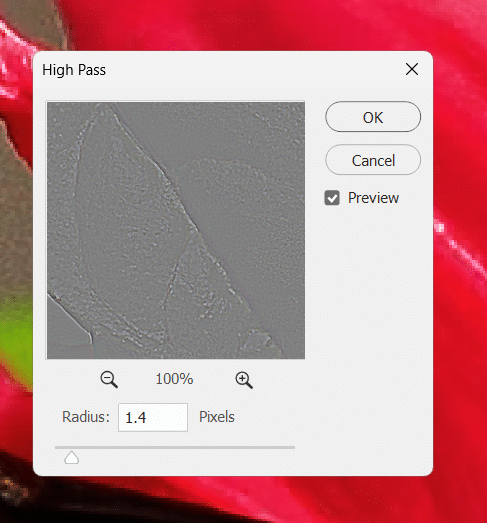
The Radius slider in the High Pass filter controls how wide the detected edges are — which directly translates to how strong and broad the sharpening effect is.
- 1–3px: fine detail sharpening. Use for portraits (sharpening eyelashes and lip edges without affecting skin pores), macro photography, and any image where you want precision without the effect spreading into smooth areas.
- 3–6px: moderate sharpening. Good for most landscape and architectural shots where you want edge sharpening to be clearly visible at normal viewing distances.
- 6–10px+: broad, strong sharpening. Use sparingly — at high radius values the grey overlay becomes very visible and the sharpening effect can look unnatural. If you need this level of sharpening, Smart Sharpen at high Amount is usually a cleaner approach.
As you drag the Radius slider, watch your image canvas (not the filter preview) — because you set Blend Mode to Overlay before opening the filter, you can see the sharpening effect updating live on the actual image. This real-time feedback is High Pass’s most useful characteristic.
| ⚠ Watch Out: Don’t desaturate the High Pass layer as some older tutorials recommend — modern Photoshop handles the colour correctly in Overlay mode without desaturation. Desaturating adds an unnecessary step and removes your ability to see the edge map correctly in the filter preview. |
Step 3: Choose the Right Blend Mode
Overlay is the standard blend mode for High Pass sharpening and works well for most images. Two alternatives are worth knowing:
- Soft Light: gentler sharpening — roughly half the intensity of Overlay. Use this for portraits where you want a subtle enhancement without risk of over-sharpening, or when you want to apply two High Pass layers at different radii (one at Soft Light for broad sharpening, one at Overlay for fine edge enhancement).
- Hard Light: stronger than Overlay. Use for images that need aggressive sharpening — high-resolution landscape prints, or correcting soft focus in architectural photography. Check carefully for halos at 100% zoom.
| 💡 Pro Tip: After applying High Pass, hold Alt/Opt and click the Add Layer Mask button at the bottom of the Layers panel — this creates a black mask that hides the sharpening everywhere. Then paint white with a soft brush over only the areas you want to sharpen (eyes, hair, product label, building edge). This selective approach is what makes High Pass superior for portraits — you get surgical precision that no filter dialogue can achieve. |
Step 4: Control Intensity with Opacity
The simplest way to fine-tune High Pass sharpening intensity is the layer Opacity slider in the Layers panel. 100% gives the full effect at whatever Radius you set. Pulling back to 70–80% reduces intensity proportionally. This is faster and more intuitive than re-opening the filter to change the Radius.
For a before/after comparison, simply toggle the High Pass layer’s eye icon on and off.
Method Comparison — When to Use What
| Method | Speed | Quality | Noise Control | Selectivity |
| 1. AI Sharpen | ★★★★★ | ★★★★★ | Built-in | Low |
| 2. Smart Sharpen | ★★★★☆ | ★★★★☆ | Reduce Noise slider | Medium |
| 3. Camera Raw | ★★★★☆ | ★★★★★ | Best in class | Medium |
| 4. High Pass | ★★★☆☆ | ★★★★★ | Via layer mask | Highest |
The honest summary: for speed, use AI Sharpen (2026+) or Smart Sharpen. For control and noise management in one step, use Camera Raw. For selective, surgical sharpening where you need to paint the effect onto specific areas, use High Pass. Most professional workflows combine two methods — Camera Raw for the base sharpening pass, and High Pass with a mask for targeted local enhancement.
Troubleshooting – Common Sharpening Problems
| Problem | Cause | Fix |
| Visible white/dark halos around edges | Radius too large or Amount too high | Reduce Radius first (it has the biggest effect on halos). Then reduce Amount. In Smart Sharpen, increase Shadows/Highlights Fade to 20–30% |
| Noise looks worse after sharpening | No noise reduction applied before sharpening | Always run noise reduction first. Use Camera Raw Method 3 to handle both in the correct order |
| Skin looks gritty or over-textured on portraits | Sharpening too broad — affecting skin pores not just edges | Use High Pass at 1–2px radius with a mask painted only on eyes/lips. Or Camera Raw Masking slider to protect skin |
| Colour fringing at sharpened edges | Sharpening applied in Normal blend mode | Change the sharpening layer’s Blend Mode to Luminosity. Or use Fade > Luminosity immediately after applying the filter |
| Result looks soft even at high Amount | Image is genuinely out of focus, not just slightly soft | No sharpening method can fix true out-of-focus. Try AI Sharpen as a last resort — it has the best chance but will not restore genuine blur |
| AI Sharpen produces unnatural hair texture | Known limitation of current Topaz AI model | Use Smart Sharpen or High Pass for images with fine hair detail. Check AI Sharpen results at 100% before delivery |
| Sharpening looks right on screen but too strong in print | Screen and print require different sharpening levels | Sharpen for print output at higher Amount (typically 1.5–2x screen values). Always run a test print at a smaller size before committing final values |
Output-Specific Sharpening Settings
Sharpening should be calibrated for how the image will be used. Here are starting-point settings by output type:
Web and Social Media
- Method: Smart Sharpen
- Amount: 80–120%, Radius: 0.5–0.8px, Reduce Noise: 10%
- Web images are viewed at 72–96ppi and typically displayed smaller than their pixel dimensions. Light sharpening is usually sufficient — the image compression and display scaling already add apparent contrast.
Print (Magazine, Photo Book, Large Format)
- Method: Smart Sharpen or Camera Raw
- Amount: 140–200%, Radius: 1–1.5px for magazine; 2–3px for large format viewed at distance
- Print requires stronger sharpening to compensate for the softening introduced by the printing process (dot gain in offset printing, ink spread in inkjet). A good rule: sharpen until it looks slightly over-done on screen, then it will look correct in print.
Portrait Retouching
- Method: High Pass with layer mask (eyes/lips/hair only) + Smart Sharpen at reduced Amount for overall
- Amount (Smart Sharpen): 60–80%, Radius: 0.5px, Reduce Noise: 25–30%
- High Pass: 1–2px Radius, Soft Light blend mode, mask painted to eyes and lip edge only
- The goal is a face that looks like it was shot with a sharp lens, not a face that looks sharpened. Skin should retain natural texture without visible edge contrast enhancement.
Landscape and Architecture
- Method: Camera Raw or Smart Sharpen
- Amount: 120–160%, Radius: 1–2px
- These subjects have hard architectural edges and fine foliage detail that respond well to stronger sharpening. Watch for halos on sky-building transitions – the Camera Raw Masking slider works particularly well here to protect the sky.
Happy sharpening!