
Photoshop’s Object Selection Tool, enhanced with Adobe’s AI in 2025 (version 26.6), revolutionises selecting complex objects like hair, clothing, or props. Its cloud-powered edge detection and attribute-specific selections (e.g., eyes, hats) make it a game-changer for designers.
In this tutorial, we’ll share 10 smart tips and tricks to maximise its potential, from retouching portraits to crafting seamless composites. Let’s unleash your editing prowess!
What You’ll Need
- Adobe Photoshop (version 26.6 or later, 2025, with cloud processing enabled)
- A sample image (e.g., a person with detailed hair or a group shot with varied clothing)
Tip 1: Enable Cloud Processing for Precision
Ensure cloud processing is active to boost AI accuracy. In Preferences > Image Processing:
Choose “Cloud (Detailed Results)”.
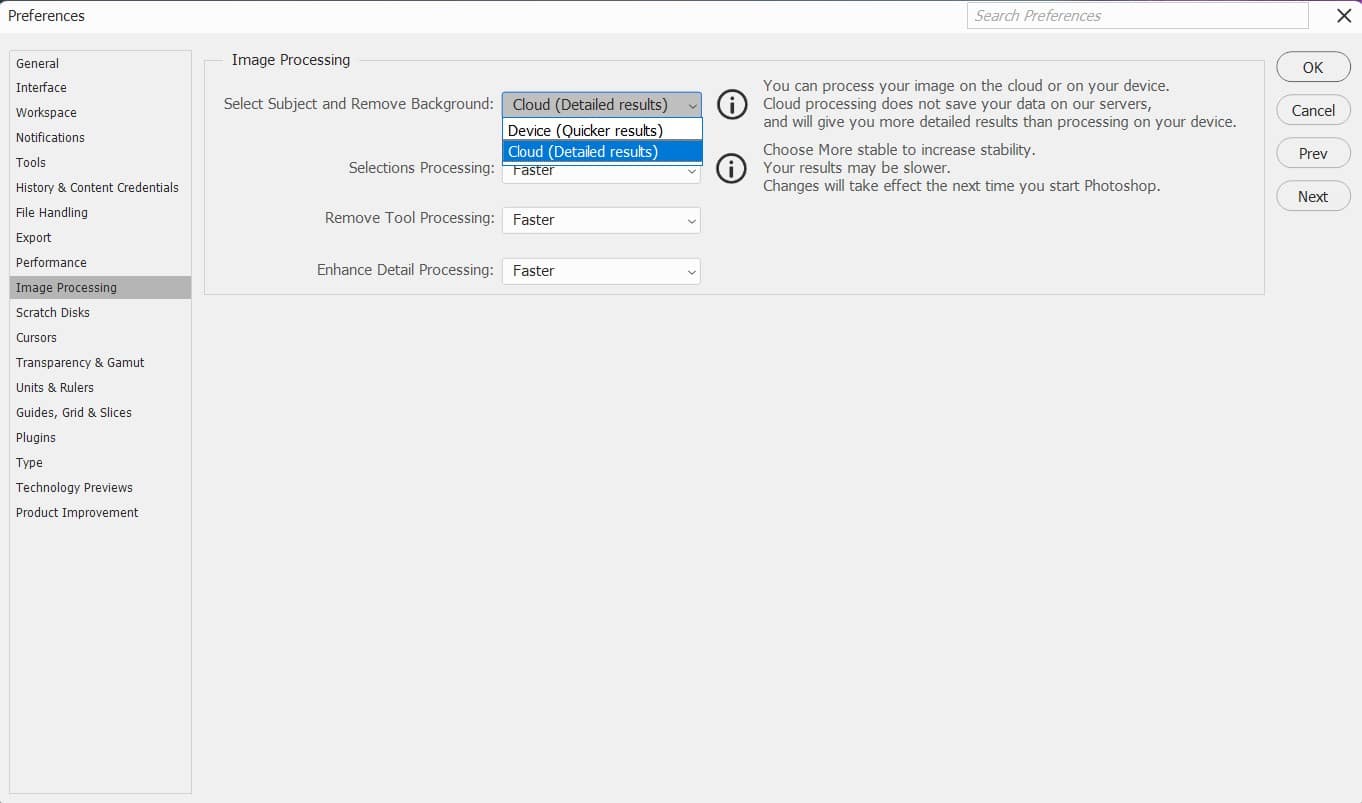
This sharpens edge detection for intricate selections like hair or lace.
Tip 2: Use Object Finder for Quick Previews
Keep “Object Finder” ticked in the Options bar. Hover over objects (e.g., a person’s head) to see AI highlight them before clicking. This saves time in busy images with multiple subjects.

Tip 3: Switch to Lasso Mode for Tricky Shapes
Set Mode to “Lasso” in the Options bar (Toolbar, W). Draw a rough outline around irregular objects like jewellery or branches. The AI snaps to edges, outperforming Rectangle mode for complex shapes.

Tip 4: Refine Hair with One Click
Select a person’s head, then click “Select and Mask” in the Options bar. Hit “Refine Hair” to let AI isolate flyaway strands instantly. Paint with the Refine Edge Brush (R) for extra polish.

Tip 5: Add or Subtract with Shortcuts
If AI misses small areas (e.g., a hat’s brim), hold Shift to add or Alt to subtract from the selection. This quick fix avoids restarting, perfect for overlapping objects.
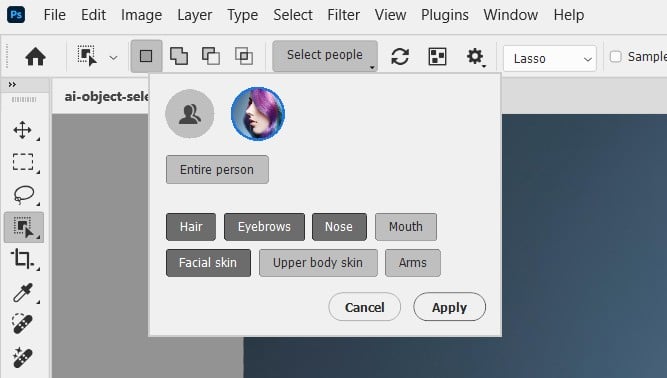
Tip 6: Select Multiple Specific Attributes at Once
Do you know in the Options bar, you can select multiple attributes all at once? Try clicking “Select People” and choose attributes like “Hair” and “Clothing”.
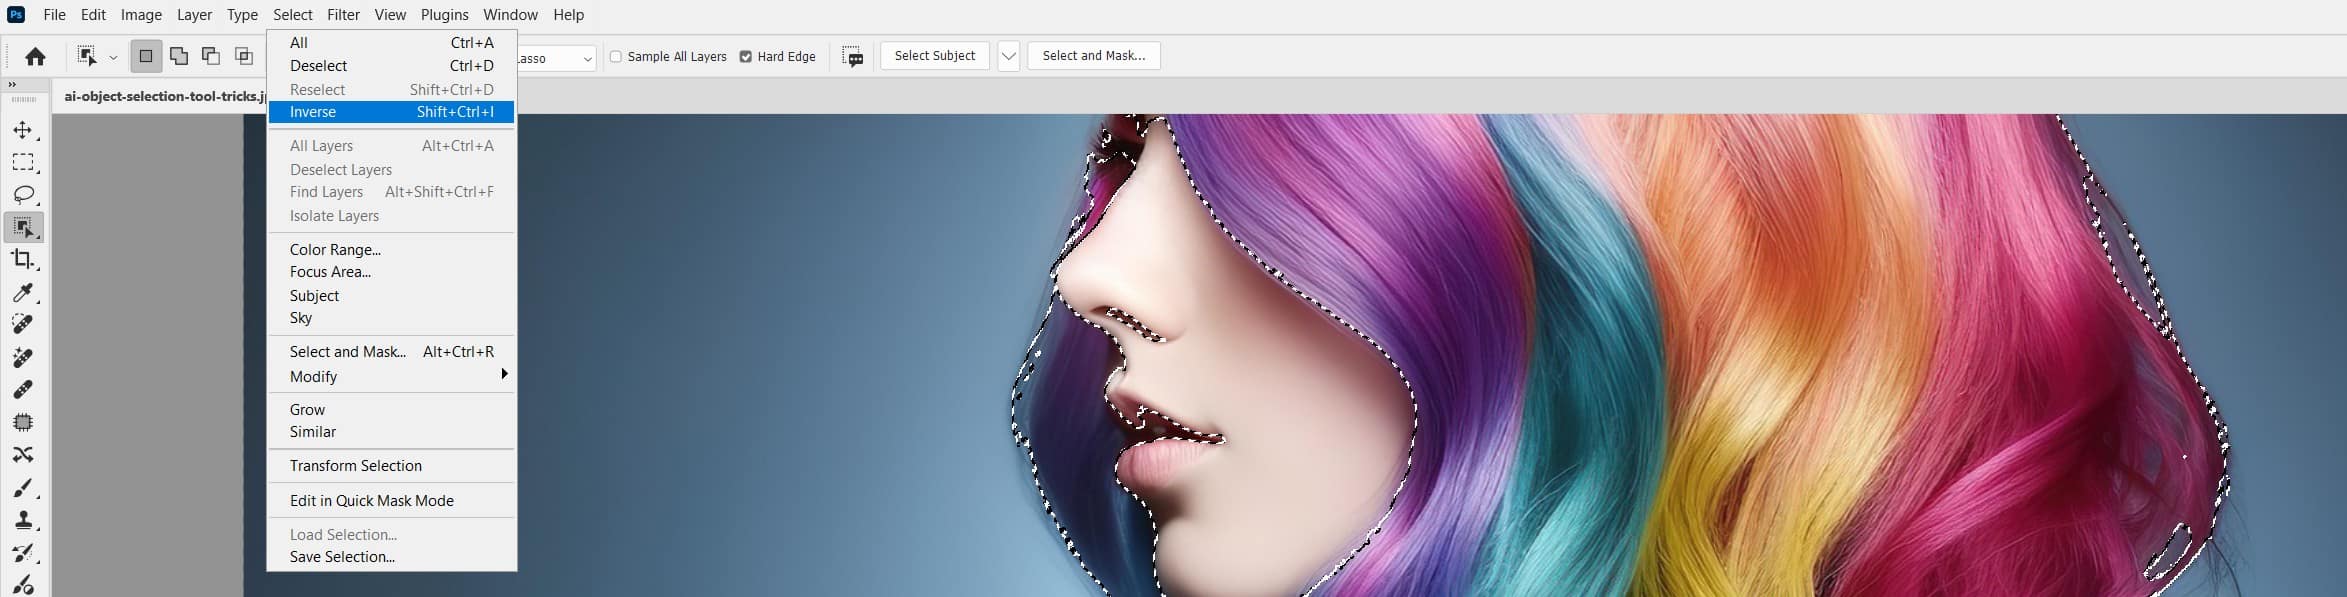
Tip 7: Pair with Generative Fill for Composites
Select an object, invert the selection (Select > Inverse), and right-click for “Generative Fill” (no prompt). Choose an AI-generated background for seamless composites, like a new sky.
Tip 8: Use Soft Edges for Natural Blends
In “Select and Mask”, set the Feather slider to 1-2 px to soften mask edges. This ensures retouched hair or clothes blend naturally with new backgrounds, avoiding harsh lines.

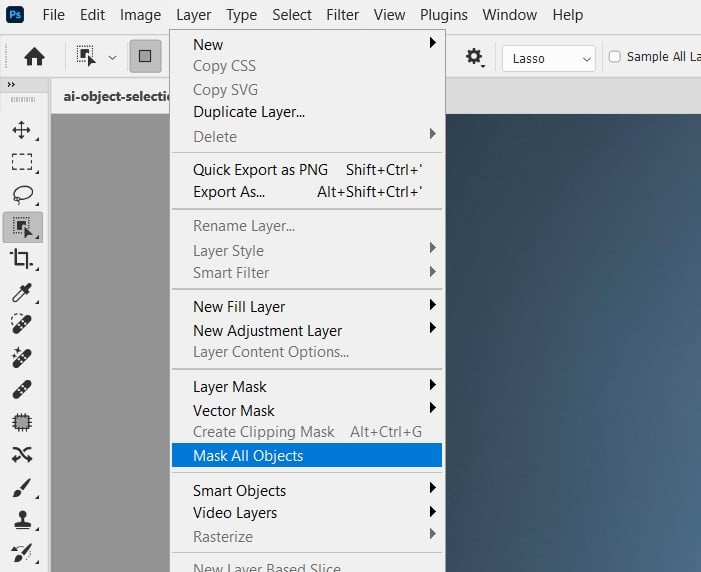
Tip 9: Batch Select with Mask All Objects
For images with multiple items (e.g., products), go to Layer > Mask All Objects. AI auto-masks all objects in one go, saving clicks on crowded scenes like product shoots.
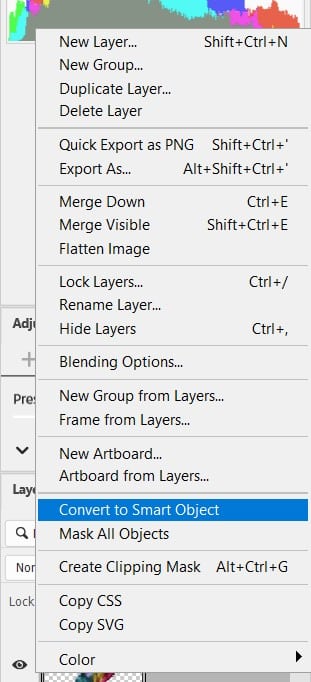
Tip 10: Save as Smart Objects for Flexibility
Before selecting, right-click the layer and choose “Convert to Smart Object”. Apply adjustments like Hue/Saturation non-destructively to change colours on selected areas, like clothing.
Why Learning These Matter
The improved Object Selection Tool’s AI detects attributes faster than manual methods, with cloud processing ensuring surgical precision. These tricks save time and elevate your edits, from portraits to composites.