Close Menu
PSD VaultPSD Vault
  • VIP Area
  • Photoshop Basics
  • Photo Effect
  • Text Effect
  • Premium Tuts
  • Drawing
  • Web Graphics
  • Abstract
  • Freebies
  • Advertise
  • Get in Touch
  • About PSD Vault
Facebook Instagram Pinterest YouTube TikTok
Facebook Instagram Pinterest YouTube TikTok RSS
PSD VaultPSD Vault
  • VIP Area
    • Sign Up
    • Log In
  • Free Image Tools
  • Photoshop Basics
  • AI
  • Photoshop Error Fixes
  • Video Tutorial
  • Photo Effect
  • Text Effect
  • Premium Tuts
  • Drawing
PSD VaultPSD Vault
Home»AI»How to Use AI to Define Custom Brushes in Photoshop
AI

How to Use AI to Define Custom Brushes in Photoshop

By James QuJuly 24, 20263 Mins Read
Share
Facebook Twitter LinkedIn Pinterest Email

Photoshop’s brushes are a designer’s superpower, and with AI-driven tools, customising them has never been easier or more exciting. By combining Generative Fill, Neural Filters, and the Brush Settings panel, you can craft unique brushes that elevate your artwork—whether for digital painting, texturing, or photo effects.

In this tutorial, we’ll create a custom textured brush using AI to generate a base pattern, then fine-tune it for professional results. Let’s unleash your creativity!

What You’ll Need

  • Adobe Photoshop (2025 version recommended for latest AI features)
  • A blank canvas or sample image (e.g., a 2000×2000 px document)

Step-by-Step Guide

Step 1: Set Up a New Document

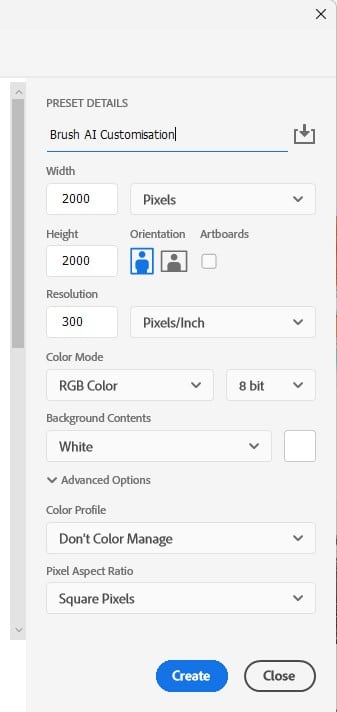
Open Photoshop and create a new document (File > New). Set it to 2000×2000 pixels with a white background to give ample space for brush creation. Ensure the resolution is 300 DPI for crisp details.
Unleash Epic AI Brushes in Photoshop: Craft Magic!

Step 2: Generate a Texture with Generative Fill

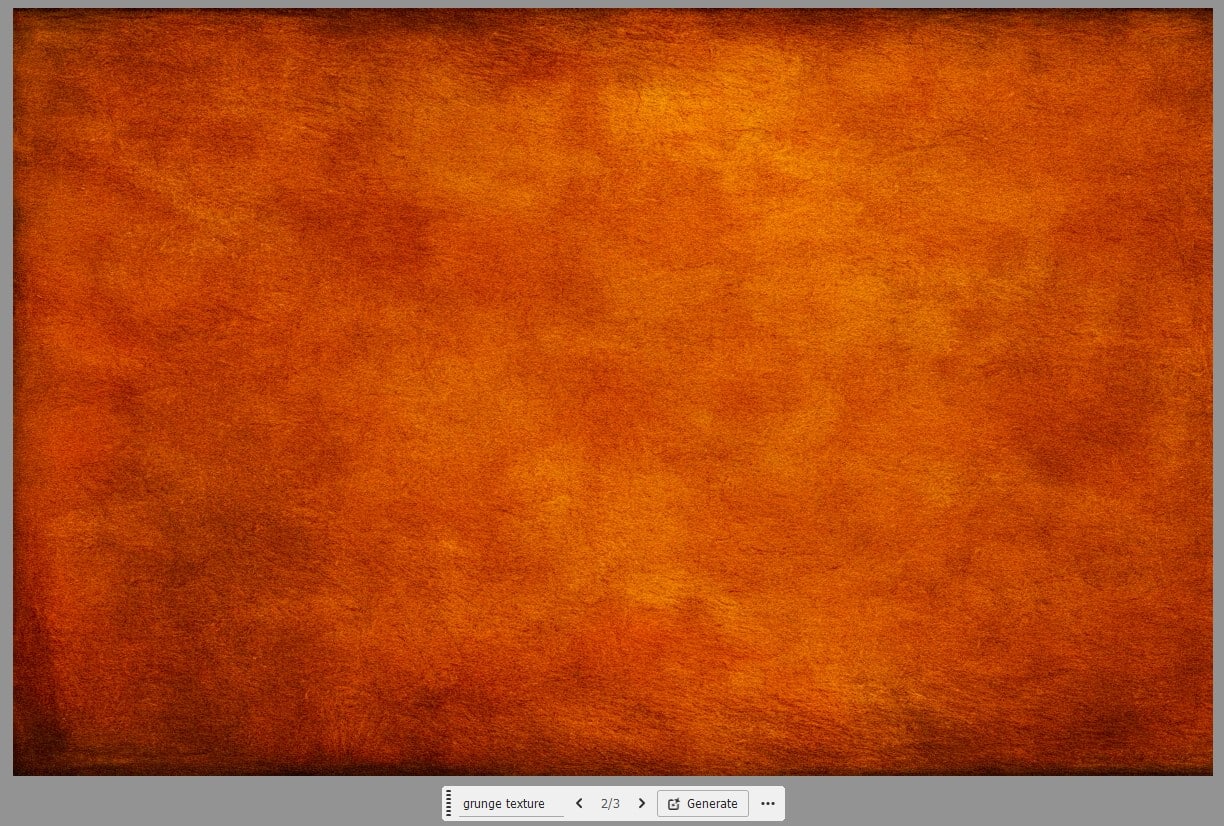
Select the Rectangular Marquee Tool (M) and draw a square selection (hold Shift for a perfect square). Go to Edit > Generative Fill, type “grunge texture” in the prompt box, and click Generate. Choose the best of three AI-generated variations in the Properties panel. This forms your brush’s base.
Unleash Epic AI Brushes in Photoshop: Craft Magic!

Step 3: Convert to a Brush Preset

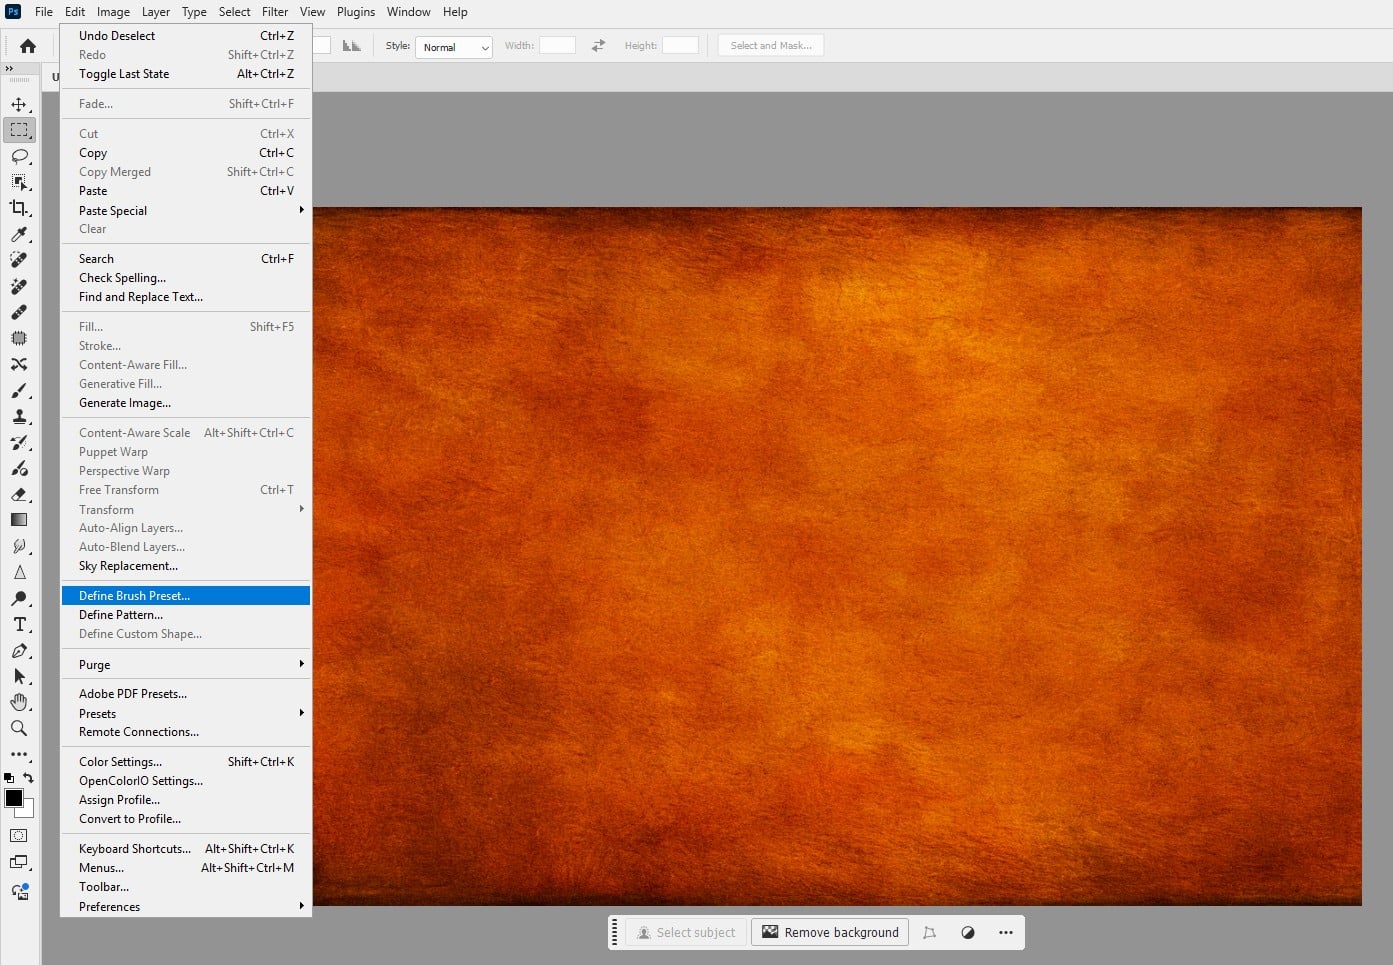
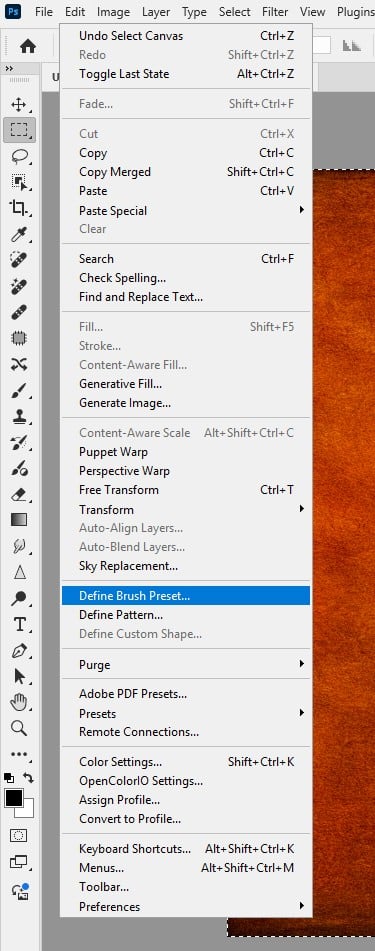
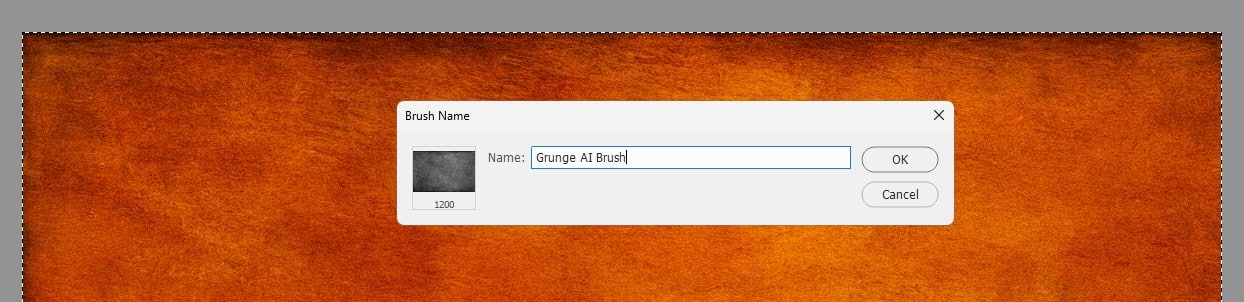
Select the texture area (Select > All or Ctrl+A), then go to Edit > Define Brush Preset. Name it “Grunge AI Brush” and click OK.
Unleash Epic AI Brushes in Photoshop: Craft Magic!

Step 4: Customise in Brush Settings

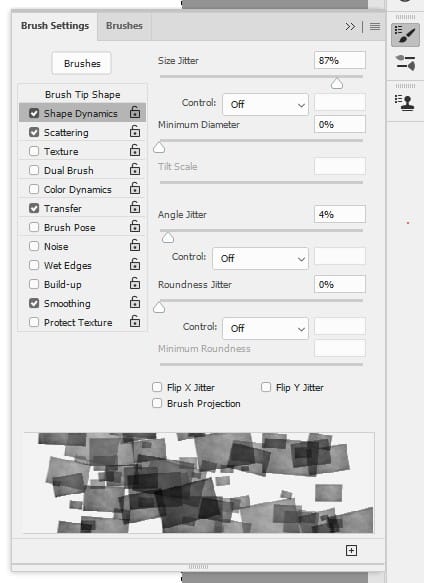
Select the Brush Tool (B) and open the Brush Settings panel (Window > Brush Settings). Choose your new “Grunge AI Brush” from the Brush Presets. Adjust settings such as Shape Dynamics, Scattering, Transfer, Smoothing. Test on a new layer.
Unleash Epic AI Brushes in Photoshop: Craft Magic!

Step 5: Refine with AI-Assisted Masking

If your brush strokes need edge refinement, create a rough stroke on a new layer, then use the Object Selection Tool (W) to select it. Enter Select and Mask (Ctrl+Alt+R), and use the Refine Edge Brush to perfect edges. This AI-driven step ensures clean application in complex designs.

Step 6: Save and Apply

In the Brush Settings panel, click the menu and select “New Brush Preset” to save your customised settings. Name it “Final Grunge AI Brush”. Test it in a project—try painting over a photo or creating a digital illustration. Save your PSD and export as needed.

Pro Tips

  • Prompt Variety: Experiment with Generative Fill prompts like “organic splatter” or “marble cracks” for unique bases.
  • Dynamic Control: Enable Pen Pressure in Shape Dynamics for tablet users to vary stroke size naturally.
  • Layer Blending: Apply your brush on a layer with Overlay mode for subtle texture effects.

Why AI-Driven Brushes?

AI tools like Generative Fill and Neural Filters take brush creation beyond manual tweaks, offering endless possibilities in minutes. Whether you’re texturing a logo or painting a masterpiece, these brushes give your work a pro edge. Share your creations in the comments!

brush customisation
Share. Facebook Twitter Pinterest LinkedIn Tumblr Email
James Qu
  • Website

James is a seasoned Photoshop expert with over 25 years of experience based in Australia. As the driving force behind PSD Vault, he authors the majority of its in-depth tutorials and insightful articles.

Related Posts

Unlock the Power of Photoshop’s Generative Expand Tool

September 10, 2026

10 Genius Tips to Master Photoshop’s AI Object Selection Tool

August 15, 2026

How to Use Generative Upscale to Enhance Cropped Image in Photoshop

August 6, 2026

Comments are closed.

Don't Miss

How to Create a Fiery Hair Face Manipulation in Photoshop

September 12, 2026

How Colour Theory Supercharges Your Photoshop Skills

September 11, 2026

Unlock the Power of Photoshop’s Generative Expand Tool

September 10, 2026

For Beginners

Basics

How Colour Theory Supercharges Your Photoshop Skills

By James QuSeptember 11, 20265 Mins Read

Curves or Levels: Choosing the Right Tool for Stunning Edits

September 2, 2026

Live Gradients in Photoshop – How to Master It

August 27, 2026

How to Blend Cut-Out Objects Seamlessly with AI Harmonize in Photoshop

August 25, 2026

You May Also Like

AI

Unlock the Power of Photoshop’s Generative Expand Tool

By James QuSeptember 10, 20264 Mins Read
AI

10 Genius Tips to Master Photoshop’s AI Object Selection Tool

By James QuAugust 15, 20264 Mins Read
AI

How to Use Generative Upscale to Enhance Cropped Image in Photoshop

By James QuAugust 6, 20263 Mins Read
Facebook X (Twitter) Instagram Pinterest
  • About Us
  • Get in Touch
  • Advertise
  • VIP Area
  • Free Image Tools
  • Privacy Policy
  • Terms & Conditions
© 2026 PSD Vault. All Right Reserved.

Type above and press Enter to search. Press Esc to cancel.

Manage Consent
To provide the best experiences, we use technologies like cookies to store and/or access device information. Consenting to these technologies will allow us to process data such as browsing behavior or unique IDs on this site. Not consenting or withdrawing consent, may adversely affect certain features and functions.
Functional Always active
The technical storage or access is strictly necessary for the legitimate purpose of enabling the use of a specific service explicitly requested by the subscriber or user, or for the sole purpose of carrying out the transmission of a communication over an electronic communications network.
Preferences
The technical storage or access is necessary for the legitimate purpose of storing preferences that are not requested by the subscriber or user.
Statistics
The technical storage or access that is used exclusively for statistical purposes. The technical storage or access that is used exclusively for anonymous statistical purposes. Without a subpoena, voluntary compliance on the part of your Internet Service Provider, or additional records from a third party, information stored or retrieved for this purpose alone cannot usually be used to identify you.
Marketing
The technical storage or access is required to create user profiles to send advertising, or to track the user on a website or across several websites for similar marketing purposes.
  • Manage options
  • Manage services
  • Manage {vendor_count} vendors
  • Read more about these purposes
View preferences
  • {title}
  • {title}
  • {title}