


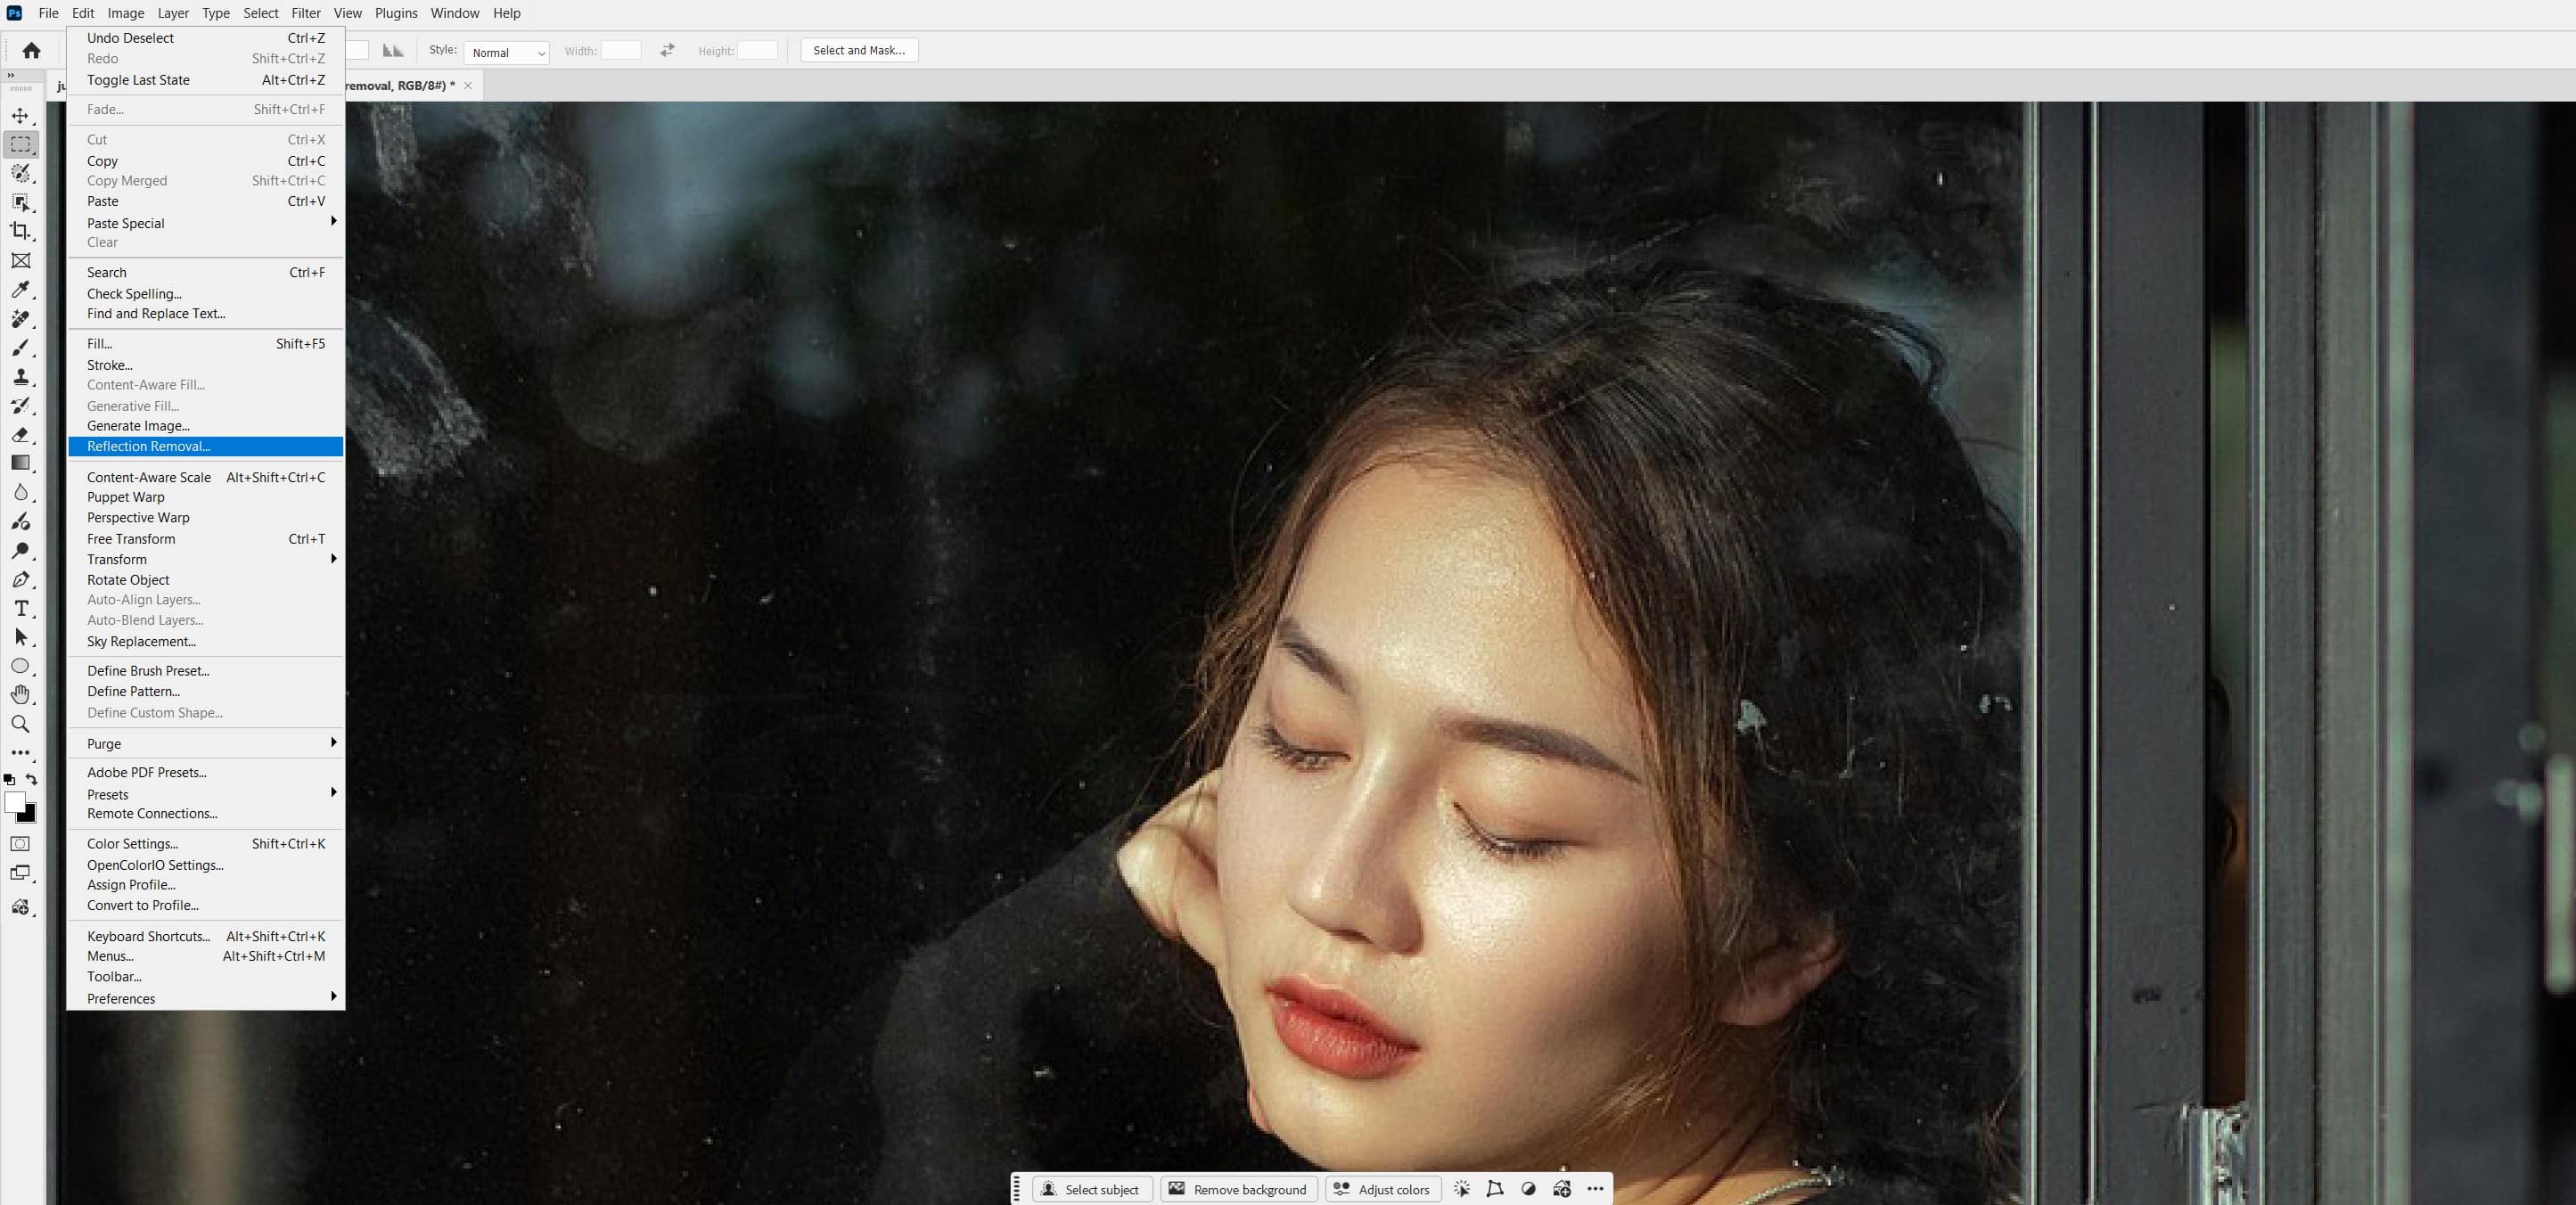
Shooting through glass almost always picks up unwanted reflections — a window behind a subject, glare on eyeglasses, or a shop front turning your photo into a mess of overlapping images. Until recently, fixing this meant painstaking manual cloning. Photoshop 2026 changes that with a dedicated AI-powered Reflection Removal tool that handles large, full-image reflections automatically, without using a single generative credit.
This tutorial walks you through exactly how to use it, when it works, and how to clean up anything the AI misses.
What is the Reflection Removal tool in Photoshop 2026?
The AI-powered Reflection Removal feature lets you easily extract and remove reflections that impact the majority of your scene. The Reflections Removal command eliminates large and prominent window reflections in just a few steps, allowing your image’s subject to stand out clearly. While AI-powered, it is not generative AI and does not use credits.
The feature is designed for large, full-image reflections caused by shooting through glass — like window reflections. It works best on broad, plate-glass situations rather than small specular highlights.
📸 Screenshot suggestion: Side-by-side comparison of a portrait taken through a window — left showing the reflection-heavy original, right showing the cleaned result. Use this as your featured image and hero shot.
What you’ll need
- Adobe Photoshop 2026 (version 27.0 or later)
- A photo affected by a large reflection — ideally a portrait through glass, or a scene shot through a shop window
Step 1: Open your image in Photoshop
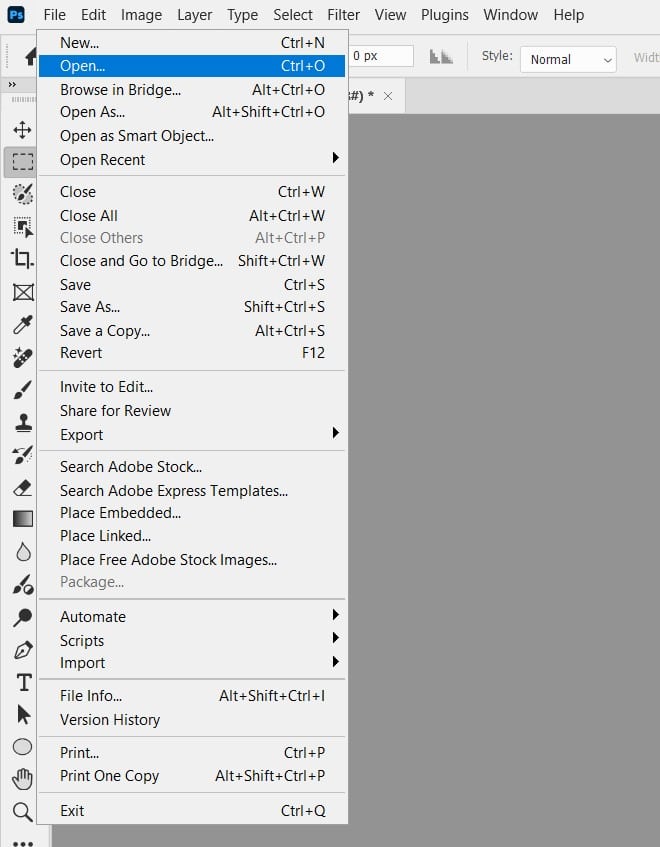
Go to File > Open and select the photo you want to work on. For best results, choose an image where the reflection covers a significant portion of the frame — the tool is optimised for this scenario.
Step 2: Select the image layer
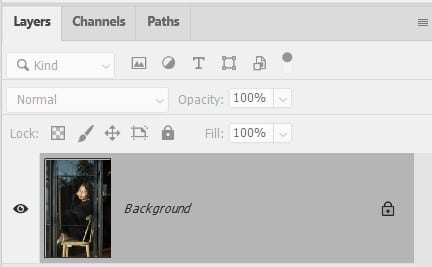
In the Layers panel, click on the layer that contains the reflection. If your image opened as a Background layer, that’s fine — leave it as-is for now.
Step 3: Run Reflection Removal
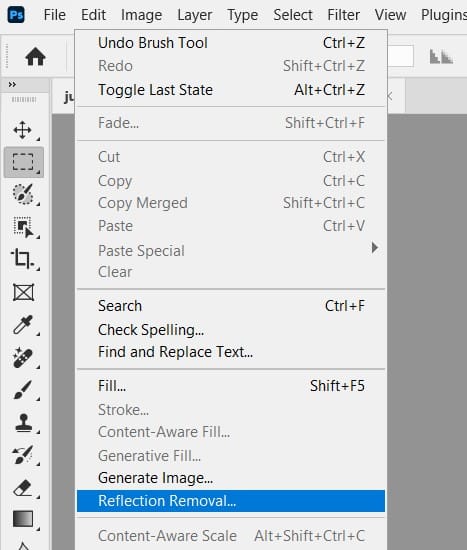
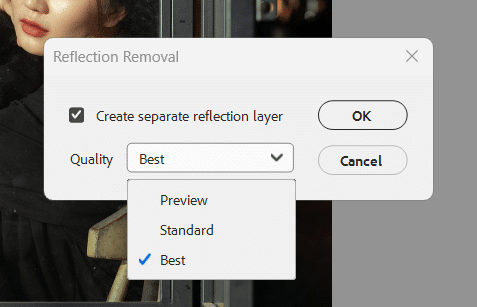
From the Edit menu, select Reflection Removal. In the Reflection Removal dialog box, select your preferred output and quality settings.
Two settings to pay attention to here:
- Quality dropdown — set this to Best for the cleanest result. The “Best” quality setting produces noticeably cleaner results, though it takes longer to process.
- Create a separate reflection layer — tick this checkbox. This creates a brand-new layer isolating the reflections, giving you a clean starting point while preserving your original.
Click OK and let Photoshop process the image. This usually takes 10–30 seconds depending on your hardware.
Step 4: Review the result
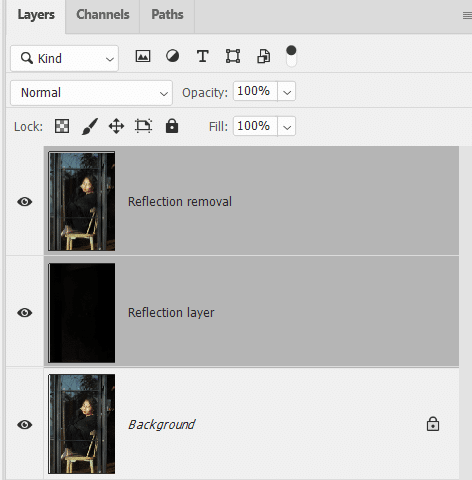
Once processing is complete, you’ll see the cleaned image on your canvas. Toggle the reflection layer on and off in the Layers panel to compare before and after.
The results are genuinely impressive in places. On a portrait shot through glass, the tool does a strong job removing the reflection obscuring the subject’s face.
Check the edges carefully — hairlines, shoulders, and clothing borders are common areas where the tool needs a small assist.
Step 5: Fix any areas the AI got wrong (optional)
The AI can occasionally mistake parts of your subject — like an arm or clothing — for a reflection and remove them. If this happens, the fix is straightforward.
- Select the reflection removal layer in the Layers panel
- Add a black layer mask (hold Alt and click the Add Layer Mask button) — this hides the entire effect
- Select a soft white brush at reduced opacity (~50%)
- Paint back over the areas where the reflection removal looks good, revealing the effect only where it actually helps
This layer-based approach is what separates the Photoshop implementation from the older Lightroom version, and it gives you meaningful control over the output.
Step 6: Clean up stubborn reflections with the Remove tool
If small patches of reflection remain around the hairline or edges, you can use the Selection Brush Tool to paint over the remaining glare, being careful to avoid core features like the eyes. Then in the contextual taskbar, click Generative Fill to have Photoshop generate realistic skin or texture to fill those areas.
Alternatively, for non-skin areas, the standard Remove tool (shortcut: J) works well — just paint over the remaining reflection on a new blank layer.
Step 7: Save your file
Go to File > Save As and export your finished image. For web use, File > Export > Export As and choose JPEG or WebP.
For a fully non-destructive save, keep it as a PSD.
Pro tips
- Best photo type to use: The tool works significantly better on reflections that cover the whole scene (like shooting through a bus window) than on small specular highlights on an object’s surface.
- Camera Raw alternative: You can also access reflection removal via Filter > Camera Raw Filter, then Distraction Removal > Reflections > Apply, and set Quality to Best. The Edit menu method covered in this tutorial tends to give cleaner results.
Frequently asked questions
Does Reflection Removal use generative credits?
No. This process uses zero generative credits. It’s AI-powered but not generative AI.
What kind of reflections does it work best on?
It is designed for large, full-image reflections caused by shooting through glass, like window reflections. Small glints or lens flares are better handled with the Healing Brush or Remove tool.
Is this available in Photoshop 2025?
No — Reflection Removal via the Edit menu is a Photoshop 2026 (v27.0) feature. The Camera Raw version has been available since an earlier update, but the standalone tool with separate layer output is new to 2026.
What if my image has both a reflection and a person in the background?
The AI distinguishes between reflections and scene content, but it isn’t perfect on complex overlaps. Use the masking technique in Step 5 to limit the effect to only the areas you need.
Conclusion
Photoshop 2026’s Reflection Removal tool turns a task that previously took careful cloning and blending into a three-click process. It’s not perfect on every image, but the layer-based output gives you the control to refine it quickly. Whether you’re shooting portraits through glass or cleaning up window photography, it’s one of the most practical new tools in this release.