Close Menu
PSD VaultPSD Vault
  • VIP Area
  • Photoshop Basics
  • Photo Effect
  • Text Effect
  • Premium Tuts
  • Resources
  • Drawing
  • Inspiration
  • Web Graphics
  • Abstract
  • Freebies
  • Advertise
  • Get in Touch
  • About PSD Vault
Facebook Instagram Pinterest YouTube TikTok
Facebook Instagram Pinterest YouTube TikTok RSS
PSD VaultPSD Vault
  • VIP Area
    • Sign Up
    • Log In
  • Free Image Tools
  • Photoshop Basics
  • AI
  • Photoshop Error Fixes
  • Video Tutorial
  • Photo Effect
  • Text Effect
  • Premium Tuts
  • Drawing
PSD VaultPSD Vault
Home»Photo Effect»Bring Old Photos Back to Life with Photoshop Super Zoom
Photo Effect

Bring Old Photos Back to Life with Photoshop Super Zoom

By James QuJanuary 29, 20263 Mins Read
Share
Facebook Twitter LinkedIn Pinterest Email

Do you have old, blurry, or low-resolution photos that you’d love to restore and bring back to life? With Photoshop’s Super Zoom feature, part of the Neural Filters, you can upscale and enhance your images with just a few clicks. This powerful AI-driven tool is perfect for restoring family photos, improving pixelated images, or preparing low-res pictures for printing.

In this step-by-step tutorial, we’ll walk you through how to use Super Zoom to transform your old photos into high-quality masterpieces. Let’s get started!


What You’ll Need

  • Adobe Photoshop (2021 or later, with Neural Filters enabled).
  • An old or low-resolution photo you want to enhance.

Step 1: Open Your Photo in Photoshop

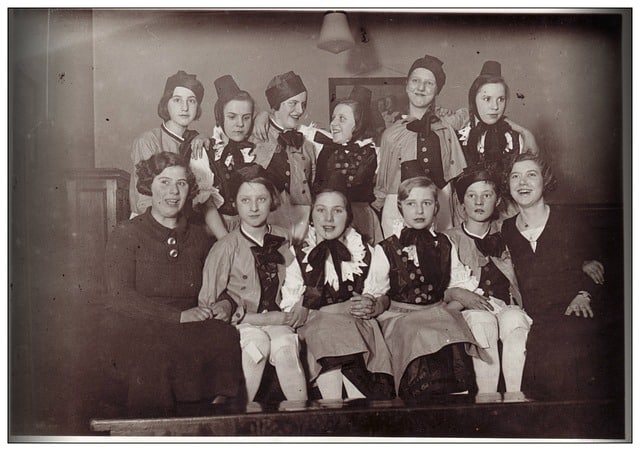
Launch Photoshop and open this low-resolution photo by going to File > Open and selecting your image.

Make sure the photo is unlocked (check the Layers panel – it should say “Layer 0” or “Background”). If it’s locked, double-click the layer to unlock it.


    Step 2: Access Neural Filters

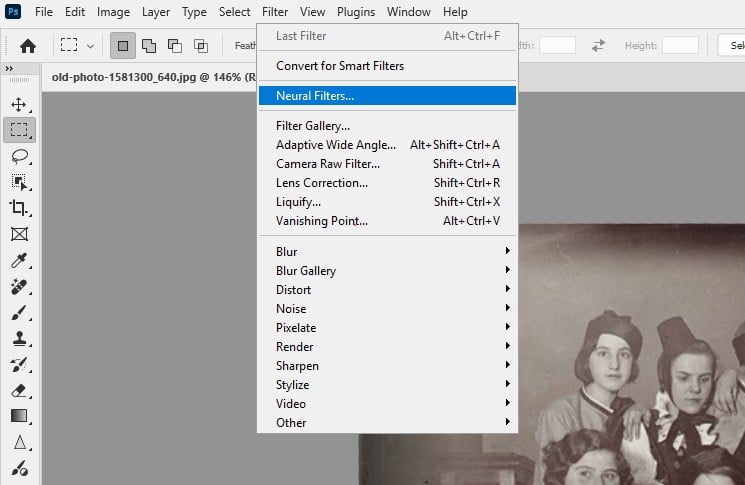
    Go to the top menu and click Filter > Neural Filters.

    • If this is your first time using Neural Filters, you may need to download the Super Zoom filter. Simply click the download icon next to the filter name.

      In the Neural Filters panel, scroll down or search for Super Zoom.


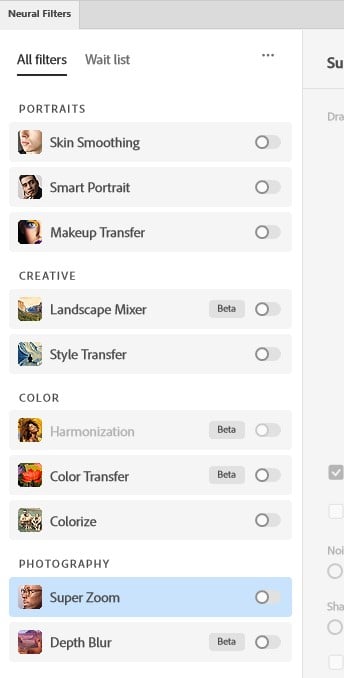
        Step 3: Enable Super Zoom

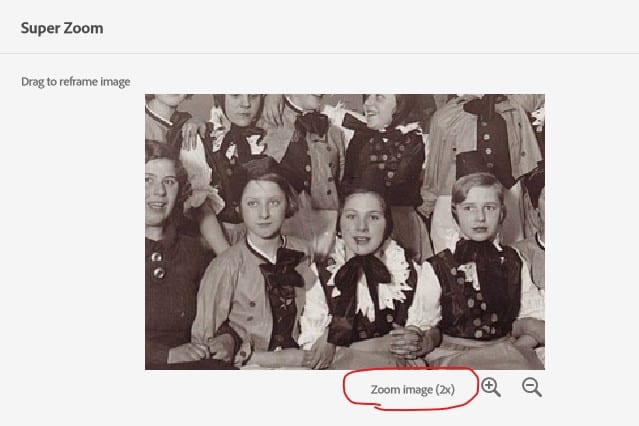
        Toggle the switch next to Super Zoom to enable the filter. A preview of your image will appear with a zoom slider and additional settings.


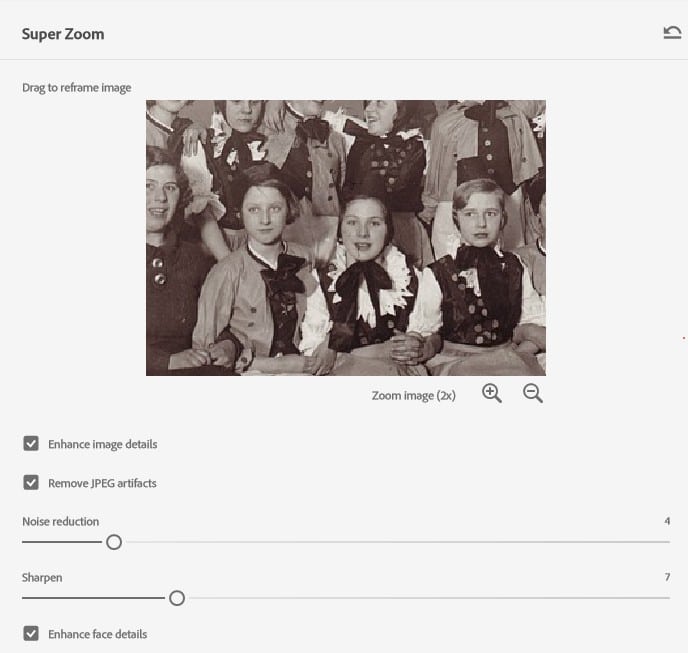
          Step 4: Adjust the Zoom Level

          Use the Zoom slider to increase the size of your image. Super Zoom will intelligently upscale the photo while preserving details. For example, if your original photo is 800×600 pixels, you can zoom in to create a 1600×1200 pixel image or larger.

          Watch as Photoshop’s AI enhances the image in real-time.


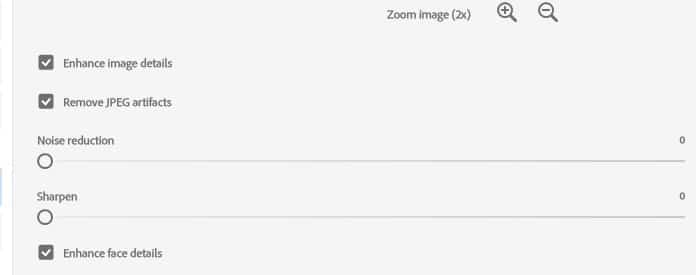
            Step 5: Enhance Details

            • Toggle on the Enhance Image Details option to sharpen the image and bring out finer textures. This is especially useful for facial features, clothing, or background details.
            • Enable Remove JPEG Artifacts to minimize compression artifacts (e.g., blocky or blurry areas caused by low-quality JPEG files).
            • Use the Reduce Noise slider to clean up grainy areas in the photo. This is particularly helpful for old photos or images taken in low light.
            • The Enhance Face Detail option will improve facial features like eyes, nose, and mouth.

              Step 7: Apply the Changes

              1. Once you’re happy with the adjustments, click OK to apply the Super Zoom filter.
              2. You can either output the new image as a new layer, or a new document.

              Step 8: Fine-Tune the Image (Optional)

              1. If needed, use additional Photoshop tools to further refine your image:
                • Spot Healing Brush Tool: Remove scratches or dust from old photos.
                • Adjustment Layers: Improve brightness, contrast, or color balance.
                • Sharpen Tool: Add extra sharpness to specific areas.

              Step 9: Save Your Enhanced Photo

              1. Go to File > Save As to save your enhanced photo in high resolution.
              2. Choose a file format like JPEG or PNG for digital use, or TIFF for printing.

              Tips for Best Results

              • Start with the highest-quality version of your photo (even if it’s low-res).
              • Experiment with the zoom level and enhancement settings to find the perfect balance.
              • Combine Super Zoom with other Photoshop tools for even better results.

              Conclusion

              Photoshop’s Super Zoom feature is a game-changer for restoring old, low-resolution photos. Whether you’re working on family memories, historical images, or pixelated pictures, this AI-powered tool makes it easy to upscale and enhance your photos with incredible detail.

              Give it a try and let us know how it works for you! If you found this tutorial helpful, don’t forget to share it with your friends and follow PSD Vault for more Photoshop tips and tricks.


              Further Readings

              • Photoshop System Requirements for Neural Filters
              • AI in Photo Editing
              super zoom
              Share. Facebook Twitter Pinterest LinkedIn Tumblr Email
              James Qu
              • Website

              James is a seasoned Photoshop expert with over 25 years of experience based in Australia. As the driving force behind PSD Vault, he authors the majority of its in-depth tutorials and insightful articles.

              Related Posts

              How to Create a Duotone Effect in Photoshop with Gradient Maps

              May 16, 2026

              How to Create Epic War Scene in Photoshop

              May 15, 2026

              7 Pro Tips for Clarity, Dehaze & Grain Adjustment Layers in Photoshop 2026 (That Adobe Won’t Tell You)

              May 9, 2026

              Comments are closed.

              Don't Miss

              How to Create a Duotone Effect in Photoshop with Gradient Maps

              May 16, 2026

              How to Create Epic War Scene in Photoshop

              May 15, 2026

              The Beginner’s Guide to Photoshop AI Masking Tool

              May 14, 2026

              For Beginners

              Basics

              How Colour Theory Supercharges Your Photoshop Skills

              By James QuMay 3, 20265 Mins Read

              How to Read Photoshop Histograms for Beginners

              April 18, 2026

              How to Sharpen Images in Photoshop: 4 Methods for Every Situation

              April 12, 2026

              Curves or Levels: Choosing the Right Tool for Stunning Edits

              March 26, 2026

              You May Also Like

              Photo Effect

              How to Create a Duotone Effect in Photoshop with Gradient Maps

              By James QuMay 16, 20263 Mins Read
              Photo Effect

              How to Create Epic War Scene in Photoshop

              By James QuMay 15, 20265 Mins Read
              Photo Effect

              7 Pro Tips for Clarity, Dehaze & Grain Adjustment Layers in Photoshop 2026 (That Adobe Won’t Tell You)

              By James QuMay 9, 20265 Mins Read
              Facebook X (Twitter) Instagram Pinterest
              • About Us
              • Get in Touch
              • Advertise
              • VIP Area
              • Free Image Tools
              • Privacy Policy
              • Terms & Conditions
              © 2026 PSD Vault. All Right Reserved.

              Type above and press Enter to search. Press Esc to cancel.

              Manage Consent
              To provide the best experiences, we use technologies like cookies to store and/or access device information. Consenting to these technologies will allow us to process data such as browsing behavior or unique IDs on this site. Not consenting or withdrawing consent, may adversely affect certain features and functions.
              Functional Always active
              The technical storage or access is strictly necessary for the legitimate purpose of enabling the use of a specific service explicitly requested by the subscriber or user, or for the sole purpose of carrying out the transmission of a communication over an electronic communications network.
              Preferences
              The technical storage or access is necessary for the legitimate purpose of storing preferences that are not requested by the subscriber or user.
              Statistics
              The technical storage or access that is used exclusively for statistical purposes. The technical storage or access that is used exclusively for anonymous statistical purposes. Without a subpoena, voluntary compliance on the part of your Internet Service Provider, or additional records from a third party, information stored or retrieved for this purpose alone cannot usually be used to identify you.
              Marketing
              The technical storage or access is required to create user profiles to send advertising, or to track the user on a website or across several websites for similar marketing purposes.
              • Manage options
              • Manage services
              • Manage {vendor_count} vendors
              • Read more about these purposes
              View preferences
              • {title}
              • {title}
              • {title}