Close Menu
PSD VaultPSD Vault
  • VIP Area
  • Photoshop Basics
  • Photo Effect
  • Text Effect
  • Premium Tuts
  • Resources
  • Drawing
  • Inspiration
  • Web Graphics
  • Abstract
  • Freebies
  • Advertise
  • Get in Touch
  • About PSD Vault
Facebook Instagram Pinterest YouTube TikTok
Facebook Instagram Pinterest YouTube TikTok RSS
PSD VaultPSD Vault
  • VIP Area
    • Sign Up
    • Log In
  • Photoshop Basics
  • AI
  • Photoshop Error Fixes
  • Video Tutorial
  • Photo Effect
  • Text Effect
  • Premium Tuts
  • Drawing
  • Opinion
PSD VaultPSD Vault
Home»Text Effect»How to Easily Create Glitch Text Effect in Photoshop
Text Effect

How to Easily Create Glitch Text Effect in Photoshop

By Matteo Della ChiesaOctober 26, 20243 Mins Read
Share
Facebook Twitter LinkedIn Pinterest Email

In this tutorial, I will show you how to easily create realistic glitch text effect in Photoshop within just 3 steps. Have a try!

This tutorial is written with beginners in mind. Along the way, you will get to practice several tools such as the liquify filter, gradient fill tool.

The PSD Files of this tutorial are available via PSD Vault VIP Area.

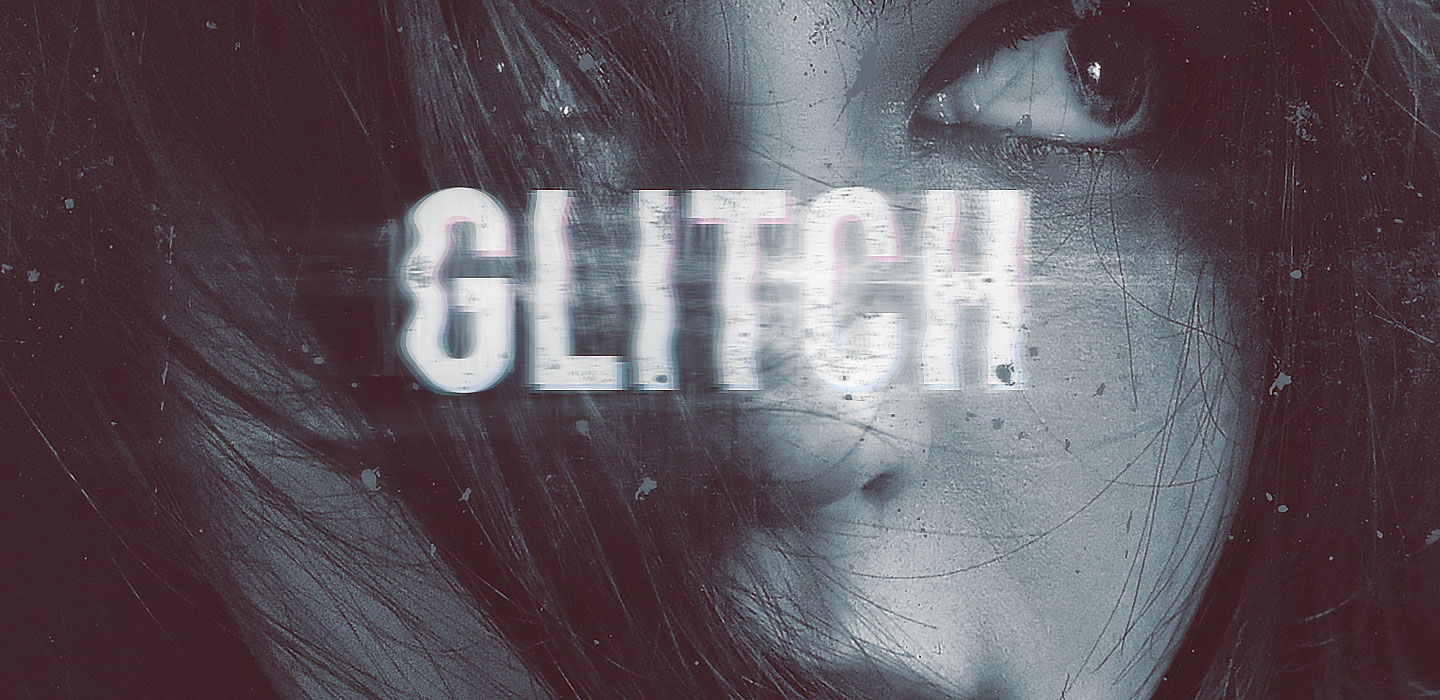
Here is a preview of the final effect I have for this tutorial: (click to enlarge)

PSD Vault VIP Membership

You can download the PSD File for this tutorial via the VIP Members Area for only $6.95/Month (or less)! You will not only get this PSD File, but also 250+ other PSD Files + Extra Goodies + Exclusive Photoshop tutorials there. Signup now and get exclusive!

Let’s get started!

Step 1

Create a new document sized 1440px * 700px. Download this stock photo and use it as our background:

Type some text using any font you like, I used the Bebas font:

Apply a gradient overlay on this text layer, you can any colour fill you like. I used the following blue/pink combination:

Duplicate this text layer once, remove the gradient overlay on the duplicated layer:

Move the duplicated layer slightly to the top-right direction, and here is the effect so far:

Step 2

Merge the 2x text layer into one layer. Right-click on the layer and select “Rasterize Type”. I recommend saving the previous editable text layers before you merge them, in case you need to change the text later:

Go to Filter > Liquify:

Select the Twirl Tool from the tool panel within the liquify fitler:

Apply this twirl effect all over the text:

Apply the liquify fitler, then drop the layer opacity of this layer to 60%:

and here is the effect:

Step 3

Duplicate the previous layer a few times and reduce the layer opacity to each of them to around 20%:

Move those duplicated layer left and right to the original layer, creating the glitch effect:

For final touches, we can flatten the image and duplicate the background layer, apply the following motion blur filter on duplicated layer:

Use a layer mask to hide the following red area, leaving the motion blur on the text only:

I further applied some colour adjustments to the overall image, and this is my final result: (click to enlarge)

That’s it for this tutorial! Leave me a comment below if you have any questions and I will try my best to answer it.

glitch text
Share. Facebook Twitter Pinterest LinkedIn Tumblr Email
Matteo Della Chiesa
  • Website

Matteo is a digital artist from Italy. He has worked with companies like Sony, 20th Century Fox, Time Warner - Warner Bros, Lions Gate Entertainment, WWF & Blizzard Entertainment,

Related Posts

Create Realistic Neon Text Effect in Photoshop

November 8, 2025

How to Fix Text Tool Lagging or Crashing in Photoshop 2025 (Quick & Permanent Fixes)

November 1, 2025

How to Create In-Water Text Effect with Displacement Maps in Photoshop

October 17, 2025

Comments are closed.

Don't Miss

How to Give Your Portrait Cyberpunk Effect in Photoshop

November 15, 2025

Create Realistic Neon Text Effect in Photoshop

November 8, 2025

How to Enlarge Images Without Losing Quality in Photoshop (using Super Resolution)

November 6, 2025

For Beginners

Basics

How to Create Relistic Burning Car Effect in Photoshop

By James QuOctober 17, 20251 Min Read

How to Pixelate an Image in Photoshop

October 16, 2025

How to Stay Ahead of Every Photoshop Update & Unlock Their Full Power

October 11, 2025

Curves or Levels: Choosing the Right Tool for Stunning Edits

September 28, 2025

You May Also Like

Text Effect

Create Realistic Neon Text Effect in Photoshop

By Valentin PetroffNovember 8, 20253 Mins Read
Photoshop Error Fixes

How to Fix Text Tool Lagging or Crashing in Photoshop 2025 (Quick & Permanent Fixes)

By James QuNovember 1, 20253 Mins Read
Text Effect

How to Create In-Water Text Effect with Displacement Maps in Photoshop

By James QuOctober 17, 20253 Mins Read
Facebook X (Twitter) Instagram Pinterest
  • About Us
  • Get in Touch
  • Advertise
  • VIP Area
  • Privacy Policy
  • Terms & Conditions
© 2025 PSD Vault. All Right Reserved.

Type above and press Enter to search. Press Esc to cancel.

Manage Consent
To provide the best experiences, we use technologies like cookies to store and/or access device information. Consenting to these technologies will allow us to process data such as browsing behavior or unique IDs on this site. Not consenting or withdrawing consent, may adversely affect certain features and functions.
Functional Always active
The technical storage or access is strictly necessary for the legitimate purpose of enabling the use of a specific service explicitly requested by the subscriber or user, or for the sole purpose of carrying out the transmission of a communication over an electronic communications network.
Preferences
The technical storage or access is necessary for the legitimate purpose of storing preferences that are not requested by the subscriber or user.
Statistics
The technical storage or access that is used exclusively for statistical purposes. The technical storage or access that is used exclusively for anonymous statistical purposes. Without a subpoena, voluntary compliance on the part of your Internet Service Provider, or additional records from a third party, information stored or retrieved for this purpose alone cannot usually be used to identify you.
Marketing
The technical storage or access is required to create user profiles to send advertising, or to track the user on a website or across several websites for similar marketing purposes.
  • Manage options
  • Manage services
  • Manage {vendor_count} vendors
  • Read more about these purposes
View preferences
  • {title}
  • {title}
  • {title}