Close Menu
PSD VaultPSD Vault
  • VIP Area
  • Photoshop Basics
  • Photo Effect
  • Text Effect
  • Premium Tuts
  • Resources
  • Drawing
  • Inspiration
  • Web Graphics
  • Abstract
  • Freebies
  • Advertise
  • Get in Touch
  • About PSD Vault
Facebook Instagram Pinterest YouTube TikTok
Facebook Instagram Pinterest YouTube TikTok RSS
PSD VaultPSD Vault
  • VIP Area
    • Sign Up
    • Log In
  • Photoshop Basics
  • AI
  • Photoshop Error Fixes
  • Video Tutorial
  • Photo Effect
  • Text Effect
  • Premium Tuts
  • Drawing
  • Opinion
PSD VaultPSD Vault
Home»Photo Effect»Create “Resurrection” Surreal Photo Manipulation in Photoshop
Photo Effect

Create “Resurrection” Surreal Photo Manipulation in Photoshop

By James QuJuly 2, 20174 Mins Read
Share
Facebook Twitter LinkedIn Pinterest Email

In this tutorial, I will show you the process of creating this “Resurrection” surreal photo manipulation in Photoshop. The photo manipulation simply tells a story about a girl’s spirit being resurrected in a surreal environment. The environment is filled with space elements such as nebula & star.

Along the way, we will practice selection, image adjustments, object/layer blending, and painting of hair with pen tool.

The PSD file of this tutorial is available via the PSD Vault VIP members area.

Here is a preview of the final effect I have for this tutorial: (click to enlarge)

PSD Vault VIP Membership

You can download the PSD File for this tutorial via the VIP Members Area for only $6.95/Month (or less)! You will not only get this PSD File, but also 200+ other PSD Files + Extra Goodies + Exclusive Photoshop tutorials there. Signup now and get exclusive!

Let’s get started!

To complete this tutorial, you will need the following stocks:

Lake

Model by mjranum-stock

Nebula 1

Nebula 2

Water Splash Photoshop Brushes

Lightening Photoshop Brushes

Cloud Photoshop Brushes

Step 1

Create a new document sized 1440px * 800px with black background. Load the lake image into Photoshop and select the following portion:

Copy and paste the selection to our document, re-size it to fit the size of the canvas:

Apply the following adjustment layers as clipping mask to this lake layer:

Black & White (set its layer opacity to 90%)

Levels

Use the cloud brush, paint some cloud over the sky. Here is the effect so far:

Step 2

Load the model image into Photoshop. Cut out the model and paste it to the following position. Erase the legs.

Apply the following adjustment layer as clipping masks:

Black & White

Levels

Use the following layer mask on the levels adjustment layer:

Curves

and here is the effect so far:

Step 3

Use the water splash brushes, paint some splashing effect around the body:

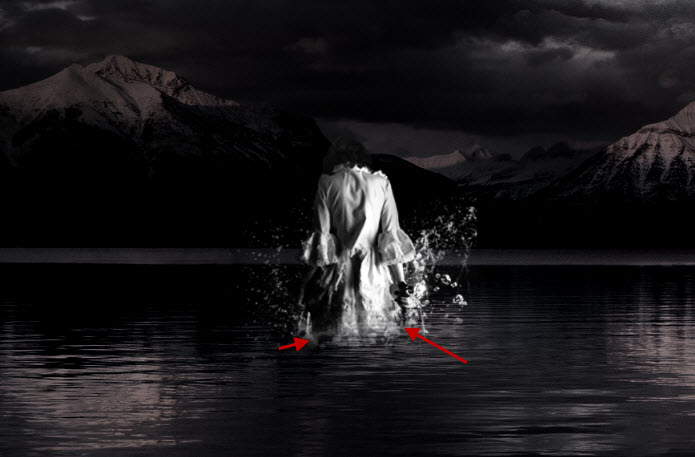
Use a soft black brush, paint some subtle shadow effect to the following position:

Step 4

Load the “Nebula 1” stock image into Photoshop and select the entire image, paste it onto our canvas:

Change the layer blending mode to “Screen” for this nebula layer:

Apply the following layer mask for this nebula layer:

Go back to the “Nebula 1” image and use the lasso tool with 40px feather, select the following portion:

Paste the selection to the right side of the model (You will need to reduce its size a bit from the copy):

Load the “Nebula 2” image into Photoshop, select the following portion with the Lasso Tool (again set feather to 4opx):

Copy and paste the selection to our document, paste it to the centre of the sky:

Step 5

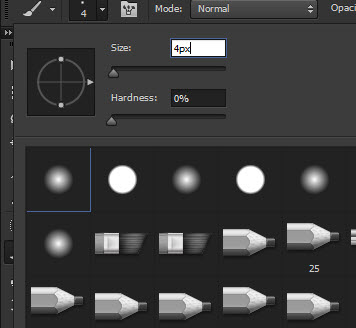
We will work on creating the hair in this step. Firstly let’s pick a 4px, soft brush:

Use the Pen Tool, draw a path as shown below:

Right-click the path and select “Stroke Path …”:

Stroke the path with the brush tool and tick “Simulate Pressure”, then press “OK”:

You will have the following effect:

Duplicate this layer and adjust the size with free transform tool:

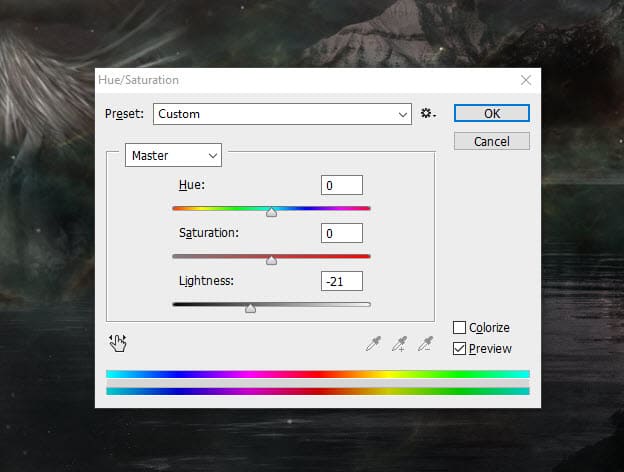
Use the Hue/Saturation adjustment to adjust the lightness of the hair:

Keep duplicating and adjusting, you will finish with the hair effect similar to below:

Step 6

Use the lightening brush we downloaded, add some lightening effect to the following area:

I added some colour to the image with a couple of colour balance adjustment layers, and this is my final result: (click to enlarge)

That’s it for this tutorial! Leave me a comment below if you have any questions. Enjoy it? Help me share it around by using the share buttons at the top of the tutorial!

manipulation photo sureal
Share. Facebook Twitter Pinterest LinkedIn Tumblr Email
James Qu
  • Website

James is a seasoned Photoshop expert with over 25 years of experience based in Australia. As the driving force behind PSD Vault, he authors the majority of its in-depth tutorials and insightful articles.

Related Posts

How to Give Your Portrait Cyberpunk Effect in Photoshop

November 15, 2025

How to Edit Non-Destructively with Smart Objects & Neural Filters in Photoshop

October 25, 2025

Create Surreal Motorbike Racing Scene in Photoshop

October 18, 2025

Comments are closed.

Don't Miss

How to Give Your Portrait Cyberpunk Effect in Photoshop

November 15, 2025

Create Realistic Neon Text Effect in Photoshop

November 8, 2025

How to Enlarge Images Without Losing Quality in Photoshop (using Super Resolution)

November 6, 2025

For Beginners

Basics

How to Create Relistic Burning Car Effect in Photoshop

By James QuOctober 17, 20251 Min Read

How to Pixelate an Image in Photoshop

October 16, 2025

How to Stay Ahead of Every Photoshop Update & Unlock Their Full Power

October 11, 2025

Curves or Levels: Choosing the Right Tool for Stunning Edits

September 28, 2025

You May Also Like

Photo Effect

How to Give Your Portrait Cyberpunk Effect in Photoshop

By James QuNovember 15, 20253 Mins Read
Photo Effect

How to Edit Non-Destructively with Smart Objects & Neural Filters in Photoshop

By James QuOctober 25, 20253 Mins Read
Photo Effect

Create Surreal Motorbike Racing Scene in Photoshop

By James QuOctober 18, 202512 Mins Read
Facebook X (Twitter) Instagram Pinterest
  • About Us
  • Get in Touch
  • Advertise
  • VIP Area
  • Privacy Policy
  • Terms & Conditions
© 2025 PSD Vault. All Right Reserved.

Type above and press Enter to search. Press Esc to cancel.

Manage Consent
To provide the best experiences, we use technologies like cookies to store and/or access device information. Consenting to these technologies will allow us to process data such as browsing behavior or unique IDs on this site. Not consenting or withdrawing consent, may adversely affect certain features and functions.
Functional Always active
The technical storage or access is strictly necessary for the legitimate purpose of enabling the use of a specific service explicitly requested by the subscriber or user, or for the sole purpose of carrying out the transmission of a communication over an electronic communications network.
Preferences
The technical storage or access is necessary for the legitimate purpose of storing preferences that are not requested by the subscriber or user.
Statistics
The technical storage or access that is used exclusively for statistical purposes. The technical storage or access that is used exclusively for anonymous statistical purposes. Without a subpoena, voluntary compliance on the part of your Internet Service Provider, or additional records from a third party, information stored or retrieved for this purpose alone cannot usually be used to identify you.
Marketing
The technical storage or access is required to create user profiles to send advertising, or to track the user on a website or across several websites for similar marketing purposes.
  • Manage options
  • Manage services
  • Manage {vendor_count} vendors
  • Read more about these purposes
View preferences
  • {title}
  • {title}
  • {title}