
If you follow my Photo Effect or Text Effect Photoshop tutorial here, you will notice I use a Photoshop function called “Clipping Masks” quite often. In this post, I will explain in-depth everything you need to know about Photoshop clipping masks, including its basic & advanced use. If you’re a Photoshop beginner, you will learn lots of about this powerful tool from this post.
What is Clipping Masks
Well, according to the official Photoshop site, a clipping mask is “a group of layers to which a mask is applied. The bottommost layer, or base layer, defines the visible boundaries of the entire group.”
Sounds a bit complex for a beginner – I would suggest you put aside the definition for now, and go straight into practice mode.
Start by drawing a circle on a new document:

Then, add any image on top of the circle layer (I added this spaceship):

This is the layer order:

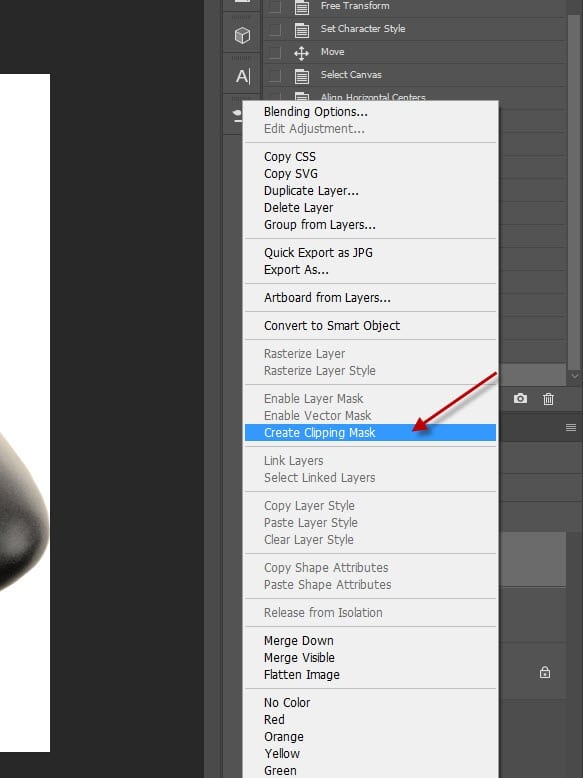
Then right-click on “layer 2”, click on “Create Clipping Mask”:
As you can see, the spaceship is now confined within the circle, which is the layer below the spaceship layer.

To release the clipping mask, right-click on the layer and click on “Release Clipping Mask”.
That’s the basics of using clipping mask. Simple, isn’t it? Now we’re onto some advanced clipping mask techniques.
Combine Clipping Mask & Layer Blend Mode
Now you understand how to set up the clipping mask, you may wonder: “can I apply some layer blend modes to the clipping mask”? The answer is YES.
To demonstrate the use of blend mode, here I have a circle rock layer:

Simply double-click on the clipping mask layer and bring up the “Layer Style”, you can see all blend mode options are at your disposal:

I set the blend mode to “overlay”, and here is the effect:

Combining clipping mask and layer blend modes can produce great effect for your artwork. I encourage you to try a few blend modes and see what results they bring you.
Using Clipping Mask on Text
Clipping mask can also be used to create attractive text effect. Here we can some texts:

We add a rock texture over this text layer and set it as clipping mask:

And the end result is a rock text effect:

We can also apply layer blend mode on the clipping mask and this will make our text look stylish and unique. Go ahead and experiment! I have a handy tutorial below you can practice with:
How to Easily Apply Texture to Your Text in Photoshop with Clipping Masks
Using Clipping Mask on Adjustment Layer
Another clever use of clipping mask is that you can set it on an adjustment layer. By doing so, we can apply image adjustments to only the layer below the clipping mask, while leaving all other layer unaffected.
You will need to tick “Use Previous Layer to Create Clipping Mask” option when adding the adjustment layer:

As you can see, we now have the adjustment layer attached to the rock layer below:

Now when you adjust the settings, only the rock layer will be affected:

You can even add several adjustment layers as clipping masks to produce complex effect:

That’s it for this post! You now should have a much better understanding of Photoshop Clipping Mask. Make sure you practice what you learn from this tutorial and drop me a comment for any questions.
Till next time, have a great day!