
Have you ever wanted to create a surreal, dreamlike photo effect that transports viewers to an underwater fantasy world? In this tutorial, we’ll show you how to create a flying jellyfish photo effect in Photoshop. This mesmerizing effect combines the beauty of jellyfish with the illusion of flight, making it perfect for creative projects, digital art, or even social media posts.
Whether you’re a Photoshop beginner or a seasoned pro, this step-by-step guide will walk you through the process, complete with tips and tricks to make your artwork stand out. Let’s dive in!
The PSD file of this tutorial is available via the PSD Vault VIP members area.
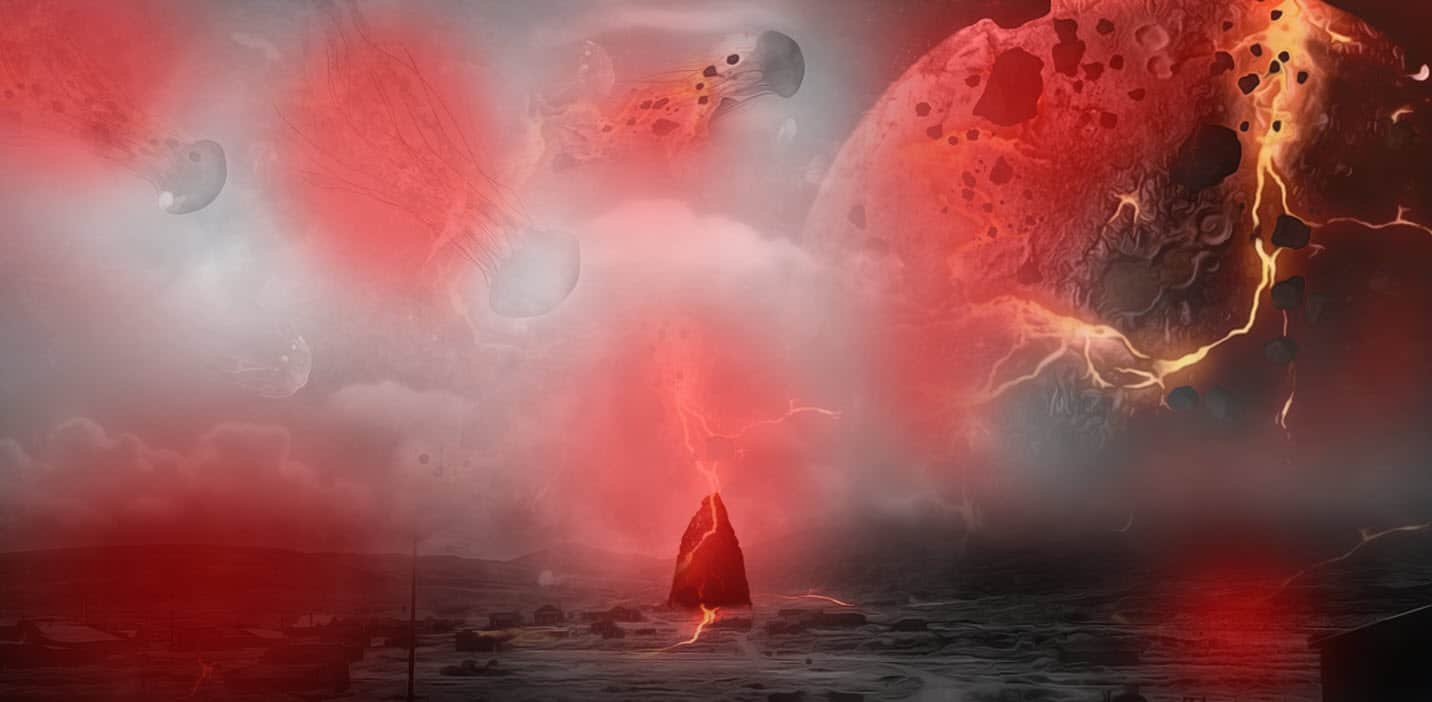
Here is a preview of the final effect I have for this tutorial: (click to enlarge)

PSD Vault VIP Membership
You can download the PSD File for this tutorial via the VIP Members Area for only $6.95/Month (or less)! You will not only get this PSD File, but also 250+ other PSD Files + Extra Goodies + Exclusive Photoshop tutorials there. Signup now and get exclusive!

To complete this tutorial, you will need the following stocks:
Step 1
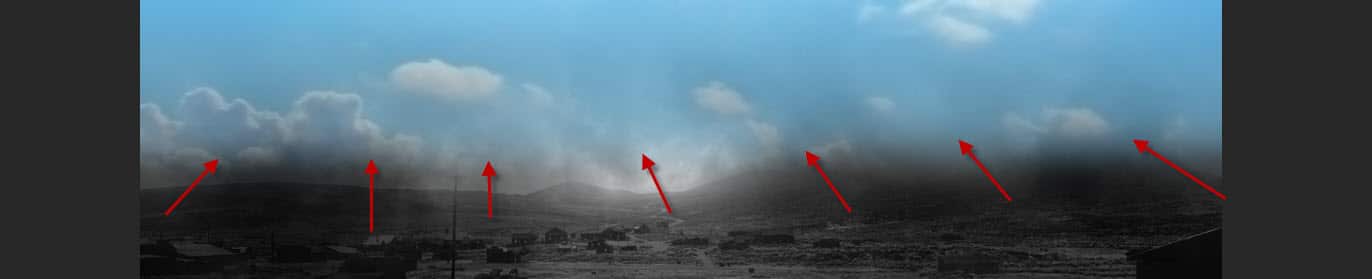
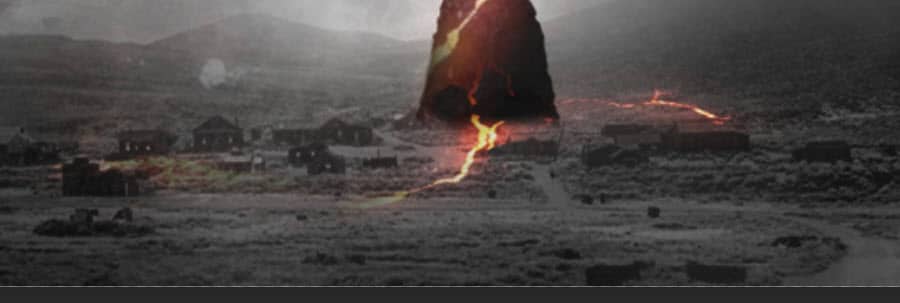
Create a new document sized 1440px * 709px with black background. Load the desert stock image into Photoshop, place it at the bottom of the canvas as shown below:
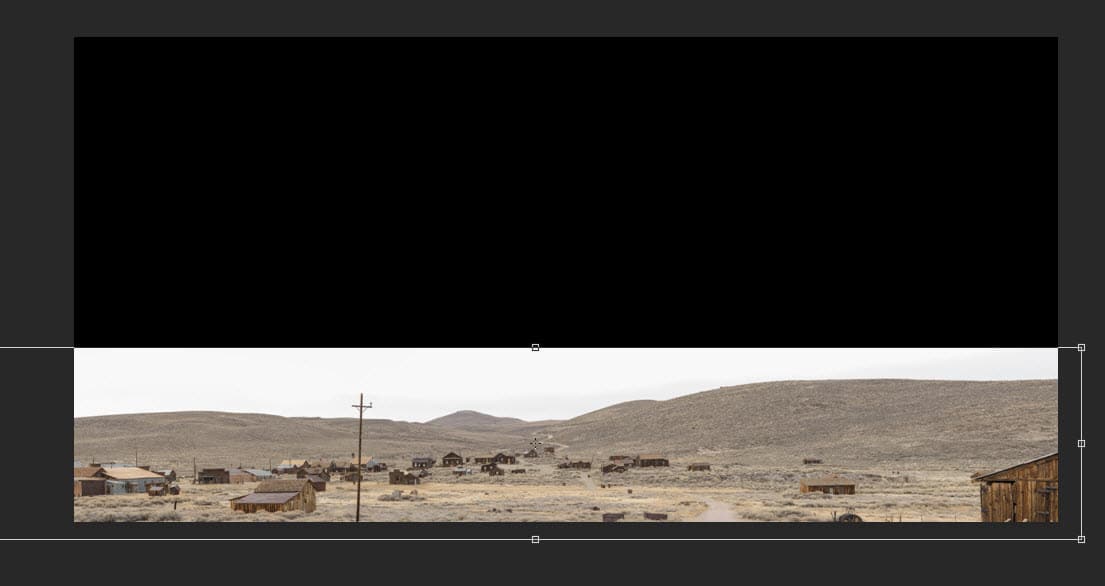
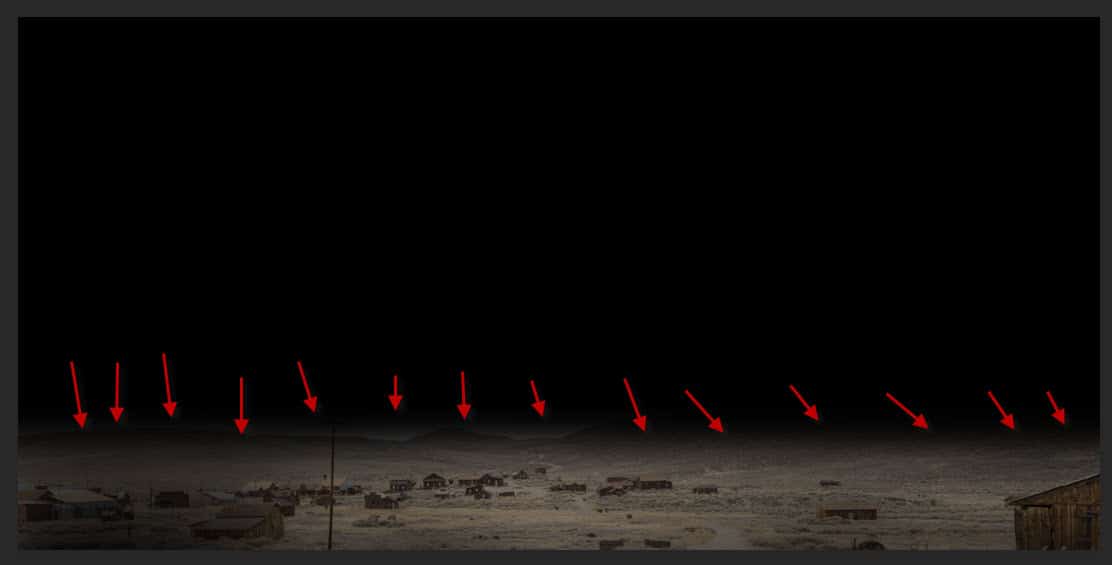
Use a layer mask to mask out the top edge of the desert:
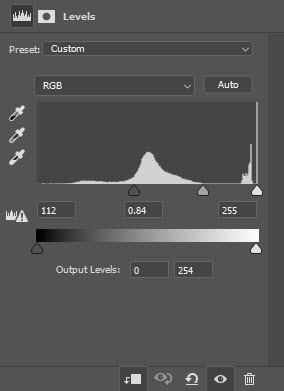
Apply the following Levels adjustment to this desert layer:
Use a cloud/smoke brush, paint some cloud effect over the top edge of the desert:

Step 2
Load the sky image into Photoshop, and place it on top of the desert as shown below:
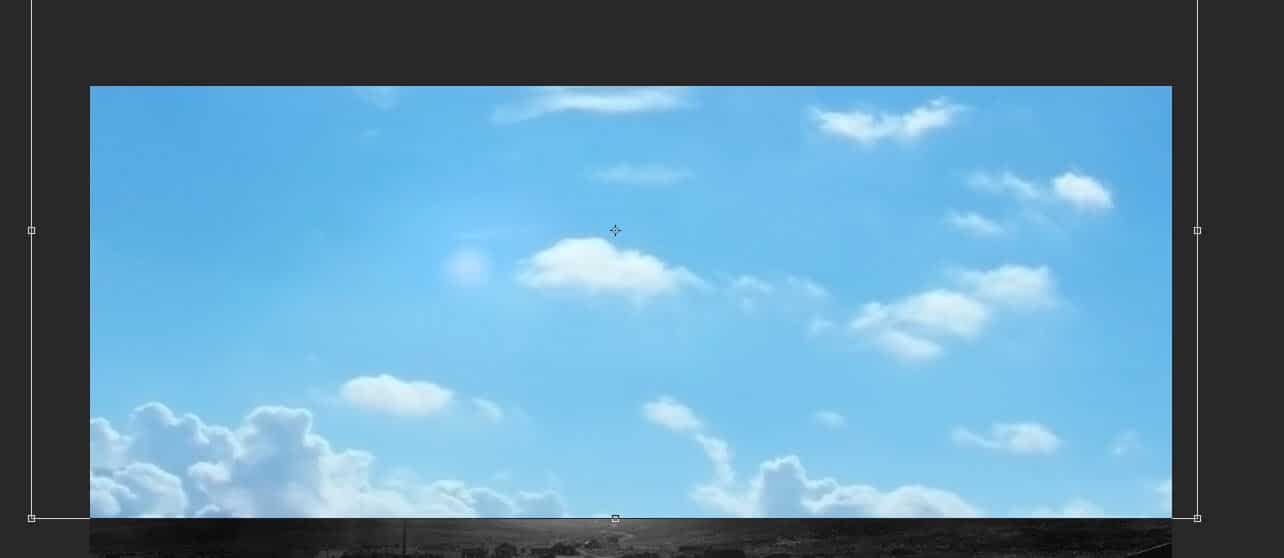
Mask out the bottom part of the sky layer:
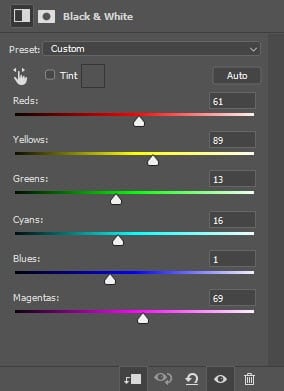
Apply the following image adjustment layers as clipping masks to the sky layer:
Black and White
Levels
and this is the effect so far:

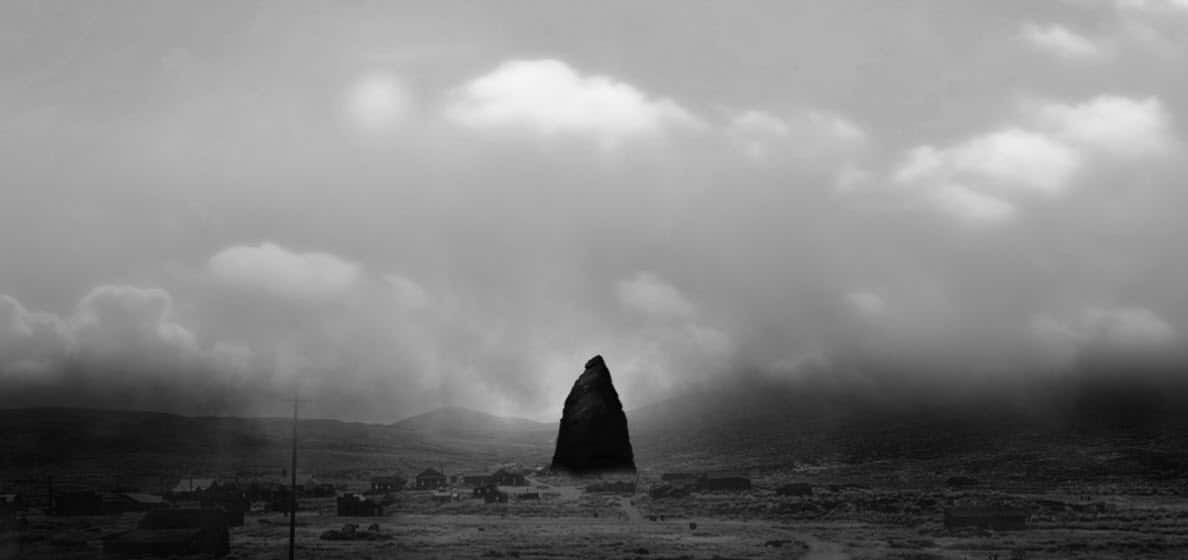
Step 3
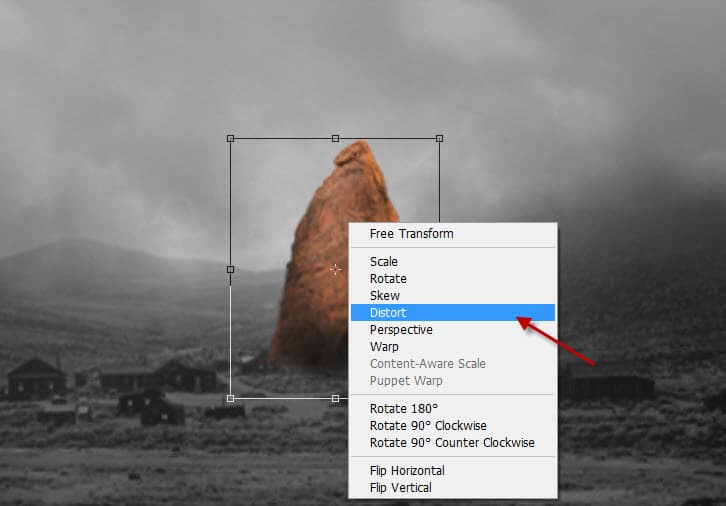
Load the rock stock image into Photoshop and select the following piece:
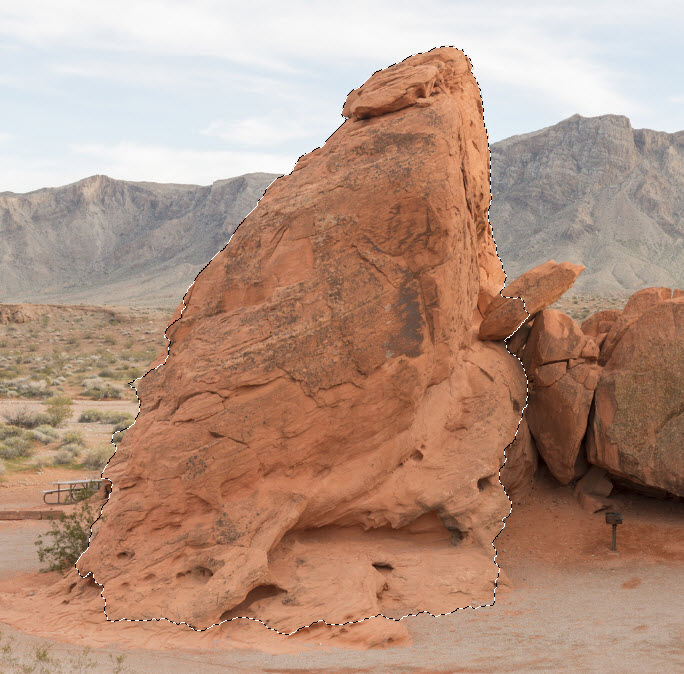
Place the selection at the centre, distort the rock layer slightly to make it into the following triangle shape:
Grab the burn tool from the tool box:
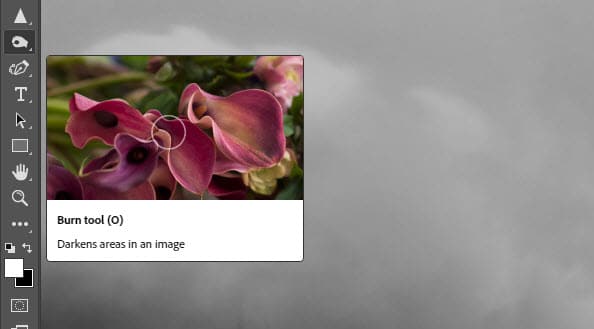
Use the following settings for the burn tool:

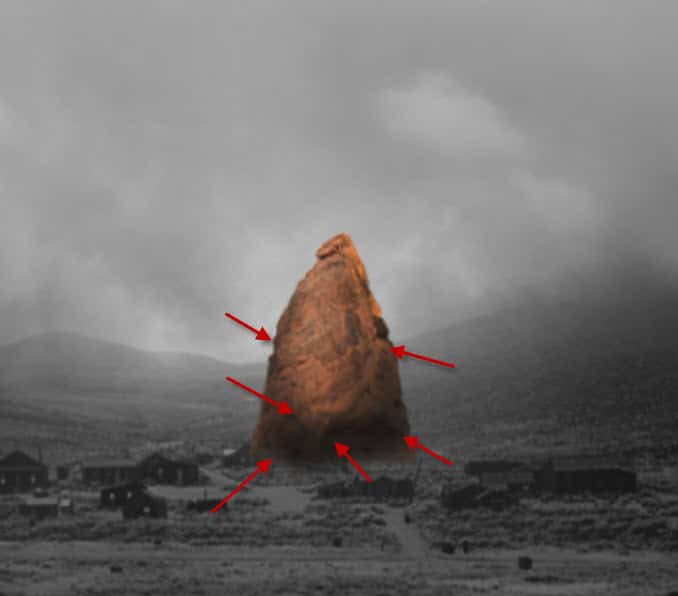
Apply the burn tool over the following locations – this adds depth for this rock:
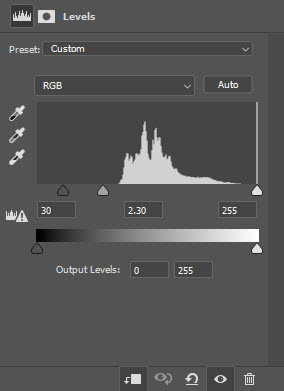
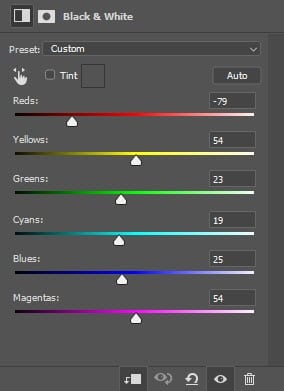
Apply the following image adjustment layers as clipping masks to the rock layer:
Black & White
Curves

and this is the effect so far:
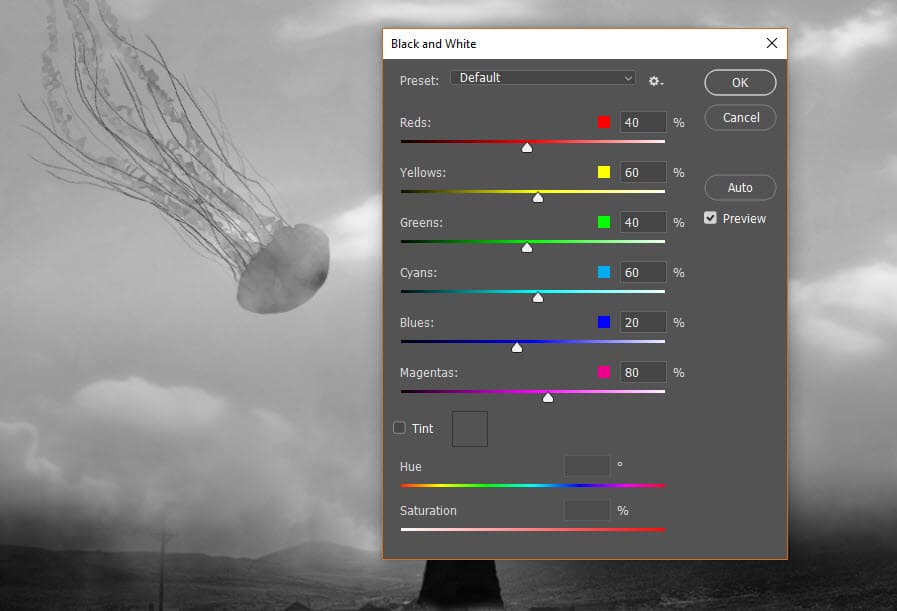
Step 4
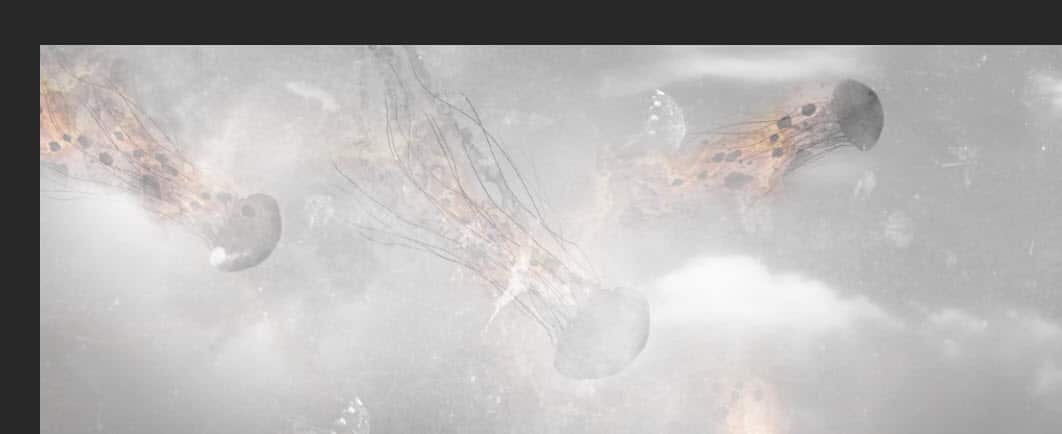
Load the 2x Jellyfish stock images into Photoshop, copy and paste them onto our document. Apply the following Black and White adjustments to them:
Use the “Multiply” layer blend mode on the Jellyfish layers:

And this is the effect so far:
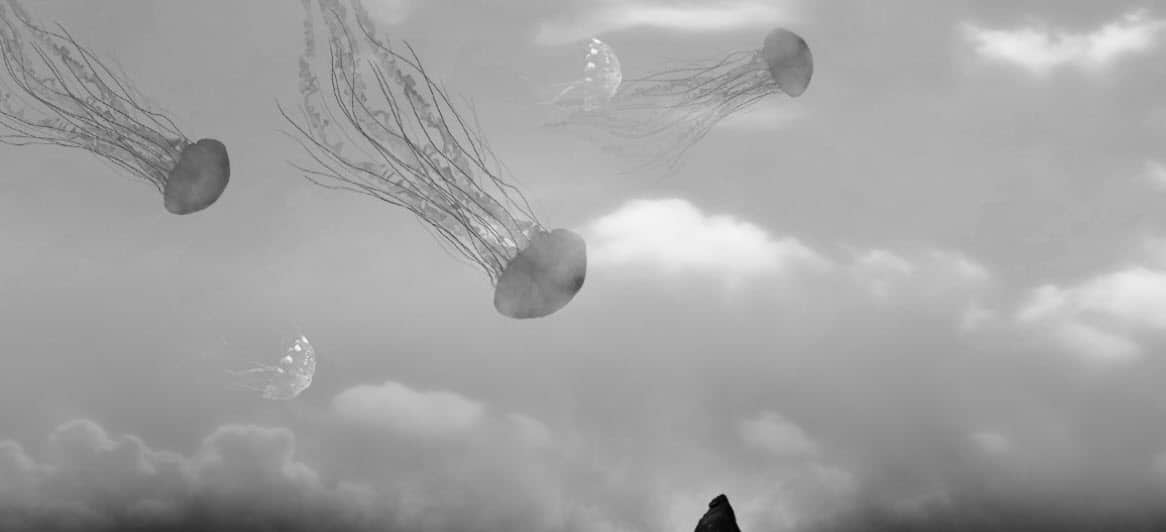
Use a cloud brush to paint some extra cloud around the Jellyfish:
Step 5
Load the planet stock image into Photoshop, select the lava portion from the stock:
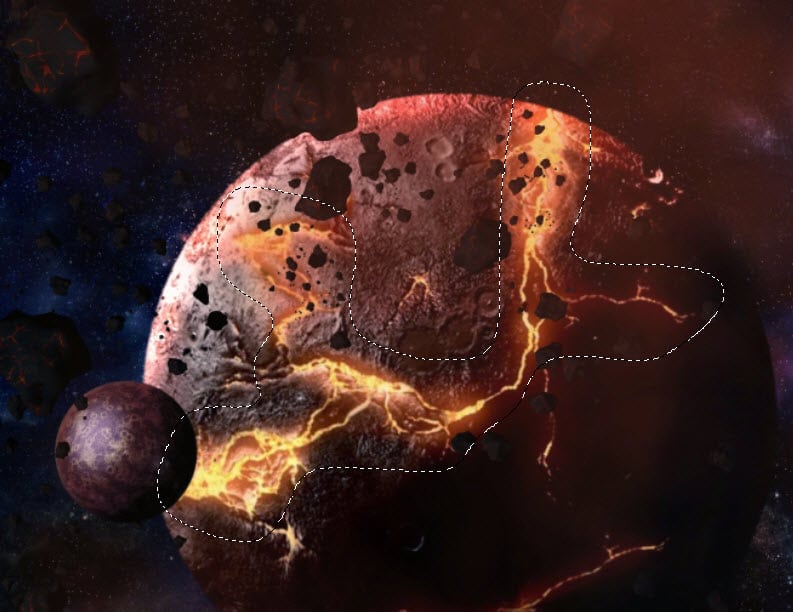
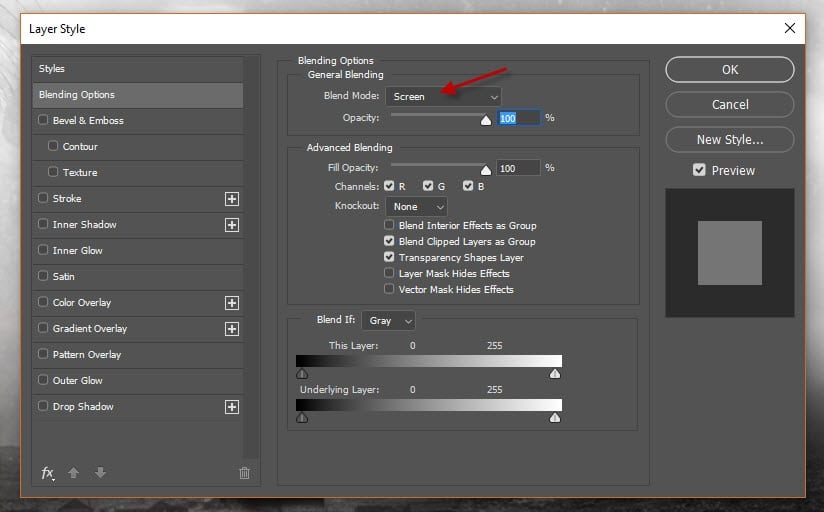
Copy and paste the selection to our document, resize and attach it to the rock. Set the layer blend mode to “Screen”:
This is the effect we’re aiming to achieve:
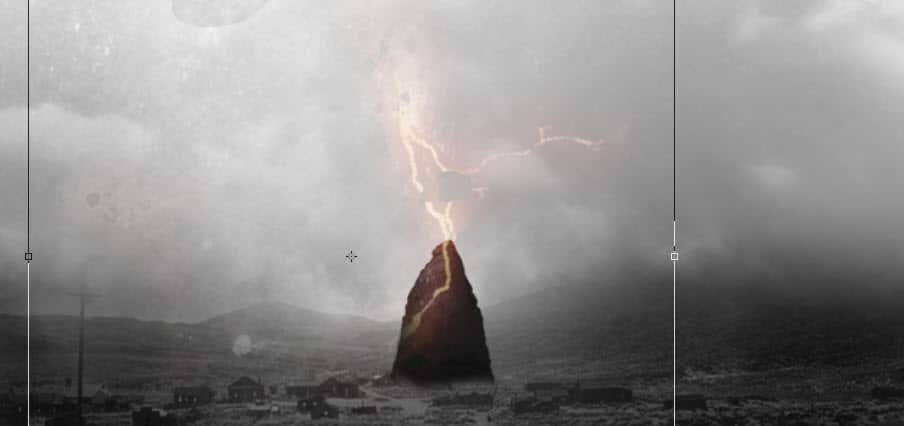
Grab another piece of lave with the floating rocks from the planet stock photo:

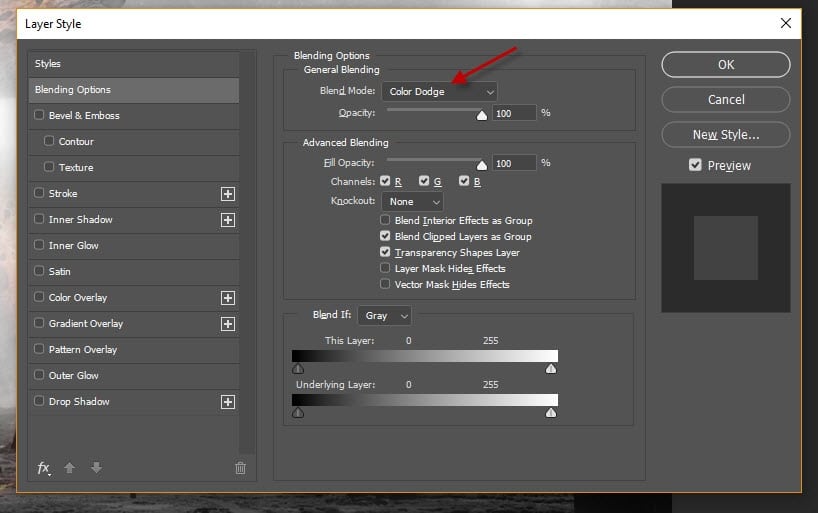
Copy and paste it to our document and set its blend mode to “Color Dodge”:
Place it at the bottom of the rock as shown below:
Add the rock and lava texture to the Jellyfish, set the layer blend mode to “Overlay”:

and this is the effect so far:
Step 6
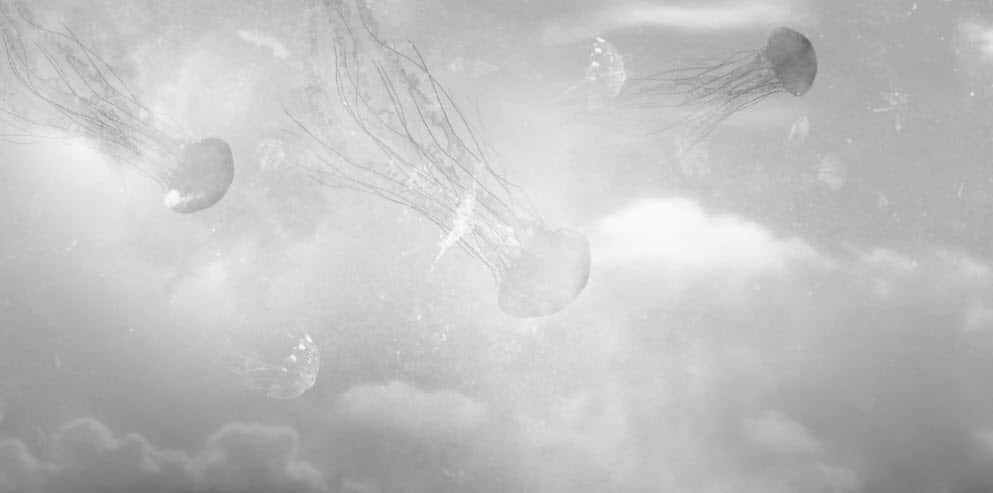
We’re almost done! For extra effect, I added the planet to the right side of the canvas:
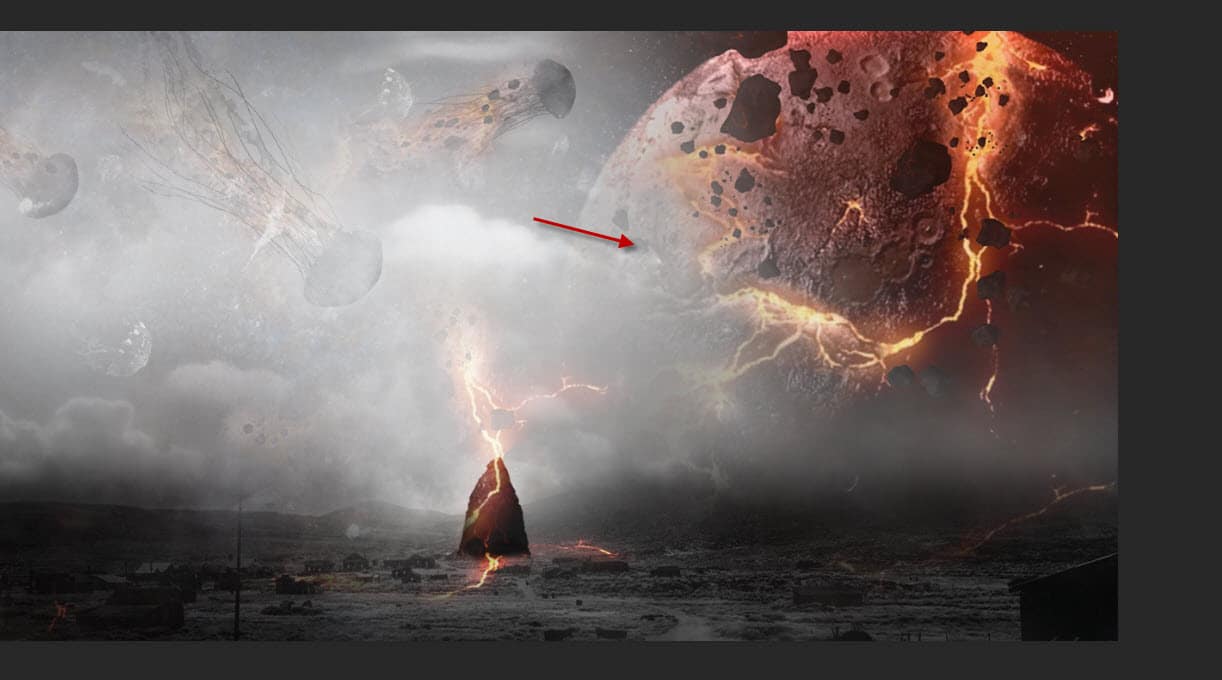
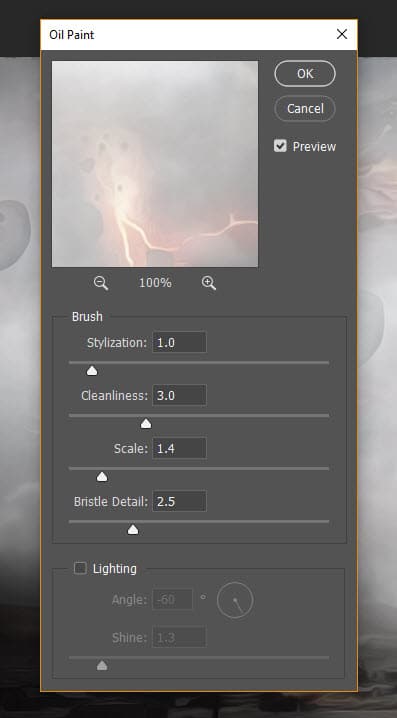
I flattened the layers and made a duplicate of the background layer, applied the following Oil Paint filter to the duplicated layer:
Mask out the following red portion on the duplicated layer:
and this is the effect so far:
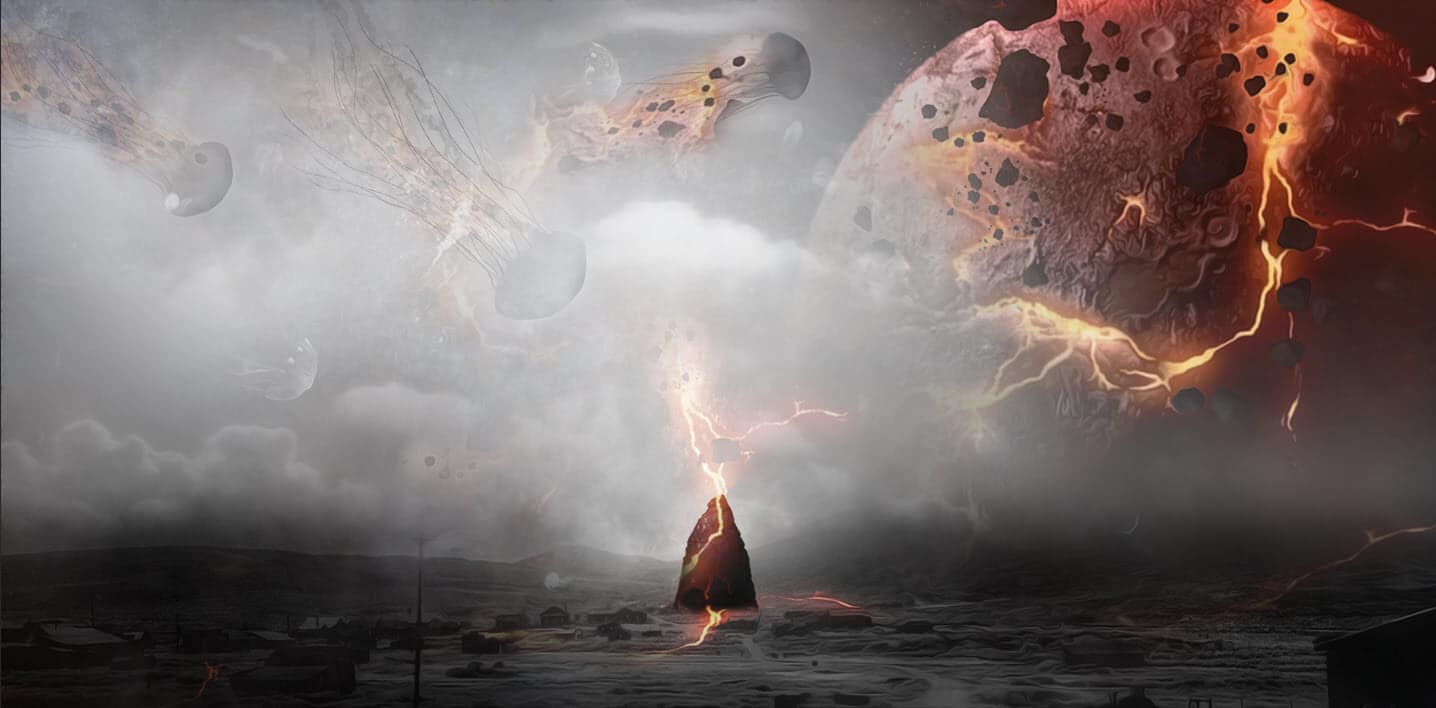
I added some colours to the image, and this is my final result: (click to enlarge)
Pro Tips for a Stunning Result
- Experiment with Blending Modes: Try different blending modes (e.g., Multiply, Screen, or Soft Light) to see what works best for your composition.
- Use Custom Brushes: Download or create custom brushes for bubbles, sparkles, or light effects to add more depth and detail.
- Play with Opacity: Lower the opacity of duplicate jellyfish layers to create a sense of distance and atmosphere.
- Add a Story Element: Include other elements like stars, clouds, or even a moon to enhance the surreal vibe.
Why This Effect Works
The flying jellyfish effect is a perfect blend of fantasy and reality. By combining the ethereal beauty of jellyfish with the vastness of the sky, you create a visually striking image that captures the imagination. This effect is versatile and can be used for:
- Digital art portfolios
- Social media posts
- Album covers or book illustrations
- Creative advertising campaigns
Conclusion
Creating a flying jellyfish photo effect in Photoshop is a fun and rewarding way to explore your creativity. With the right tools and techniques, you can transform ordinary photos into extraordinary works of art. Whether you’re a beginner or an experienced Photoshop user, this tutorial provides all the steps you need to bring your vision to life.
So, what are you waiting for? Open Photoshop, unleash your imagination, and start creating your own underwater-inspired masterpieces today!