In this tutorial, we will guide you through the process of pixelating an image in Photoshop using “Mosaic” under the Pixelate Filter. The Pixelate filter has been with Photoshop for a long time and is a widely used amongst graphic designer and artists.
What is Image Pixelation
Pixelation is a popular technique used in graphic design and digital art to create a retro or low-resolution effect. Pixelating an image in Photoshop is a great way to create a unique artistic effect or to protect your privacy.
Let’s get started with the tutorial:
Step 1 – Open the Image in Photoshop
Start by launching Adobe Photoshop on your computer. Then, go to the “File” menu and select “Open” to choose the image you want to pixelate. Alternatively, you can use the keyboard shortcut Ctrl+O (Windows) or Command+O (Mac).

Step 2 – Duplicate the Image Layer
To preserve the original image, it’s essential to work on a duplicate layer. Right-click on the background layer in the Layers panel and select “Duplicate Layer.” This will create a new layer above the original one.

Step 3 – Select the Pixelation Area
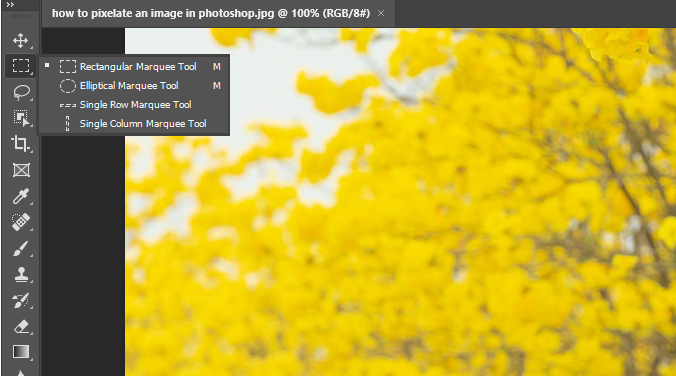
Use the Marquee tool from the toolbar on the left (shortcut: M) to select the area you want to pixelate. You can choose to pixelate the entire image or just a specific portion. Ensure that you have the duplicate layer selected in the Layers panel.
In this tutorial, I selected the background area of the image, separating the model:
Step 4 – Apply the Mosaic Filter
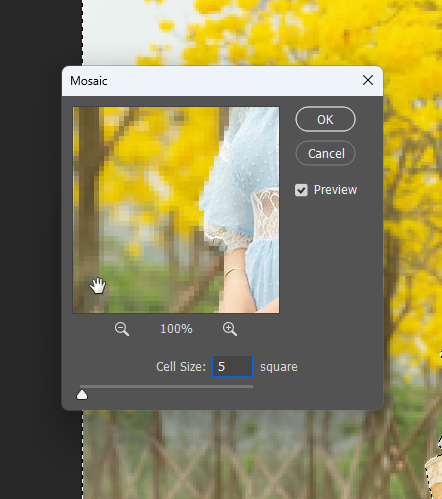
Once you have selected the desired area, go to the “Filter” menu, navigate to “Pixelate,” and choose “Mosaic.” A dialog box will appear, allowing you to adjust the pixel size. Drag the slider to determine the level of pixelation you desire. Click “OK” to apply the filter.
Step 5 – Refine the Pixelation
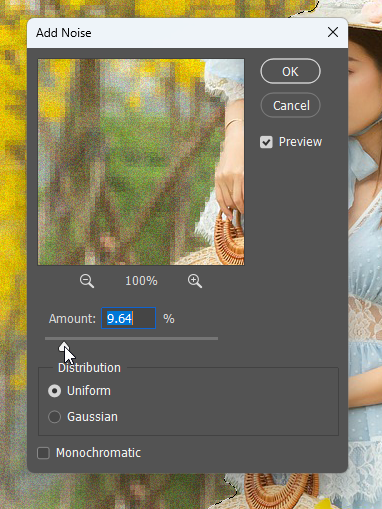
If you’re not entirely satisfied with the initial pixelation effect, you can further refine it. Go to the “Filter” menu, select “Noise,” and choose “Add Noise.” Adjust the “Amount” and “Distribution” sliders to add subtle variations to the pixelation, giving it a more organic appearance. Click “OK” to apply the noise filter.
The image will now be pixelated. You can adjust the size of the pixels to get the desired effect.
Extra Tips for Pixelating Images
Here are some additional tips for pixelating images in Photoshop:
- You can use the Rectangular Marquee Tool to select a specific area of the image to pixelate.
- You can also use the Lasso Tool to create a freehand selection.
- Once you have made a selection, you can apply the Mosaic Filter to the selected area.
- You can also use the Smart Object feature to pixelate an image without permanently altering the original image.
To use the Smart Object feature, follow these steps:
- Right-click on the image layer and select Convert to Smart Object.
- Click on the Filter menu and select Pixelate.
- From the list of options, select Mosaic.
- In the Mosaic Filter dialog box, adjust the Cell Size slider to control the size of the pixels.
- Click OK to apply the filter.
The image will now be pixelated, but it will be stored as a Smart Object. This means that you can edit the original image without affecting the pixelated version.
Final Words
Pixelating an image in Photoshop is a straightforward process that can yield intriguing and visually appealing results. By following these steps, you can experiment with different levels of pixelation and create unique effects for your digital artwork or design projects. Remember to save a copy of the original image and work on a duplicate layer to maintain flexibility and preserve your creative options. Enjoy exploring the world of pixel art and its artistic possibilities!