The Clone Stamp Tool in Photoshop is your digital clone machine, allowing you to duplicate parts of an image seamlessly. Whether you want to remove imperfections, replicate objects, or create artistic compositions, this tool is a must-have for your Photoshop toolkit. In this beginner’s guide, we’ll explore the Clone Stamp Tool step by step, so you can start duplicating and retouching your images like a pro.
Why the Clone Stamp Tool Matters
The Clone Stamp Tool is a versatile tool that can be used for various tasks, such as:
- Removing Imperfections: Easily erase blemishes, dust, or unwanted objects from your photos.
- Object Duplication: Clone and duplicate elements within an image, perfect for replicating patterns or objects.
- Artistic Composition: Use the Clone Stamp Tool to create surreal or artistic effects by blending elements together.
Where Can We Find The Clone Stamp Tool?
You can find The Clone Stamp Tool in The Toolbox, that tall bar on the left hand side of your screen.

How The Clone Stamp Tool Works
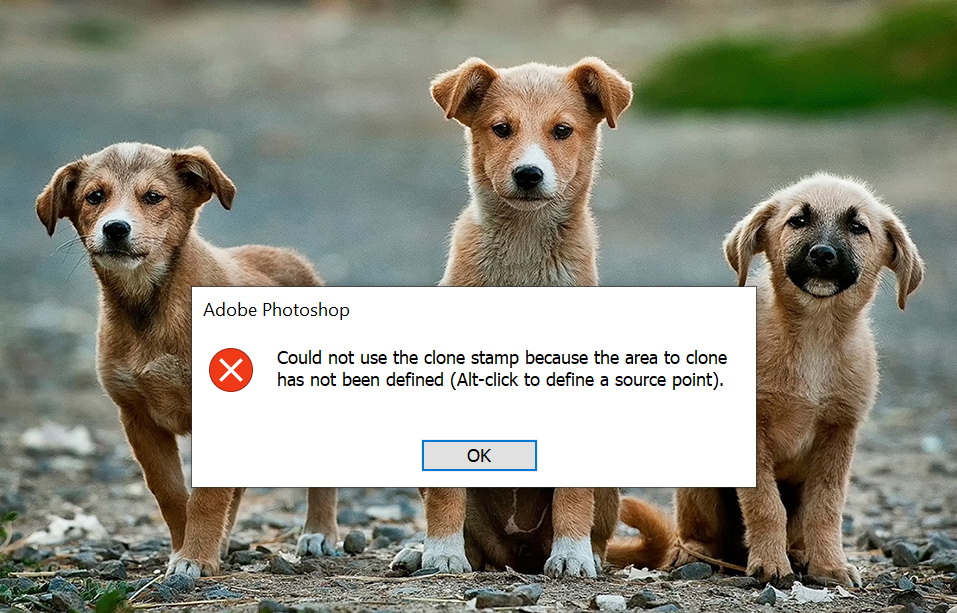
Unlike regular Brush Tool where you just simply click and drag, With The Clone Stamp Tool, you need to first determine the clone source. If you don’t, you can’t use it.
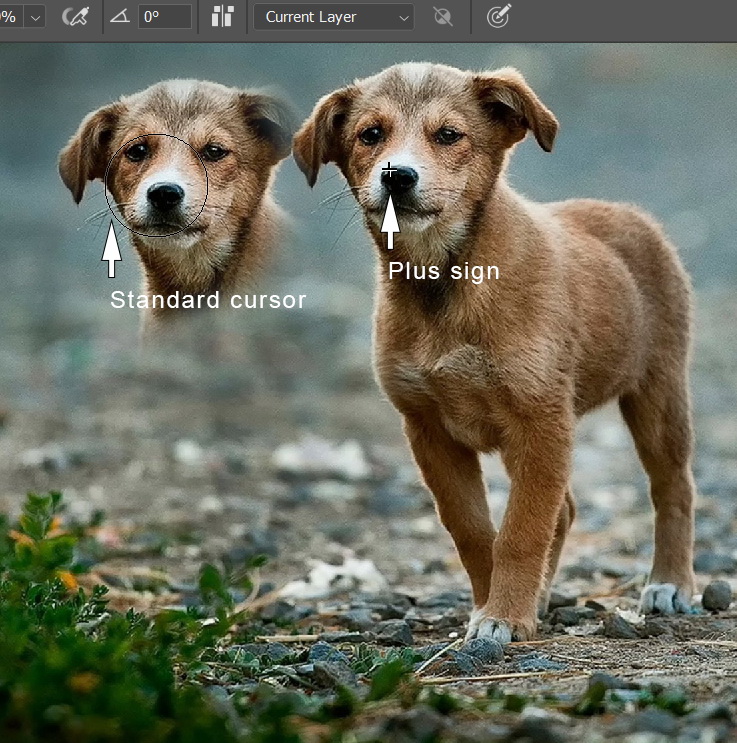
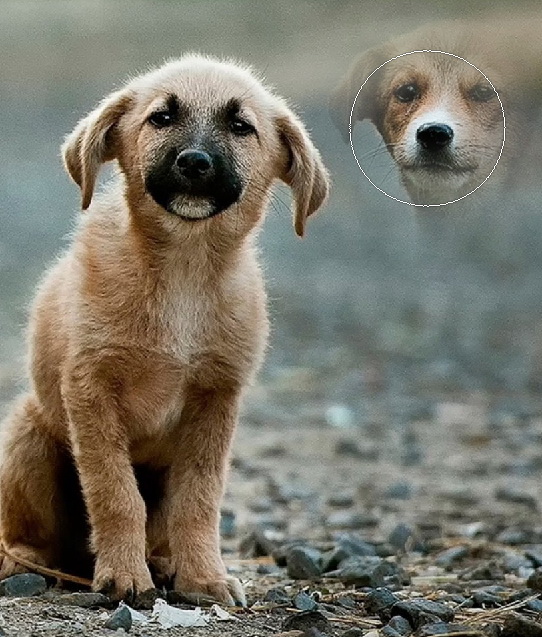
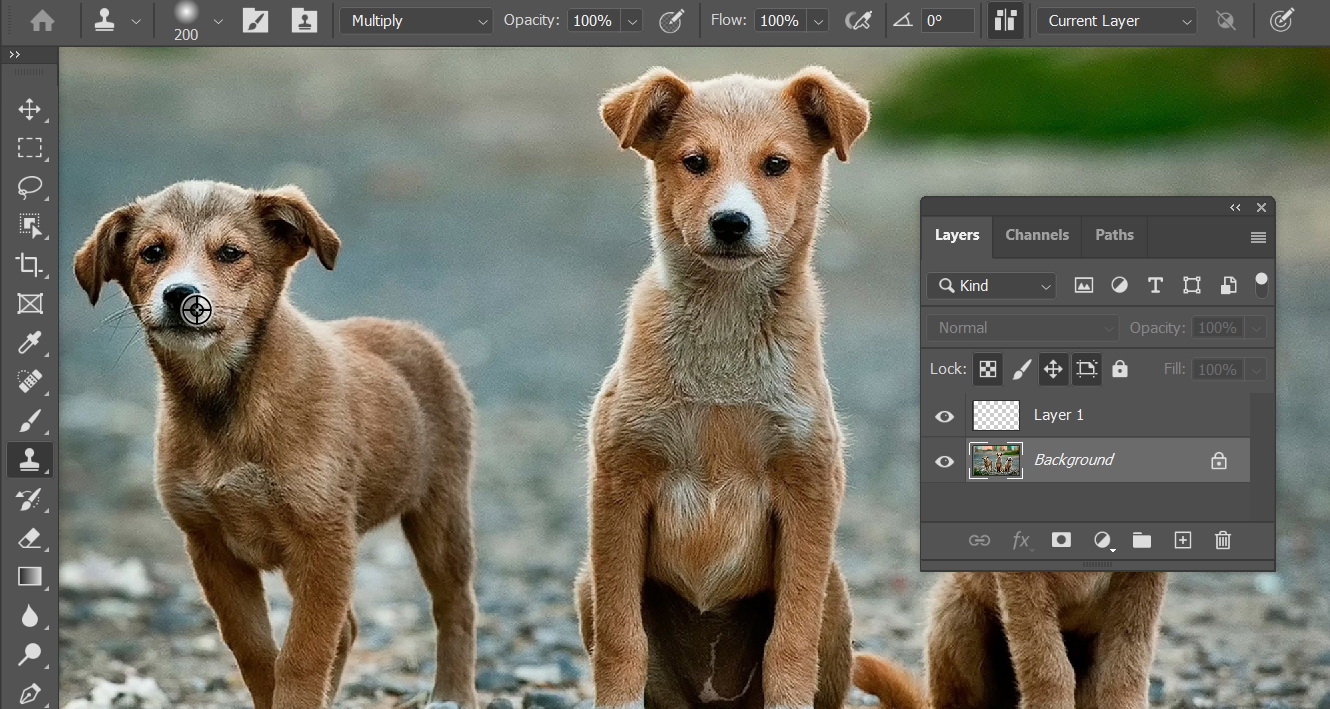
Hold Alt and then click the area that you want to use as a clone source. In the image below, the left dog is used as a clone source.

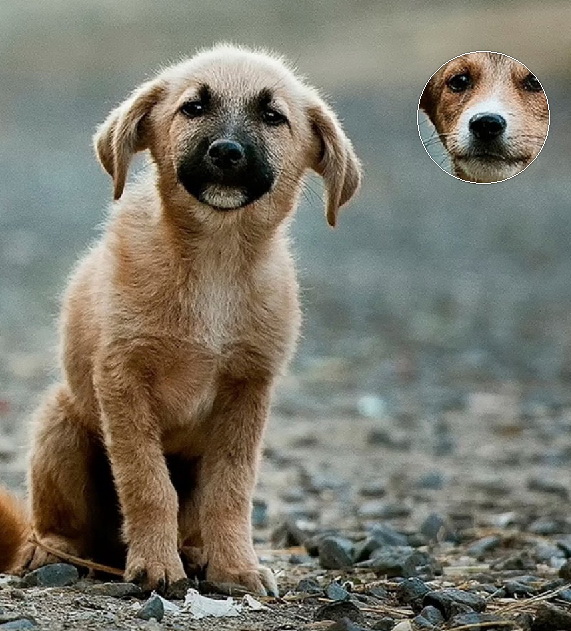
After the source is set, you can simply click and drag to paint its clone.

While painting with The Clone Stamp Tool, two cursors appear. The first cursor is the standard round brush. The second is a plus sign which indicates the clone source.
Brush Size and Its Hardness
The Clone Stamp Tool has basic characteristics of a brush. It has brush size, hardness, blend mode, and so on. You will find them in The Options Bar.

Brush size and hardness can be changed using the same shortcut, [ and ] to decrease and increase the brush size, Shift + [ and Shift + ] to decrease and increase the Hardness.
Small brush size with small Hardness.
Bigger brush size with small Hardness.
Same brush size with maximum Hardness.
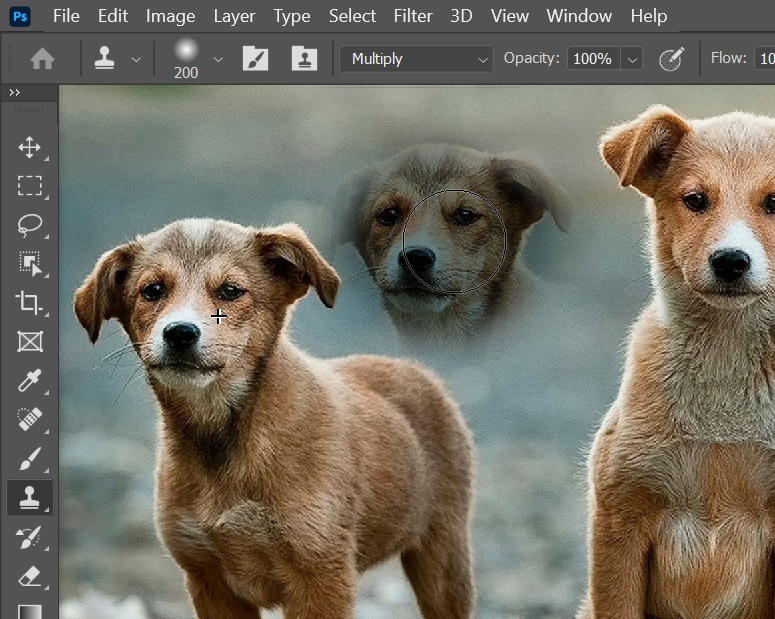
Blend mode works just like in The Brush Tool. For example, using Multiply, you paste only pixels that are darker than the original pixel.
Cloning In A Different Layers
Most people paint using The Clone Stamp Tool on the image layer itself. By doing that, you are destroying the original pixel and that’s bad. The best practice is cloning in a new layer. Click the New Layer icon to make a new layer.
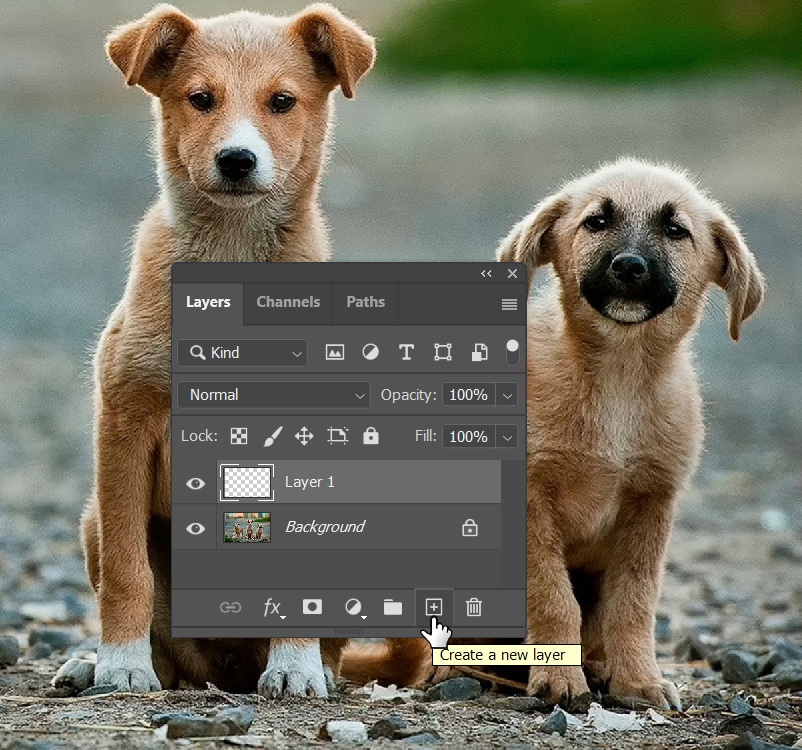
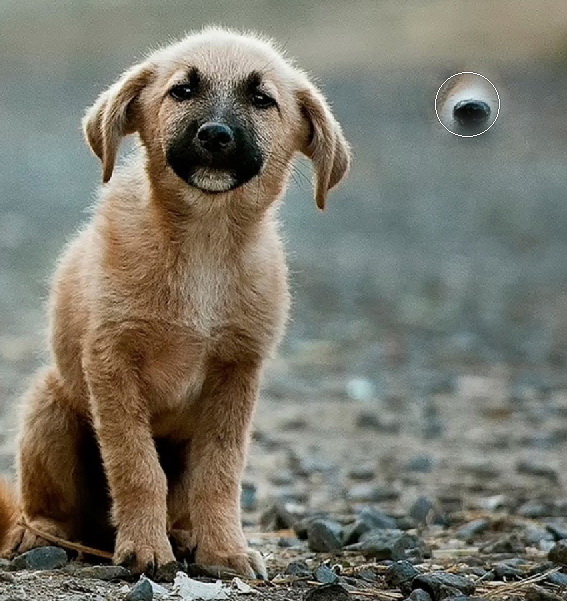
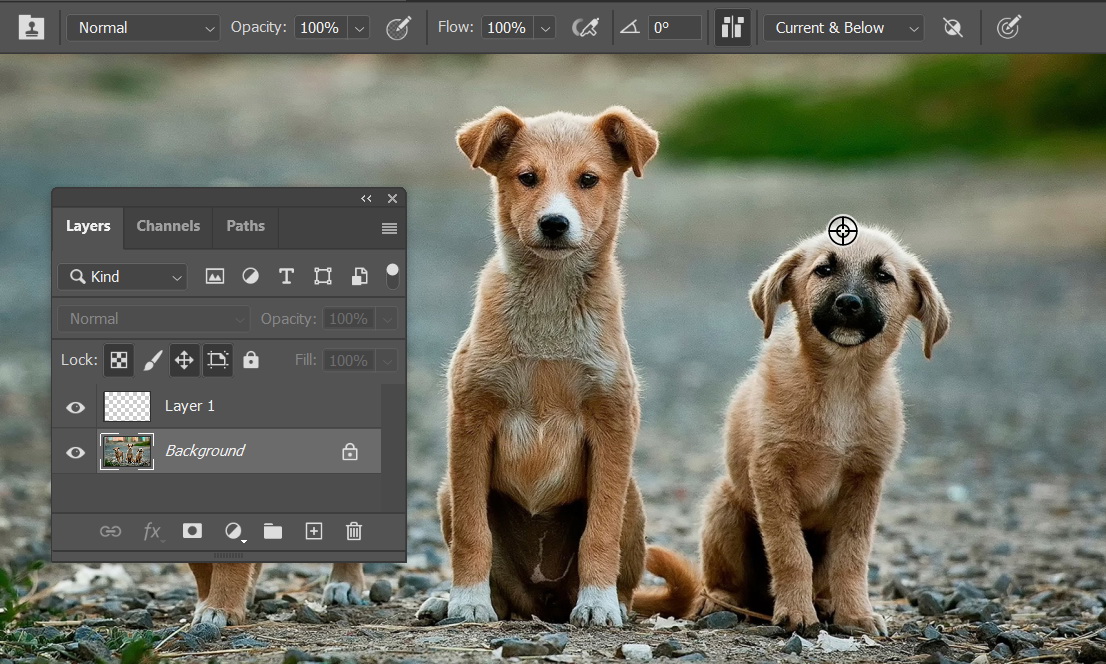
You need to activate the layer that contains the clone source, Alt – click to determine the source. In this case, I’m using the nose of the left dog.
Activate the new layer. Start painting.
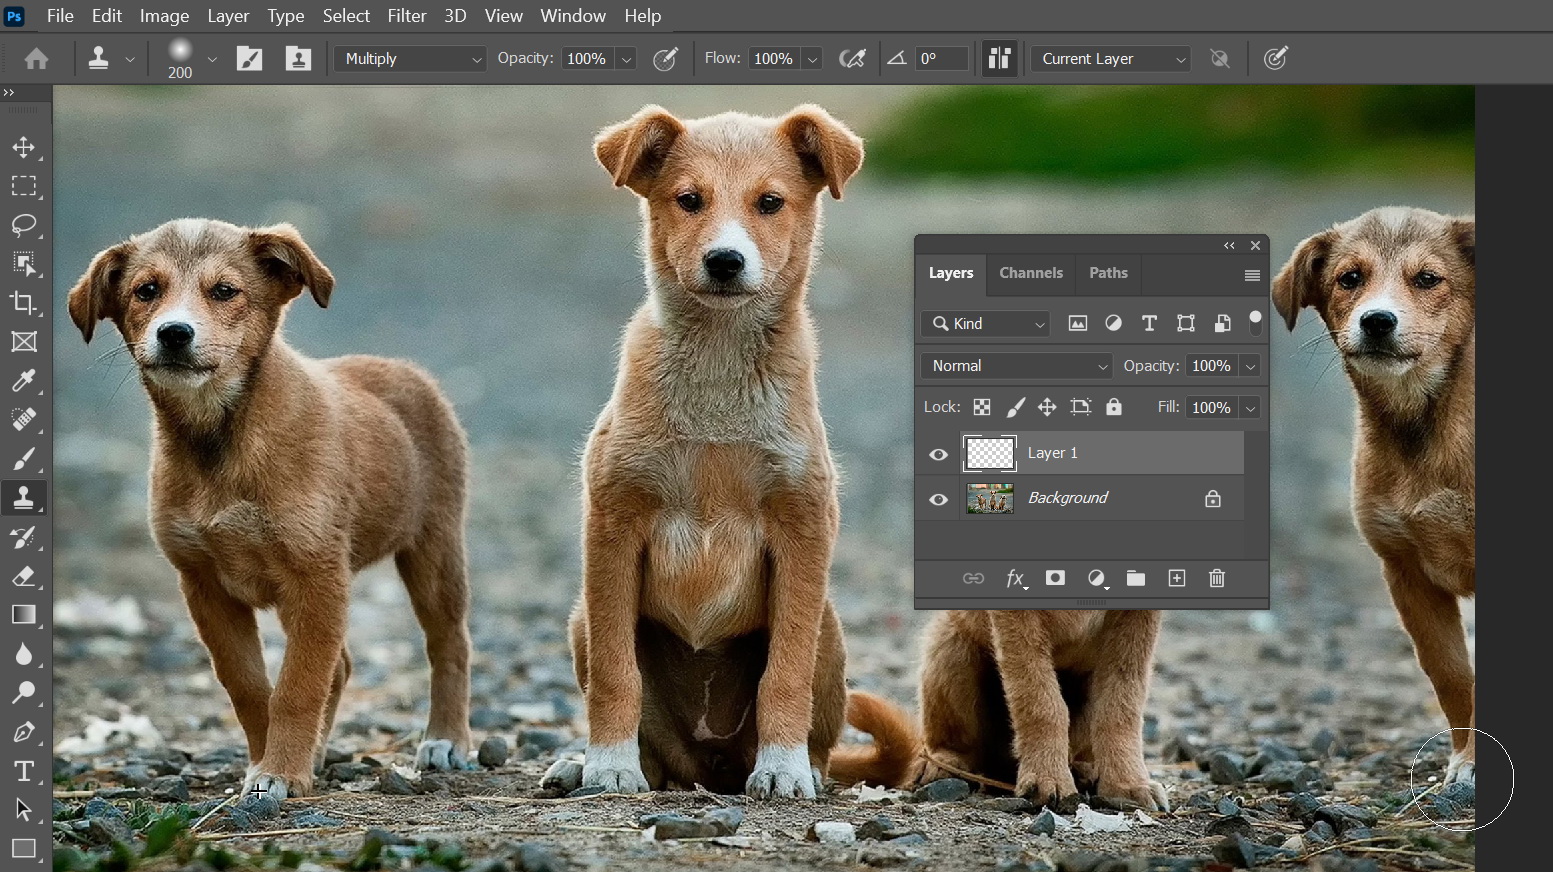
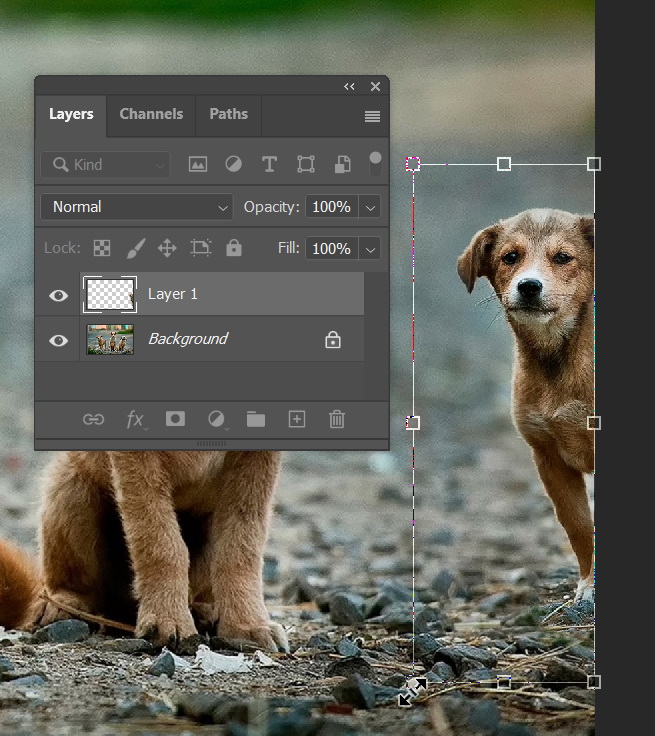
Because the clone is in a separate layer, you can modify it without affecting the original image. The image below shows the duplicated dog is resized using the Transform command (Ctrl + T).
Cloning Using Multiple Layers
By default, The Clone Stamp uses Current Layer mode which only allows it to copy pixels from one layer. We can use another mode to copy from more than one layer.

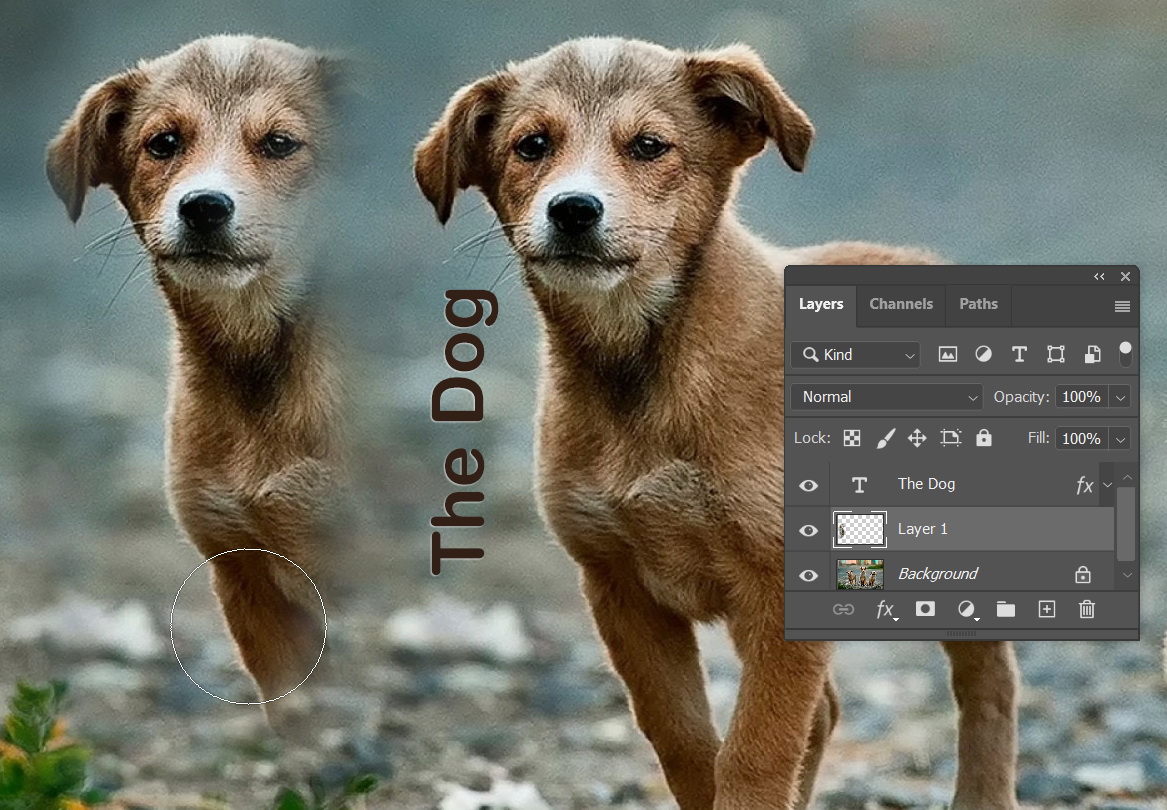
Here we have a photo layer and a text. Between the two layers, we have an empty layer. In the image below, we are in the empty layer and Alt – clicking the dog’s nose.
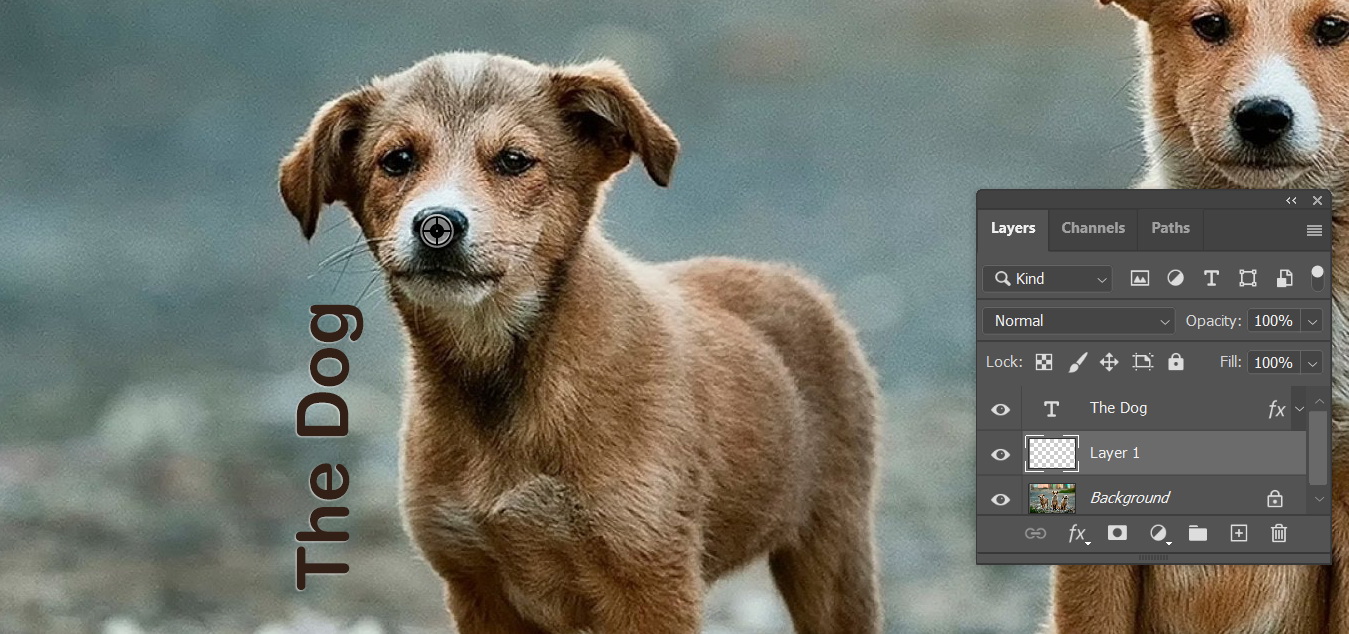
Using All Layers mode, The Clone Stamp Tool will copy all visible pixels, from the photo and the text.

If we use Current & Below, The Clone Stamp Tool will take pixels from the source layer and any layers underneath it. As seen below, the text which sits above the source layer is not pasted by The Clone Stamp Tool.
Aligned Stroke
In the Options Bar there is an option to align the brush stroke and by default it is activated. When activated, the next stroke will continue the cloning process relative to the first stroke. To give you a clearer idea, let’s start with defining a clone source, make sure to activate the correct layer and then Alt – click a point.
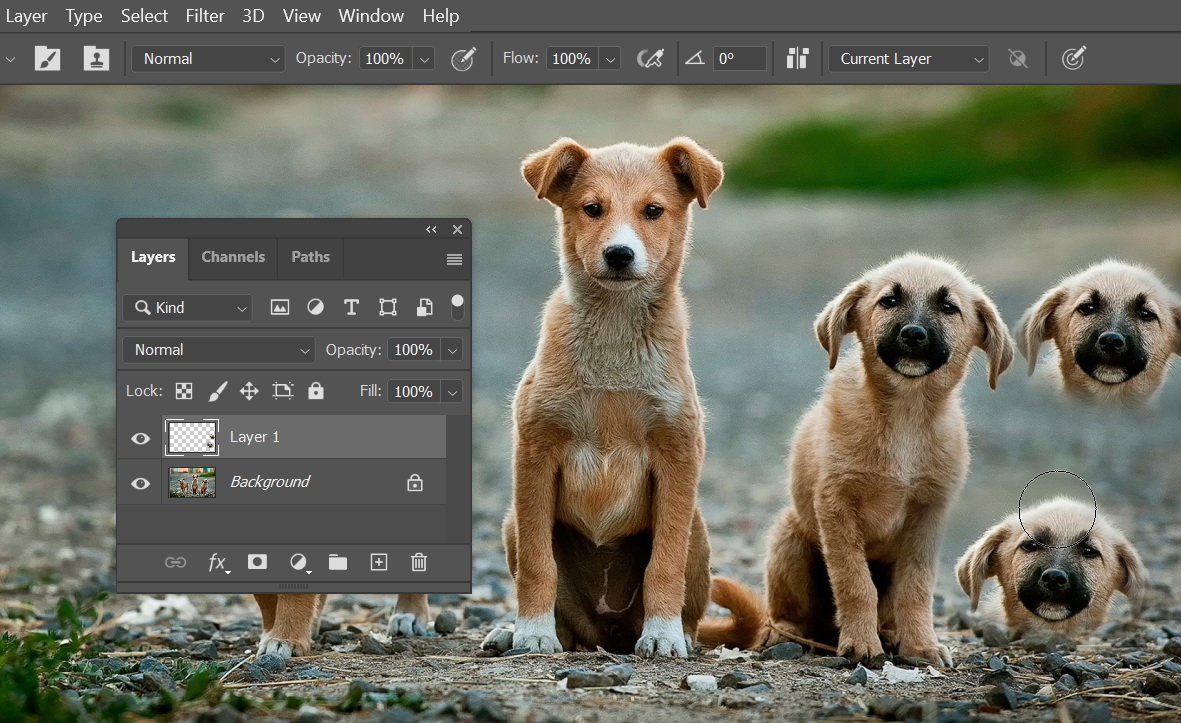
In a new layer, start painting to get the clone. Pause painting and then continue in another area. All the brush stroke will stay connected, they are based on the same starting point.
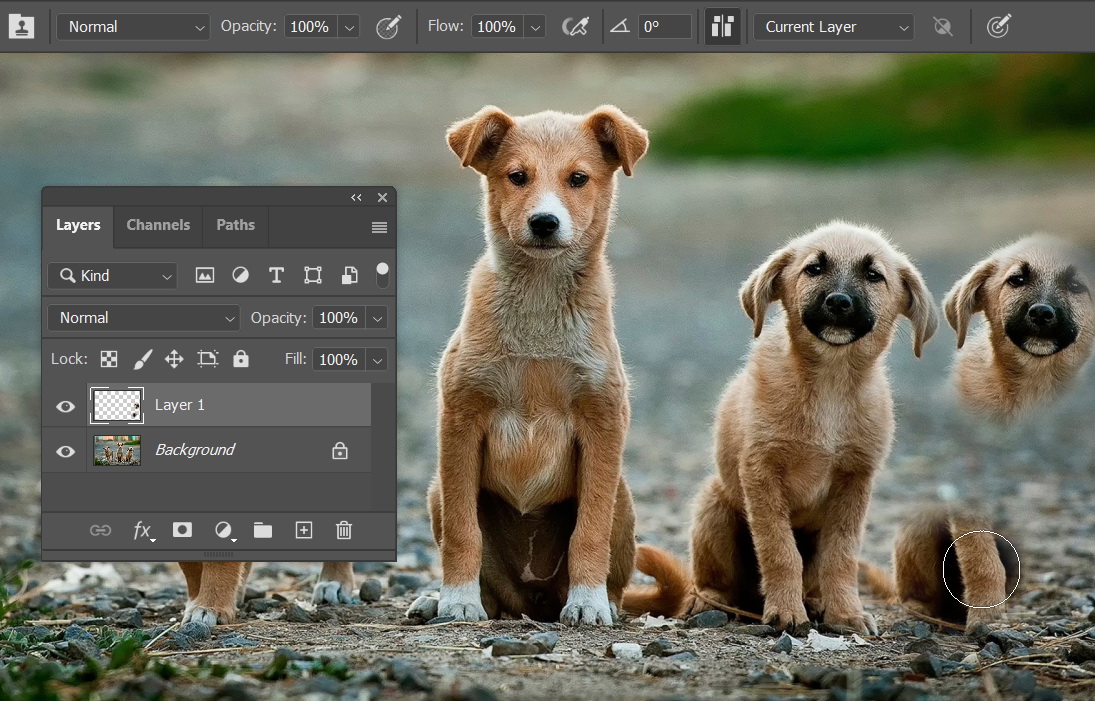
If we turn the Aligned option off, each brush stroke will be treated as an independent paste. Therefore, we are going to have a new clone dog with each new brush stroke. This option works nicely when you have to clone repeatedly from the same source.
Clone Source From Multiple Files
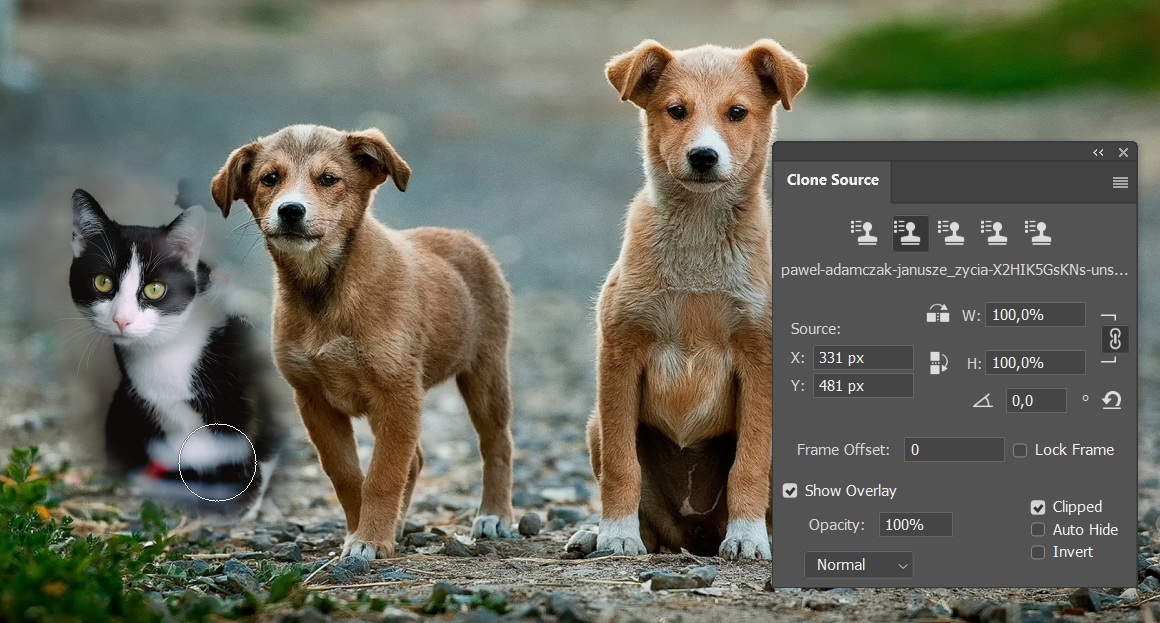
You can perform more complex cloning using features available in The Clone Source Panel. At the top part of the panel, you will find five stamp icons. Each represents a source clone. So, you can have up to five clone sources. Each icon shows the file name and layer of the source.

To add another clone source, click the stamp icon, make sure you are targeting the right file and layer, and then Alt – click the image.
Choose which clone source you want to use by clicking its stamp icon.
Clone Size and Rotation
You can change the size of the pasted image by changing its scale value in The Clone Source Panel. To keep its size proportional, activate the link icon.
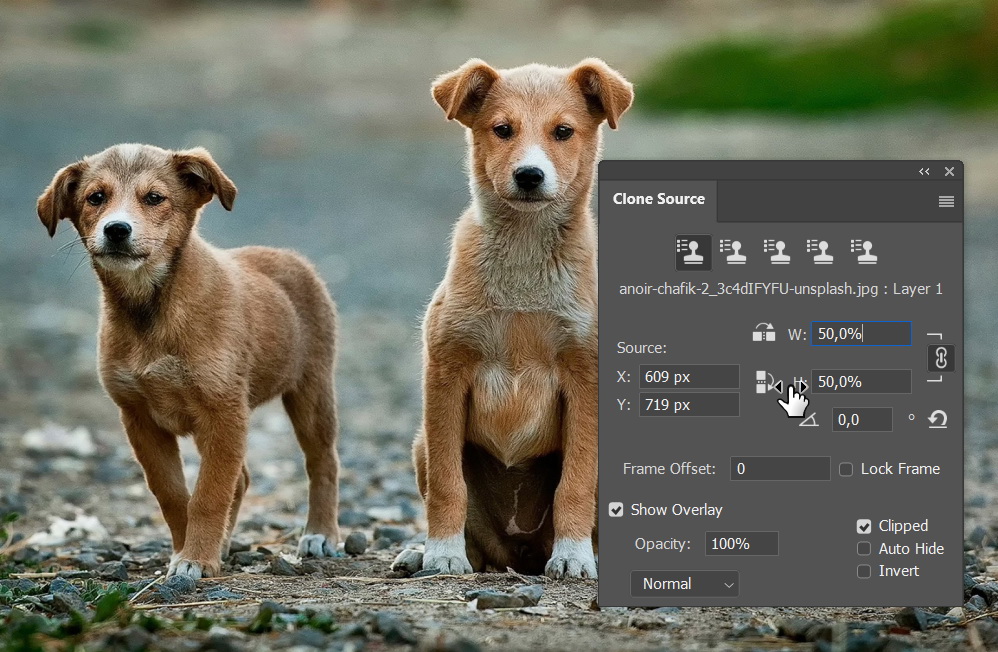
Below, you can see the pasted image smaller, 50% of the original image, to be exact.
You can flip it, either vertically or horizontally.

We have smaller and flipped dog clone now.

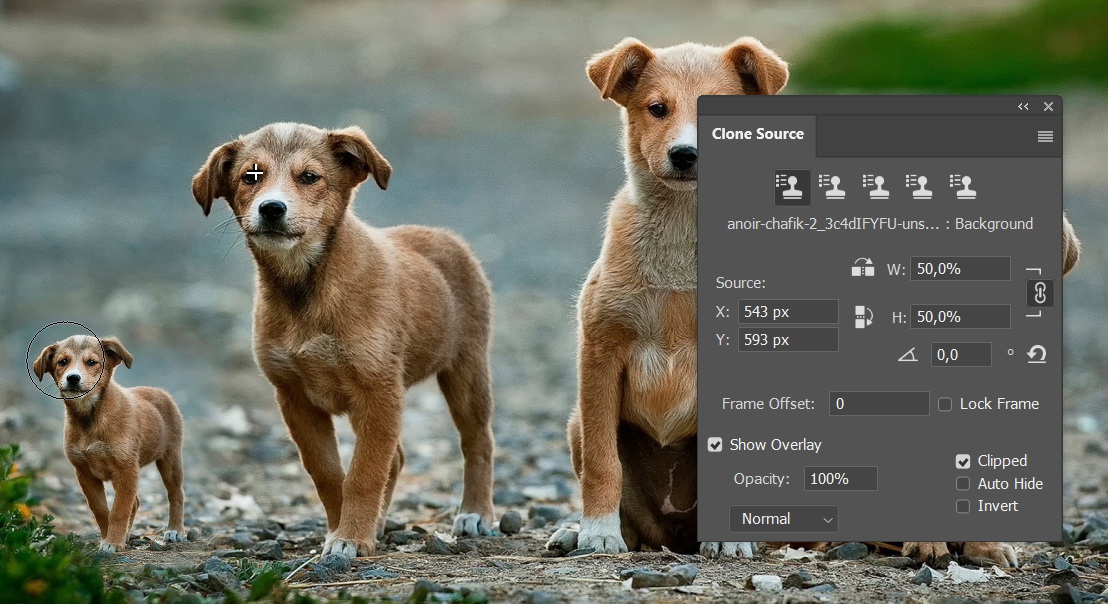
You can also change the angle to automatically rotate the clone. While changing the angle, the clone source image will appear to help you decide the right value.
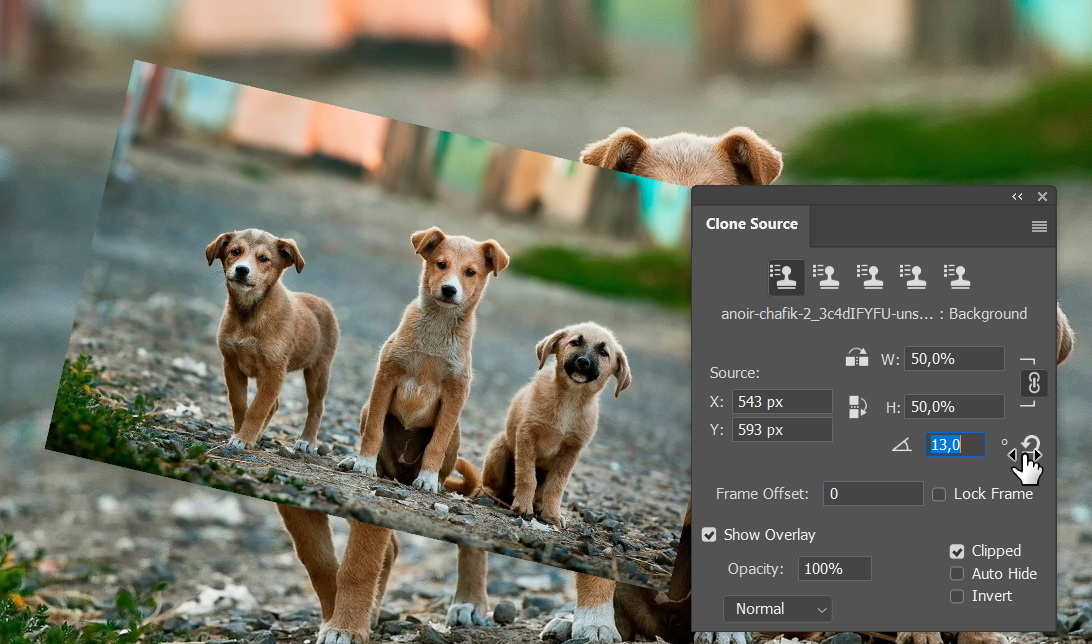
Image below shows a slightly rotated clone dog.

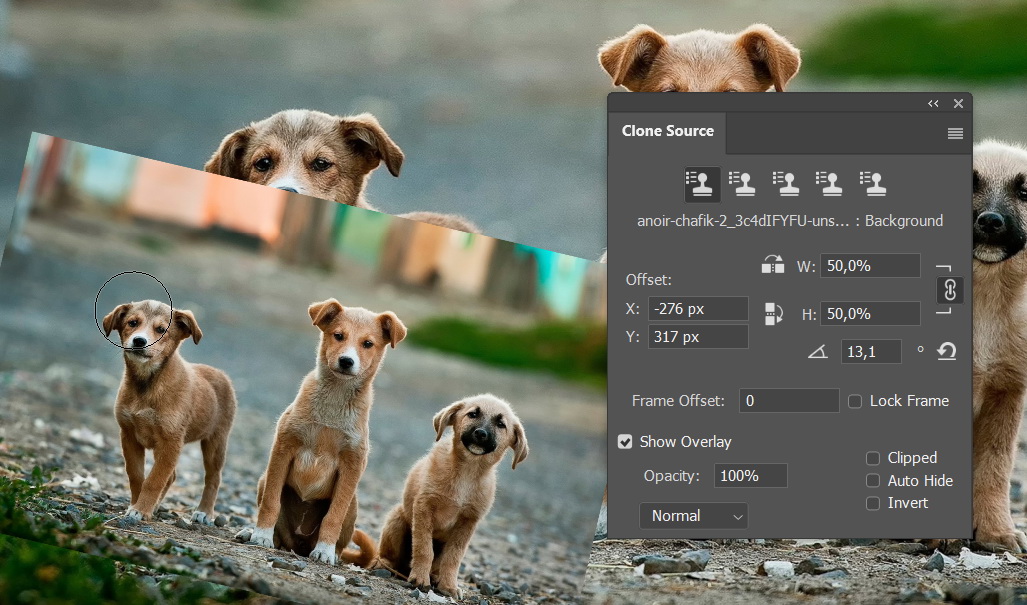
At the bottom of The Clone Source Panel we have some options in the Show Overlay section. They control the appearance of the tool and have no effect on how the tool works. If Show Overlay is deactivated, there is no preview of the pasted image.
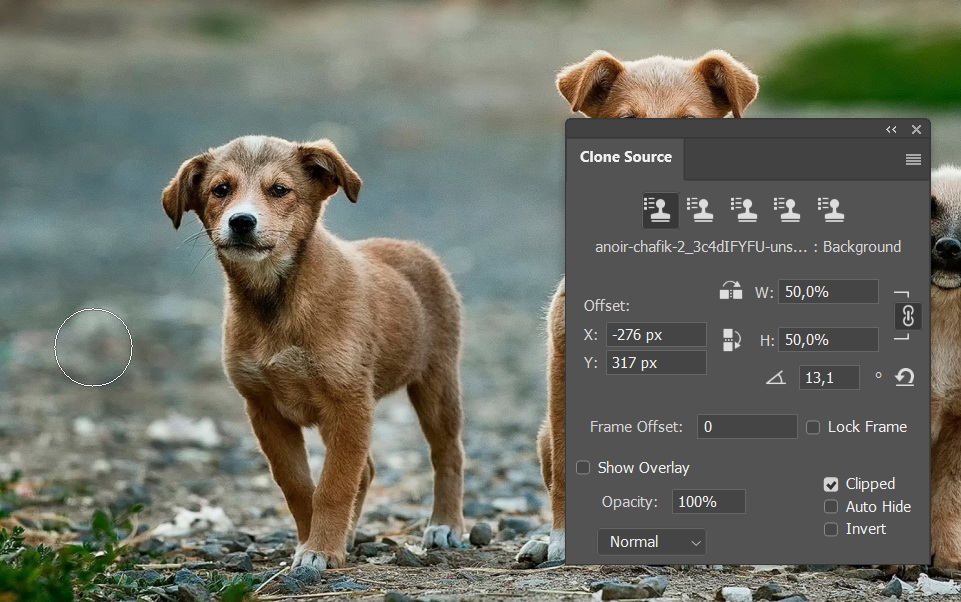
If you want to reveal the clone source, you can deactivate the Clipped option.
To reset the scale and angle of the clone to 100% and 0°, hit the Reset icon.

Removing Object Using The Clone Stamp Tool
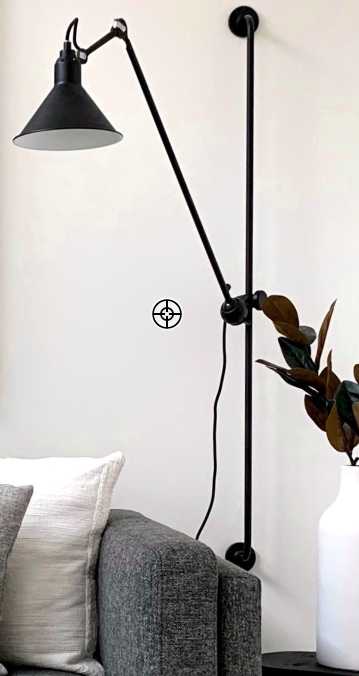
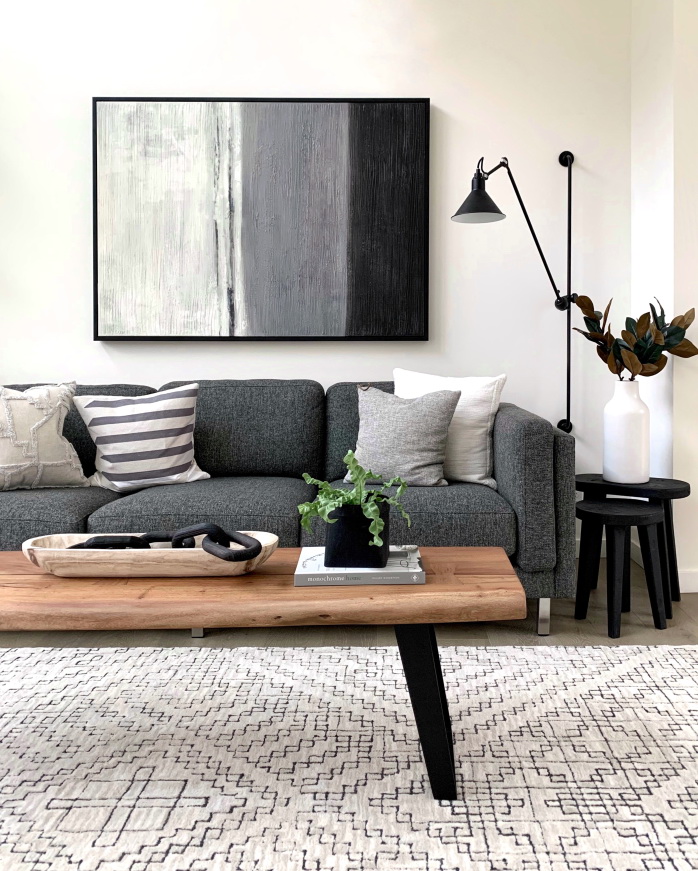
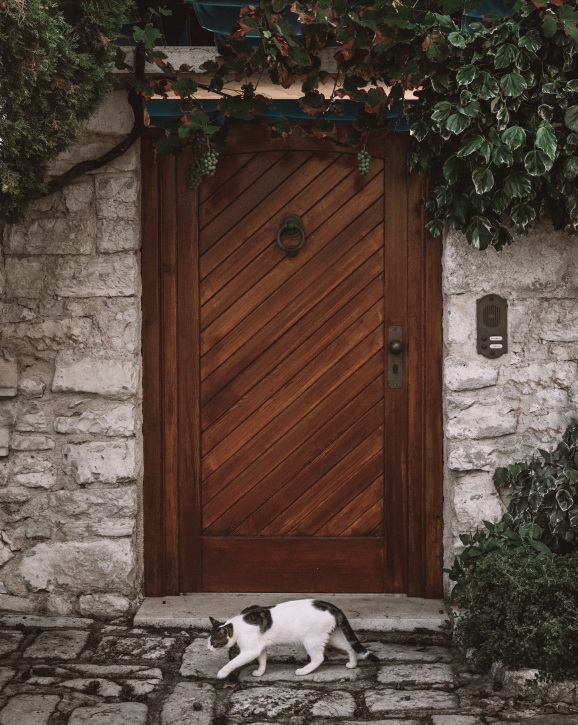
One of the most frequent uses of The Clone Stamp Tool is to remove unwanted objects. Here, we have an image. A nice image actually, but I’m a bit distracted with the cable hanging from the lamp stand. I wish it’s not there. Here’s a job for The Clone Stamp Tool.

First, we need to set the clone source. Alt – click area near the cable.
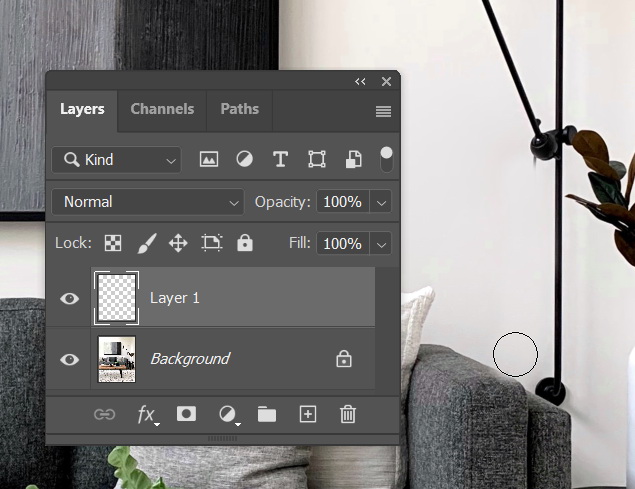
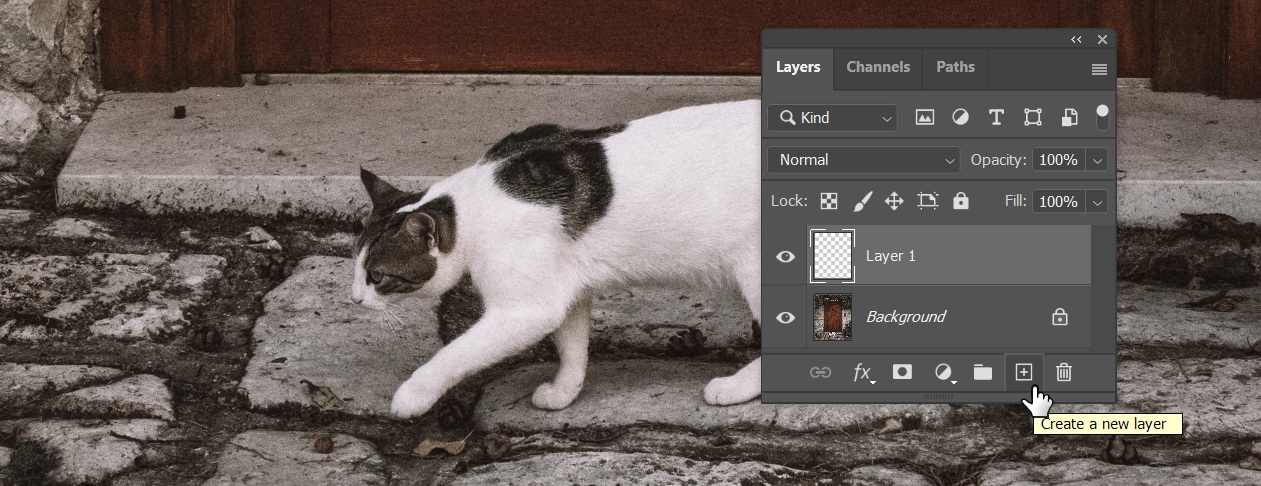
We don’t want to destroy the original so we will clone in a separate layer. In the Layers Panel, click the New Layer icon to make a new layer. Place the cursor on the cable to see its preview.

Start painting to cover the cable and effectively remove it.
To fix smaller details, we will need to zoom in and paint with Hardness set to 100%.
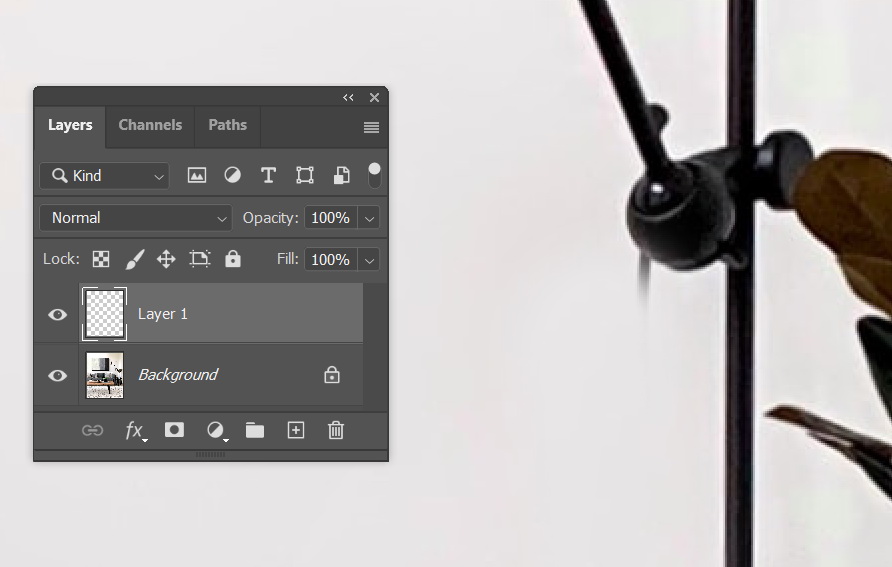
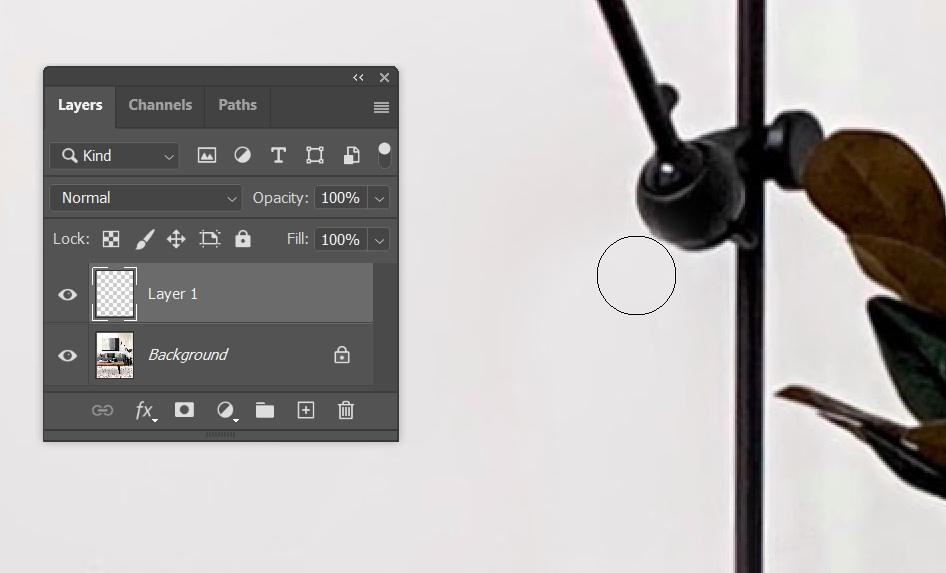
Below is the final result. The cable has been seamlessly removed.
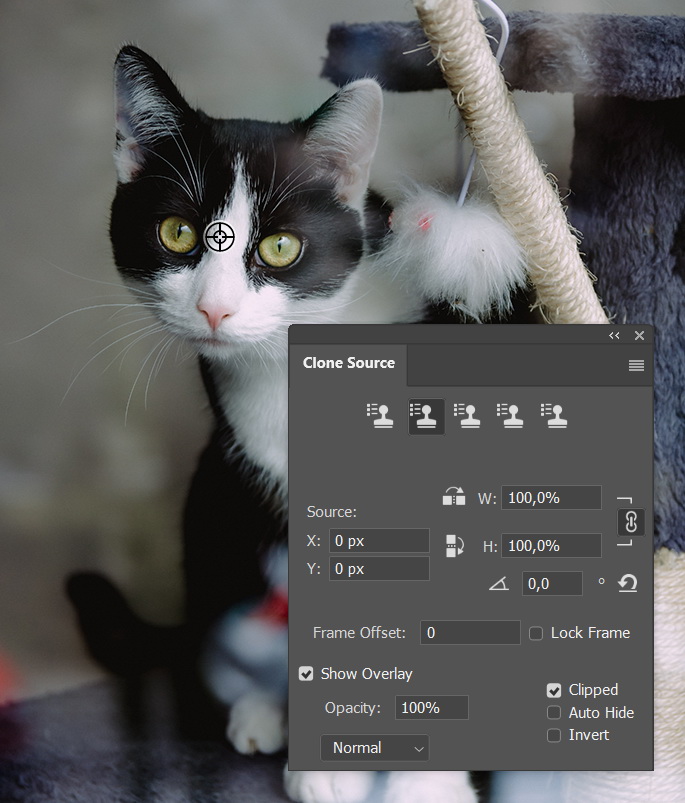
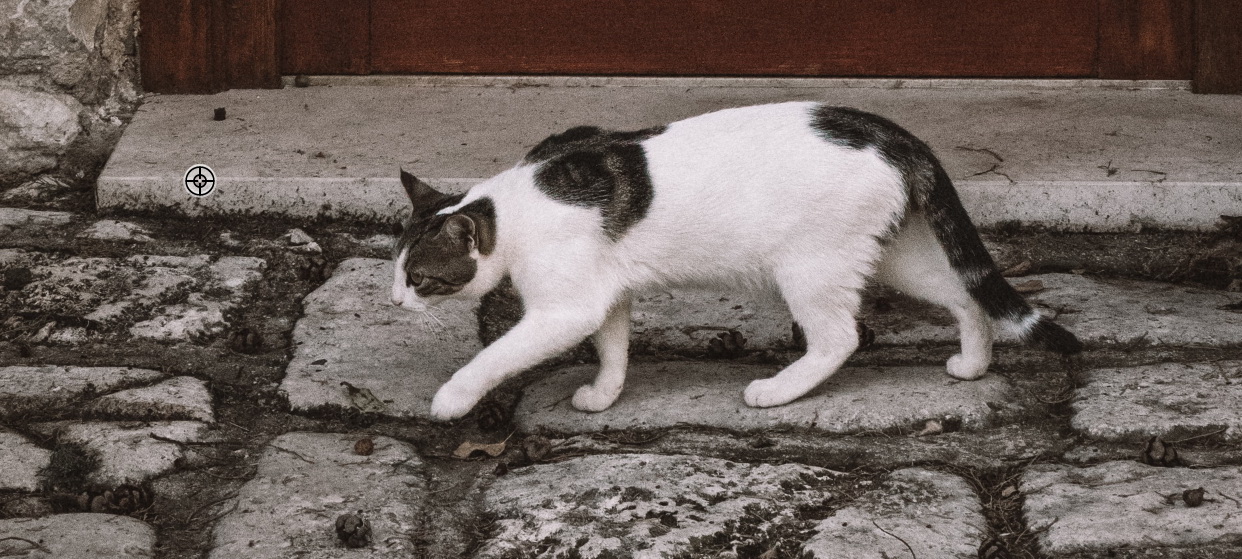
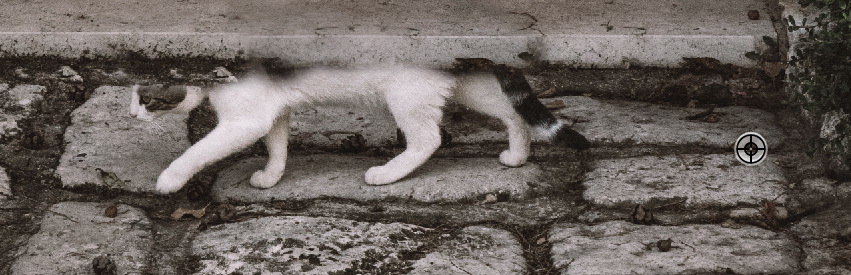
What we just did is quite easy. Let’s move on to a harder task. How about removing this cat?
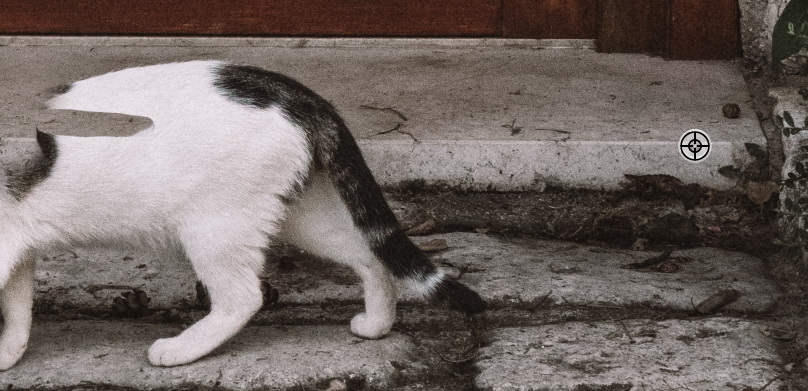
The steps needed are basically the same. Start by determining the clone source. We are using the step in front of the door as the clone source.
Make a new layer.
Start painting. Make sure the step line is properly aligned.
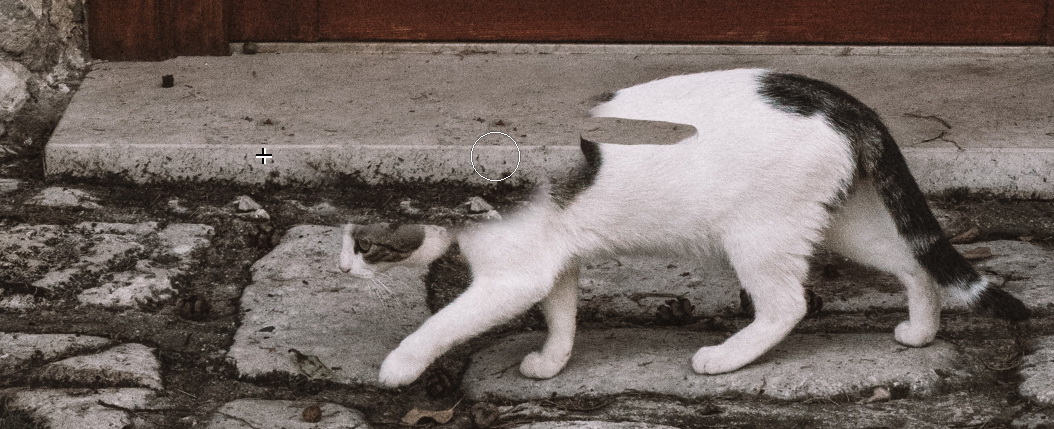
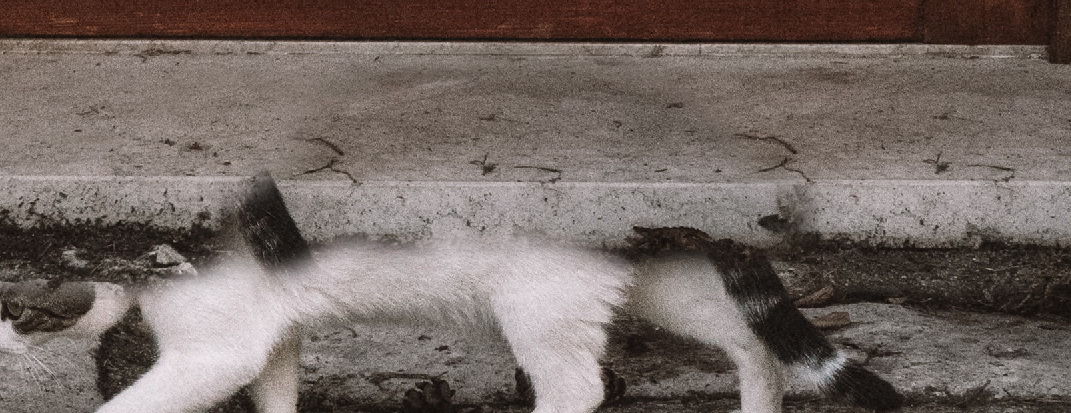
We can only go so far. If we continue brushing, we will end up cloning the cat and reveal him back. So, we need to clone another area. We want to avoid using the same step because this will introduce a pattern to the image, informing the world that this area has been Photoshoped.
Keep on painting. Make sure the lines are connected. That’s the number one rule in cloning. And you have to check for any occurrence of patterns. An unexpected pattern is also a clear sign to the viewer that the image has been altered.
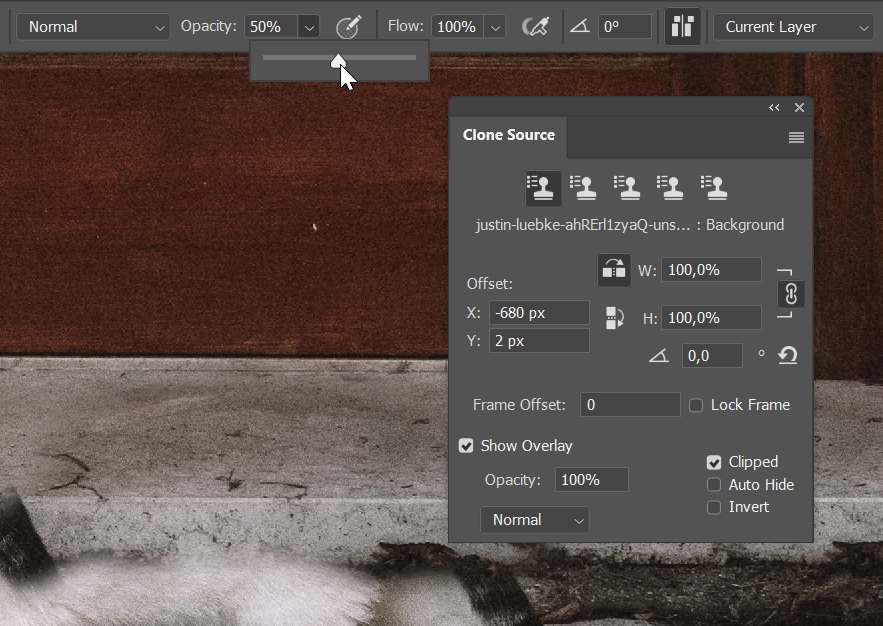
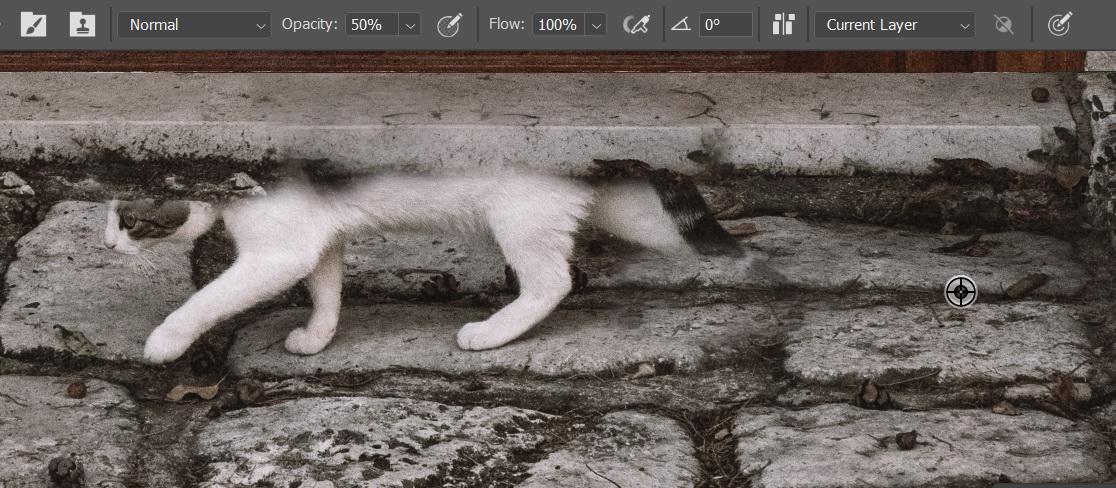
To remove this unwanted pattern, we can combine it with other sources. Reduce the tool’s Opacity to 50%.
Grab another source and then paint over the unwanted pattern.
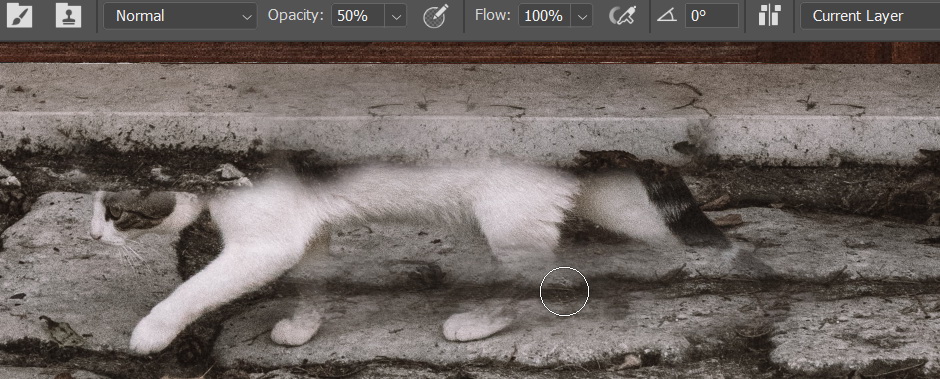
Continue to clone over the other areas. In the image below, we start by erasing the cat’s leg.
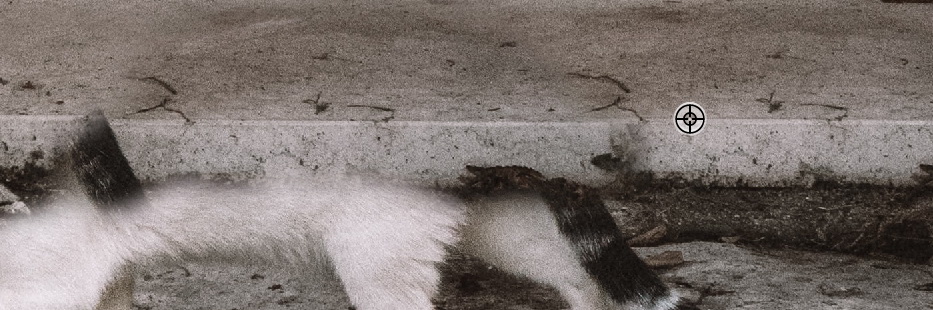
Keep on cloning to remove other parts of the cat. With this image, it’s not so easy to avoid unwanted patterns because the available source clones are limited. We can overcome this by merging several clone sources. We do this by setting its Opacity to 50% and paint over the area repeatedly using several different clone sources.

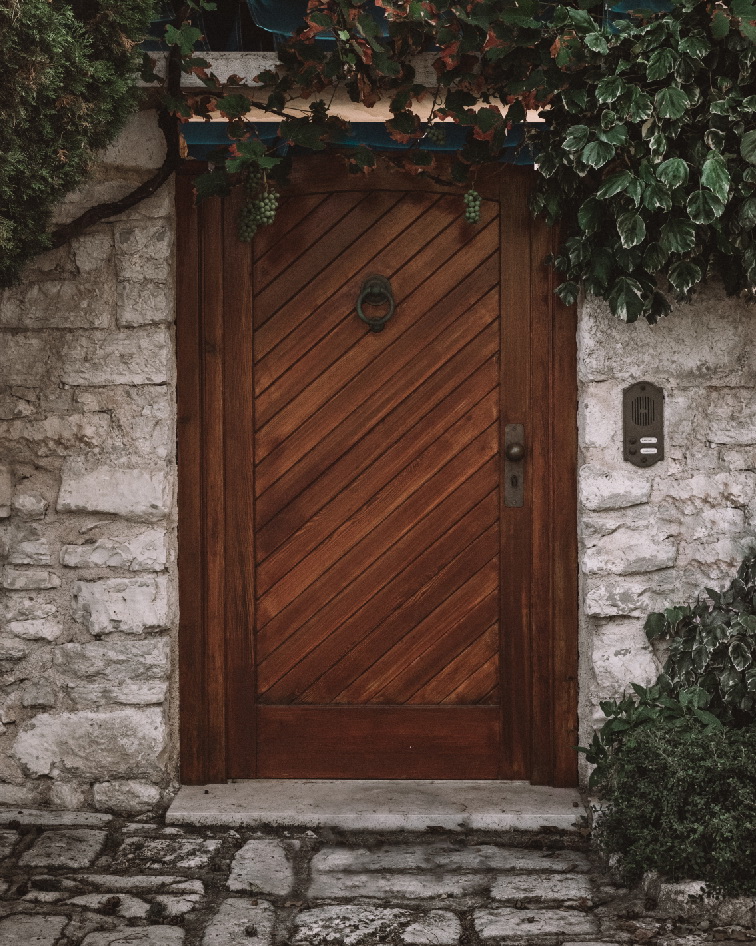
This is the result after the cat is removed.
Reset The Tool
When The Clone Stamp Tool is acting weird, you might want to try to reset it. Click the arrow icon next to the tool icon and select Reset Tool. You can also do the same for all other tools by selecting the Reset All Tools option.
Do You Even Need The Clone Stamp Tool?
After reading this long article on The Clone Stamp Tool, you might be thinking “Wow, this is an awesome tool. I’m going to use it all the time.” Well, that’s so wrong. It’s like saying “This axe is amazing. It can split a big log in one swing. Now, I’m going to use it all the time.” You don’t want to use an axe to cut grass or paper, for example. Different circumstances require different approaches.
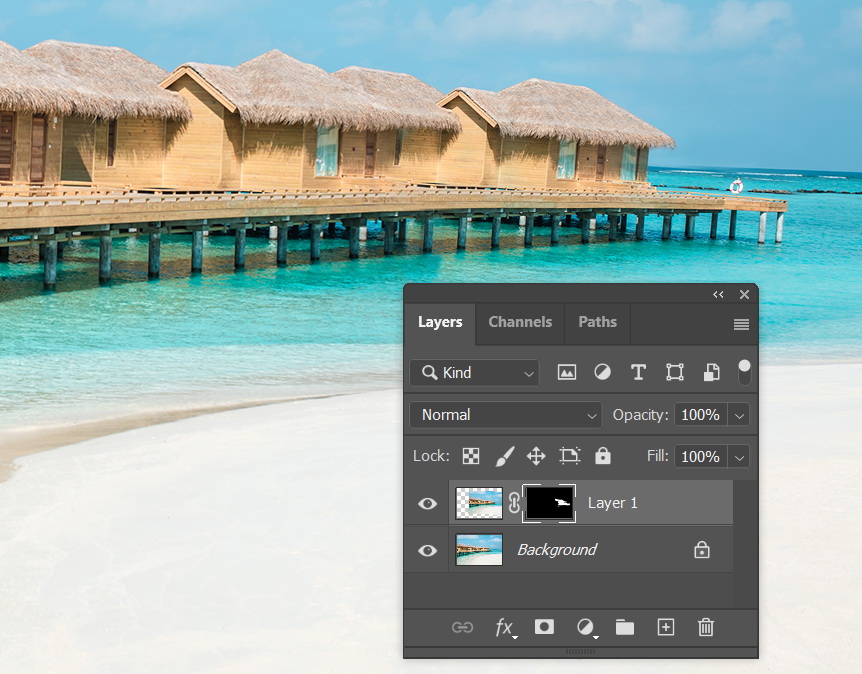
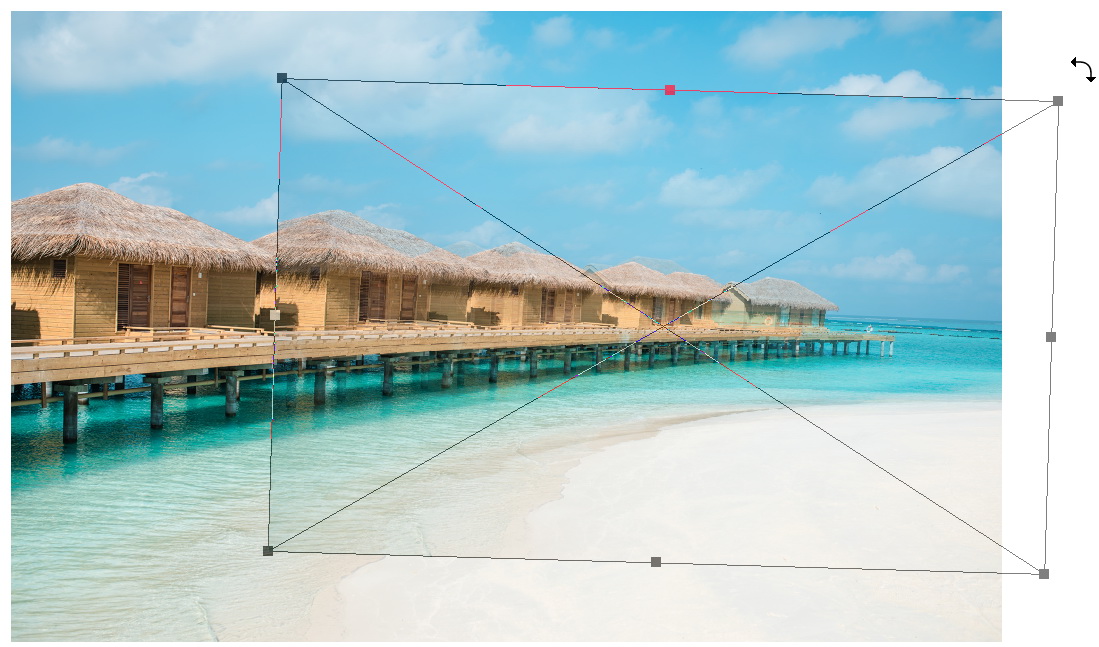
The Clone Stamp Tool is a great tool for pasting images. But, sometimes, a good old copy paste is just enough. Take a look at the following image. We have a series of beach huts. What if we want to have more huts? Easy, copy and paste. Should we use The Clone Stamp Tool? I don’t think so.

The first thing to do is duplicate the original layer using Ctrl + J. To retain its data, it is better to convert the duplicated layer into a smart object by right clicking it and then selecting Convert to Smart Object.

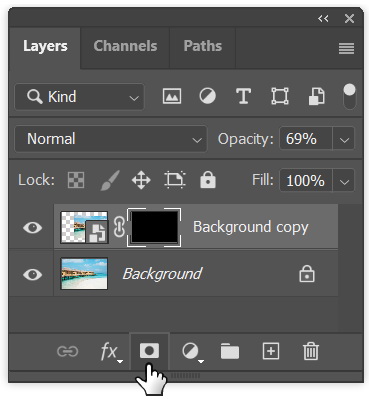
Reduce the layer’s Opacity to around 20%.

Use Ctrl + T and then drag its corner inward to make it smaller. Click and drag outside the bounding box and try to add extra hut. Make sure to align it to the original hut.

Once you are satisfied with the placement of the new hut, add a layer mask and then fill it with black.
The new hut should be hidden now. Hit D to set your foreground and background color to white and black. Paint white using The Brush Tool and reveal only the last hut. Hit X to quickly switch the foreground and background color. To hide unneeded image, paint it with black.
When you’re done, bring back the Opacity to 100%.

Below is the result we get from simple copying and pasting. As you can see, this can be done easily without the need of a Clone Tool.