
In this tutorial, you will learn how to use selection tool to remove unwanted objects in Photoshop with ease. Tons of useful tips & trick, perfect for beginner!
Why You Need to Practice This Technique
Selecting an object or separating a background can be difficult. This type of problem occurs most often. Regardless of what activity you are doing, be it photo manipulation, retouching, or photo correction, you will need to remove unwanted objects in Photoshop on regular basis.

What you’ll be creating
In this task, special attention should be paid to analysis and observation. Each tool can have its limit of possibilities and target use. But this does not mean that you restrict to use it only in a given way and not try to set a trick problem.
Your goals and objectives may differ from case to case. Knowing about the many tools, you can adapt them to your workflow and the desired final result. Do not forget that sometimes it is worth looking at the question from the other side.
You need to get rid of one thing without separating the entire background. Sometimes, it’s easier to separate the desired object or isolate the interfering parts. Then invert the selection. In such cases, the problem may get a bit different form and a solution.
Tutorial Resources
- Bird on a flowering tree Photo by Ray Hennessy on Unsplash
Introduction
The activity is based on several principles. This is creating a selection of the area. Which you want to remove or just what needs to be separated. Next, you can remove pixels from the image, which corresponds to destructive editing. On the other hand, you can add a layer mask (“Add layer mask” icon at the bottom of the Layers panel or go to Layer > Layer Mask) and hide the unwanted areas.
In case you need to return something from unwanted areas, you can always edit the layer mask. This applies to non-destructive workflow methods. After that, transparency will appear in an isolated place. The layer itself will resemble a stencil or an image on a transparent film, through which the contents under this layer can appear.
Common and Fast Techniques
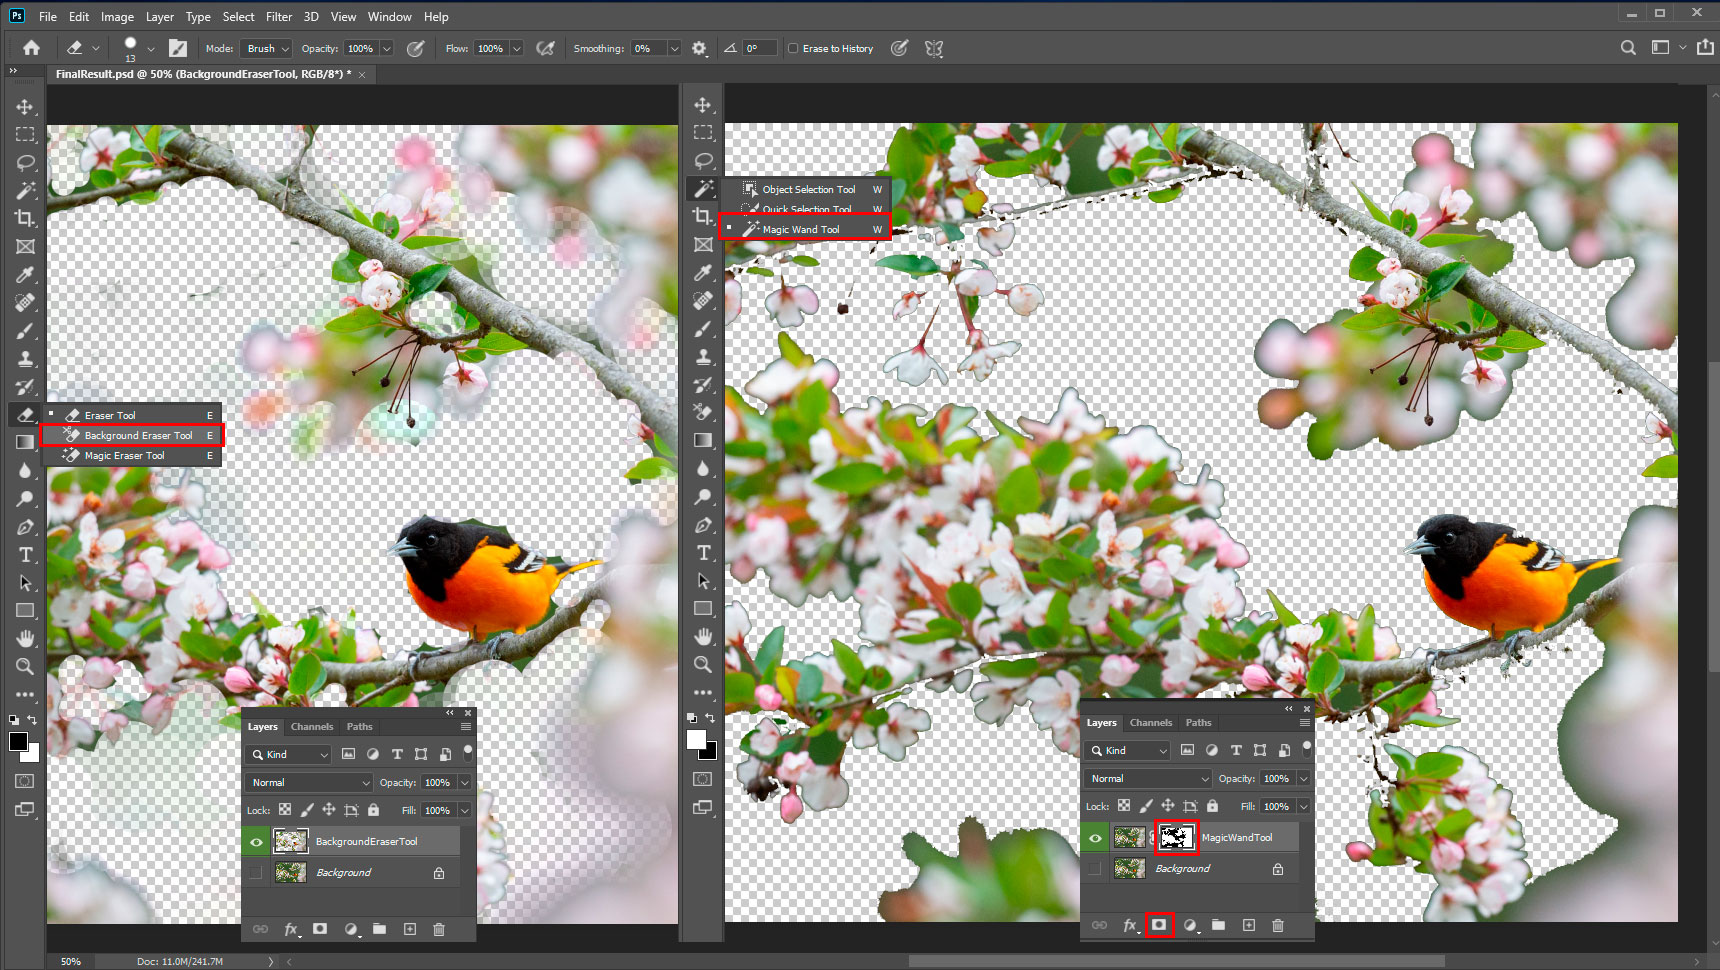
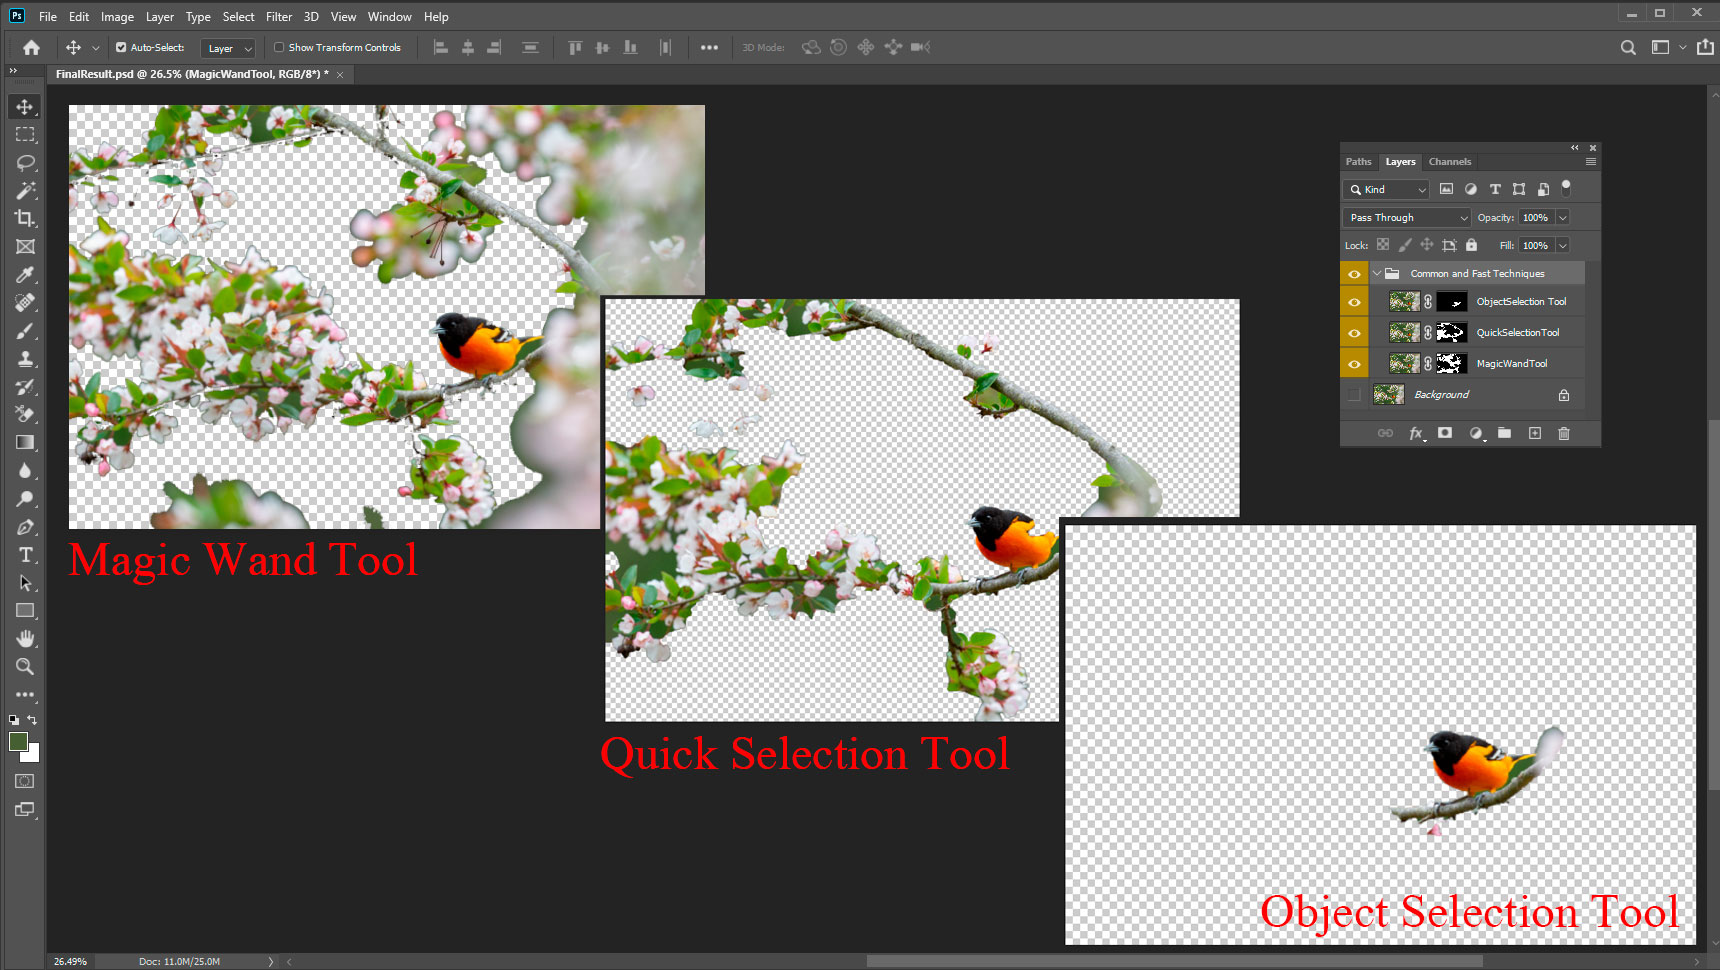
Simple backgrounds include solid color, without any special shades and transitions. Or a large area of shadow, blurred background in images with depth of field. A Quick Selection Tool (W), Magic Wand Tool (W), can handle it. Object Selection Tool (W) appeared in recent Photoshop (Photoshop 21.0, November 2019).
This tool helps to select an entire object by drawing a broad selection around it. Photoshop analyzes the given fragment and cuts out the object.
Extraction by Algorithms
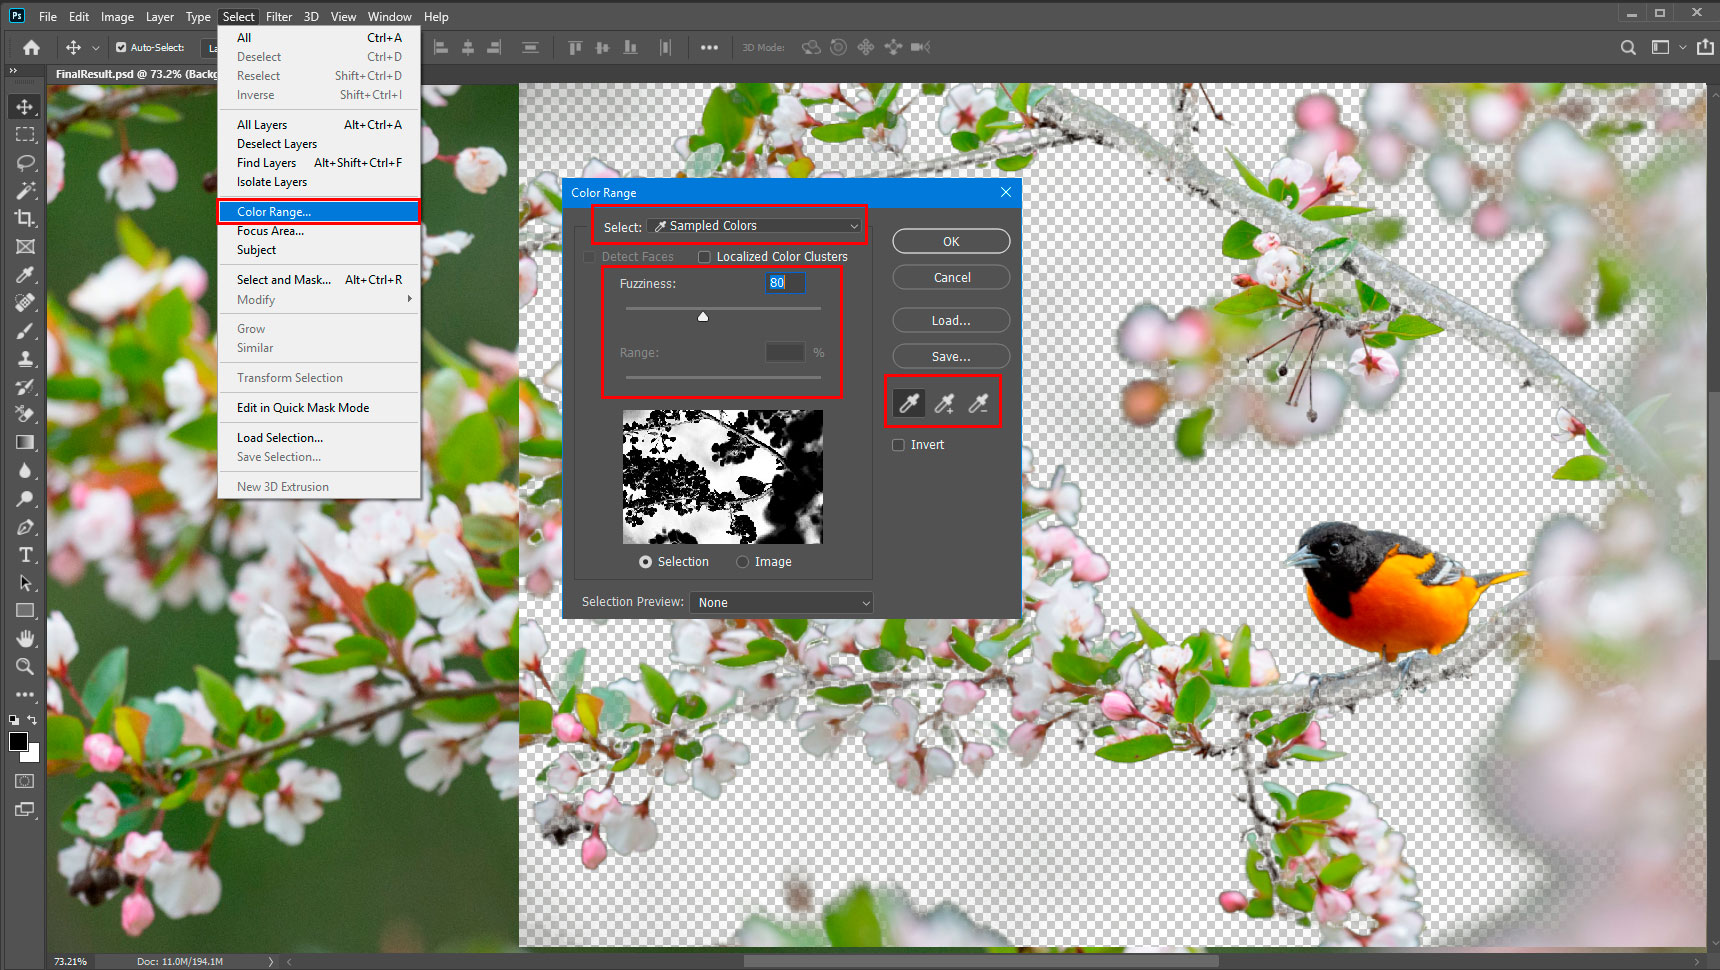
There are also several useful algorithms like “Color Range” (Select > Color Range). With this command, you can set the target color as the selection. You can pick one or multiple shades of interest and adjust the threshold.
To do this, take an eyedropper and click on the desired tone in the picture. With the Shift key pressed, you can add tints. Opt/Alt excludes tint from the selection.
If you have a background with a depth of field and the desired subject is crisp, you can try “Focus Area” (Select > Focus Area). This command can separate a sharp object in focus from an image, captured with the depth of field (DOF). Often you will need to use the tools in this window to add or exclude regions.

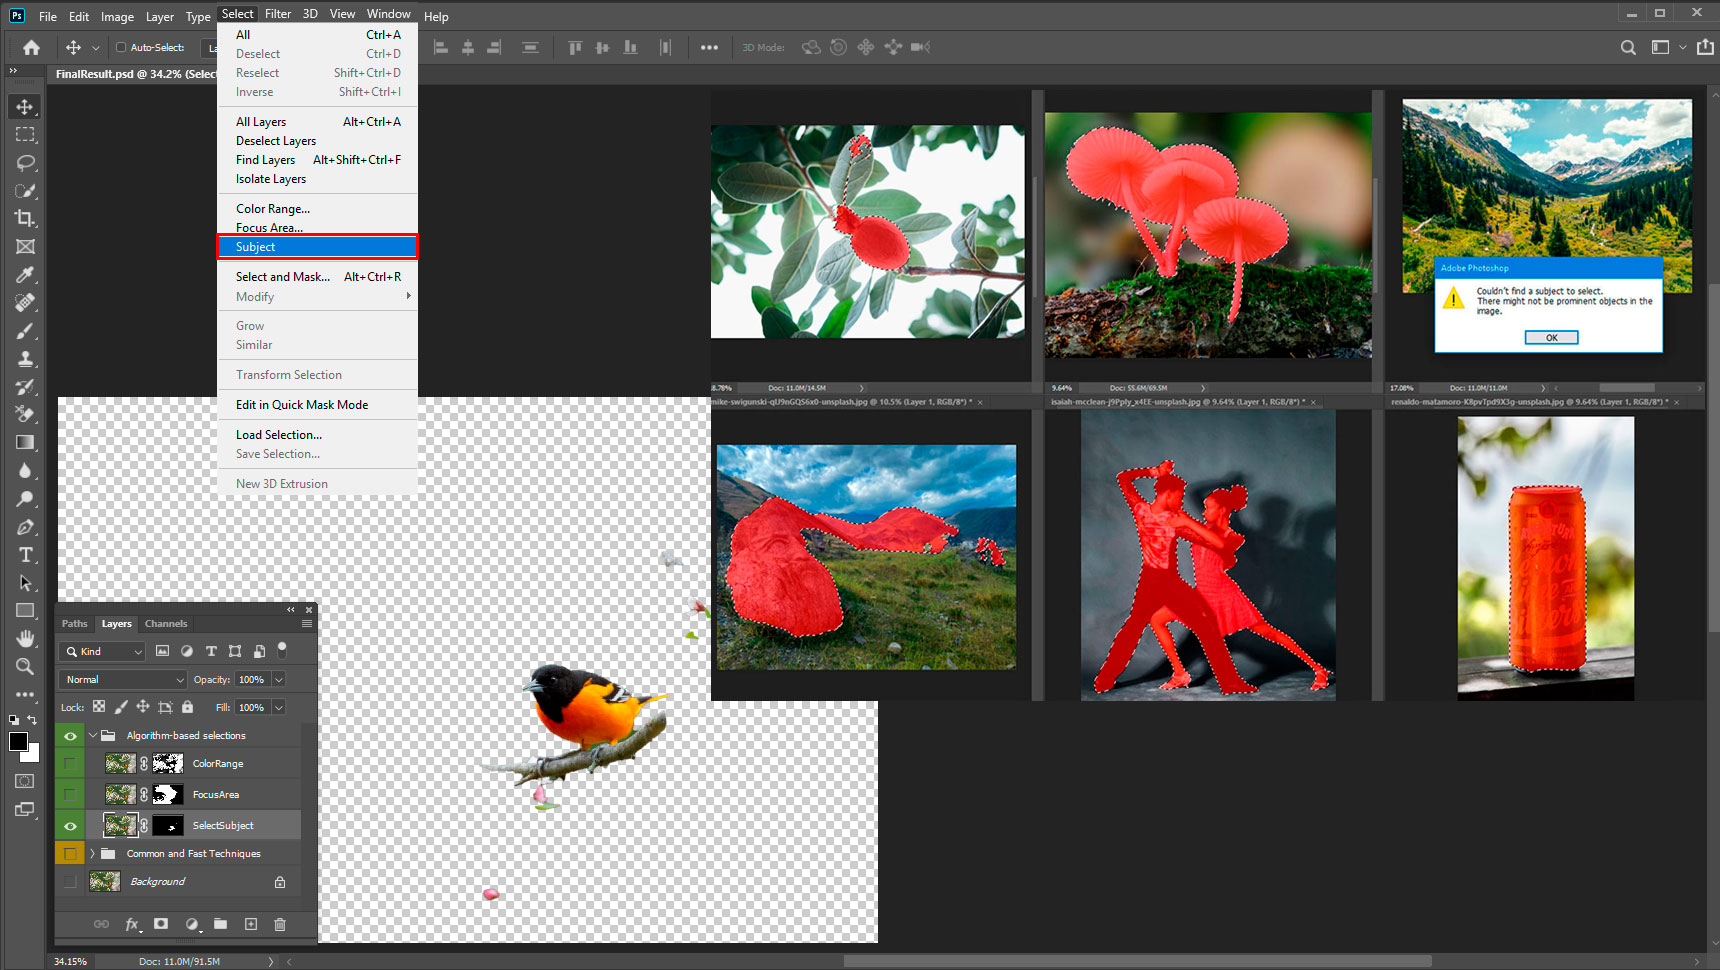
“Select Subject” (Select > Subject) command analyzes the entire picture in search of what could be the main task. Like, to guess what we would like to cut and even boasts quite reasonable judgments. De-focused areas, photos with large areas of solid color, and everything located in the center come to aid in the analysis. That works very well on people (on the solid background) and single objects. If it doesn’t find anything, it will give a message about it.
Using Blending Options
The Blending Options panel (Layer > Layer Style > Blending Options) can not only control the layer blend modes, but also the portions of the tonal range. At the “Blend If” section you can move the sliders further until the largest part of the unwanted area disappears. You can split the slider and set the start and stop values of the range, just hold down Opt/Alt and click on it. This method has a drawback. There may be some colored edge or noise around the edges of such an object. This needs to be fixed manually.

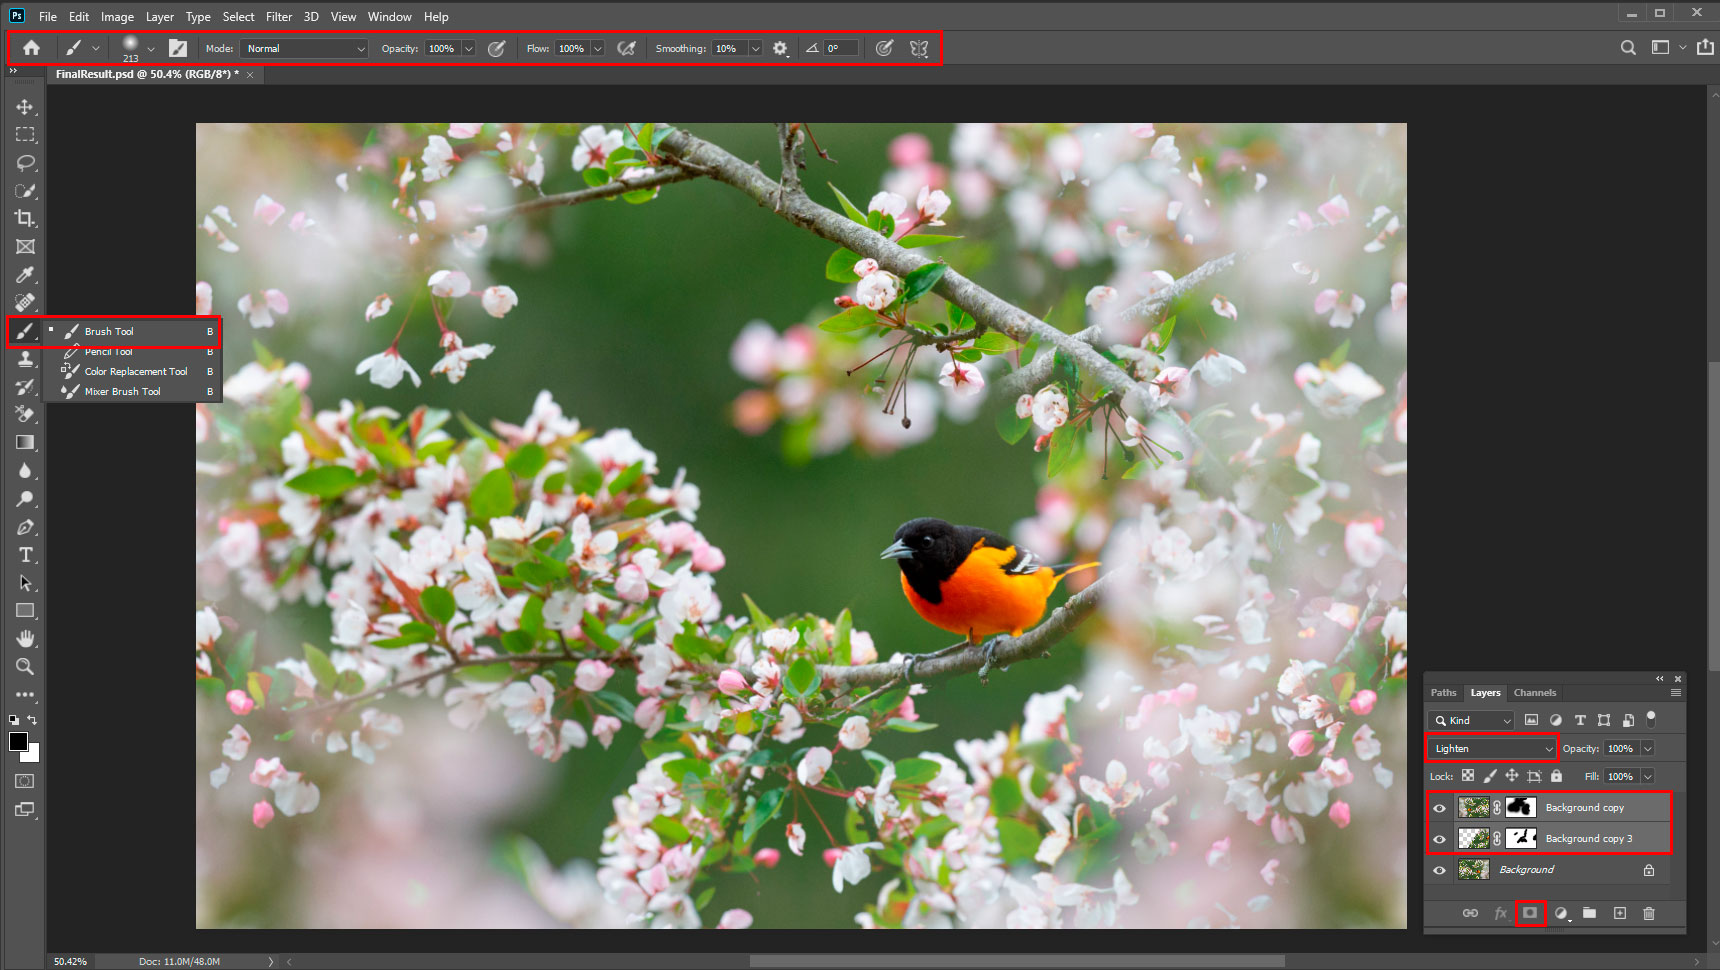
There are varieties of images in which you can cut corners. These images include special effects, textures, and images with pure black, white, or 50% gray backgrounds. To do this, change the blending mode. For black backgrounds use Lighten layer modes group. For white backgrounds use Darken group. For 50% gray is better to use the Contrast group of modes.
Complex backgrounds
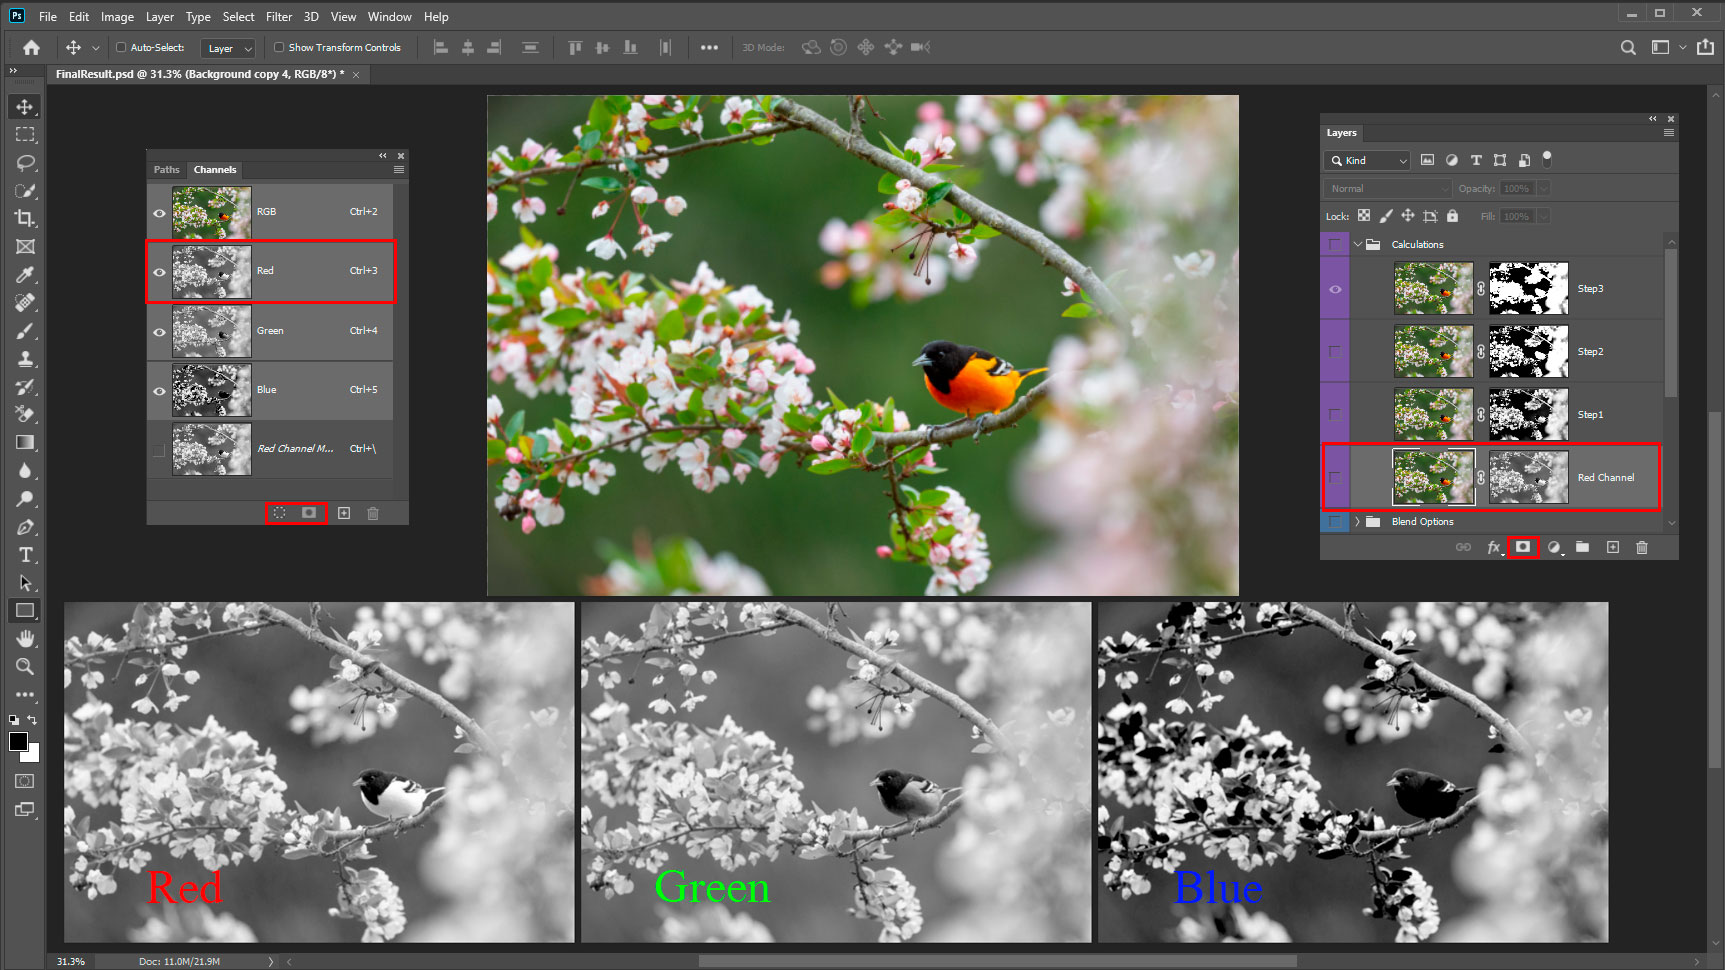
This category includes images in which every detail is clear and there are many intersecting shapes. Then you have to analyze and choose an extraction strategy. Sometimes use several of the above tools. And sometimes resort to complex techniques based on understanding theory and Chrome key compositing. One example is the use of the Channels Panel (Window > Channels). Following the task, you look at each channel. Look at the desired object as a solid color, black or white, where less noise and more contrast (less manual work). Make a selection of this channel. Add a layer mask (Layer > Layer Mask) or the inverted layer mask to edit the selection, using other tools like Brush Tool (B) or Lasso Tool (L).
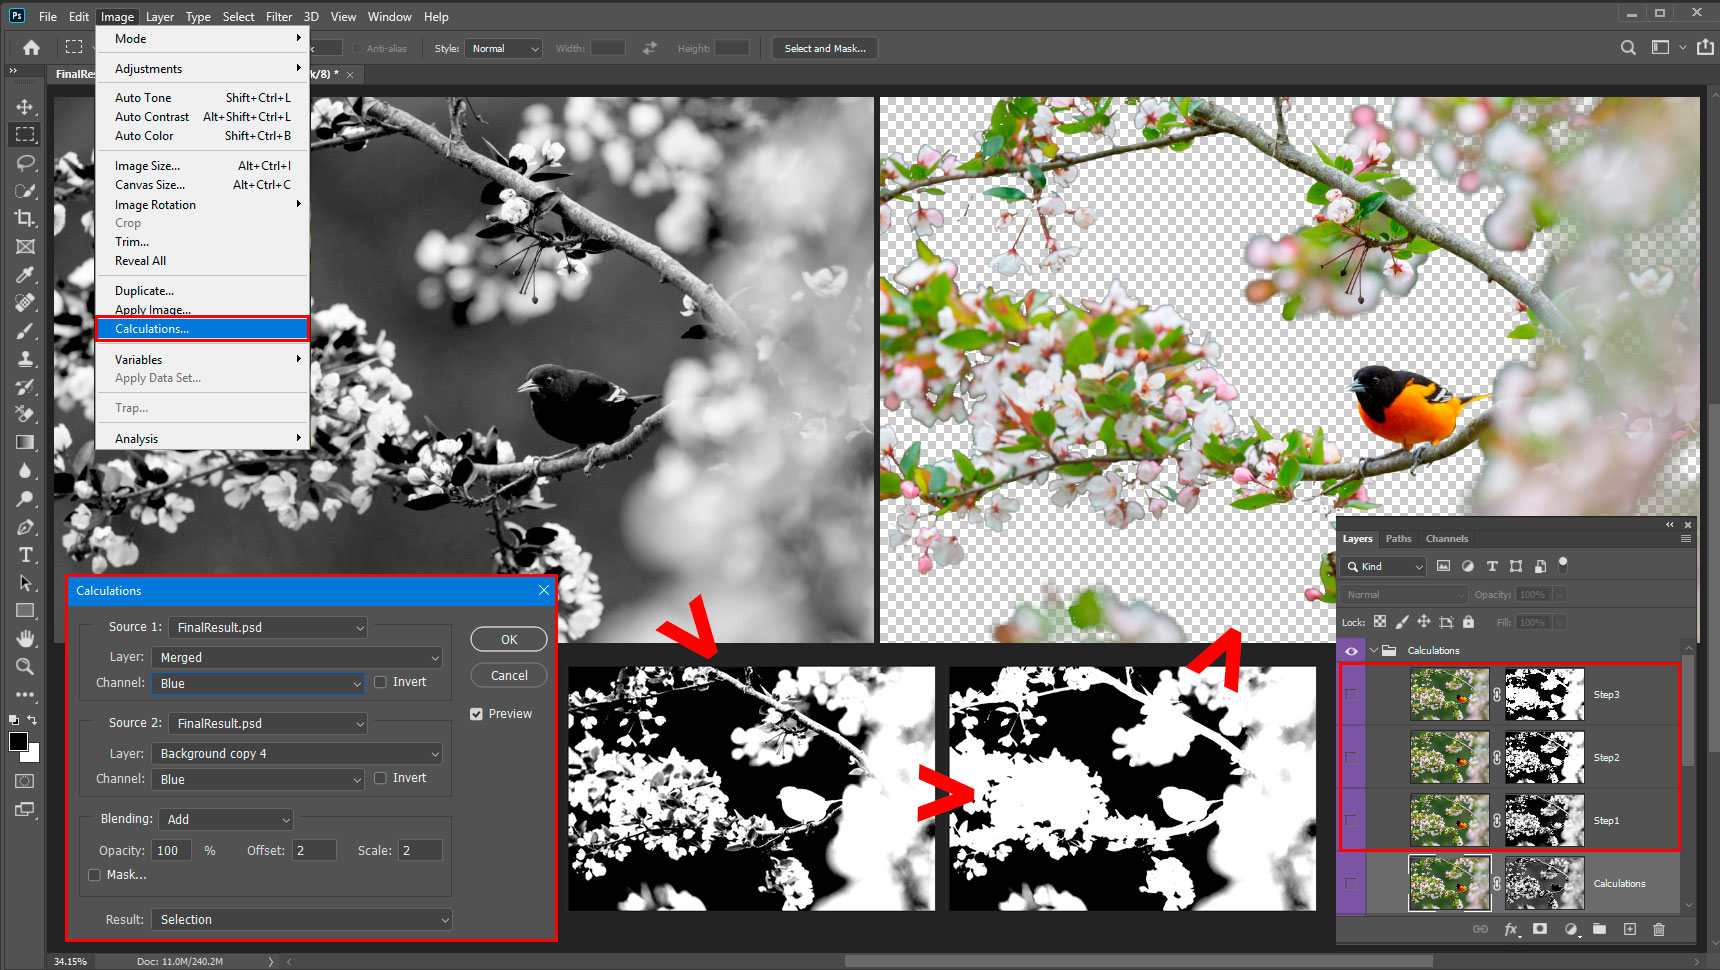
The Calculations Command (Image > Calculations) can blend, in the black and white state, two channels using blend modes. Then combine the results in a single channel or selection. This command offers two extra mathematical operations/blending modes that not available in the Layers panel — “Add” and “Subtract”. “Add” the most used because it is more convenient to work with lighter areas. “Subtract” gives pretty dark results for the most part. The definition is not so correct from a technical point of view. But this is what you will do – look for the most suitable option in black and white and mix different channels of other layers.
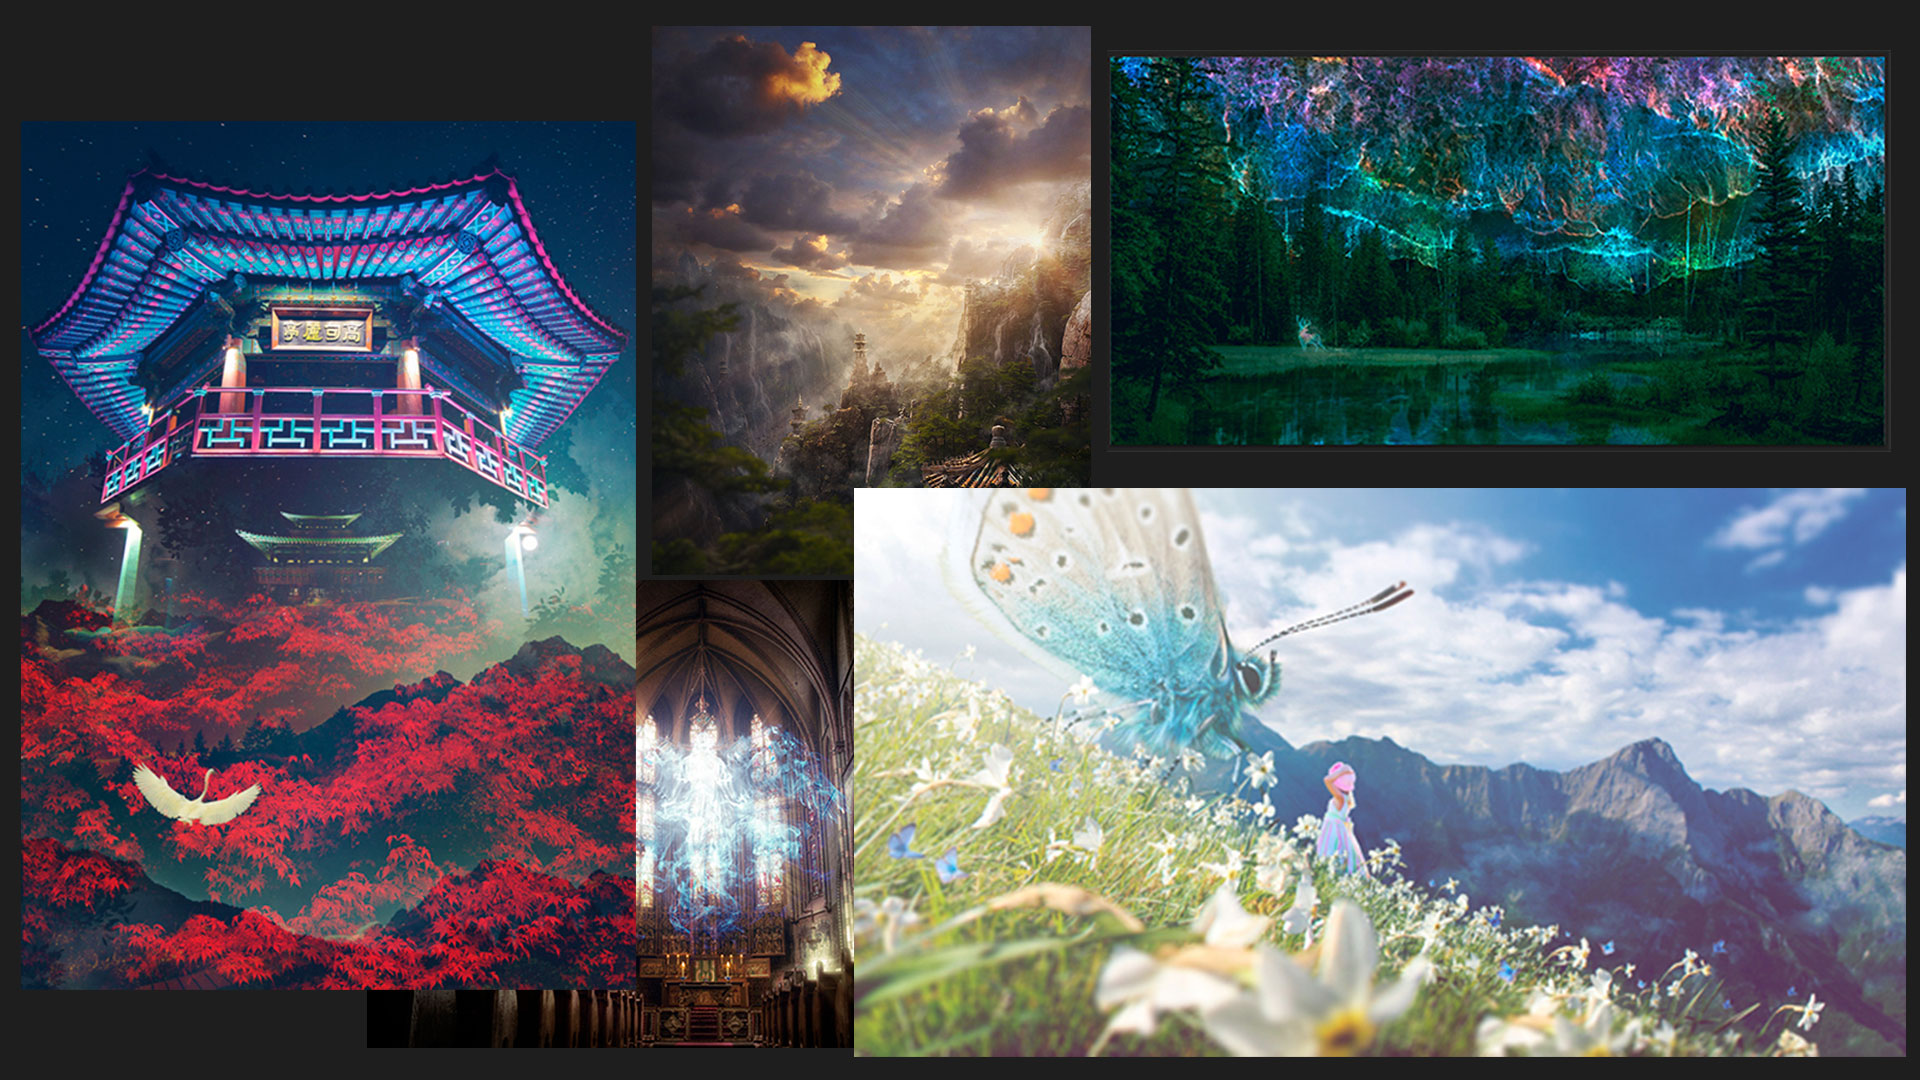
Here are some examples of tutorials in which you can practice some of the described techniques:
A Few Useful Tips and Tricks
- If you need to separate a specific subject, try to find or create similar images with the most distinct and contrasting background. This will make it easier for you to isolate the desired object. Only not in cases where this is the only and not repeatable, ideal image by all criteria.
- Try to keep your images as clear as possible. Slightly blurring details or edges can make a big difference in the finished piece if you don’t take care of it.
- But if you are pursuing the goal of creating a selective focus image, keep the edges soft. Match the depth of field of your task and consumables.
- Don’t soften the edges too much by removing details. When dealing with organic shapes, do not neglect natural details. Keeping the little things like this helps keep things realistic and harmonious.
- You can compose from the successful parts of other selections or masks.
- Some selection flaws can be hidden with other objects or hidden in a less visible area of the final image.
- Sometimes, you have to do a little work with your hands. It is not always possible to create a selection quickly and correctly. Sometimes you have to combine successful fragments and eliminate errors manually.
- Use refinement tools like Select and Mask (Select > Select and Mask), Defringe, or Remove Black/White Matte (Layer > Matting) to clean up the edge.
- Reduce Dencity from Properties Panel (Window > Properties) to reveal some details like a guide while working over layer mask.
Summary
Some tools can work great when applied to appropriate situations. Sometimes it so happens that even on simple tasks, tools and algorithms give unexpected results. It takes a little persistence to try something different or experiment with the settings. By becoming familiar with the variety of possibilities, you gain control and freedom in solving tasks associated with creating selections, saving time and effort. Thank you for your attention and good luck to you in your creative projects! Have something to add or ask? Use the comment section below!
