Close Menu
PSD VaultPSD Vault
  • VIP Area
  • Photoshop Basics
  • Photo Effect
  • Text Effect
  • Premium Tuts
  • Resources
  • Drawing
  • Inspiration
  • Web Graphics
  • Abstract
  • Freebies
  • Advertise
  • Get in Touch
  • About PSD Vault
Facebook Instagram Pinterest YouTube TikTok
Facebook Instagram Pinterest YouTube TikTok RSS
PSD VaultPSD Vault
  • VIP Area
    • Sign Up
    • Log In
  • Photoshop Basics
  • AI
  • Photoshop Error Fixes
  • Video Tutorial
  • Photo Effect
  • Text Effect
  • Premium Tuts
  • Drawing
  • Opinion
PSD VaultPSD Vault
Home»Basics»How to Easily Add Watermark in Photoshop
Basics

How to Easily Add Watermark in Photoshop

By Mohammad JeprieMay 17, 20234 Mins Read
Share
Facebook Twitter LinkedIn Pinterest Email

To protect your image from unauthorized usage, you may want to add watermark on top of it. In this tutorial, we are going to learn how to add a logo as watermark in Photoshop in a easy & fast way.

Preview

Here’s the image with watermark added.

Free PSD File Download

The PSD File of this tutorial is freely available on PSD Vault. You can download it here.

Step 1

There are various method in Photoshop to add watermark to image or images. We can use custom brush, linked file, action, and even batch processing. Each method has its own advantages and some are more complex that the rest.

In this beginner tutorial, we will use linked file. It is the easiest and the most flexible way to add watermark. The idea is simple, prepare watermark file and then put it on top of the image. First, let’s make the document. Click File > New.

Step 2

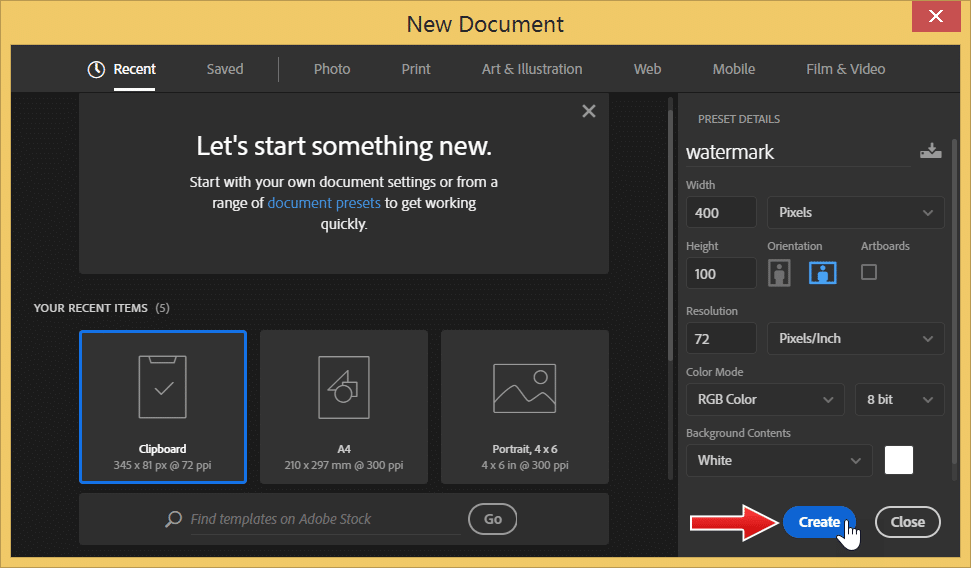
In the New Document dialog box, enter the dimension of the watermark image. Once you’re done, click Create button.

Step 3

For this tutorial. I just paste the logo of this website. You may want to use your company logo, your email, or simply your name. When you’re done, save the watermark file by clicking File > Save.

Adding Watermark to Photo using Photoshop

Step 4

Open up your image. Click File > Open and then select the file. Here, we are going to use image from our previous tutorial.

Adding Watermark to Photo using Photoshop

Step 5

Click File > Place Linked to insert file into the image. In the next dialog box file, pick the watermark file.

Adding Watermark to Photo using Photoshop

Step 6

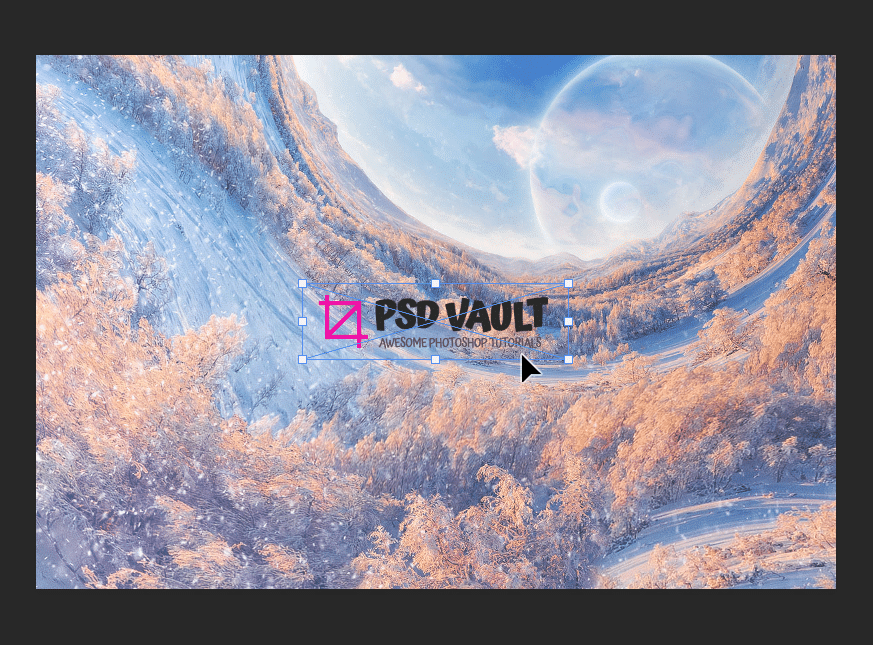
Click and drag the file to position it in your desired location. At the same time, you can alter the size by dragging one of the small boxes around the file. When you’re done, hit the Enter key to confirm it.

Adding Watermark to Photo using Photoshop

Step 7

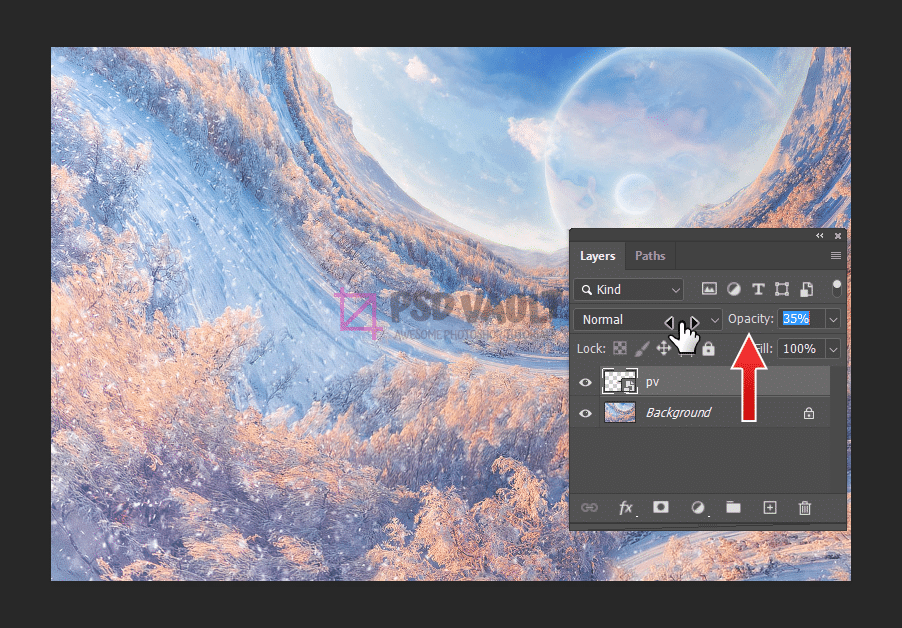
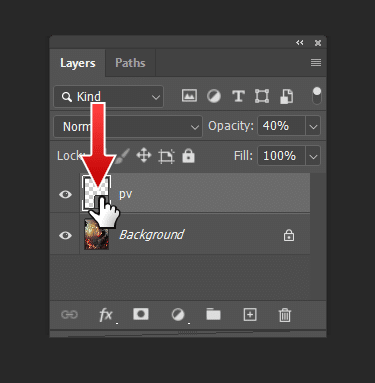
We don’t want the watermark ruin the image. it needs to be subtle but visible enough to show information to the viewer. One way to do it is by reducing its layer Opacity:

  • Layer Opacity controls how much the layer is visible;
  • Opacity of 100% means the layer is opaque, blocking every image underneath it;
  • Opacity of 50% means the layer is transparent, some of the underlying image shown through;
  • 0% Opacity means the layer is completely hidden.

Change the watermark layer Opacity from the Layers Panel. Scrub the Opacity to tone down its size. You need to figure out yourself the ideal Opacity for your watermark.

Adding Watermark to Photo using Photoshop

Step 8

Change your mind on the location of the watermark? That’s easy. Activate Move Tool from the Toolbox or just hit the V key.

Adding Watermark to Photo using Photoshop

Step 9

Next, click and drag to change the watermark’s position.

Adding Watermark to Photo using Photoshop

Step 10

How about changing the watermark size? That’s also easy. Click Edit > Free Transform. You can also use shortcut Ctrl + T for Transform.

Adding Watermark to Photo using Photoshop

Step 11

Click and drag one of the small boxes surrounding the watermark. In newer Photoshop version, you can just simply drag it. In earlier version of Photoshop, you need to hold the Shift key to constraint its proportion.

Adding Watermark to Photo using Photoshop

Step 12

Or, you can also use the Option Bar to accurately change the watermark’s size.
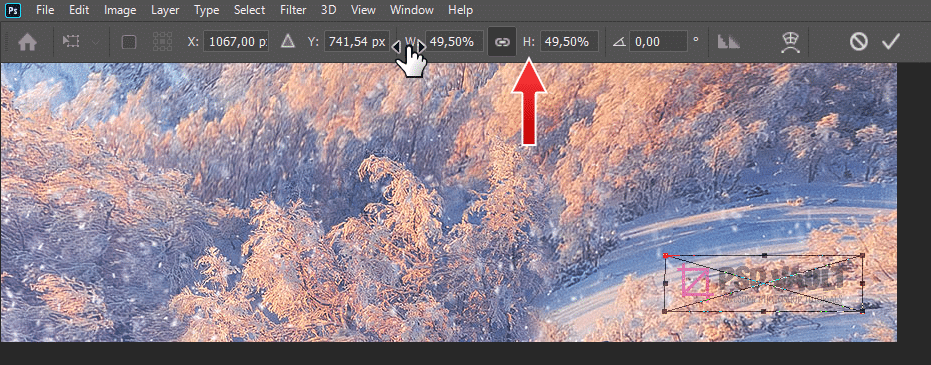
Adding Watermark to Photo using Photoshop

Step 13

What if we need to modify the watermark. Here’s an example using image from our tutorial. With this dark image, The watermark is practically indistinguishable. We can fix this by changing the text’s color to white.

Adding Watermark to Photo using Photoshop

Step 14

To edit the watermark, we can double click its layer to open the watermark file. You can also directly open the watermark file in Photoshop.

Adding Watermark to Photo using Photoshop

Step 15

Edit the watermark file and then save it (Ctrl + S).

Adding Watermark to Photo using Photoshop

Step 16

Save the watermark file and close it. The watermark is automatically updated. This will help when you are working with multiple images. Because the watermark inside the images is linked to the file, one changes in the watermark file is enough to change watermark in all your images.

Adding Watermark to Photo using Photoshop

Step 17

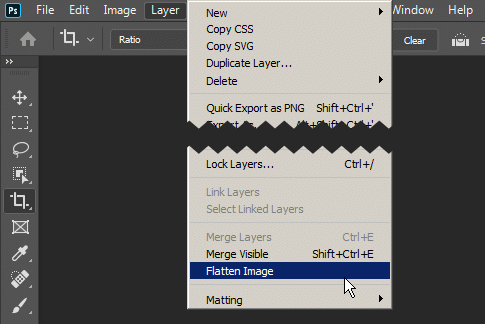
You can save the file along its watermark layer in PSD format. But, obviously, the PSD is only for yourself. For distribution, you need to flatten the layers and save it as JPG or PNG file. To flatten the layers and merge the watermark with the original image, click Layer > Flatten Image.

Adding Watermark to Photo using Photoshop

Step 18

Click File > Export > Export As. In the dialog box, select the file format you want and then click the Export button to save the file.

Conclusion

I hope now you can easily adding watermark to your image. Don’t forget the main principle of watermark, subtle but visible enough to protecting the image. Thank you for reading.

photoshop watermark
Share. Facebook Twitter Pinterest LinkedIn Tumblr Email
Mohammad Jeprie
  • Website

Mohammad Jeprie is a blogger, author, and graphic designer from Indonesia. He's not an artist, but he knows a few Photoshop techniques and loves to share it with everyone.

Related Posts

Curves or Levels: Choosing the Right Tool for Stunning Edits

September 28, 2025

How to Create Double Exposure Photos in Photoshop (Easy Tutorial 2025)

September 27, 2025

How to Use Reference Image AI Feature in Photoshop

September 26, 2025

Comments are closed.

Don't Miss

How to Refine Adobe Firefly Generations Directly in Photoshop with Firefly History

October 4, 2025

Curves or Levels: Choosing the Right Tool for Stunning Edits

September 28, 2025

How to Create Double Exposure Photos in Photoshop (Easy Tutorial 2025)

September 27, 2025

For Beginners

Basics

Curves or Levels: Choosing the Right Tool for Stunning Edits

By Lana WilsonSeptember 28, 20255 Mins Read

How to Read Photoshop Histograms for Beginners

September 19, 2025

How to Master Auto-Blend Layers in Photoshop for Stunning Image Blending

September 13, 2025

10 Genius Tips to Master Photoshop’s AI Object Selection Tool

August 30, 2025

You May Also Like

Basics

Curves or Levels: Choosing the Right Tool for Stunning Edits

By Lana WilsonSeptember 28, 20255 Mins Read
Photo Effect

How to Create Double Exposure Photos in Photoshop (Easy Tutorial 2025)

By James QuSeptember 27, 20254 Mins Read
AI

How to Use Reference Image AI Feature in Photoshop

By Mario TeodosioSeptember 26, 20254 Mins Read
Facebook X (Twitter) Instagram Pinterest
  • About Us
  • Get in Touch
  • Advertise
  • VIP Area
  • Privacy Policy
  • Terms & Conditions
© 2025 PSD Vault. All Right Reserved.

Type above and press Enter to search. Press Esc to cancel.

Manage Consent
To provide the best experiences, we use technologies like cookies to store and/or access device information. Consenting to these technologies will allow us to process data such as browsing behavior or unique IDs on this site. Not consenting or withdrawing consent, may adversely affect certain features and functions.
Functional Always active
The technical storage or access is strictly necessary for the legitimate purpose of enabling the use of a specific service explicitly requested by the subscriber or user, or for the sole purpose of carrying out the transmission of a communication over an electronic communications network.
Preferences
The technical storage or access is necessary for the legitimate purpose of storing preferences that are not requested by the subscriber or user.
Statistics
The technical storage or access that is used exclusively for statistical purposes. The technical storage or access that is used exclusively for anonymous statistical purposes. Without a subpoena, voluntary compliance on the part of your Internet Service Provider, or additional records from a third party, information stored or retrieved for this purpose alone cannot usually be used to identify you.
Marketing
The technical storage or access is required to create user profiles to send advertising, or to track the user on a website or across several websites for similar marketing purposes.
Manage options Manage services Manage {vendor_count} vendors Read more about these purposes
View preferences
{title} {title} {title}