In the tutorial, you will learn how to create this glowing flower pattern in Photoshop. Steps are very simple, great for beginners.
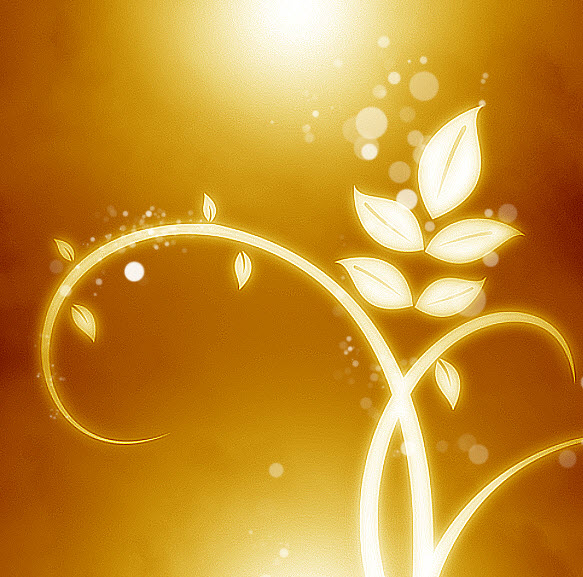
Here is a preview of the final effect for this tutorial: (click to enlarge)

PSD File Download
You can download the PSD File for this tutorial via the VIP Members Area for only $6.95/Month (or less)! You will not only get this PSD File, but also 300+ other PSD Files + Extra Goodies + Exclusive Photoshop tutorial there. Signup now and get exclusive :) Find out more about the VIP Members Areas

You will need the following stock to complete this tutorial:
Floral Brushset (Pick one from the list)
Ok let’s get started!
Step 1
Create a new document sized 600px * 600px, fill the background with black colour. Create a new layer called “Cloud” with around 40% opacity, use the cloud brush you downloaded, and paint some cloud onto it:

Create a new layer called “background light”, grab a big soft brush with white colour, and paint as shown below:
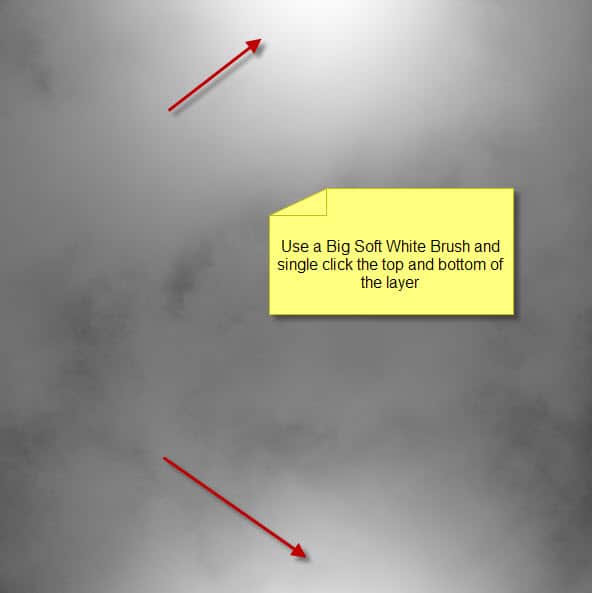
As you can see, by doing so you immediately created a nice background to work on.
Step 2
Create a new layer called “floral pattern”, use the brush you downloaded, paint a floral pattern onto it:

Apply the following layer blending options to this layer:
Drop Shadow
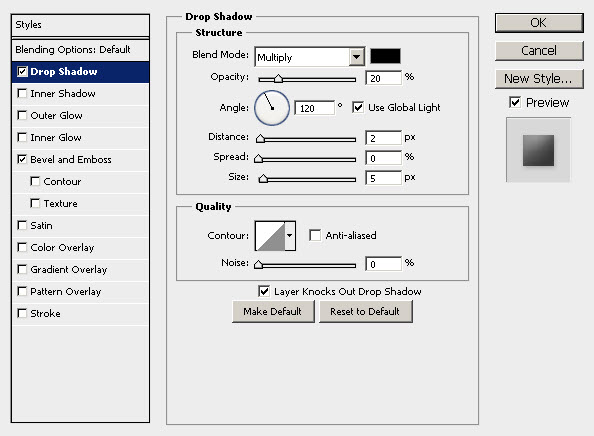
Bevel and Emboss

and you can see now we created some light and shadow effect for the floral pattern:

Step 3
Now we can add a glowing effect to the floral pattern. To do this, simply duplicate the original floral layer once, apply the following Gaussian Blur settings to it:
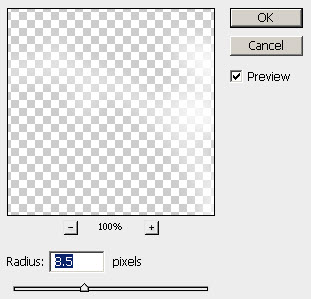
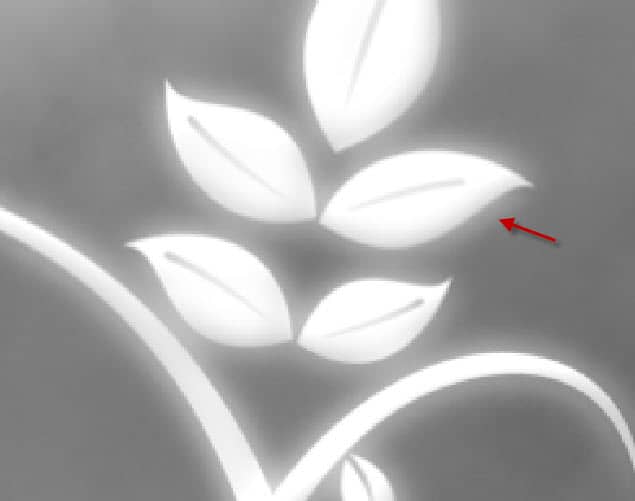
and you will see a glowing edge appear around the floral pattern:
Step 4
Now let’s add some colour to the image. The Color Balance image adjustment layer will do the job. Personally I think it’s a quick and easy way to add colour to an image, without having to use brush and the colour picker.
I chose a golden colour mix: (Settings as shown below)
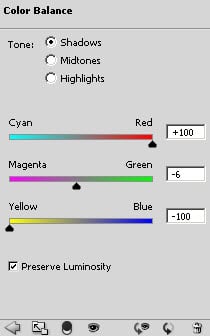
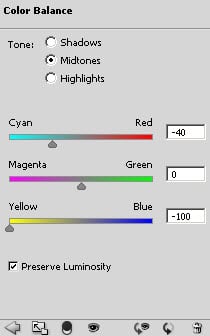
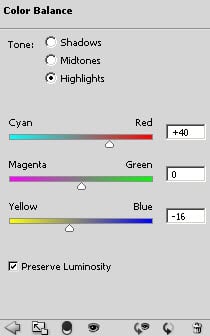
and you will have the following effect:
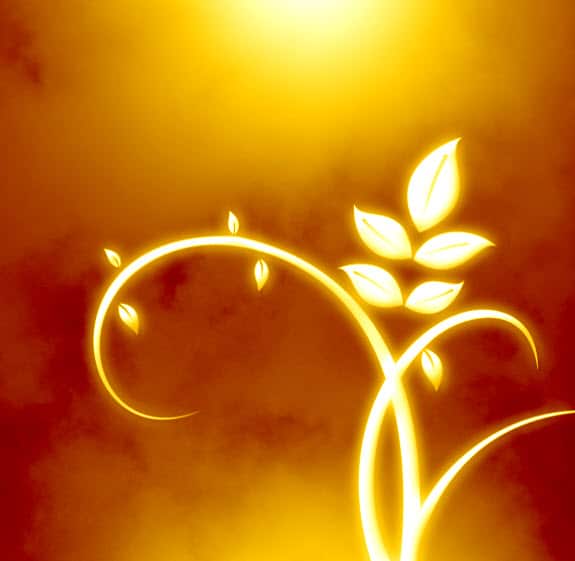
Please note that there is no need to use the exact same colour as I used, you’re free the experiment any colour scheme you prefer.
Step 5
Now let’s flatten the image (save a layered copy before you do so). Duplicate the background layer, and apply the following Smart Sharpen filter to it:
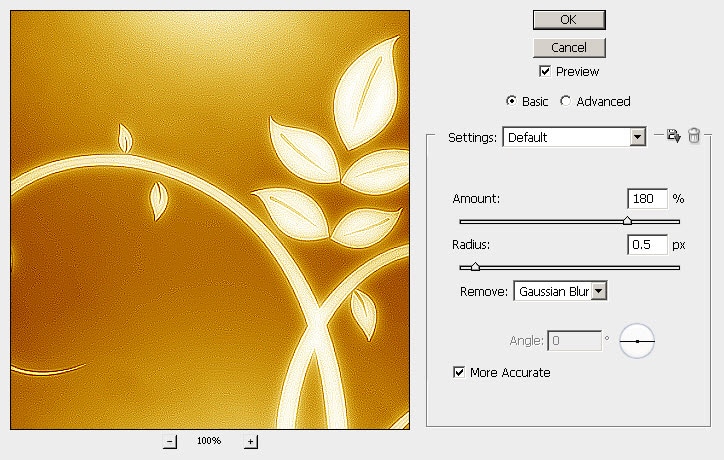
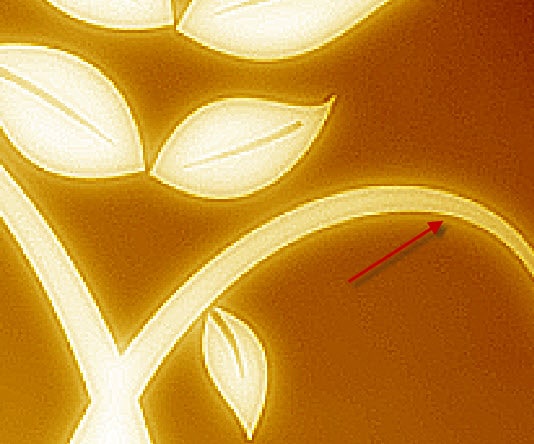
As you can, we now have a darkened edge around the floral pattern, also the overall image becomes more crispy and detailed:
Now let’s get on with the bokeh creation. We can do this with brush dynamics (F5).
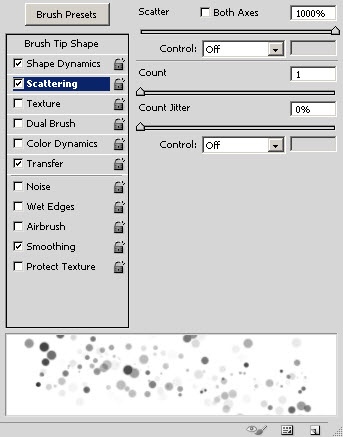
Create a new layer called “bokeh” on top of all previous layers, grab a around brush with 90% hardness, apply the following brush settings to it:
Shape Dynamics

Scattering
Transfer (Other Dynamics)
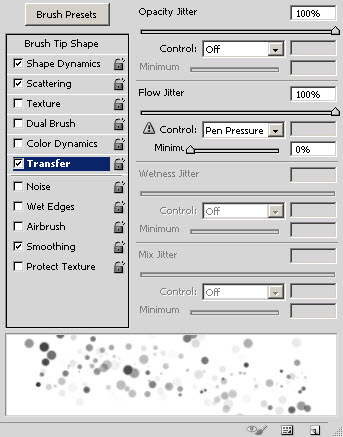
Tick the Airbrush and Smoothing option:

and you will have the following effect:
Step 6
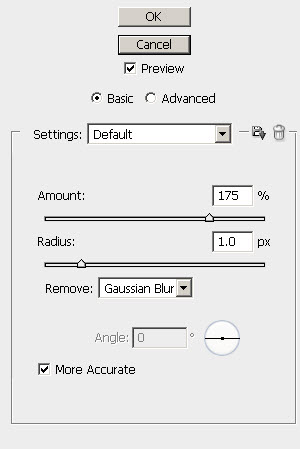
Duplicate the bokeh layer once, and apply the following Smart Sharpen Filter Settings to the duplicated layer:
Drop the opacity of the duplicated layer to around 80%, you will see now we have a highlighted edge appear around the bokeh:
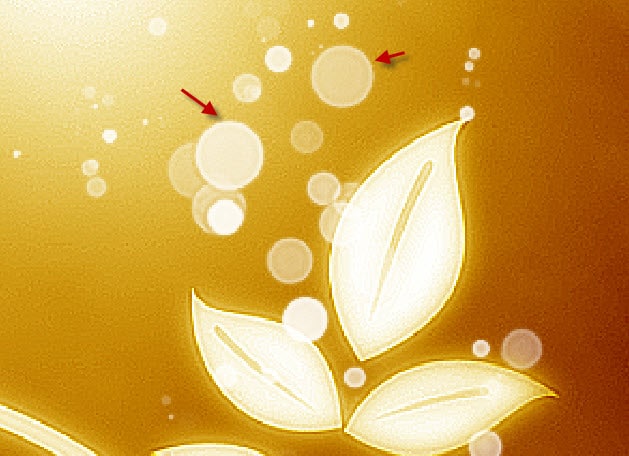
Note: I personally prefer using Smart Sharpen filter to add the edge, other than using the “Stroke” layer blending option. The former produces a clearer, more detailed result in my opinion.
Create a new layer on top of all previous layer called “highlight”, set the layer blending mode to “soft light”, and grab a soft white brush, do a few single-clicks around the floral pattern as shown below:

Finally, add a levels adjustment layer on top, with the following settings: (this will alter the contrast and give the image more depth)
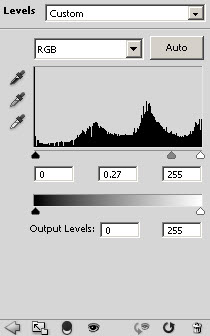
Mask on the levels adjustment layer:

and you will have the following final effect:

That’s it for this beginner-level mini Photoshop tutorial! Hope you enjoy it and find it useful. Until next time, have a great day!
22 Comments
awesome tut
Great stuff, nicely explained
Great Tutorial, really nice design…!!!
That would look wonderful framed and hung on a wall. It is now my new desktop background at least!
Nice editing, simple and cool… can’t wait to try it though…
really awesome
nice tutorial :) indeed …
I can’t seem to get the colors to show up on my image. Is there a specfic layer that I need to be on? Thanks for the help!
Nice tutorial, thanks
Quick and useful
Nice Tutorial, Thanks
I am also not able to see colours like Anon mentioned.
i am using PS 7. Please suggest.
me ashfaqmalik7@gmail.com i really appriciate the job you have done….its fantastic keep continuing for the students of adobe photosshop…..thanks alot
thx a lot , I like it.
Awesome! thanks for sharing.This helping me to improve my designs.Atlanta Web Design Company
Thank you for sharing your talents and taking time to create this wonderful tutorial.
Hi! Really awesome tutorial keep providing us with all these cool stuffs!!!
colour adding step is very confusing. I can’t do next to that step.
Amazing Result! Thanks for this Quick & Cool tutorial!
Everyone who’s having a problem in color balance, Solution:
click on the “add Adjustment layer” in the layers panal and then choose color balance, DON’T GO TO “Image–> Adjustment–> color balance” menu because it won’t work if you didn’t flattened the layers , the same thing to hue/Saturation Function
This is awesome man……loved it
Thank you ;)
Super……………..
how to Mask on the levels adjustment layer ?