In this Photoshop tutorial, I will show you the steps I took to Design an Interesting Fire Text Effect with Particles in Photoshop. This is an intermediate level tutorial so some steps can be a bit tricky, but why not have a try :)
Along the way, we will be using a fire stock image and attach it to a text base, then use a number of filters and custom brush to create an interesting particle effect.
Here is a preview of the final effect I have for this tutorial: (click to enlarge)
PSD File Download
You can download the PSD File for this tutorial via the VIP Members Area for only $6.95/Month (or less)! You will not only get this PSD File, but also 70+ other PSD Files + Extra Goodies + Exclusive Photoshop tutorials there. Signup now and get exclusive :) Find out more about the VIP Members Areas
OK Let’s get started!
To complete this tutorial, you will need the following stocks:
Cloud Brushset (Pick one from the list)
Step 1
Create a new document sized 770px * 900px with black background, create a new layer and use the cloud brush you picked to add some cloud texture to the top and bottom part of the canvas as shown below:
Hint: If the default brush size is too large, reduce its size to fit our canvas size.
Create a new layer again and add some smoke pattern with a cloud brush (with layer opacity set to around 20%):
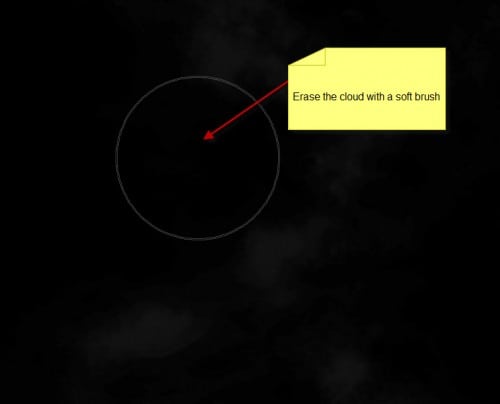
Use a soft eraser to remove the edges of the smoke layer so it blends into the background:
Step 2
Create a new layer and type a letter on this new layer with a dark grey colour:
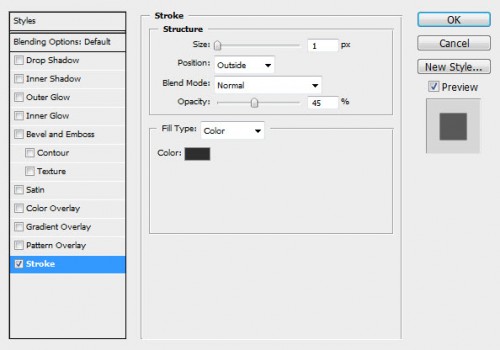
Apply the following Stroke effect to this text layer:
Then change this colour of this text layer to black, you will have the following effect:
Load the fire texture into Photoshop, use the quick selection tool and select a piece as shown below:

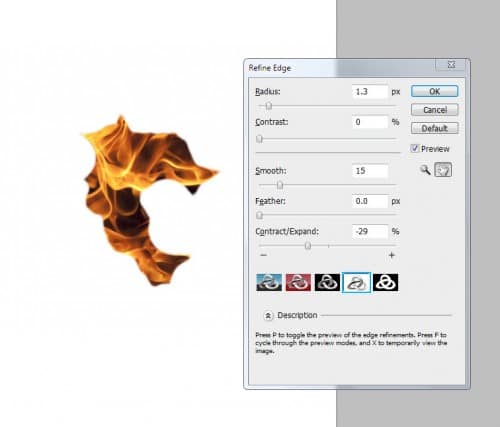
Apply the following Refine Edge settings to smooth out the edge:
Copy and paste the selection onto our text as shown below:
Step 3
Now let’s add some liquifying effect to this fire texture, use the liquify filter with the following settings:
Then, use the forward warping tool in the liquify filter, go crazy on this fire texture and add some flowing effect:

Apply the following Black and White adjustment to this fire layer:
Duplicate this fire layer a few times, resize and rotate them, then attach them to different part of the text as shown below:
Step 4
Now we can add some fire particles onto the text – go back to the fire texture and use the quick selection tool to select a few fire pieces as shown below:
Apply the following Refine Edge option to the selection:
Copy and paste the selection onto our text, resize it and change the blending mode to “Hard Light”:
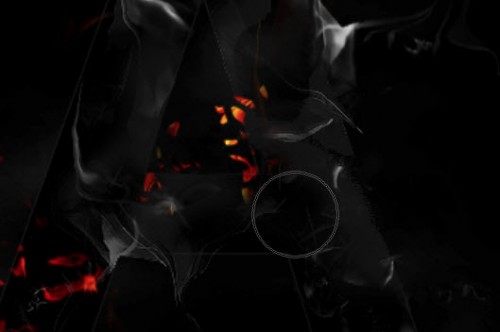
This is effect so far:
Duplicate this layer a few times and attach them to different parts of the letter as shown below:
Step 5
Now let’s make a simple stripe brush – create a new document with a thin rectangular shape, add a new layer and fill it with black colour as shown below:

Then define a new brush via Edit > Define Brush Preset:
Apply the following brush options to this brush:
Shape Dynamics
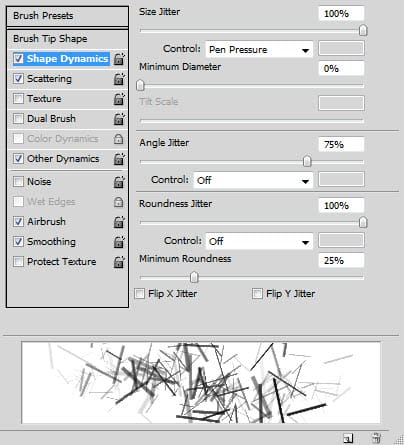
Scattering
Other Dynamics
Tick the “Airbrush” and “Smoothing” options.
Use this newly created brush, paint some particles around the text as shown below:

Step 6
We’re almost done! For some final retouches, I added some red colour over the text with a colour balance adjustment layer (you can also use a red brush to paint over the text with the “Color” blending mode):
Hint: use layer mask on this colour layer to assist masking colours from the areas that you don’t want to have colours on.

Use a soft white brush, add some highlight over the text with the “overlay” blending mode for this highlight layer:
I also added some more fire texture around the text with “Hard Light” blending mode for those added fire layers:
I also added some lines with method described in this tutorial here:

and here is the final effect I have for this tutorial: (click to enlarge)
That’s it for this tutorial! Hope you enjoy it and find it useful! Till next time, have a great day!








8 Comments
thanks men ^_^
there are some brushes that i can’t use in CS5 ,why is it ? and i don’t know where’s that mask layer … could you teach me ?..(not Dougie)
fantastic
Yes some brushes may not be compatible with cs5. For layer mask, I have a basic video tutorial here might be useful to you: http://youtu.be/MLlKUz1q_VE
thanks ^_^
HORRIBLE tutorial!!!! No menu explications no hotkeys.
Tutorial fails majorly. Lack of instructions, and tips on how to do specific things. I suggest you stop writing tutorials if you’re going to have them like this.
If this is meant for an Advanced Photoshop user, then list it as such otherwise, include more directions.
I really liked it until the end.. just were the redness comes in and the project is finished, it lacks instructions.. didnt really get how to finish it.