Close Menu
PSD VaultPSD Vault
  • VIP Area
  • Photoshop Basics
  • Photo Effect
  • Text Effect
  • Premium Tuts
  • Resources
  • Drawing
  • Inspiration
  • Web Graphics
  • Abstract
  • Freebies
  • Advertise
  • Get in Touch
  • About PSD Vault
Facebook Instagram Pinterest YouTube TikTok
Facebook Instagram Pinterest YouTube TikTok RSS
PSD VaultPSD Vault
  • VIP Area
    • Sign Up
    • Log In
  • Photoshop Basics
  • AI
  • Photoshop Error Fixes
  • Video Tutorial
  • Photo Effect
  • Text Effect
  • Premium Tuts
  • Drawing
  • Opinion
PSD VaultPSD Vault
Home»Text Effect»Create Abstract Layered Text with Decorative Lighting Effect in Photoshop
Text Effect

Create Abstract Layered Text with Decorative Lighting Effect in Photoshop

By James QuMay 7, 20124 Mins Read
Share
Facebook Twitter LinkedIn Pinterest Email

In this Photoshop tutorial, I will show you the steps I took to Create this interesting, layered Text Effect with Awesome Lighting in Photoshop. This is an beginner to intermediate level Photoshop tutorial, have a try!

We will use techniques such as layer blending, filter effect, custom brushes and transform tools to create this text effect.

The PSD file of this tutorial is available via the PSD Vault VIP members area.

Here is a preview of the final effect I have for this tutorial: (click to enlarge)

PSD Vault VIP Membership

You can download the PSD File for this tutorial via the VIP Members Area for only $6.95/Month (or less)! You will not only get this PSD File, but also 100+ other PSD Files + Extra Goodies + Exclusive Photoshop tutorials there. Signup now and get exclusive!

OK Let’s get started!

To complete this tutorial, you will need the following stocks:

Font

No Stock image is required for this tutorial.

Step 1

Create a new document with black background (canvas size doesn’t matter for this tutorial), use the font we downloaded, type some pick texts on it:

Duplicate this layer once and choose a different text colour, move this layer slightly to the right:

Duplicate this second layer once more, again we choose a different colour and move it slightly to the right, you will have the following effect:

Step 2

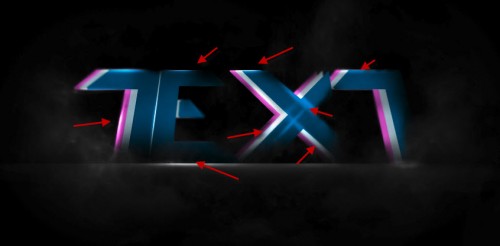
Rasterize those text layer and merge them together, use a soft eraser to erase the edges of the text as shown below to add some depth:
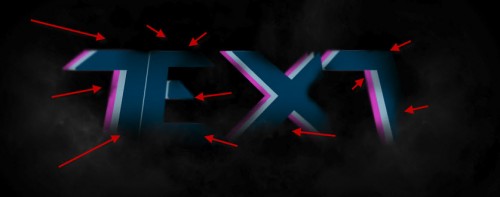
Use the blur tool to blur out some part of the text as well:

Optional Step: you can add a base line for the text by using a white brush to paint a big dot on the top edge of the canvas:
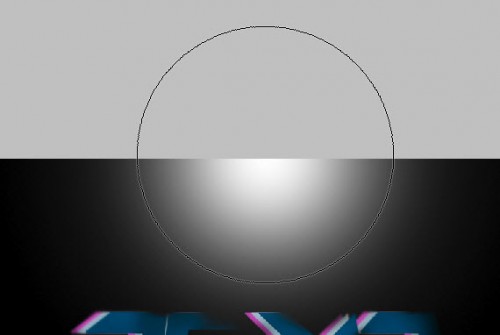
Then compress it down with the free transform tool:

Reduce the layer opacity to around 50% for this layer, effect as shown below:

Step 3

Now let’s add some highlighting effect – create a new layer and use a soft white brush to paint a dot like this:

Hit Ctrl + T and use the free transform tool to compress it down:

Change this layer blending mode to “overlay”:

Duplicate this light layer twice for a more shining effect:
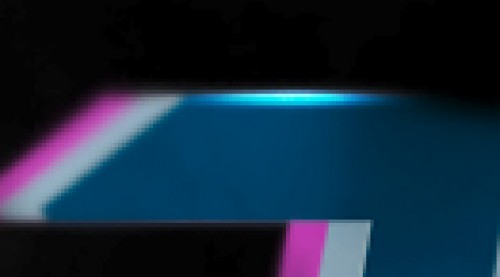
Repeat the above steps, add some further highlights around the text to the positions that you desire:

Step 4

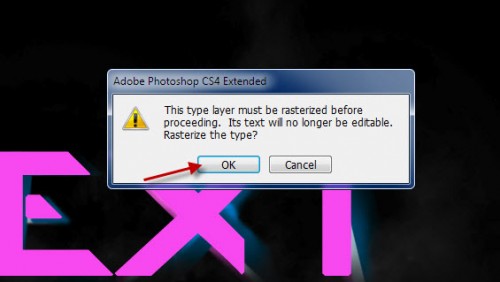
We can now add some pink lighting over the text – so let’s duplicate this original pick text layer and move it above all previous layers, go to Filter > Blur > Motion blur, and click on “OK” when you see the following window:

Apply the following motion blur settings:
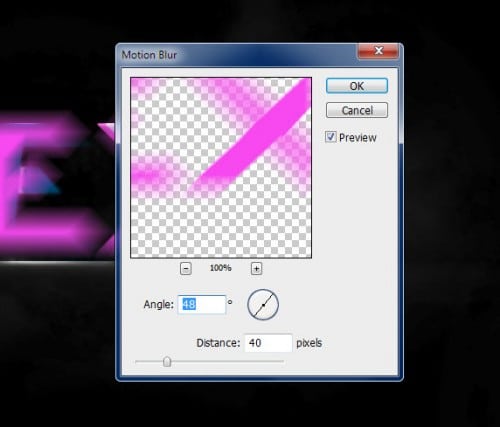
Hit Ctrl + F and apply this filter twice for more blurring effect:

Then use a soft erase to remove some parts of the blur to add more depth:
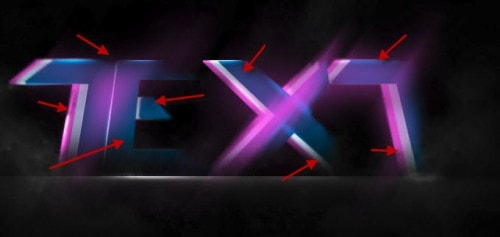
Duplicate this motion blur layer 3 times, and you will have the following effect:

Step 5

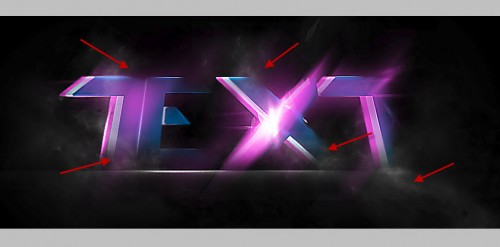
OK we’re almost done! For some final retouches, I added some further lighting effect to the “X” letter with method describe above (except we keep the blending mode to “normal” this time):

Add some abstract particles with a custom brush (you can find plenty over the internet) around this additional lighting area:

Then I flatten the image, duplicate the background layer and apply this unsharp mask filter to bring some more details for the text:

Paint or render some more cloud effect around the text for some more dramatic effect:

I then further added some colour effect onto the image with selective colours and image adjustment layer, and here is the final effect I have: (click to enlarge)

That’s it for this tutorial! Hope you enjoy it and find it useful! Till next time, have a great day!


layered text effect photoshop text effect lighting text effect photoshop
Share. Facebook Twitter Pinterest LinkedIn Tumblr Email
James Qu
  • Website

James is a seasoned Photoshop expert with over 25 years of experience based in Australia. As the driving force behind PSD Vault, he authors the majority of its in-depth tutorials and insightful articles.

Related Posts

Create Realistic Neon Text Effect in Photoshop

November 8, 2025

How to Create In-Water Text Effect with Displacement Maps in Photoshop

October 17, 2025

Create Deep Space Text Effect in Photoshop

August 22, 2025

17 Comments

  1. Kendall Kildare on May 7, 2012 12:03 PM

    Very cool! Nice tutorial.

  2. Nisha Gandhi on May 9, 2012 2:22 AM

    wow this is awesome!

  3. Alex on May 13, 2012 8:17 AM

    What did you do to the “TEXT” before the soft eraser to get the 3D affect? The last T is at an angle after the soft eraser.

  4. Non on May 14, 2012 8:08 PM

    useless tutorial that doesnt include all detail guide and dl for the brushes sigh

  5. Ciliartist on May 19, 2012 2:02 AM

    interesting but my brushes and paint will have to do

  6. drumguyrobc on May 30, 2012 4:27 AM

    I would really like to see what you did to get the final image.

  7. Kjhasdfjhadf on June 9, 2012 3:48 AM

    could you please update this to be more detailed with what brushes you used and the colour effect? 

  8. sanju on June 9, 2012 8:28 PM

    wow

  9. Lwd112 on June 16, 2012 7:56 PM

    great tutorial!
    my result: http://kepfeltoltes.hu/120616/titans_www.kepfeltoltes.hu_.jpg

  10. Ursu Andrei on August 29, 2012 11:23 PM

    My result! :)
    https://www.facebook.com/photo.php?fbid=471537052880471&set=a.232227886811390.63807.201798013187711&type=1&theater

  11. Green on September 18, 2012 3:05 PM

    To complete this tutorial your expected to have a certain level of “Skill”

  12. disqus_dmGvmTq0N7 on October 28, 2012 7:25 PM

    THANKS

  13. EDD on April 18, 2013 3:54 AM

    Why download the psd when you are explaining it

  14. ramy on August 27, 2013 9:54 PM

    bad tutorial u just say do and do but dont see us how just some photos after u do and do -_-

  15. TJP on September 26, 2013 3:01 PM

    Not going to say it is good or bad… but it definitely gave me a great idea for my own work. I liked the effects and what not you used, but you do need to explain every step in a tutorial. Its obvious to experienced artists, but for the beginners are looking at some of the pix/steps going “Wait what??”

  16. Derk Jan on October 1, 2013 4:56 AM

    I used about the samen technique, but at the end i put some flames on the background, influenceer with Sue and Saturation, to get the purple and blue colors in the flames.

  17. Mega Man on March 29, 2014 7:09 AM

    A Really simple, easy-to=follow and brilliant tutorial. Thanks!

Don't Miss

How to Give Your Portrait Cyberpunk Effect in Photoshop

November 15, 2025

Create Realistic Neon Text Effect in Photoshop

November 8, 2025

How to Enlarge Images Without Losing Quality in Photoshop (using Super Resolution)

November 6, 2025

For Beginners

Basics

How to Create Relistic Burning Car Effect in Photoshop

By James QuOctober 17, 20251 Min Read

How to Pixelate an Image in Photoshop

October 16, 2025

How to Stay Ahead of Every Photoshop Update & Unlock Their Full Power

October 11, 2025

Curves or Levels: Choosing the Right Tool for Stunning Edits

September 28, 2025

You May Also Like

Text Effect

Create Realistic Neon Text Effect in Photoshop

By Valentin PetroffNovember 8, 20253 Mins Read
Text Effect

How to Create In-Water Text Effect with Displacement Maps in Photoshop

By James QuOctober 17, 20253 Mins Read
Text Effect

Create Deep Space Text Effect in Photoshop

By James QuAugust 22, 20254 Mins Read
Facebook X (Twitter) Instagram Pinterest
  • About Us
  • Get in Touch
  • Advertise
  • VIP Area
  • Privacy Policy
  • Terms & Conditions
© 2025 PSD Vault. All Right Reserved.

Type above and press Enter to search. Press Esc to cancel.

Manage Consent
To provide the best experiences, we use technologies like cookies to store and/or access device information. Consenting to these technologies will allow us to process data such as browsing behavior or unique IDs on this site. Not consenting or withdrawing consent, may adversely affect certain features and functions.
Functional Always active
The technical storage or access is strictly necessary for the legitimate purpose of enabling the use of a specific service explicitly requested by the subscriber or user, or for the sole purpose of carrying out the transmission of a communication over an electronic communications network.
Preferences
The technical storage or access is necessary for the legitimate purpose of storing preferences that are not requested by the subscriber or user.
Statistics
The technical storage or access that is used exclusively for statistical purposes. The technical storage or access that is used exclusively for anonymous statistical purposes. Without a subpoena, voluntary compliance on the part of your Internet Service Provider, or additional records from a third party, information stored or retrieved for this purpose alone cannot usually be used to identify you.
Marketing
The technical storage or access is required to create user profiles to send advertising, or to track the user on a website or across several websites for similar marketing purposes.
  • Manage options
  • Manage services
  • Manage {vendor_count} vendors
  • Read more about these purposes
View preferences
  • {title}
  • {title}
  • {title}