Close Menu
PSD VaultPSD Vault
  • VIP Area
  • Photoshop Basics
  • Photo Effect
  • Text Effect
  • Premium Tuts
  • Resources
  • Drawing
  • Inspiration
  • Web Graphics
  • Abstract
  • Freebies
  • Advertise
  • Get in Touch
  • About PSD Vault
Facebook Instagram Pinterest YouTube TikTok
Facebook Instagram Pinterest YouTube TikTok RSS
PSD VaultPSD Vault
  • VIP Area
    • Sign Up
    • Log In
  • Photoshop Basics
  • AI
  • Photoshop Error Fixes
  • Video Tutorial
  • Photo Effect
  • Text Effect
  • Premium Tuts
  • Drawing
  • Opinion
PSD VaultPSD Vault
Home»AI»Unlock the Power of Photoshop’s Generative Expand Tool
AI

Unlock the Power of Photoshop’s Generative Expand Tool

By Lana WilsonMay 27, 20254 Mins Read
Share
Facebook Twitter LinkedIn Pinterest Email

Photoshop 2024 brings us an exciting new feature: Generative Expand. This tool lets you extend your images in any direction. It’s like magic! In this tutorial, we’ll explore how to use Generative Expand. We’ll also look at some cool tricks to make the most of it.

What is Generative Expand?

Generative Expand is an AI-powered tool in Photoshop. It lets you make your images bigger. The AI fills in the new space with matching content. It’s great for creating panoramas or fixing cropped photos.

Getting Started with Generative Expand

First, let’s open Photoshop 2024.

Photoshop's Generative Expand Tool - Get Started

Then, follow these steps:

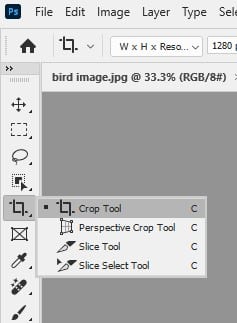
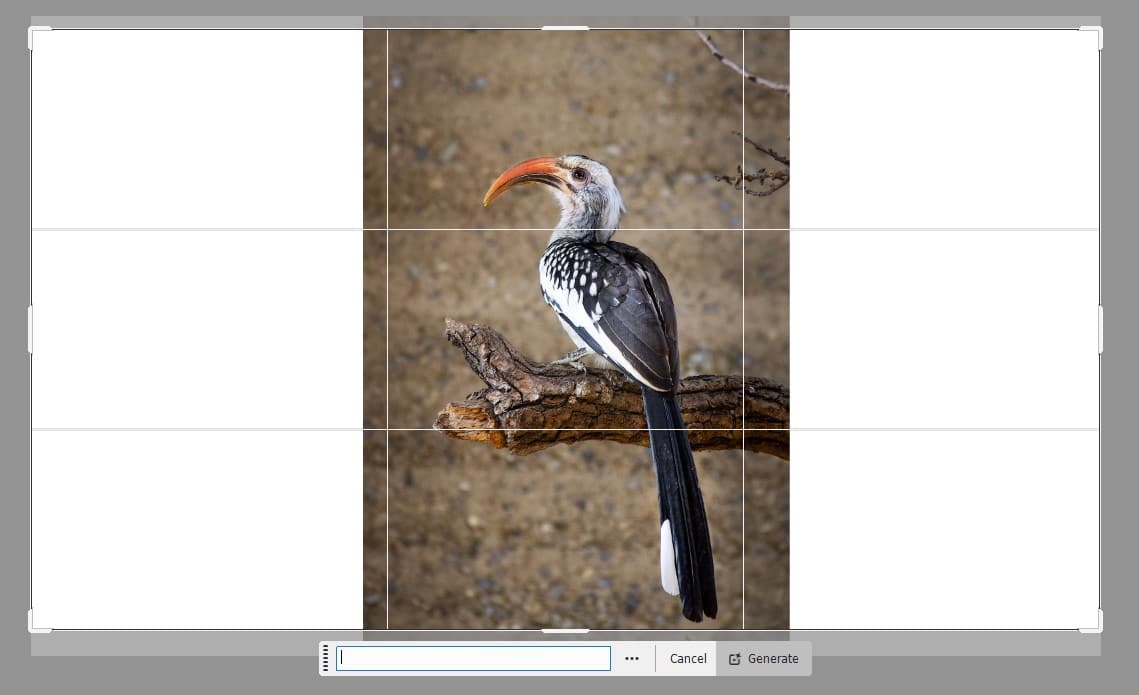
Open your image. Select the Crop Tool from the toolbar.

Photoshop's Generative Expand Tool - Use Crop Tool

Look for “Generative Expand” in the Fill dropdown at the top.

Photoshop's Generative Expand Tool - Property Panel

    Now you’re ready to start expanding!

    Expanding Your Image

    Here’s how to expand your image:

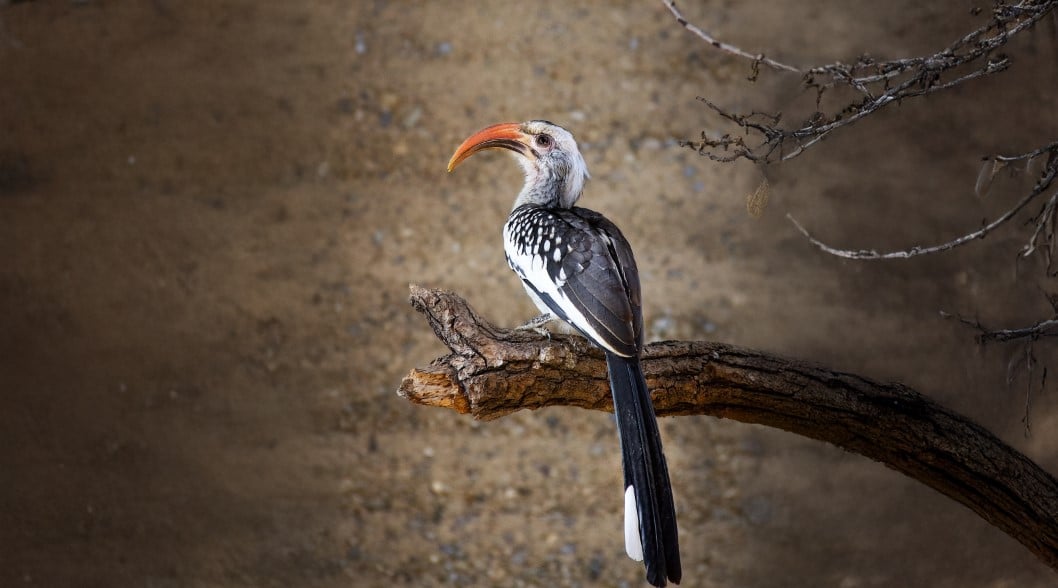
    Drag the crop handles outward and click the checkmark or press Enter. Wait for the AI to work its magic.

    Photoshop's Generative Expand Tool - Expand Your Image

      It’s that simple! The AI will fill in the new space. It matches the style of your original image.

      Photoshop's Generative Expand Tool - Result

      Fine-Tuning Your Results

      Sometimes, you might want to tweak the results. Here’s how:

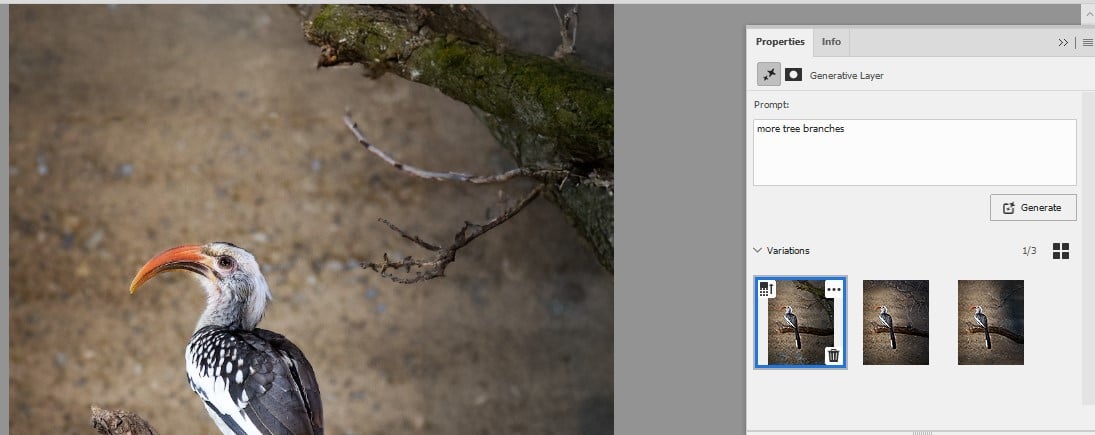
      1. Look for the Properties panel.
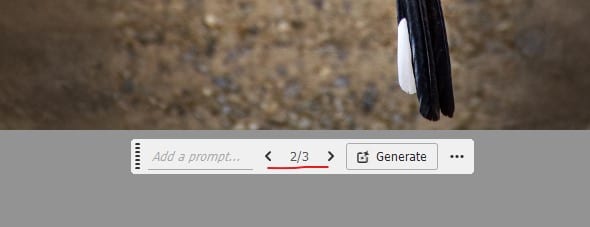
      2. Scroll down to find different variations.
      3. Click on a variation you like.
      4. If you’re not happy, click “Generate” for more options.
      Photoshop's Generative Expand Tool - Fine Tune Result

      You can keep trying until you get the perfect result.

      Using Text Prompts

      Want more control? Try using text prompts. Here’s how:

      1. After expanding, look for the text box in the Properties panel.
      2. Type in what you want to see.
      3. Click “Generate”.
      Photoshop's Generative Expand Tool - Generate

      Expanding in Multiple Directions

      You can expand your image more than once. Here’s how:

      1. Use Generative Expand in one direction.
      2. Then, use the Crop Tool again to expand in another direction.
      3. Repeat the process.

      This way, you can create super-wide panoramas or tall, vertical images.

      Blending Expanded Areas

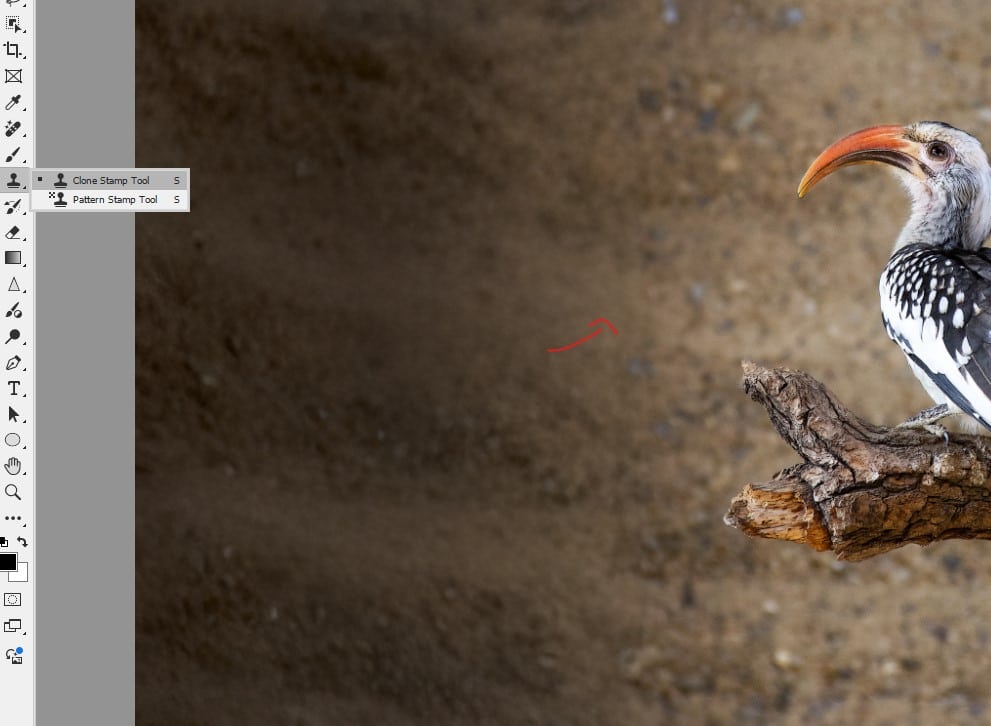
      Sometimes, the expanded area might not blend perfectly. Here’s a trick:

      1. Use the Clone Stamp Tool.
      2. Sample from the original image.
      3. Carefully blend the edges of the expanded area.

      This helps create a seamless look.

      Photoshop's Generative Expand Tool - Clone Stamp Tool

      Creating Panoramas

      Generative Expand is great for panoramas. Here’s how:

      1. Start with a wide image.
      2. Expand both sides.
      3. Use text prompts to match the scene.
      4. Blend if needed.

      You can create stunning wide-angle views this way.

      Fixing Cropped Photos

      Have a photo where something important is cut off? Generative Expand can help:

      1. Expand the cropped side.
      2. Use a text prompt to describe the missing part.
      3. Fine-tune with the Clone Stamp if needed.

      It’s like uncropping your photos!

      Photoshop's Generative Expand Tool - uncropping

      Adding Creative Elements

      Generative Expand isn’t just for realistic edits. Get creative:

      1. Expand your image.
      2. Use text prompts to add fantasy elements.
      3. Blend and adjust to make it look natural.

      You can turn a normal scene into something magical!

      Combining with Other Tools

      Generative Expand works well with other Photoshop tools:

      1. Use Generative Expand to add space.
      2. Then use Generative Fill to add specific objects.
      3. Finish with manual adjustments.

      This combo gives you ultimate control.

      Tips for Best Results

      Here are some tips to get the most out of Generative Expand:

      1. Start with high-quality images.
      2. Use simple, clear text prompts.
      3. Expand in small steps for more control.
      4. Always check the edges for seamless blending.
      5. Don’t be afraid to try multiple variations.

      Remember, practice makes perfect!

      Limitations to Keep in Mind

      While powerful, Generative Expand has some limits:

      1. It might struggle with complex patterns.
      2. Very specific details can be hard to generate.
      3. Results can vary, so always double-check.

      Knowing these limits helps you use the tool better.

      Real-World Applications

      Generative Expand has many uses:

      1. Landscape photography: Create wider views.
      2. Portrait photography: Add more background.
      3. Product photography: Extend backgrounds for different layouts.
      4. Graphic design: Adapt images to different formats.

      The possibilities are endless!

      Conclusion

      Generative Expand is a powerful new tool in Photoshop 2024. It opens up new possibilities for editing and creating images. With practice, you can use it to transform your photos in amazing ways.

      Remember, Generative Expand is a tool to enhance your creativity, not replace it. Use it to bring your vision to life. Experiment, have fun, and create something amazing!

      Additional Resources

      • How to Use Reference Image AI Feature in Photoshop
      • Elevate Your Photo with AI Noise Reduction and Sharpening in Photoshop

      Final Tips

      1. Always work on a copy of your original image.
      2. Save versions as you go to compare results.
      3. Combine Generative Expand with manual edits for the best results.
      4. Share your creations and learn from others in the Photoshop community.

      Generative Expand is just the beginning. What will you create with it?

      generative expand photoshop
      Share. Facebook Twitter Pinterest LinkedIn Tumblr Email
      Lana Wilson

      Lana Wilson is a Photoshop artist with over 10 years of experience. She is known for her creative and innovative use of Photoshop to create stunning images. Her work has been featured in magazines, websites, and advertising campaigns. Lana is passionate about using Photoshop to tell stories and create emotional connections with her audience. She is always looking for new ways to use the software to push the boundaries of what is possible.

      Related Posts

      Curves or Levels: Choosing the Right Tool for Stunning Edits

      September 28, 2025

      How to Create Double Exposure Photos in Photoshop (Easy Tutorial 2025)

      September 27, 2025

      How to Use Reference Image AI Feature in Photoshop

      September 26, 2025

      Comments are closed.

      Don't Miss

      Curves or Levels: Choosing the Right Tool for Stunning Edits

      September 28, 2025

      How to Create Double Exposure Photos in Photoshop (Easy Tutorial 2025)

      September 27, 2025

      How to Use Reference Image AI Feature in Photoshop

      September 26, 2025

      For Beginners

      Basics

      Curves or Levels: Choosing the Right Tool for Stunning Edits

      By Lana WilsonSeptember 28, 20255 Mins Read

      How to Read Photoshop Histograms for Beginners

      September 19, 2025

      How to Master Auto-Blend Layers in Photoshop for Stunning Image Blending

      September 13, 2025

      10 Genius Tips to Master Photoshop’s AI Object Selection Tool

      August 30, 2025

      You May Also Like

      Basics

      Curves or Levels: Choosing the Right Tool for Stunning Edits

      By Lana WilsonSeptember 28, 20255 Mins Read
      Photo Effect

      How to Create Double Exposure Photos in Photoshop (Easy Tutorial 2025)

      By James QuSeptember 27, 20254 Mins Read
      AI

      How to Use Reference Image AI Feature in Photoshop

      By Mario TeodosioSeptember 26, 20254 Mins Read
      Facebook X (Twitter) Instagram Pinterest
      • About Us
      • Get in Touch
      • Advertise
      • VIP Area
      • Privacy Policy
      • Terms & Conditions
      © 2025 PSD Vault. All Right Reserved.

      Type above and press Enter to search. Press Esc to cancel.

      Manage Consent
      To provide the best experiences, we use technologies like cookies to store and/or access device information. Consenting to these technologies will allow us to process data such as browsing behavior or unique IDs on this site. Not consenting or withdrawing consent, may adversely affect certain features and functions.
      Functional Always active
      The technical storage or access is strictly necessary for the legitimate purpose of enabling the use of a specific service explicitly requested by the subscriber or user, or for the sole purpose of carrying out the transmission of a communication over an electronic communications network.
      Preferences
      The technical storage or access is necessary for the legitimate purpose of storing preferences that are not requested by the subscriber or user.
      Statistics
      The technical storage or access that is used exclusively for statistical purposes. The technical storage or access that is used exclusively for anonymous statistical purposes. Without a subpoena, voluntary compliance on the part of your Internet Service Provider, or additional records from a third party, information stored or retrieved for this purpose alone cannot usually be used to identify you.
      Marketing
      The technical storage or access is required to create user profiles to send advertising, or to track the user on a website or across several websites for similar marketing purposes.
      Manage options Manage services Manage {vendor_count} vendors Read more about these purposes
      View preferences
      {title} {title} {title}