In this tutorial, you will learn the process of how to create a distant planet exploration scene in Photoshop. We will transform a simple mountain stock photo into a hostile, alien planet in just 5 steps. Have a try!
The difficulty of this Photoshop tutorial is intermediate. The PSD file of this tutorial is available via the PSD Vault VIP members area.
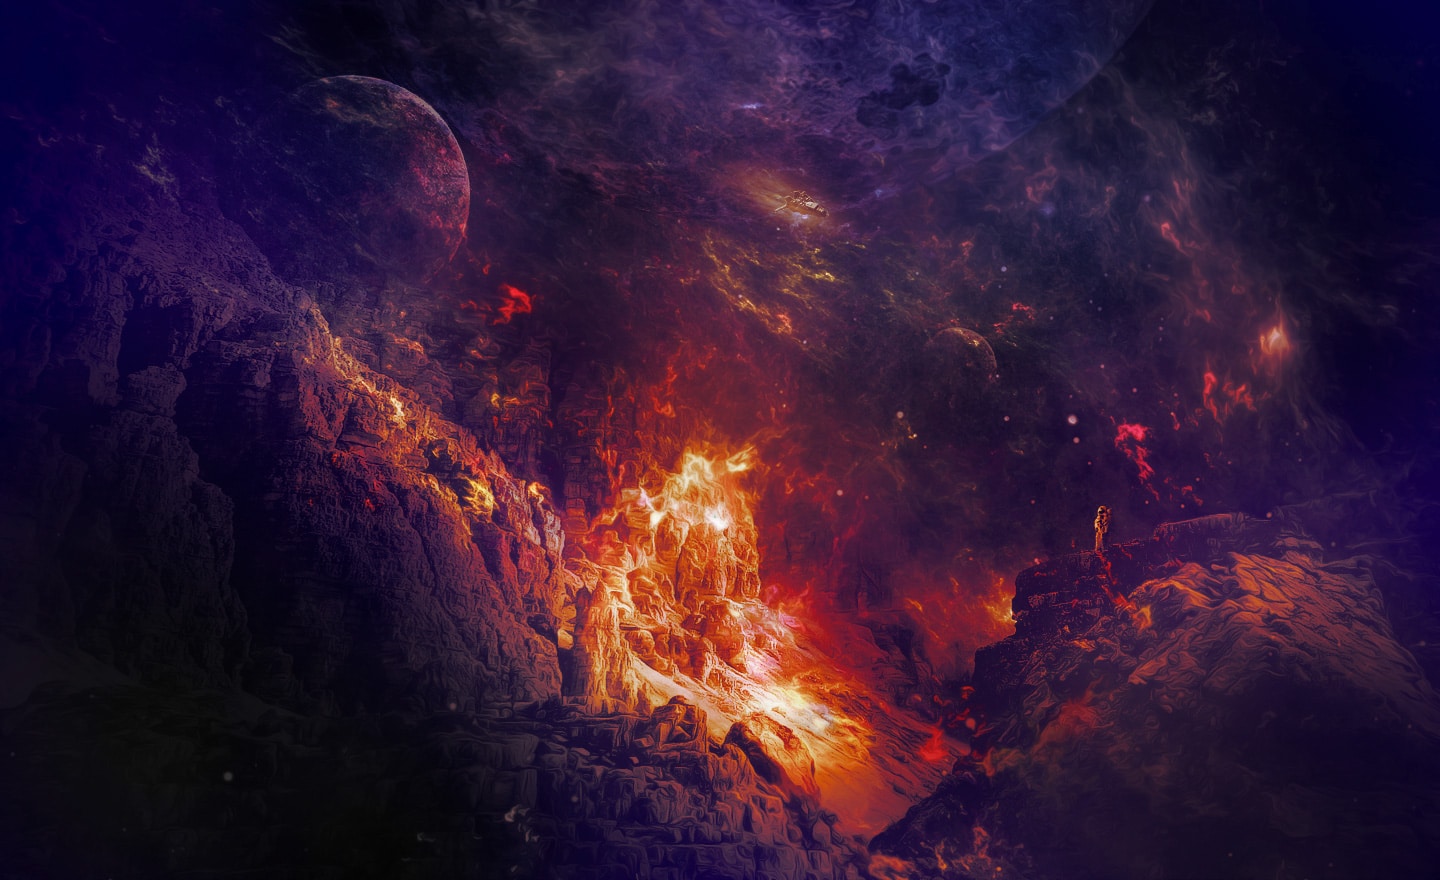
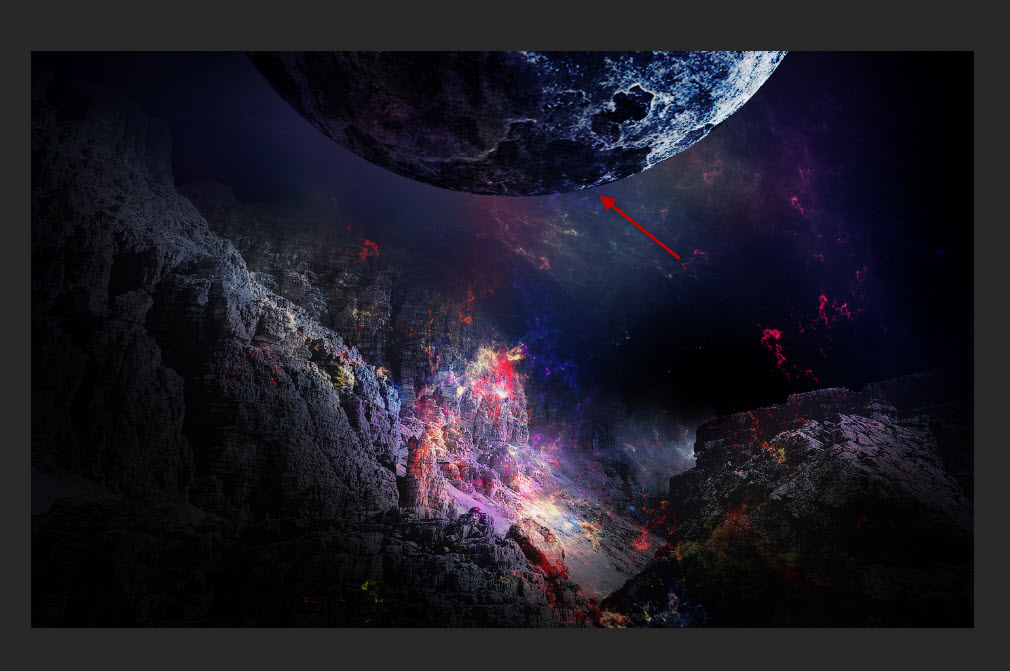
Here is a preview of the final effect I have for this tutorial: (click to enlarge)
Stock Image Required
To complete this tutorial, you will need the following stocks:
Mountain By kuschelirmel-stock
Nebula 2 (optional)
Step 1
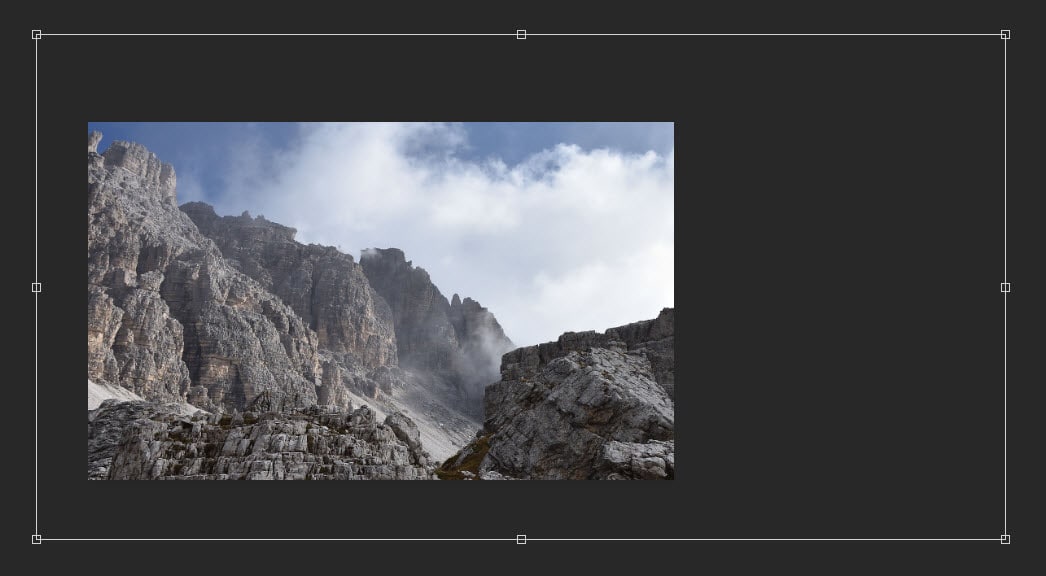
Create a new document sized 1440px * 800px with black background. Place the mountain image onto the following area:
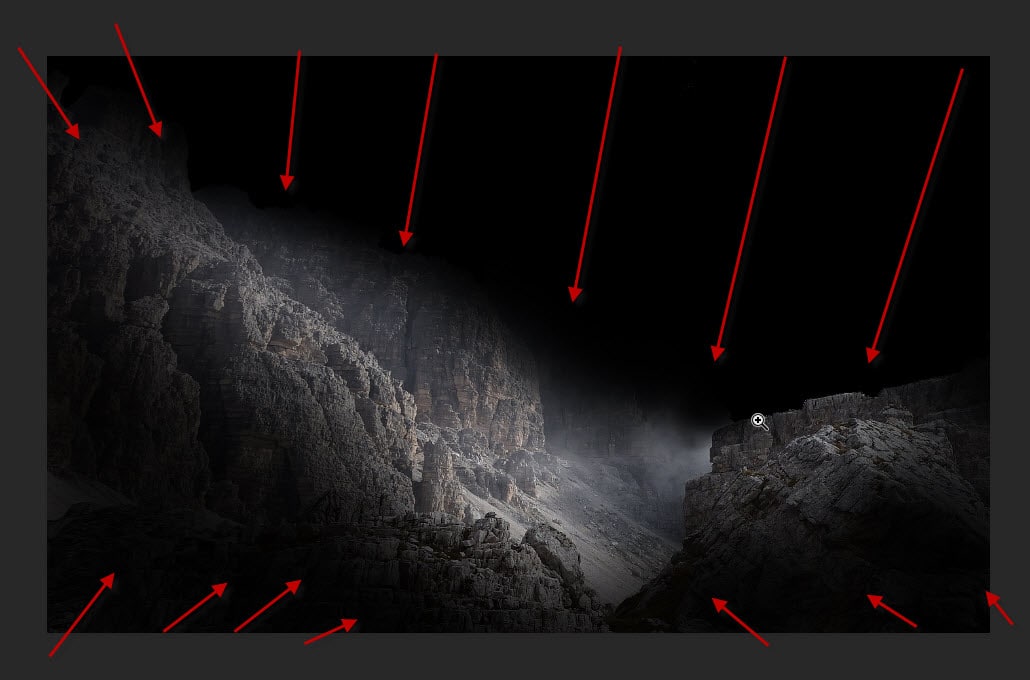
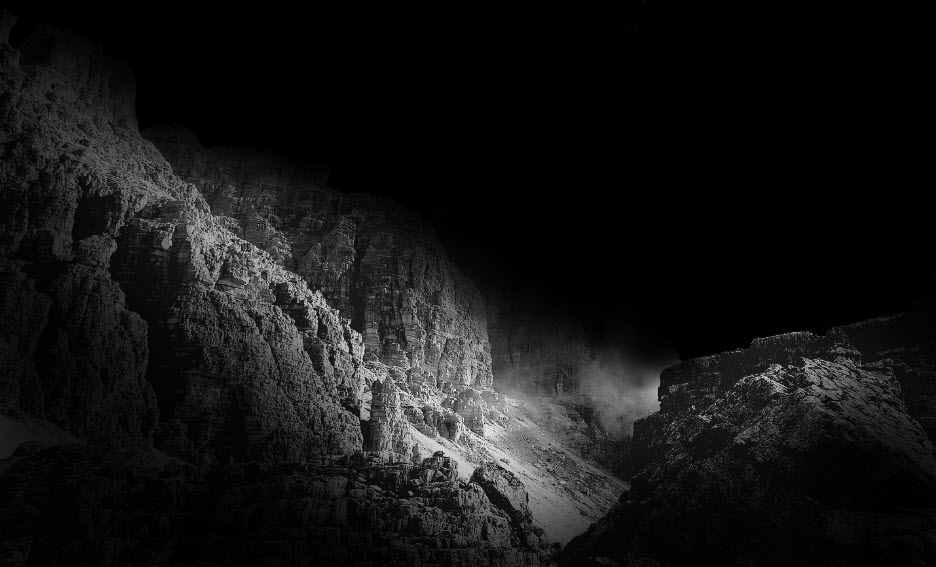
Remove the sky portion, as well as the bottom corners of the mountain layer:
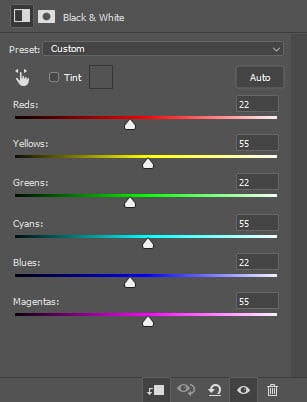
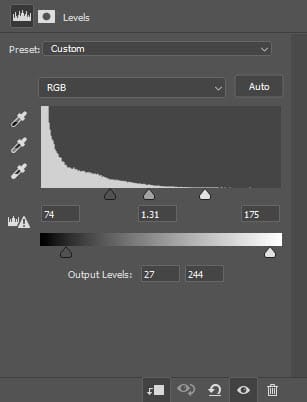
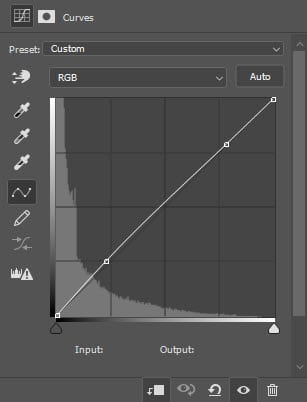
Apply the following image adjustments for this mountain layer:
Black and White
Levels
Curves
and here is the effect so far:
Step 2
Add the nebula 1 image onto the following position – we will create a colorful background with this:
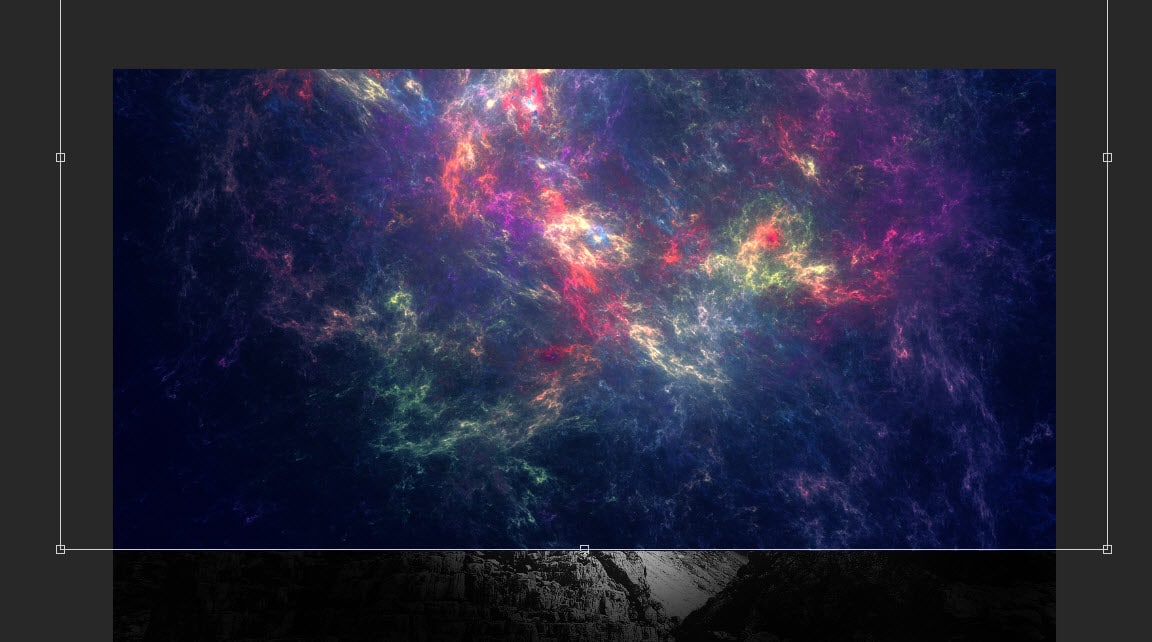
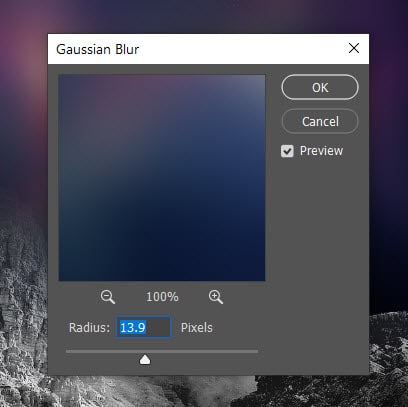
Use a soft eraser to remove the following area:
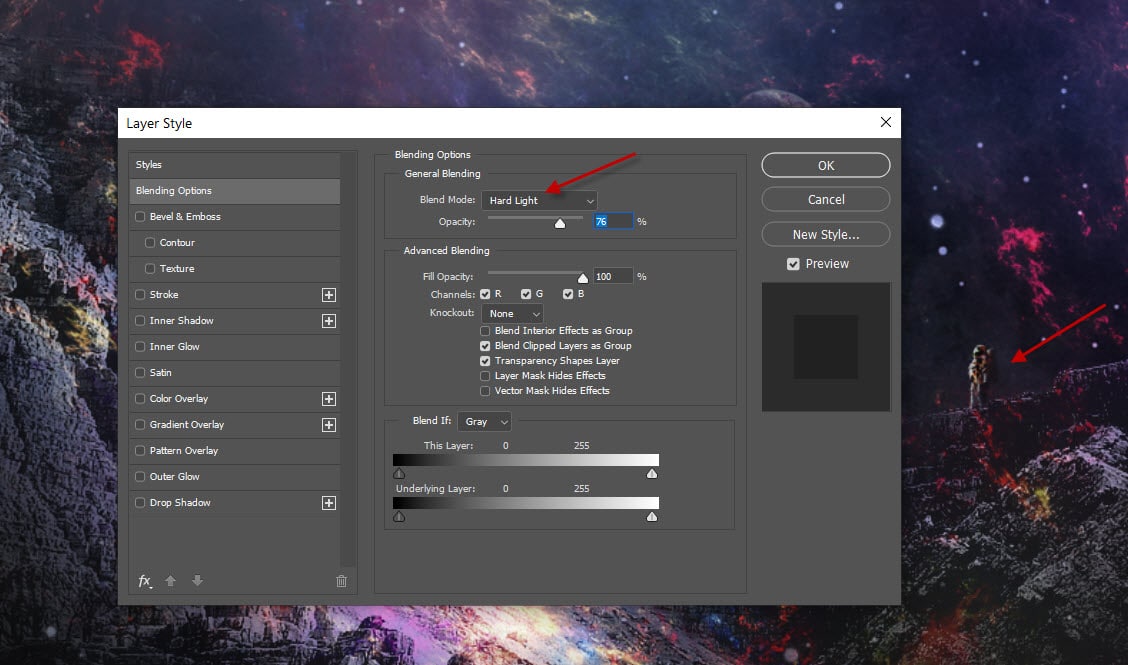
Set the layer blend mode to “Hard Light”:
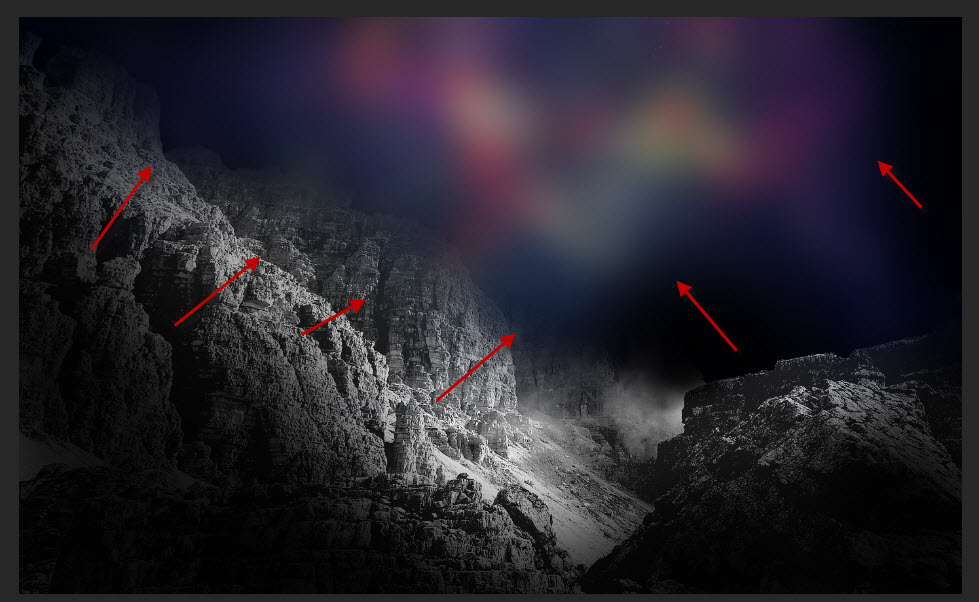
Copy and paste the nebula image onto our document again, set the layer blend mode to “Hard Light” as well and ensure it cover the mountain rocks.
Then, use a soft eraser to remove the following areas:
Optional step: you can apply Nebula 2 stock image onto our document, to add more nebula effect around the canvas.
Step 3
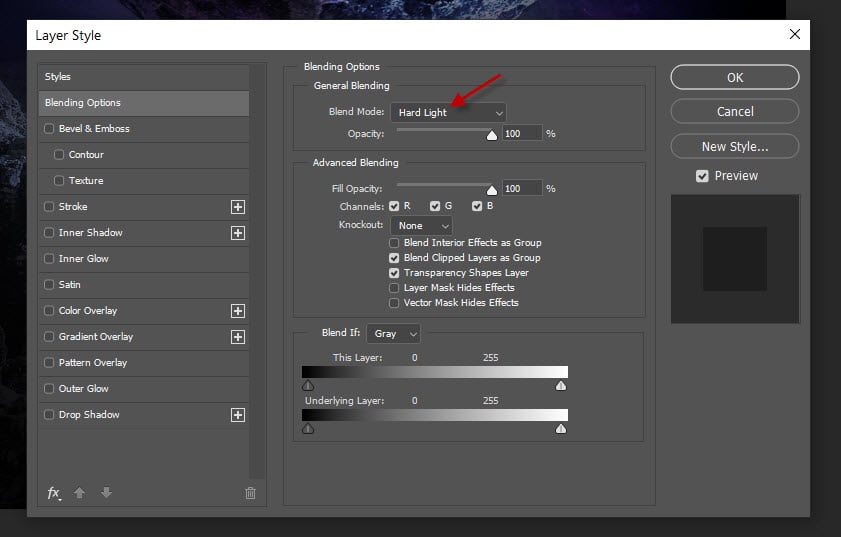
Add one of the planets from our stock image, place it to the following position:
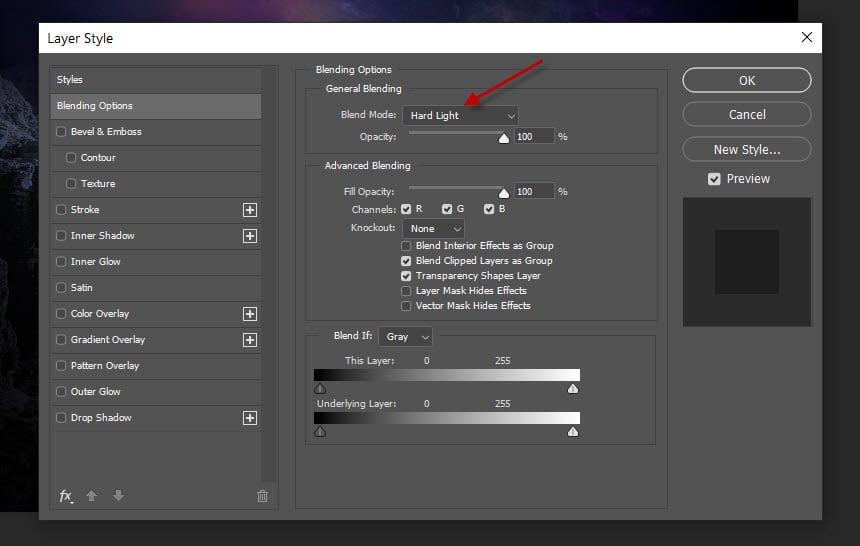
Set layer blend mode to “Hard Light”:
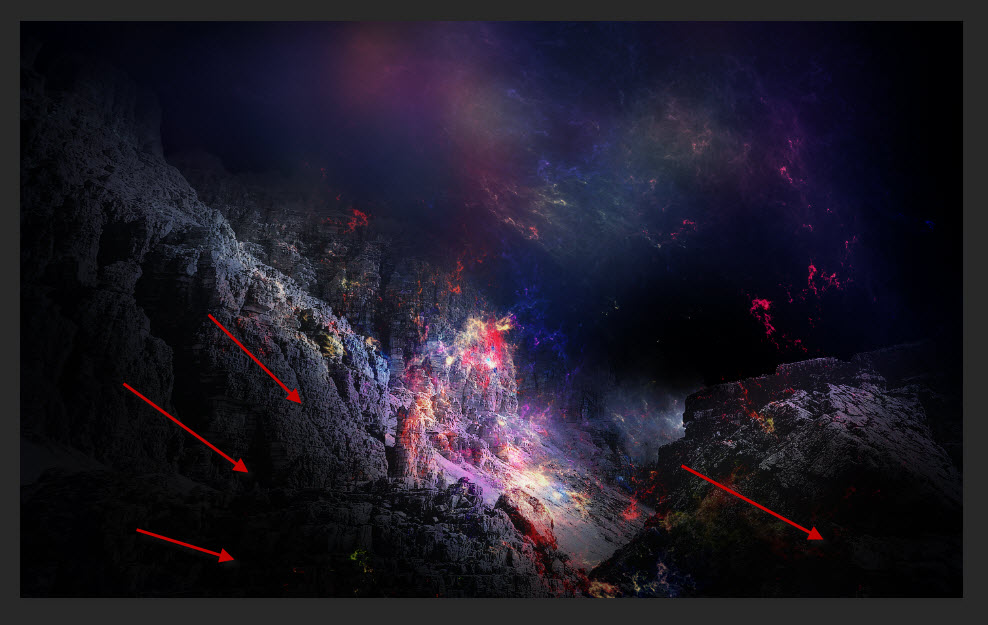
Add more planets onto our document as shown below:
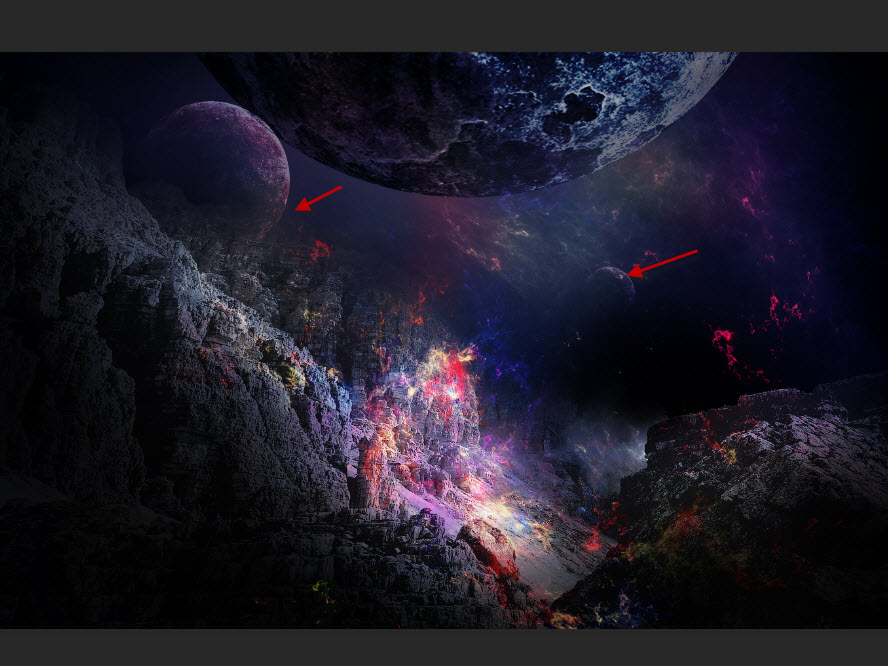
Make sure you adjust the layer opacity of these new planet layers to be around 50%, and use the Free Transform tool to adjust the size of each planet. This will add depth to our image.
Step 4
Load the spacecraft image into Photoshop. Copy and paste it onto the following position with a greatly-reduced size:

Render some cloud around the spacecraft, using a cloud brush or the cloud filter:
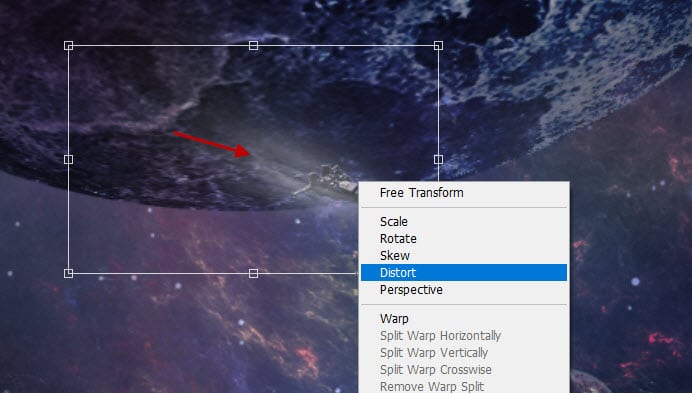
The distort & warp feature can take a while to get used to – remember the ultimate goal here is to produce a trail of engine smoke for the spacecraft, and all your effort should focus on making this.
Step 5
Load the astronaut image into Photoshop. Copy and paste the astronaut onto our document and place him on top of the mountain on the right side. Set the layer blend mode to “Hard Light”:
This is the overall result so far:
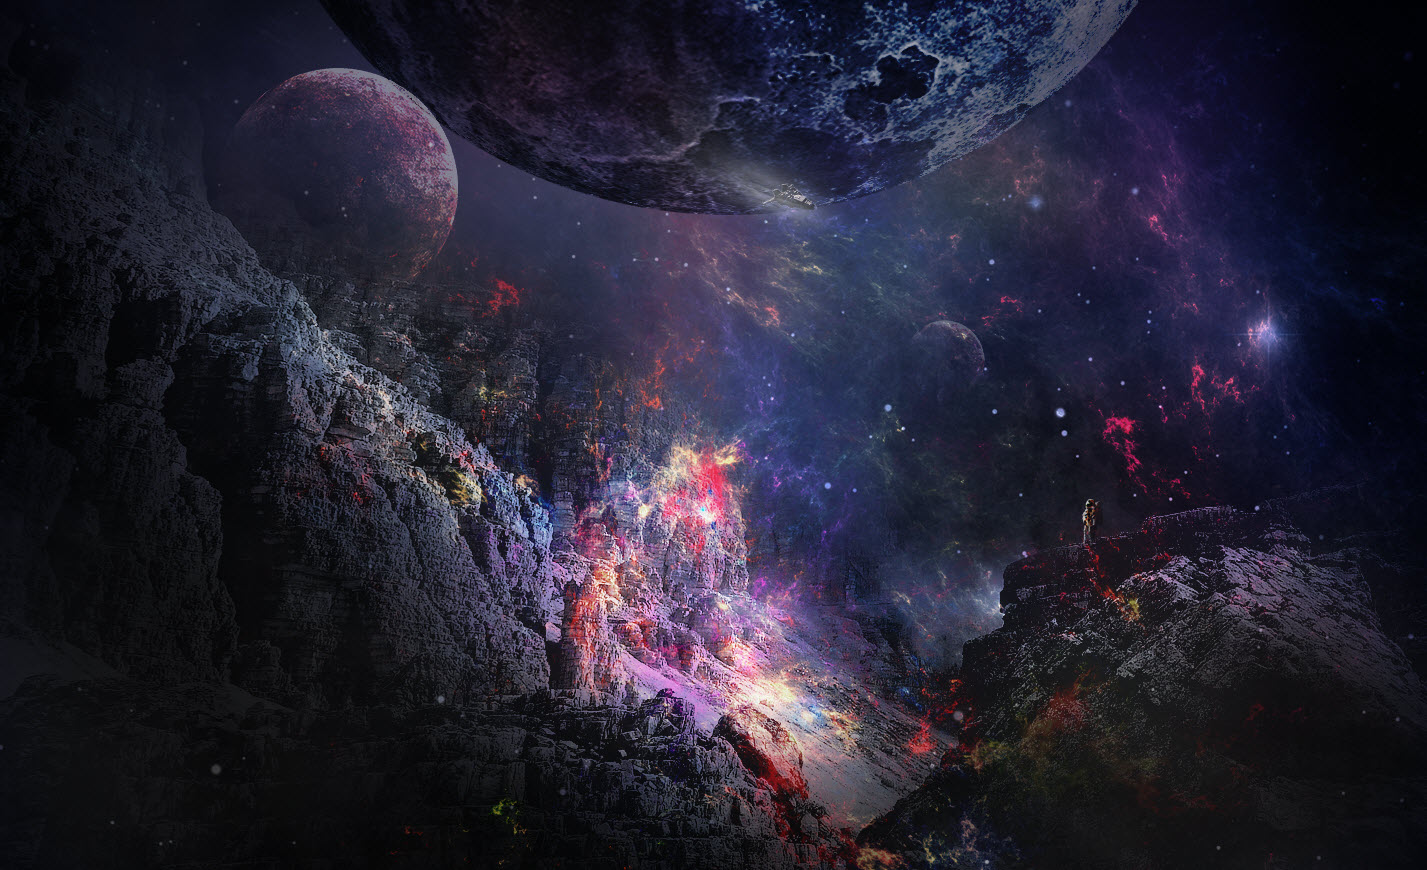
I further adjusted the color balance of the image, just to make to the center of the image look like a erupting volcano. This is my final result: (click to enlarge)

That’s it for this tutorial! Leave me a comment below if you have any questions and I will try my best to answer it.