
Resizing images without losing quality is a fundamental skill for anyone using Adobe Photoshop, especially for beginners creating content for web, print, or social media. With Photoshop 2025’s advanced tools like Preserve Details 2.0 and AI-powered upscaling, you can resize images while maintaining sharpness and clarity.
In this beginner-friendly tutorial, we’ll guide you through the process step-by-step, share tips and tricks, and highlight potential shortcomings. Whether you’re preparing images for your blog or designing graphics, this guide will help you master resizing in Photoshop 2025.
Why Resizing Images Matters
Resizing images is crucial for optimizing file sizes or fitting specific dimensions, such as for Instagram posts or website banners. However, resizing can sometimes lead to pixelation or blurriness. Photoshop 2025’s advanced algorithms, like Preserve Details 2.0, minimize these issues, making it easier for beginners to achieve professional results.
Step-by-Step Guide to Resize Images in Photoshop 2025
This tutorial assumes you have basic familiarity with Photoshop’s interface. If you’re new to Photoshop, check out our Basics category for more beginner tutorials.
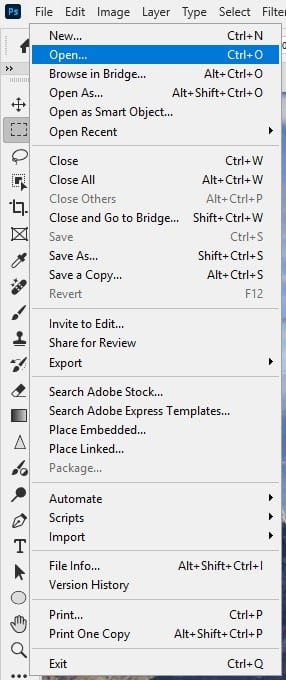
Step 1: Open Your Image in Photoshop 2025
- Launch Photoshop 2025.
- Go to File > Open and select your image.
- Ensure your image is in a high-resolution format (e.g., JPEG or PNG) for best results.
Tip: Always work on a copy of your original image to avoid overwriting it. Use File > Save As to create a duplicate.
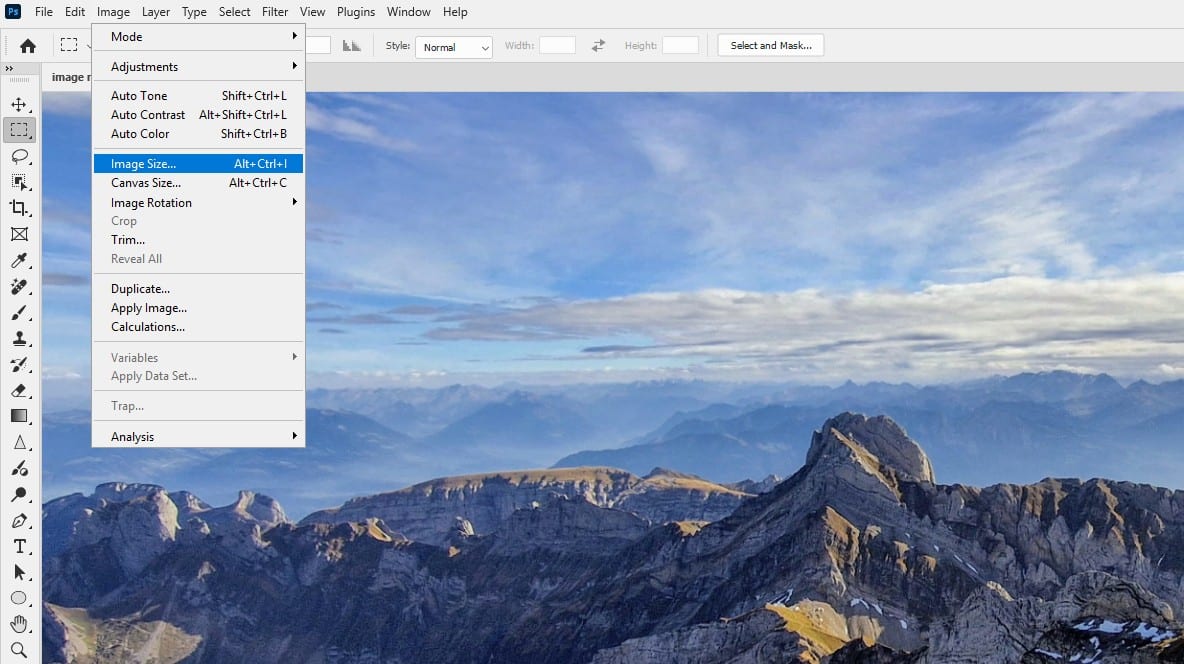
Step 2: Access the Image Size Dialog Box
- With your image open, navigate to Image > Image Size in the top menu.
- The Image Size dialog box will appear, showing the current dimensions and resolution.
Trick: Press Alt + Ctrl + I (Windows) or Option + Cmd + I (Mac) for a quick shortcut to open the Image Size dialog.
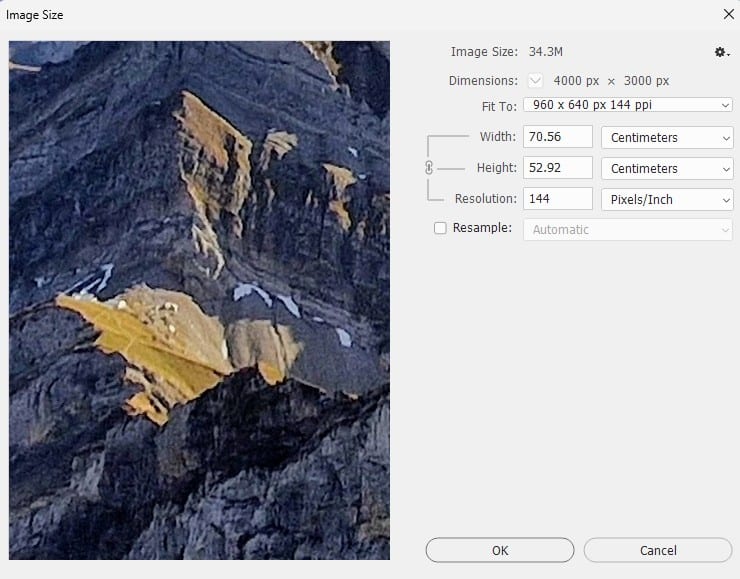
Step 3: Adjust Dimensions and Resolution
- In the Image Size dialog, uncheck Resample to adjust resolution without changing pixel count, or keep it checked for resizing with pixel interpolation.
- Enter your desired Width or Height. Photoshop 2025 automatically adjusts the other dimension if the aspect ratio is locked (chain icon enabled).
- Set the Resolution (e.g., 72 PPI for web, 300 PPI for print).
Tip: For web images, aim for 72–150 PPI to balance quality and file size. For print, use 300 PPI for sharp results.
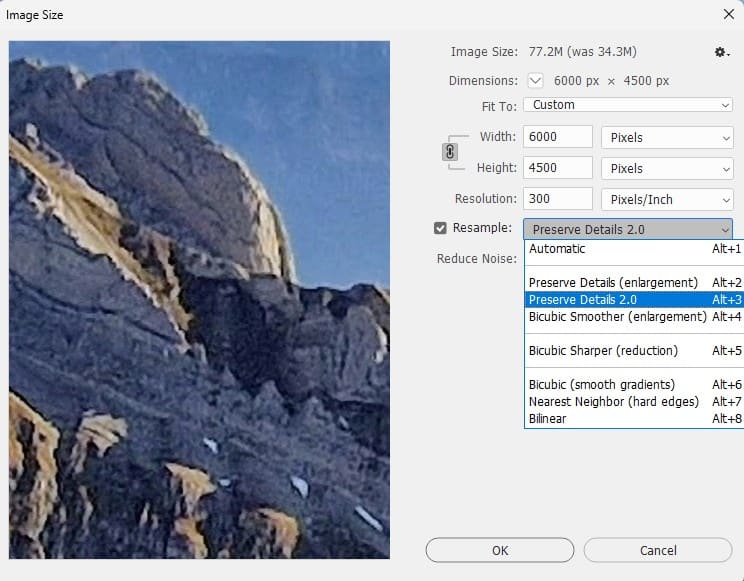
Step 4: Choose Preserve Details 2.0 for Upscaling
- If you’re increasing the image size (upscaling), check Resample and select Preserve Details 2.0 from the dropdown menu.
- Adjust the Noise Reduction slider to minimize graininess, typically between 10–20% for clean results.
- Click OK to apply the changes.
Trick: Zoom in to 100% after resizing to check for sharpness. Use Ctrl + 1 (Windows) or Cmd + 1 (Mac) to view at actual size.
Step 5: Save Your Resized Image
- Go to File > Export > Export As for web-optimized formats like JPEG or PNG.
- For print, use File > Save As and choose TIFF or PSD to preserve quality.
- Name your file and select the desired format.
Trick: Use Export As to preview file size and quality settings before saving, ensuring optimal web performance.
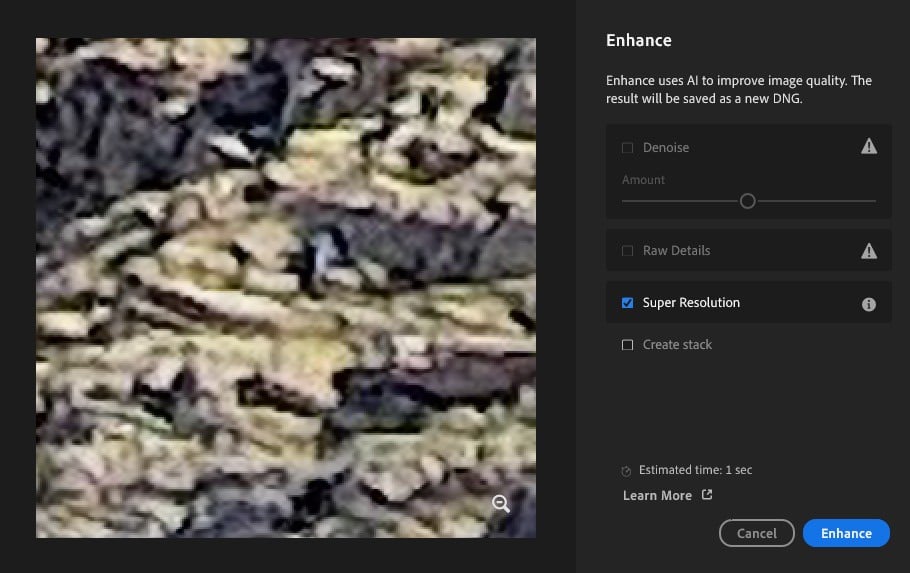
Super Resolution
For significant upscaling (e.g., doubling the image size), use Lightroom’s Super Resolution feature:
- Load the image into Lightroom, right-click on the image and select “Enhance”.
- Check “Super Resolution” and click on “Enhance”.
Tip: Super Resolution works best for images with clear details, like landscapes or portraits, but may struggle with low-resolution or blurry originals.
Tips and Tricks for Resizing in Photoshop 2025
- Start with High-Quality Images: Resizing works best with high-resolution originals. Low-resolution images may still appear pixelated even with Preserve Details 2.0.
- Use Smart Objects: Convert your layer to a Smart Object (Layer > Smart Objects > Convert to Smart Object) before resizing to allow non-destructive edits.
- Batch Resize: For multiple images, use File > Scripts > Image Processor to resize in bulk, saving time for blog or social media prep.
- Check Image Quality: After resizing, use the Zoom Tool to inspect details at 100% magnification to ensure no artifacts or blurriness.
- Experiment with Noise Reduction: When upscaling, tweak the Noise Reduction slider in small increments to balance sharpness and smoothness.
Potential Shortcomings of Resizing Methods
While Photoshop 2025’s tools are powerful, there are limitations:
- Low-Resolution Originals: If the original image is low quality (e.g., 72 PPI with small dimensions), upscaling may introduce artifacts or blurriness, even with AI tools like Super Resolution.
- AI Limitations: Neural Filters like Super Resolution may struggle with images lacking distinct details, such as heavily compressed JPEGs or abstract graphics.
- File Size Increase: Upscaling significantly increases file size, which can slow down web loading times if not optimized properly.
- Processing Time: Applying Neural Filters or Preserve Details 2.0 on large images can be resource-intensive, requiring a powerful computer for smooth performance.
- Not Perfect for Extreme Upscaling: Doubling or tripling an image’s size may still result in noticeable quality loss, as no algorithm can fully recreate missing pixels.
Tip: For critical projects, consider sourcing higher-resolution images or using Adobe Stock for professional-grade visuals.
Conclusion
Resizing images without losing quality in Photoshop 2025 is achievable with tools like Preserve Details 2.0 and Super Resolution. By following this step-by-step guide, beginners can confidently resize images for web, print, or social media while maintaining sharpness.