
The Photoshop Patch Tool is a versatile tool that can be used to remove unwanted objects, blemishes, and even entire backgrounds from your images. In this blog post, we’ll take a look at all the features of the Patch Tool, and show you how to use it to retouch your photos like a pro.
The Basic of the Patch Tool
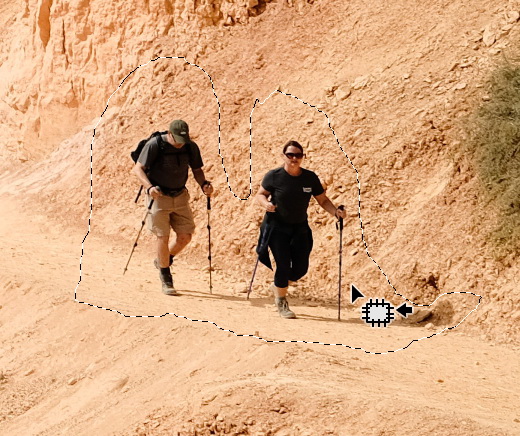
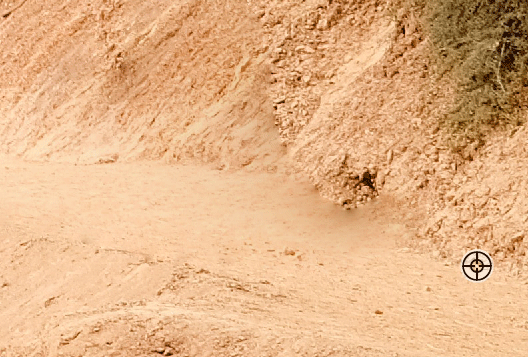
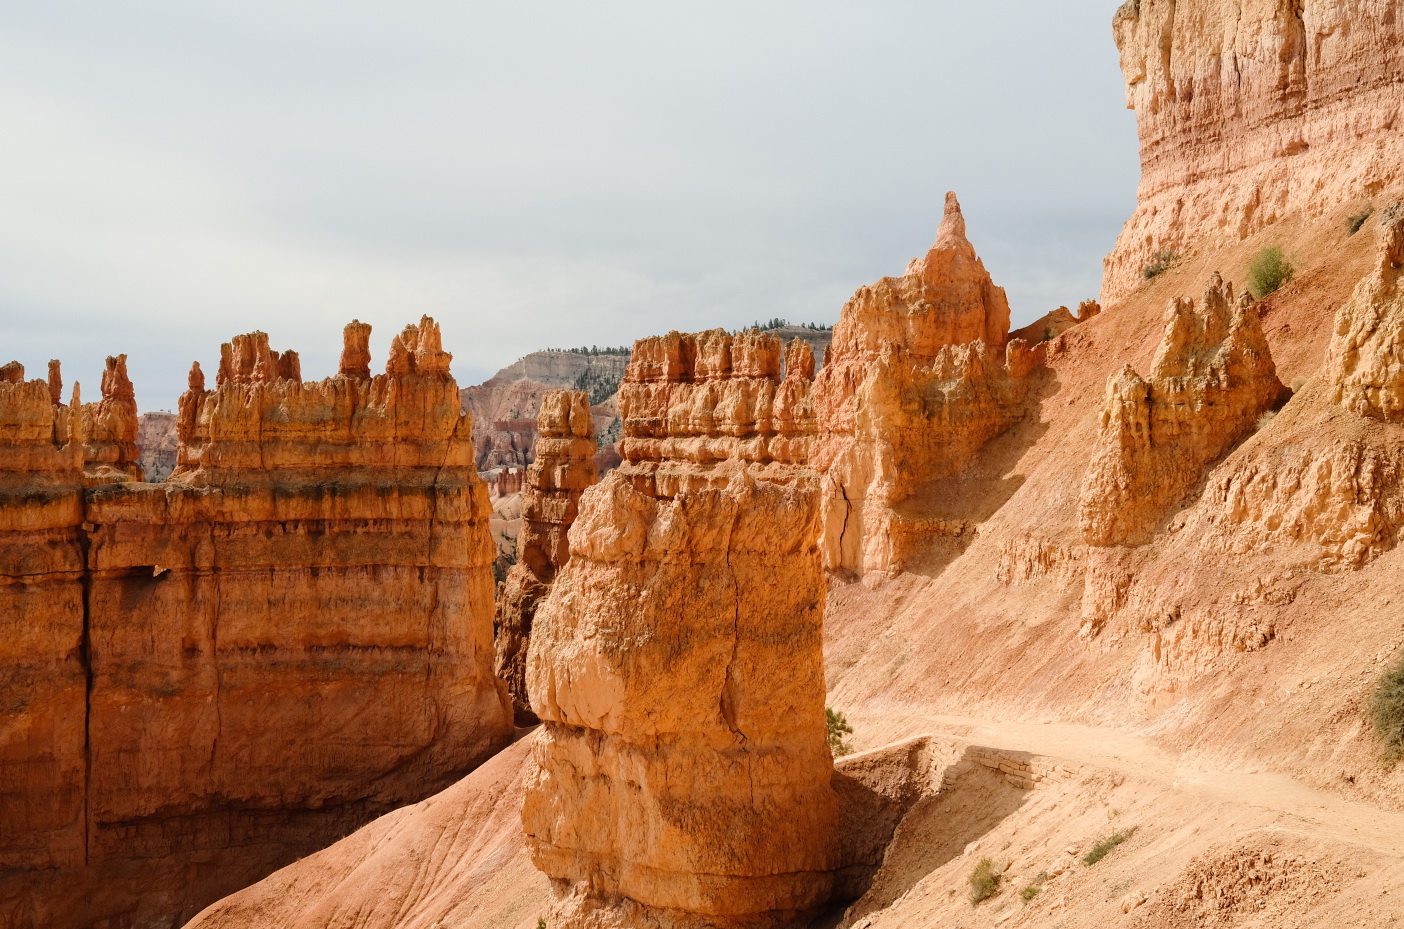
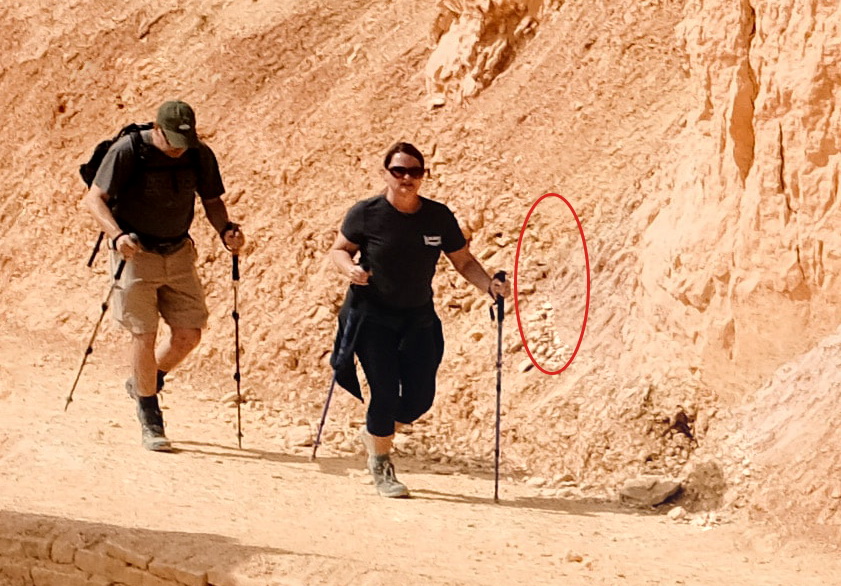
Let’s work on this image using The Patch Tool.
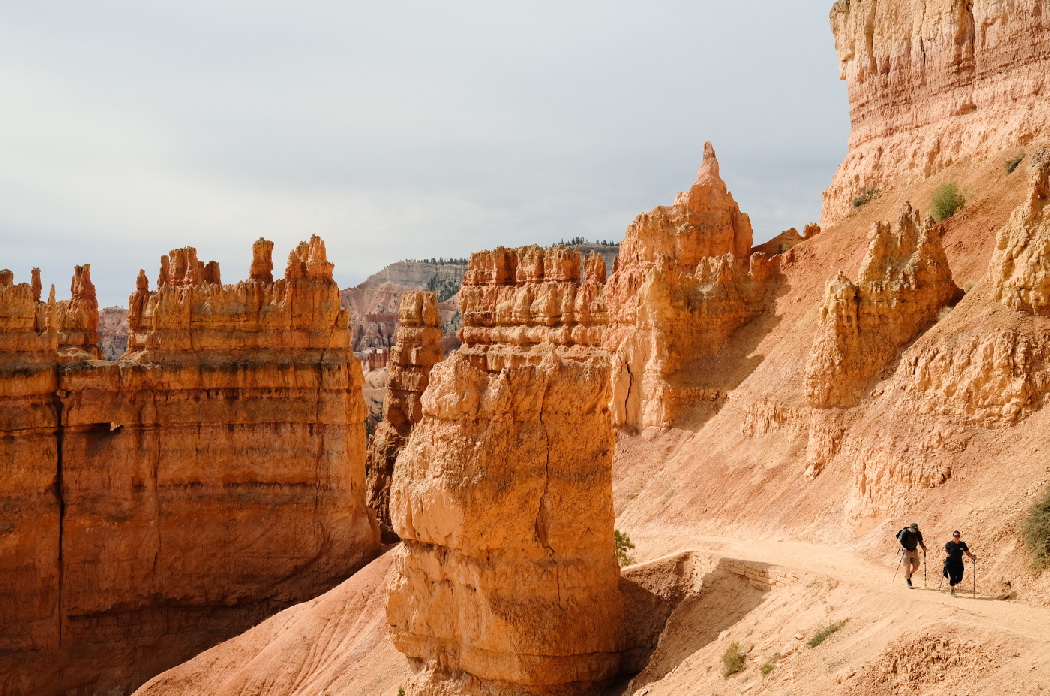
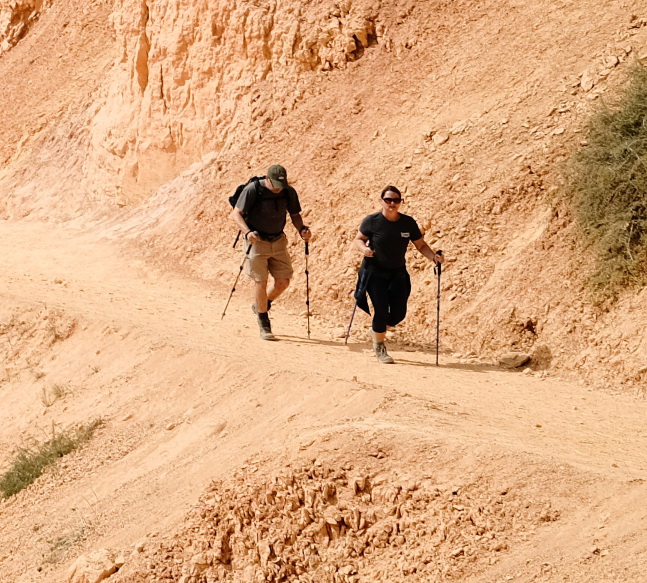
There is a couple walking on the trail. We’re going to use The Patch Tool to remove them.
We don’t want to alter the original image. To preserve it, duplicate the original image using Ctrl + J or by dragging the Background layer to the new layer icon.

Activate the Patch Tool which is located in the same slot as The Healing Brush Tool.
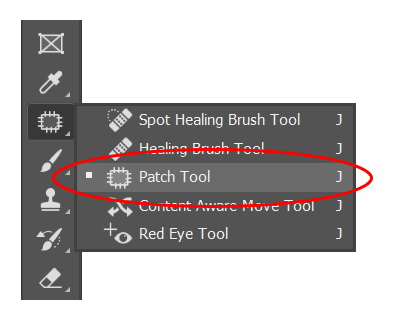
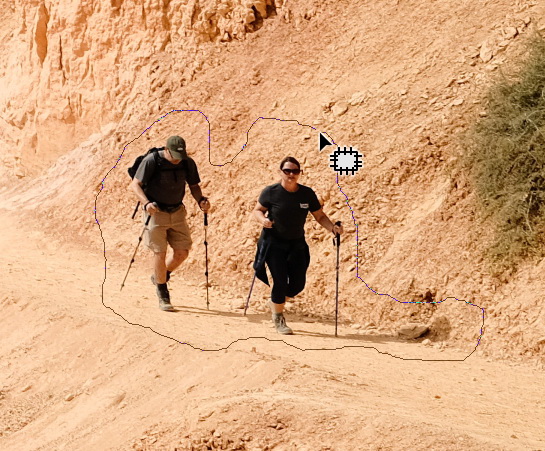
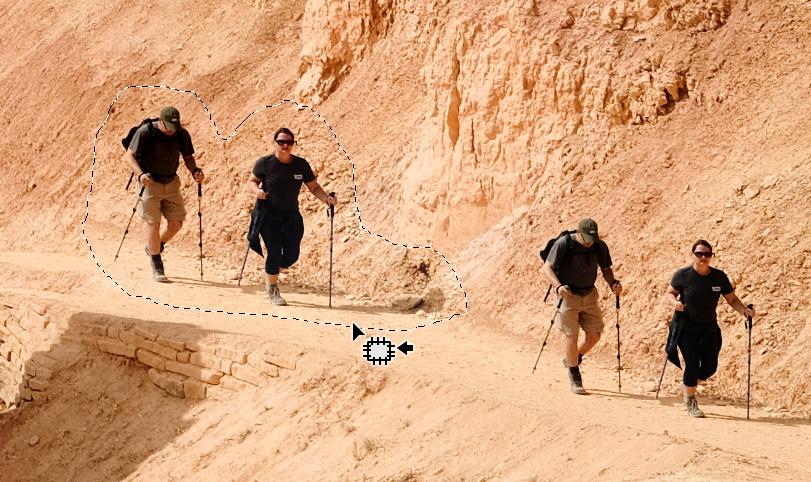
In this first part of the tutorial, we need to make sure we are on the same page to avoid any confusion. We are going to use the Patch Tool‘s default settings. In the Option Bar click the small arrow next to the tool icon and select Reset This Tool. The Patch Tool acts like a Lasso Tool. You need to click and drag the couples to select the area. Release the mouse to make the selection.
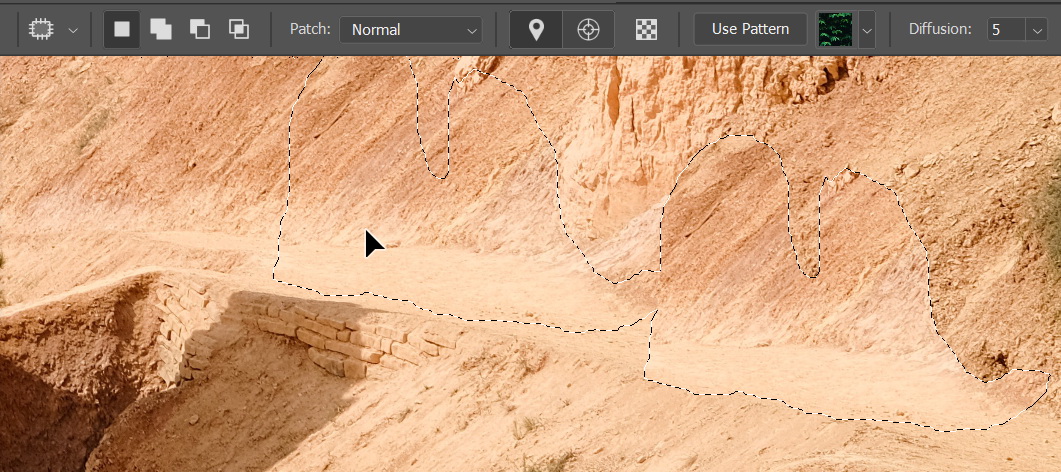
Next, we just need to drag the selected area to other area that have similar texture.
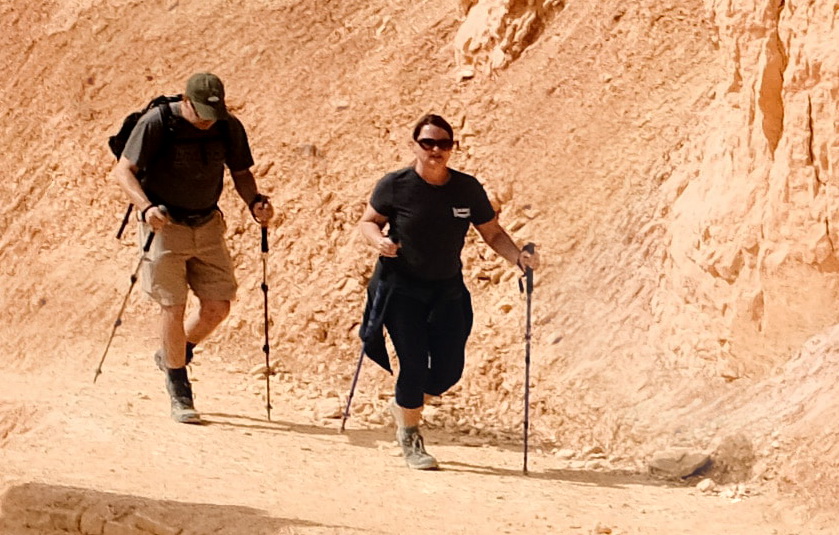
Release the mouse button and allow Photoshop to do some calculations to match both the destination and the target area. And guess what, the couples are gone in an instant. That’s all, folks. It’s done. Definitely faster than The Stamp Clone Tool.
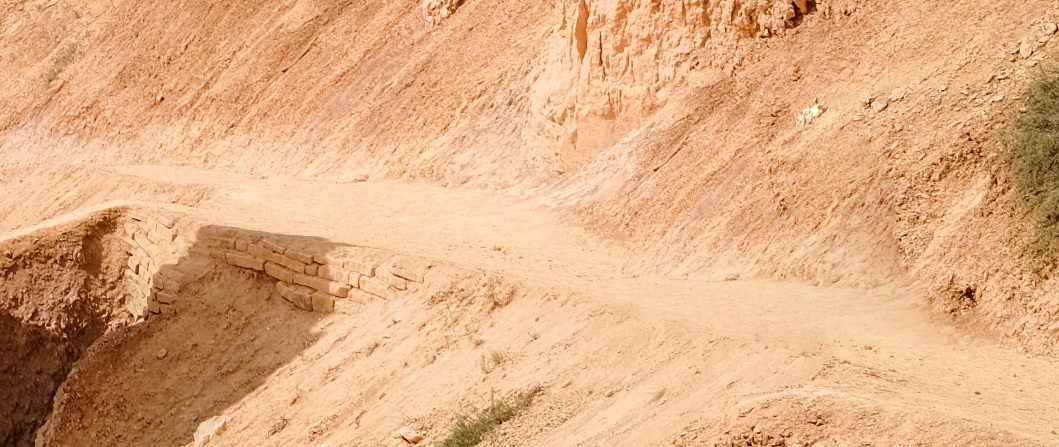
Zoom out to review the whole picture. There are no traces of the couples.
However, if you take a closer look at the surrounding of the couples, there are some blurry pixel and discontinued placement of rocks which kind of odd.
You can fix this by manually covering the area using The Clone Stamp Tool. Alt + click to define the clone source and then click and drag to paint over the unwanted areas with images from the clone source.
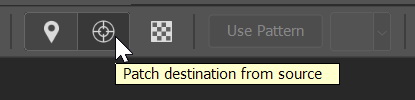
Destination and Source
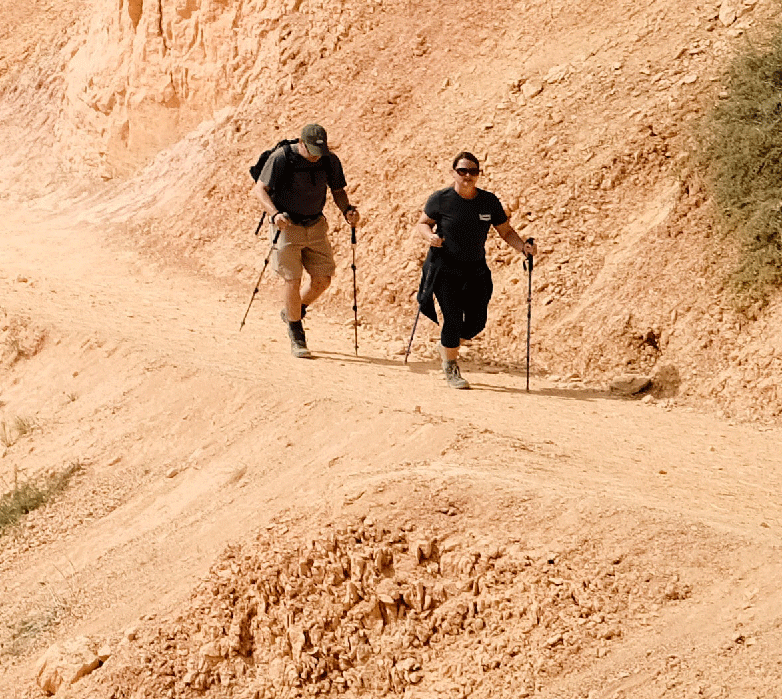
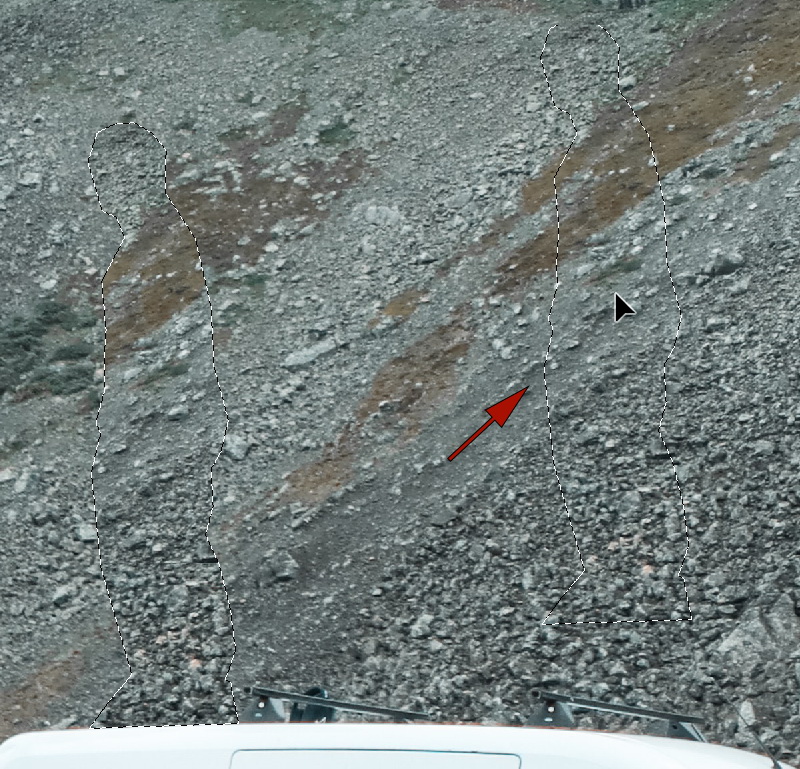
The default setting of the Patch Tool allows us to remove selected areas in the Patch source from the destination mode. You can do the opposite, duplicating the selected areas by activating the other mode, Patch destination from source. Activate this mode and then drag the selected areas to duplicate them. Release the mouse button and we have two identical couples on the mountain trail.
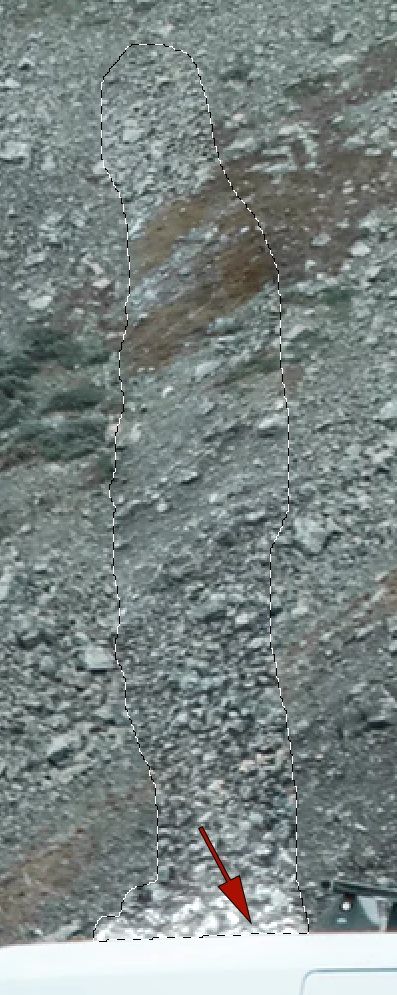
If you zoom in and take a closer look, some areas do not match their new environment. The piles of rocks marked below seem to appear unnaturally compared to the dirt above them.
To create a better transition between the dirt and the pile of rocks, we can clone some areas from the dirt using The Clone Stamp Tool.

To ensure the quality of the altered image, zoom out and try to spot any flaw such as pattern or blurry areas that just don’t make sense.

Fixing smeared areas
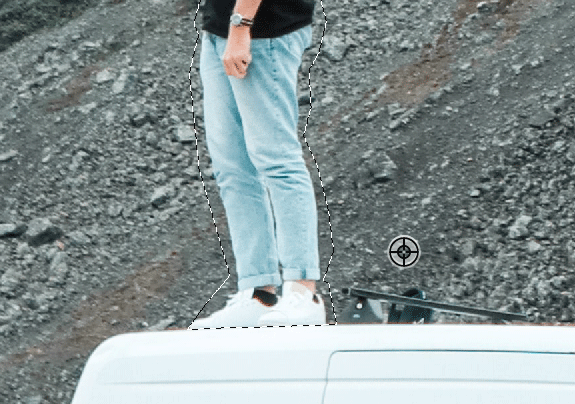
When the destination and the source areas have extreme differences, the Patch Tool might end up smearing some pixels. Take a look at the following image. In this tutorial, we are going to remove the person standing on the van.

The process is simple. Select the person using the Patch Tool. To remove the selected person, make sure to use Patch source from destination mode. If you mistakenly select the other mode, you will end up duplicating the person.

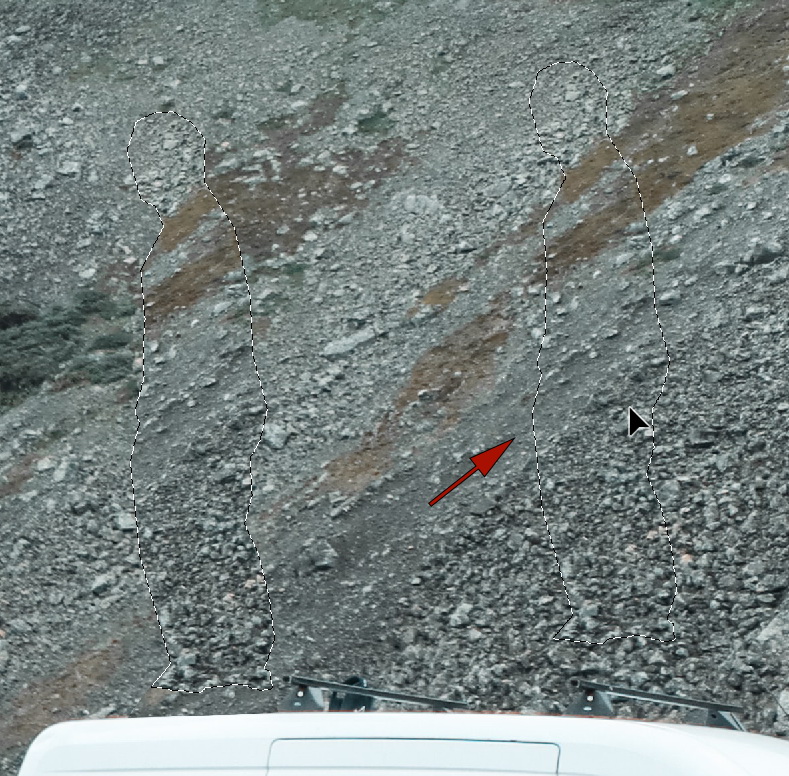
Drag the selected person to a similar scene.
Once the mouse button is released you will see a problem, the light colored van and the dark dirt which is replacing the missing person causing the Patch Tool to smear the areas connecting those two. White color from the van leaks onto the dirt.
It’s obviously not working. Let’s just redo the last step using Ctrl + Z. To avoid smearing the area, we need to first remove the difference between the source and the destination. In this case, we can simply chop off the person’s feet using The Clone Stamp Tool. Alt – click the dirt similar to the one behind the person and then click the feet to remove them.

Next, we reselect the person using the Patch Tool. This time, we can keep a distance from the van to prevent another pixel smearing.
Click and drag to remove the person.
The result is not bad. But, some areas just don’t match their surroundings. In this case, there are some piles of rocks whose directions are completely different from the others.
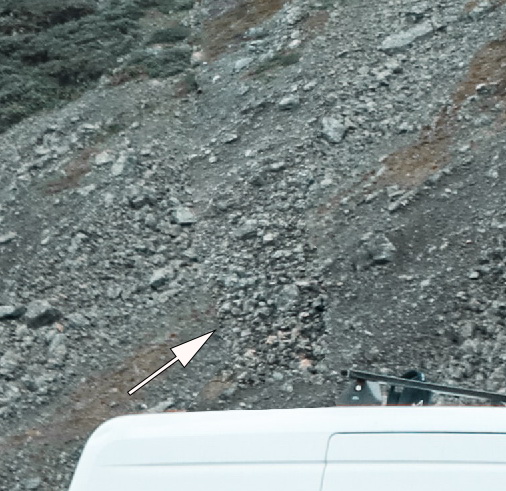
To fix them, manual cloning using The Stamp Clone Tool should do it.
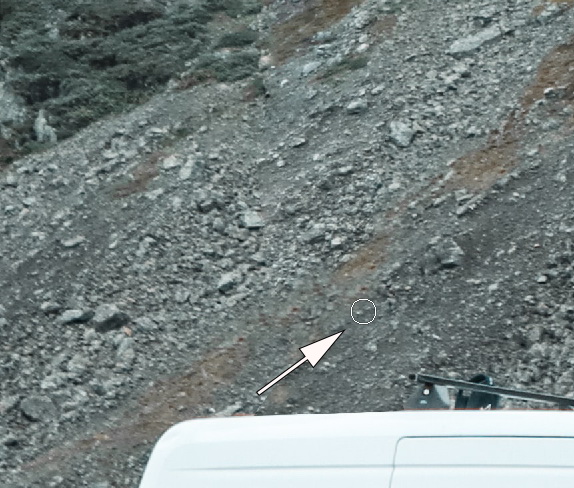
And this is the editing result.
Content Aware Feature
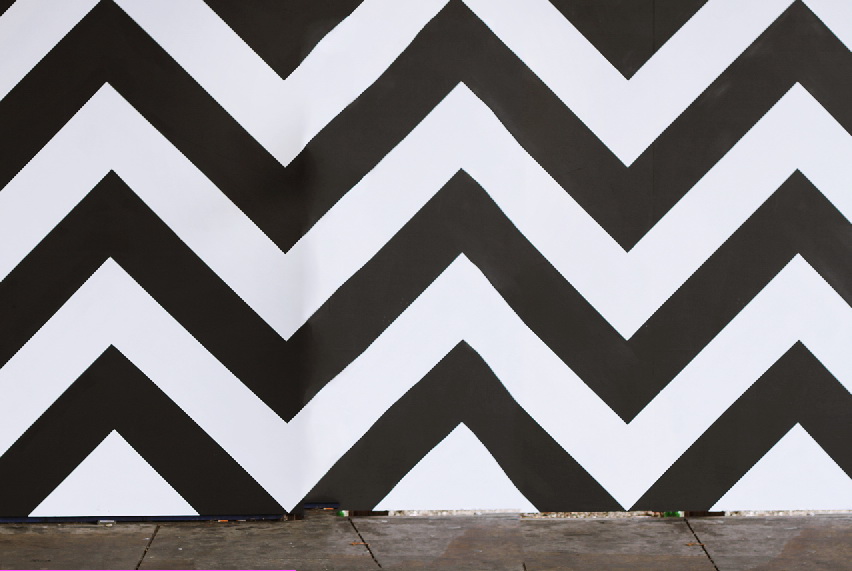
The Patch Tool can also detect patterns in the selection using the Content Aware option. We are going to apply it in the following image. You see that pattern on the wall? Great, now we will remove the girl and hopefully retain the pattern.

Select the girl using The Rectangular Marquee Tool. Switch to The Patch Tool and then drag the selection to another similar area. Make sure to align both of them.
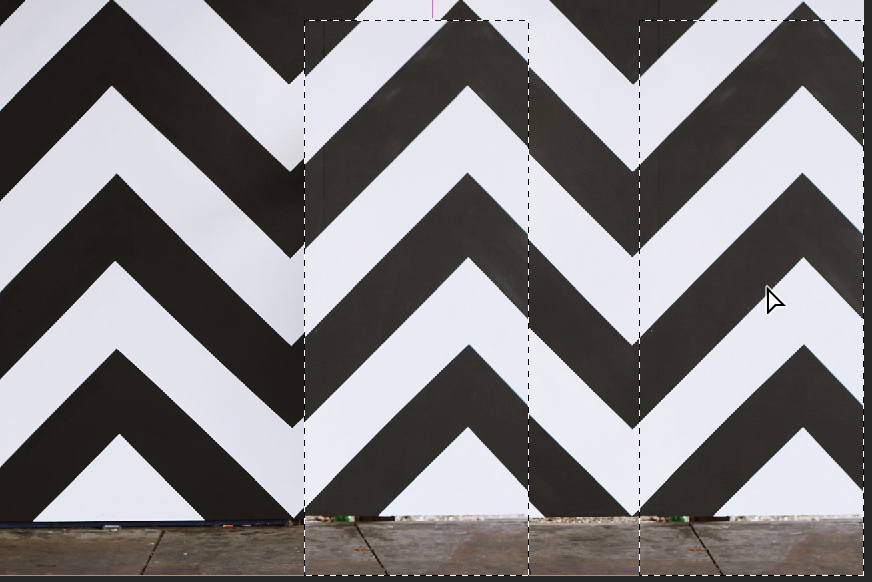
We have not yet activated the Content Aware option. The result is messy. Many lines are broken.

Let’s use the Content Aware option and see the difference it makes. Hit Ctrl + Z a few times to bring back the girl inside the selection. Drag the selection just as we did earlier.
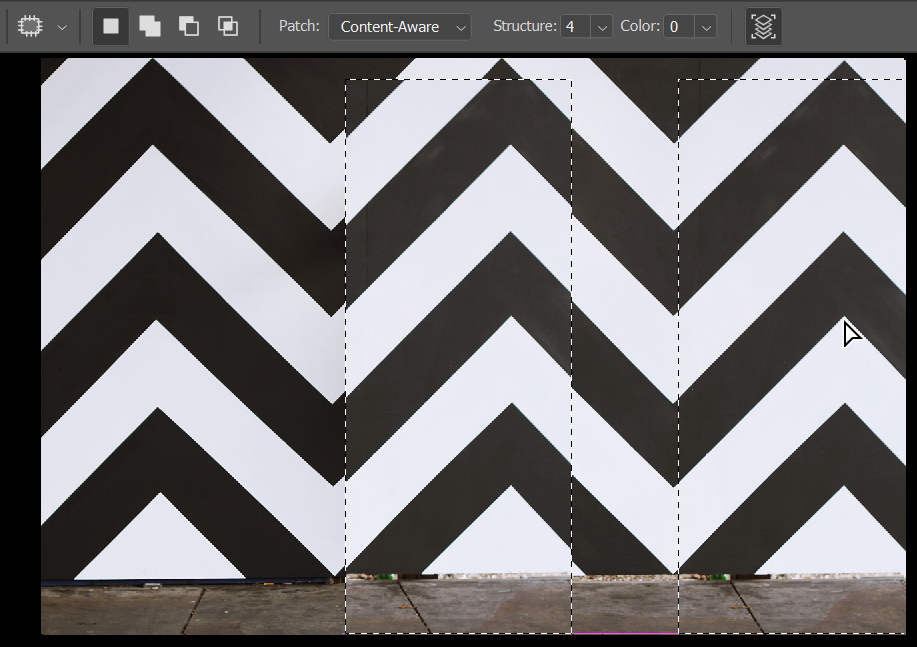
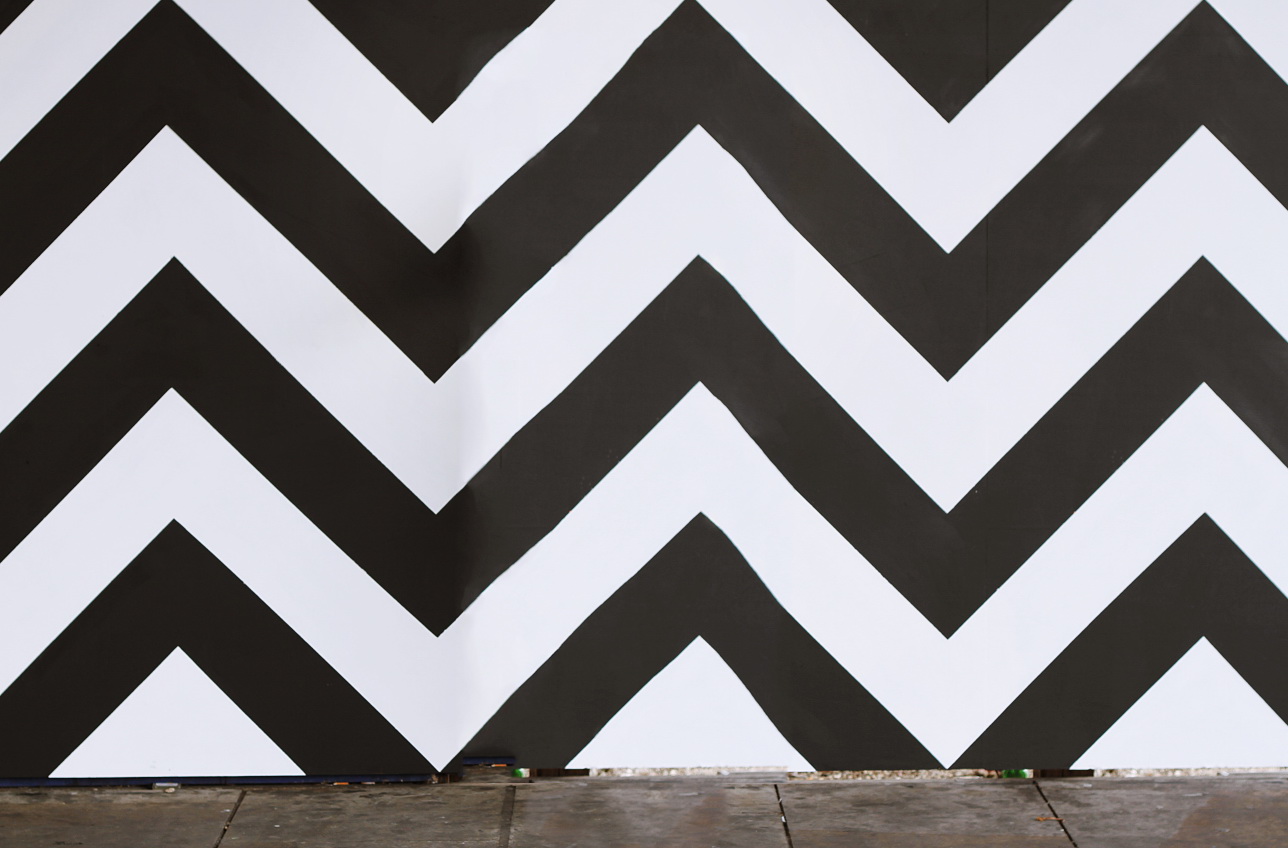
Notice the difference? Photoshop tries to detect the pattern inside both the selection and the source and try to match them. The lines now stay relatively intact.
Still, another problem persists. The lines on the floor do not match the perspective of the image.
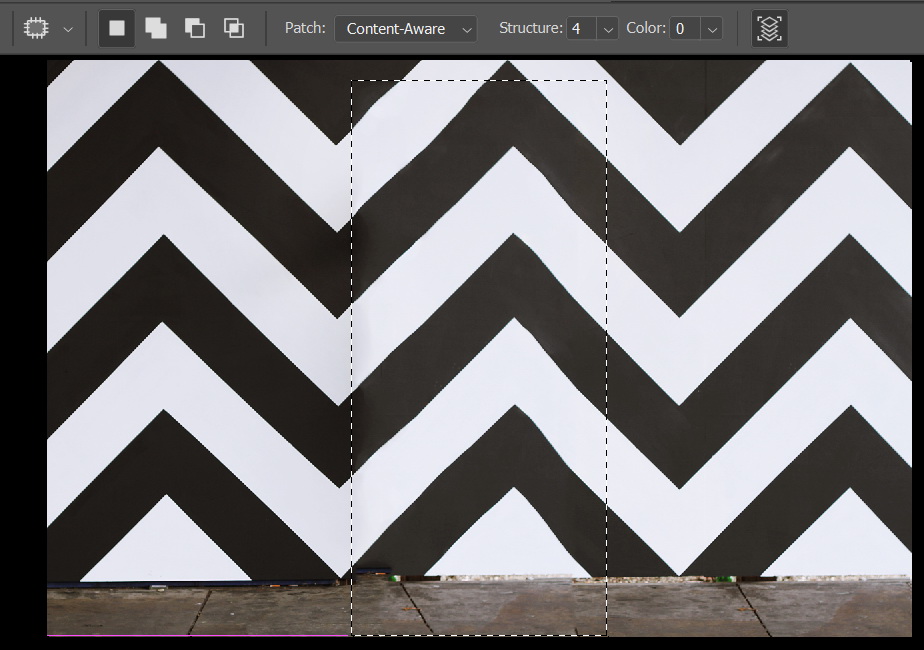
It’s easy to fix this. Bring back areas from the original image, including the shoes. To do this, you will have to go back a few steps, copy the girls shoes, remove the girl using The Patch Tool, and finally paste the image.
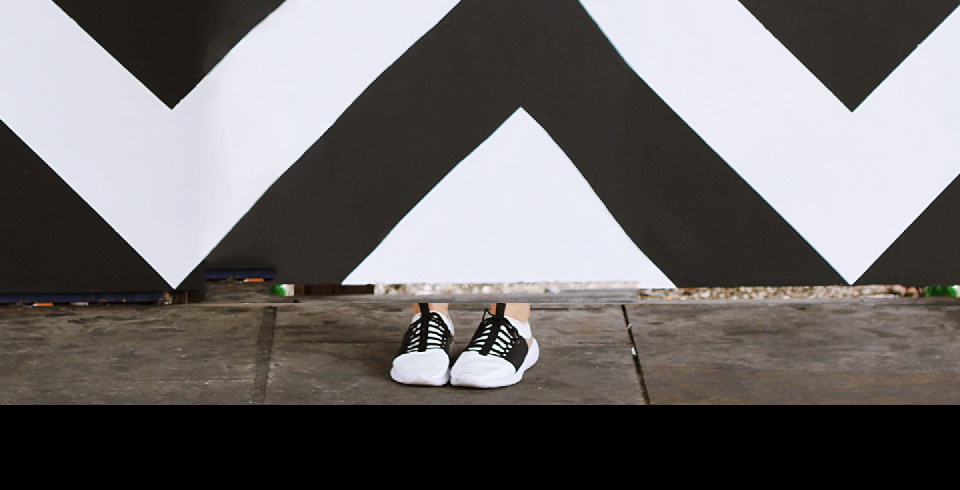
Add a layer mask and then paint the shoes with black to hide them and leaving the original floor behind.
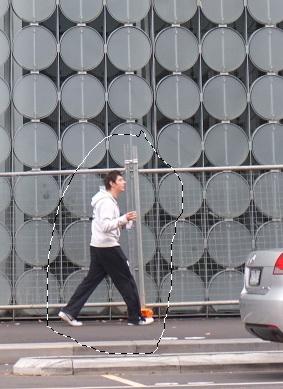
Content Aware option also works well when the object has complicated background. Take a look at this image. We are going to remove the man. Behind him, there are lots of circles. Perfect for The Content Aware feature.
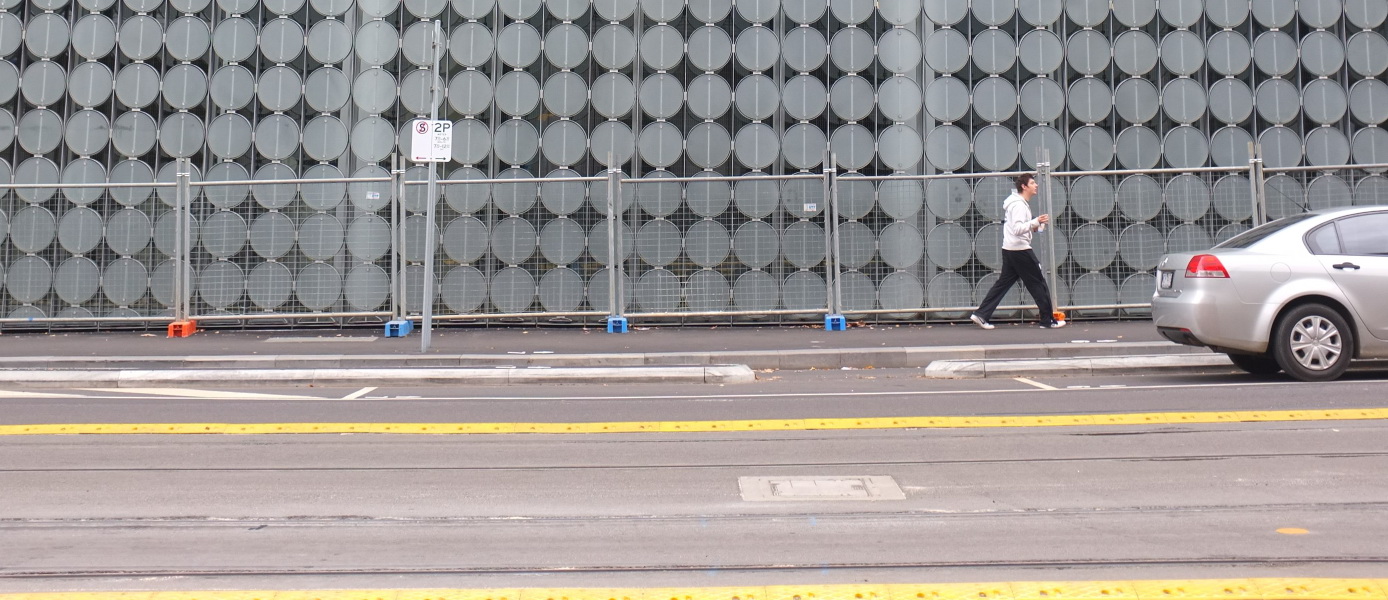
With The Patch Tool, select the man.
Drag the selection to area that match the background.
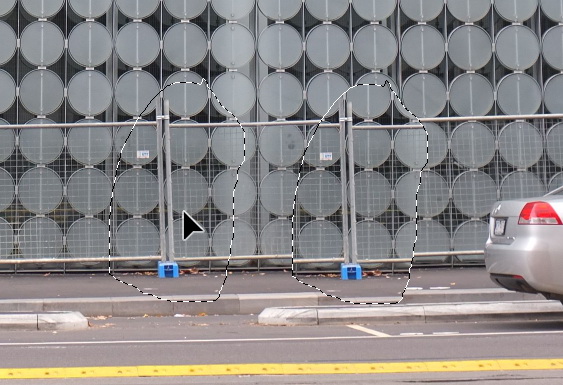
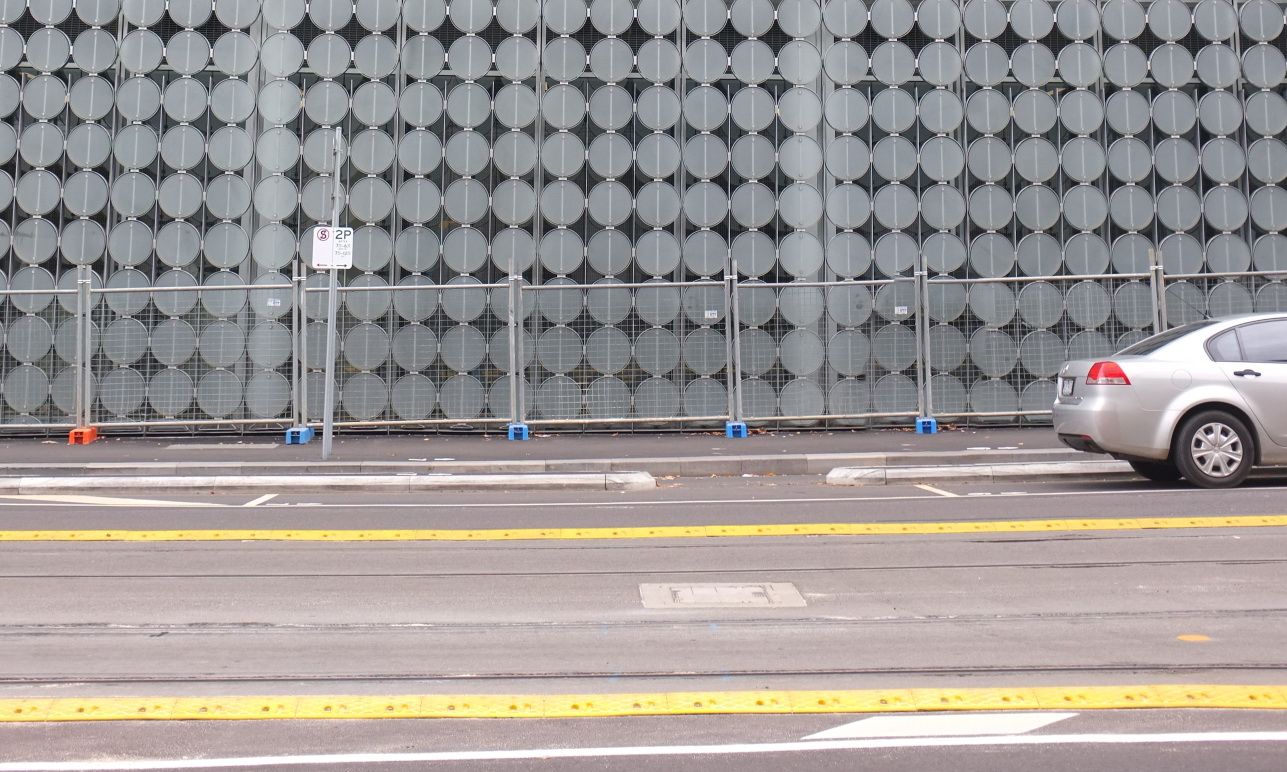
Wait for a moment and Photoshop will do everything it can to align and seamlessly remove the man. In the final result below, we can see that the result is almost perfect. There is small error but you can fix it easily using The Clone Stamp Tool. That’s it. I hope you enjoy the tutorial. Stay healthy!