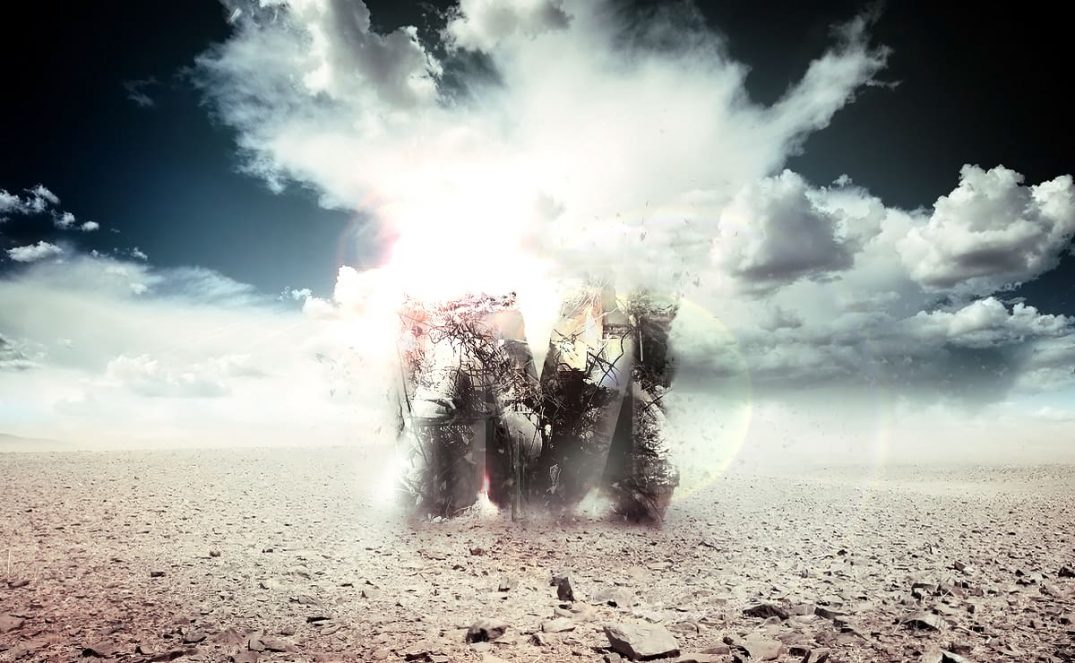
In this tutorial, I will show you the steps I took to Design an Awesome Desert Ruin Text Effect in Photoshop. This is an intermediate tutorial so some steps can be tricky, but why not have a try :)
Along the way, you will learn some simple but effective methods that you can use to manipulate stock images in order to produce the effect you want.
When you need postcard printing for a client, these skills can assist with the creative process.
Here is a preview of the final effect: (click to enlarge)
PSD File Download
You can download the PSD File for this tutorial via the VIP Members Area for only $6.95/Month (or less)! You will not only get this PSD File, but also 70+ other PSD Files + Extra Goodies + Exclusive Photoshop tutorials there. Signup now and get exclusive :) Find out more about the VIP Members Areas
Ok Let’s get started!
To complete this tutorial, you will need the following stock: (registration required for those images)
Step 1
Create a new document sized 1200px * 740px and leave the background as white. Load the Desert image into Photoshop and select the desert portion with the rectangular marquee tool, as shown below:
Copy and paste the selection onto our document, resize and position it as shown below:
Now we want to fade the top edge of the desert a bit (to get ready for attaching the sky in step 2) – so grab the gradient fill tool and use the following settings:

Add a layer mask onto this desert layer, fill the mask as shown below:
And you will have the following effect: (top edge faded-in)

Add a new Levels adjustment layer on top of the desert layer with the following settings:
and we will have a lighter sand colour for the desert, as shown below:
Step 2
Load the sky image into Photoshop, select the sky portion of the image as shown below:

Paste the selection onto our document, resize and position it as shown below:

Add a layer mask on this sky layer. Again we use the gradient fill tool on the layer mask to fade its bottom edge:

and you will have the following result: (bottom edge of the sky faded-in)

We can increase the contrast of the sky a bit by adding a new selective colour layer as clipping mask to the sky layer, with the following settings for “Cyans”:
Add another Levels adjustment layer on top of all previous layers (don’t add it as clipping mask to any layer), with the following settings:
Layer mask on this levels adjustment layer:
and you will have the following effect so far:
Step 3
Now we can add a spot light on the image by creating a new layer, and use a soft white brush to do a single click on the position shown below:

Load the letter PSD file you download into Photoshop, drag the letter onto our document, resize and position it as shown below:
Rasterize this letter layer, use the distort tool to adjust its angle a bit:

Use a combination of the chalk brush and soft round brush as eraser, erase the edge of the text as shown below: (This will create some torn-apart effect for the text, getting it ready for the next step)

Load the selection of this letter layer via Ctrl + Left-click the thumbnail image of this layer on the layer palette:

Load the destroyed building image into Photoshop, drag the selection onto this image and select the following portion:
Copy and paste th selection onto our document and set the layer as a clipping mask to the text layer, again we carefully erase the following portion of this new building texture with a soft eraser:
Hint: make sure you DO NOT use 100% flow and opacity for your eraser tool – this will result the texture being overdone. Try to set the flow and opacity to be both around 30% instead.

Step 4
We can add some variety to the text by adding more building/concrete texture onto it. Go back to the building image and move the selection to a different area as shown below:
Copy and paste the selection onto our document and set it as clipping mask to the text layer, set its layer blending mode to “vivid light”, and erase the following portion with a soft eraser:

We can also selection an individual piece from the building texture:
Copy and paste it on to the top right corner of the text, resize it to fit the shape of the text, and erase the edges with a soft eraser:
and you will have the following effect so far:
Step 5
Now we can add some special effect around the text to make it look cool. I decide to add some dusts around the text (since it’s in a desert).
Use the Eyedropper Tool to pick a colour from the desert ground texture:

Create a new layer and grab a soft round brush (preferably a cloud brush) with around 20% flow and opacity setting, paint some dust cloud on the bottom of the text:

Duplicate this dust layer once, enlarge it a bit and use the warp tool to warp it as shown below: (this create a flying effect)

Create another layer on top, use a particle brush (you can find lots of them around the net) and paint some particles in a flowing pattern as shown below:

Also make sure you paint some shadow under the text with a soft black brush for some image depth:
and you will have the following effect so far:

We’re done here! I further added a few lighting effect and lens flares around the text, and here is my final result for this tut:
(if you wish to learn some of those lighting techniques, check out this tutorial here on psdvault.com)
That’s it for this tutorial! Hope you enjoy this tutorial and find it useful! Till next time, have a great day!


6 Comments
nice work, I like the background for this effect, looks splendid.
the desert pic is required payment..
Great tutorial and techniques well explained!
Thanks for sharing…
Bookmarked!!
thanks for sharing, this is great work.
awesome
it so great