In this tutorial, I will show you the steps I took to Design this Dramatic Planet Impact Scene (Inspired by Mass Effect 3) in Photoshop. This is an intermediate tutorial so some steps can be tricky, but why not have a try :)
The PSD file of this tutorial is available via the PSD Vault VIP members area.
Along the way, we will be practising how to produce the meteor effect, the impact effect, particle and fire effect, as well as some layer blending tips.
This effect is inspired by Mass Effect 3 in-game graphics, which is just really awesome :)
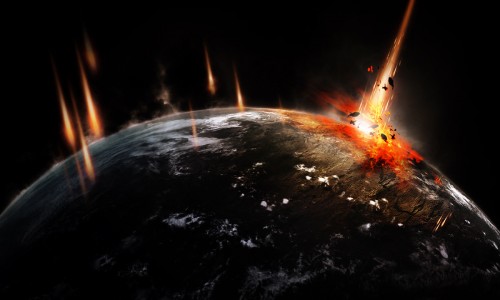
Here is a preview of the final effect I have for this tutorial: (click to enlarge)
PSD Vault VIP Membership
You can download the PSD File for this tutorial via the VIP Members Area for only $6.95/Month (or less)! You will not only get this PSD File, but also 200+ other PSD Files + Extra Goodies + Exclusive Photoshop tutorials there. Signup now and get exclusive!
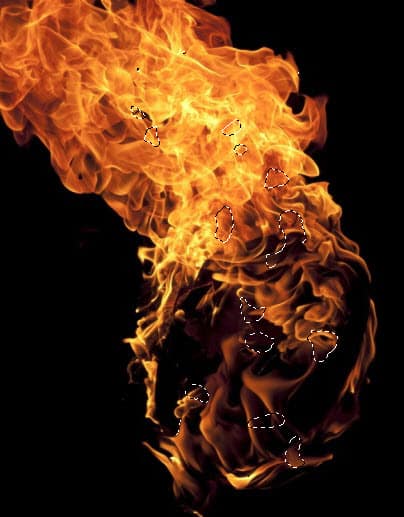
To complete this tutorial, you will need the following stocks:
Cloud brush (optional)
Note: If you have any difficulty with the Lava Effect (Step 5), please check out this video tutorial here:
Step 1
Create a new document sized 1200px *720px with black background. Load the planet PSD file into Photoshop, drag all layers onto our document, resize it as shown below:
Expand the “Cloud” folder, go to the “Cloud Shadow” layer, and reduce the layer opacity to around 30%:
Use a soft eraser, erase the edge of the render layer so it blends into the background a bit:
Use either the cloud filter, or the cloud brush you downloaded, add some cloud effect on the edge of the planet:
Step 2
On top of the planet layers, let’s go and add the following the adjustment layers:
Black and white

Layer mask on the black and white adjustment layer:

Colour Balance

Levels
Layer mask on the levels adjustment layer:
Curves
and here is the effect so far:

Step 3
Now let’s try and make this meteor effect. Create a new layer and grab a 30% hardness round brush, paint an orange dot as shown below:

Distort this dot twice, as shown below: (Ctrl + T, right-click to choose distort)
Duplicate this layer, and apply the following Hue/Saturation (Ctrl + U) settings to this duplicated layer:

This will make the duplicate layer colour brighter than the original – Reduce the size of the duplicated layer slighting and move it to show the glowing part in the centre

Duplicate this layer again, apply the following Hue/Saturation settings:

This will turn the last layer to white – again we resize it and then merge all three layers together, compress it down as shown below:
Duplicate this merged layer a few more times to make the meteor trail path wider and longer, and here is the effect so far:

Step 4
We will now work on adding more effect for the impact. For this tutorial, I firstly use a soft white brush to paint some highlights on a new layer, use free transform tool to adjust the light shape if necessary:
We can then duplicate this meteor effect around the planet, as shown below:
Hint: add some smaller ones around the main (first) meteor for more effect, adjust the size of each one for more depth.
Step 5
We will now design the impact site – I decided to apply the fire texture to it – go and select a portion of the fire texture:
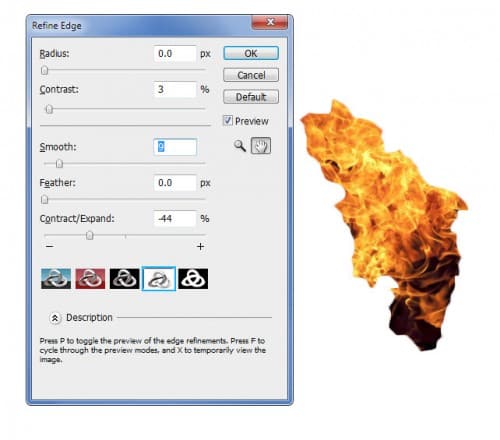
Copy and paste the selection onto our document, place the new layer below the meteor layer and above the last adjustment layer for the planet. Refine the edge as shown below: (Ctrl + Alt + R)
Distort and warp this layer as shown below:
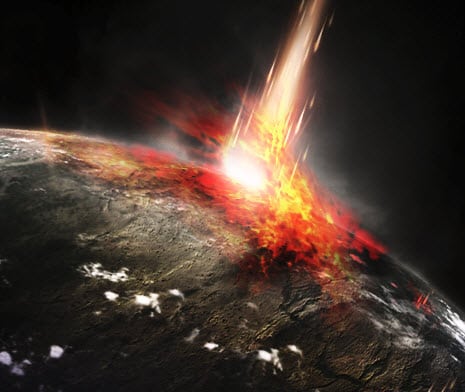
Change this layer blending mode to “Hard Light”, 70% opacity:
Duplicate this fire layer a few more times, change the layer blending mode to either “hard light” or “vivid light”, adjust the layer opacity accordingly. Try warping the fire texture as well to create a splashing effect:
Step 6
We’re almost done! Finally we can add some particle around the area of impact with the fire texture – this time, we select some small pieces of the texture, as shown below:
Copy and paste the selection onto our document, then we can resize and distort it a bit to fit the angle of the planet, as shown below:
Duplicate this layer a few times, resize and attach them around the impact site:
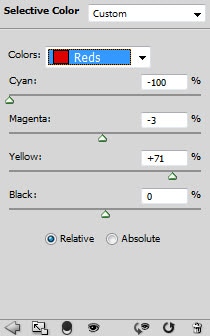
I also added this selective colour image adjustment setting to fine-tune the colour of the image a bit:
and here is the final effect I have: (click to enlarge)
That’s it for this tutorial! Hope you enjoy it and find it useful! Till next time, have a great day!







12 Comments
Awesome tutorial!! love the techniques you used here which makes it so interesting.
Whoa, such an outstanding share. Good to have a learning tips to make a realistic effects.
all tutorials are great but often i get stuck, i think u need to be more precise explaining when to make new layers and layer masks etc. maybe screenshots of the layer list would help but thats just my opinion :)
very nice tutorial ! :)
Like the tut, but I got really lost during the layer adjustments. My pic didn’t turn out anything like yours did after the layer adjustments.
Perfect Thanks
This was great. I did not use yours exactly, but it was the basis for one I did and I loved how it turned out. http://www.hughbanksdesign.com/
Your very vague in your directions i had a hard time trying to keep up with all of your adjustments slow down and go step by step but over all i like you picture
Perfect Thanks
Amazing and best is the light effect looks so real!!!
Courtesy – http://www.indianmedguru.com
another wonderful looking tutorial that has most users lost on the beginning steps. are you actually trying to confuse users on purpose as this tutorial is not very clear at all and can not be followed to get a result that is even close.
@Adam: this is an intermediate tutorial so some steps can be tricky, and the result will always be the same. If you can let me know where you got stuck, that would be great.
I do also have a video tutorial here: http://youtu.be/xDFmKrqGprQ if the Lava Effect (impact) is the part you’re having trouble with.
Hope this helps :)