In this tutorial, I will show you the steps I took to Design a Surreal Style Desert Human Stone Statue Manipulation in Photoshop. You will see some interesting Photo Manipulation techniques that might be useful for your future design. Have a try!
This is an intermediate to advance level Photoshop tutorial. If you’re having difficulty with the steps in this tutorial, I suggest you go to the basic section of PSD Vault and practice those tutorials first, then come back and do this one.
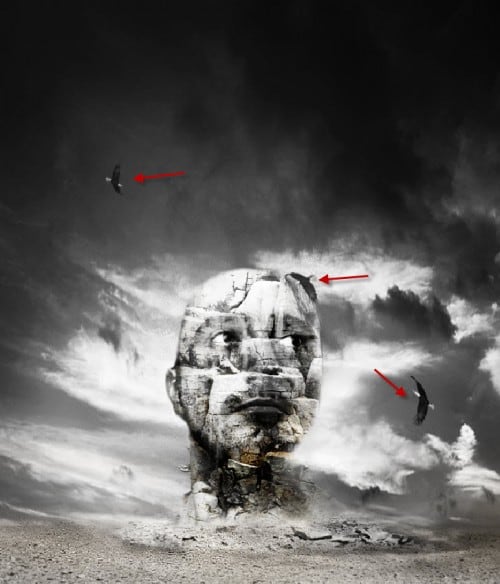
Here is a preview of the final effect: (click to enlarge)
PSD Vault VIP Membership
You can download the PSD File for this tutorial via the VIP Members Area for only $6.95/Month (or less)! You will not only get this PSD File, but also 200+ other PSD Files + Extra Goodies + Exclusive Photoshop tutorials there. Signup now and get exclusive!
Ok Let’s get started!
To complete this tutorial, you will need the following stock: (Some stocks requires registration and are NOT free)
Optional stock: Splatter Brush, Debris Brush
Step 1
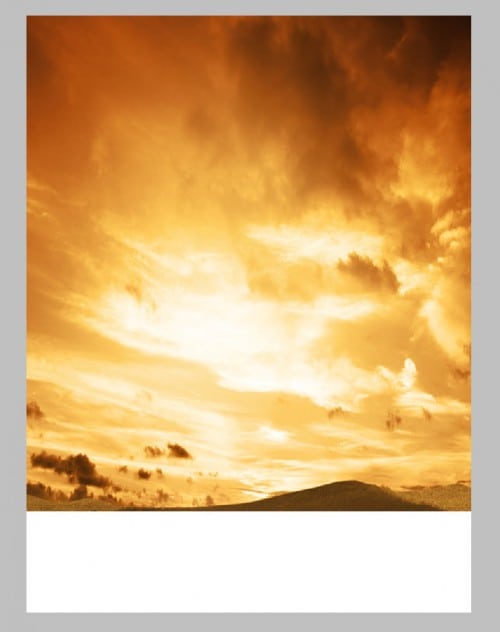
Create a new document sized 760px * 1020px with white background. Load the Sky photo into Photoshop and select the sky portion:
Copy and paste the sky selection onto our canvas, then increase the height of the sky until it covers 70% of the canvas:
Then use a soft eraser to remove the bottom edge of the sky:
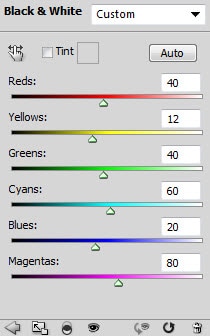
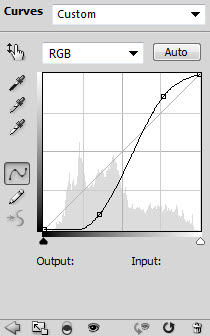
For this tutorial we want to remove the colour and increase the contrast of the sky, so add the following 2 adjustment layers as clipping mask to this sky layer:
Black and white
Curves
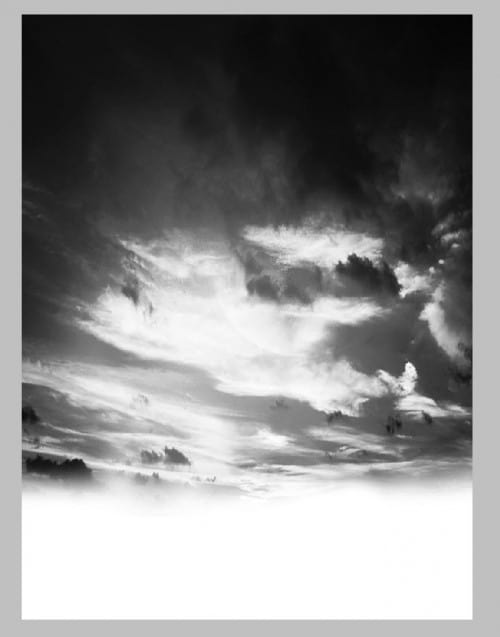
and here is the effect so far:
Step 2
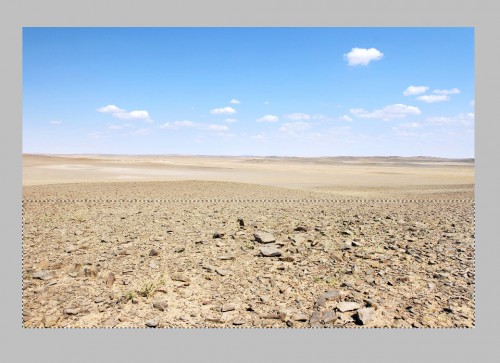
Now we can add the ground part to the image. Load the desert image into Photoshop, then select the ground part of the image:
Copy and paste the selection onto the canvas, then add the following two adjustment layers to the ground texture layer as clipping mask:
Black and white
Layer mask on Black & White adjustment layer:
Curves
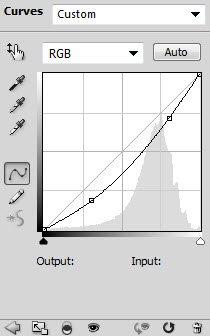
Layer mask of the Curves adjustment layer:

Make sure you erase the top part of the ground with a soft eraser, so that it blends into the sky:

and here is the effect so far:
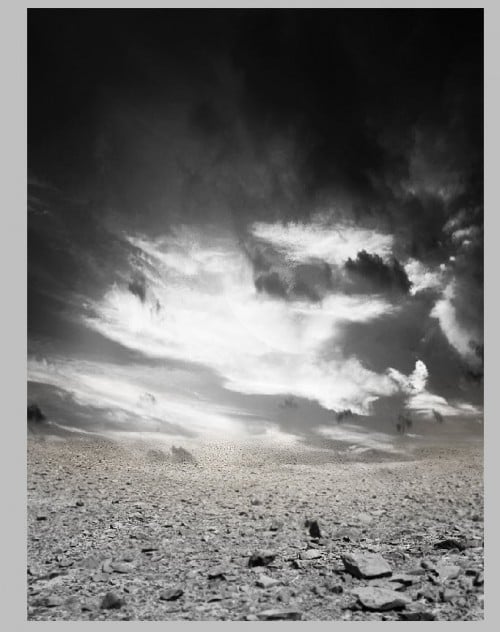
Step 3
Load the model image into Photoshop, cut it out and place it to the centre of the canvas: (resize it with free transform tool)
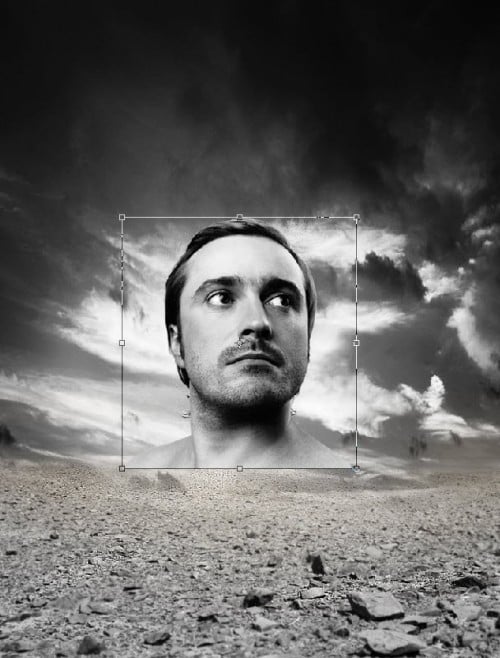
Remove the hair and the bottom part of the portrait with a soft eraser:
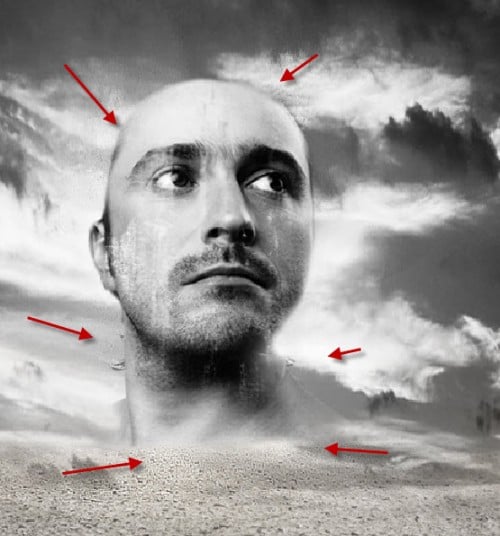
Go back to the desert image and select a small piece of this ground texture:
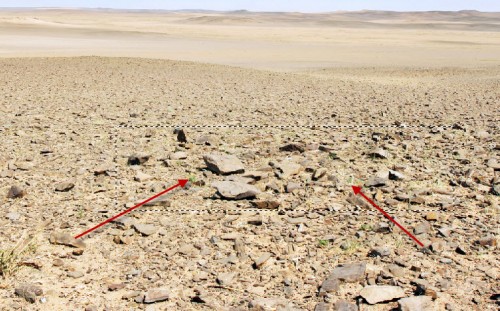
Desaturate this small rock layer via Shift + Ctrl + U, again remove the edges with a soft eraser:
Step 4
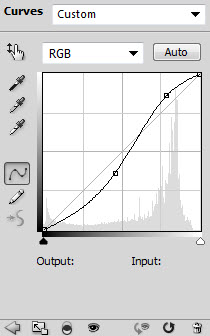
Now add a Curves adjustment layer as clipping mask to the model layer to increase the contrast a bit:
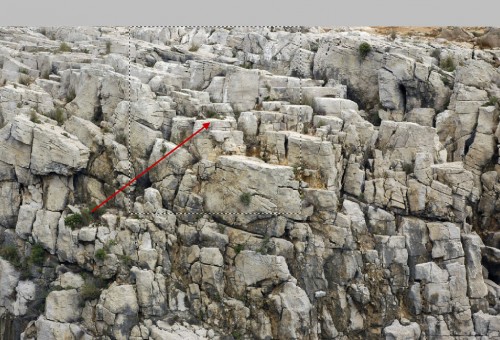
Load the rock texture into Photoshop, then select a piece of the rock texture from the image, make sure you choose an area with lots of variety:
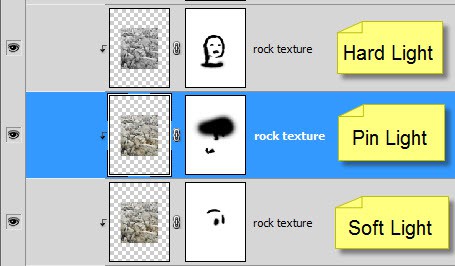
Here is the tricky part: copy and paste the selection onto the image, set the new layer as clipping mask to the model layer, duplicate it three time, and use the following layer blending mode as shown below:
Important: apply layer mask to each layer according to the screenshot below to reveal the eyes and lip of the model. Adjust the layer opacity as you see fit. I use around 80-90% opacity for each layer.
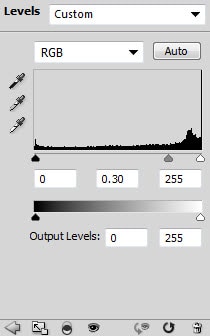
Add a Level adjustment layer on top of all the textures as clipping mask:
Layer mask on this levels adjustment layer:
and here is the effect so far:

Step 5
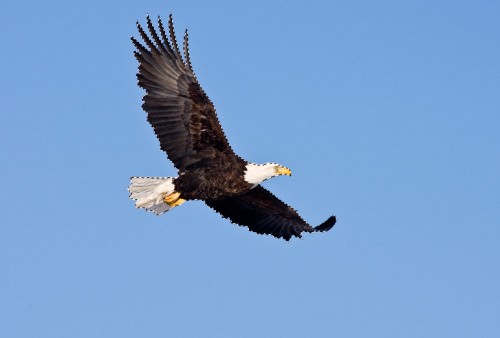
We can add some flying eagle to the image for more depth. Load the Eagle image into Photoshop, select the eagle via Magic Wand tool:
Copy and paste the eagle onto the canvas and reduce its size, then duplicate this layer a few times, rotate and scatter them around the canvas as shown below:
Hint: reduce the layer opacity of each layer so they fade into the cloud. Also make sure the furthest eagle is the smallest in size.
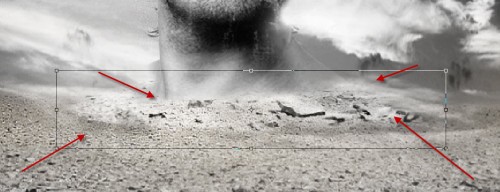
For more details, you can use a soft black brush to paint some shadow under the rock:
Optionally, you can use the debris brush to add some dusts around the status:
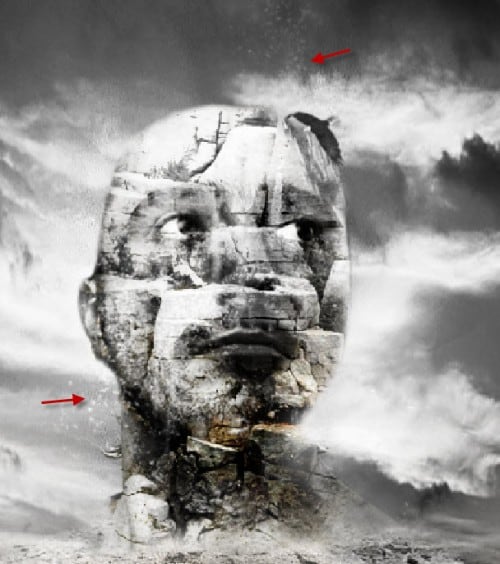
You can also add a spot light by creating a new layer on top of all previous layers, and use a soft white brush to do a single click:
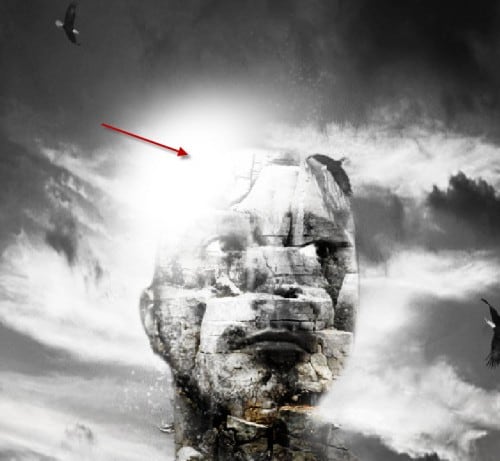
and here is the effect so far:

Finally, we can add some colours and perhaps sharpen the image a bit. I want you to experiment with different colour scheme and see what result they will bring you. One thing you need to remember is DO NOT over-use colour, a subtle effect will do in this occasion.
I also added some splatter brush paint just to spice up the image a bit.
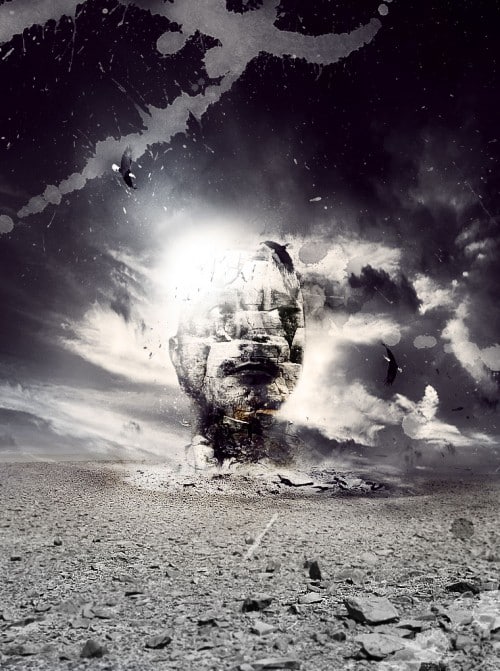
Here is the final effect I have for this tutorial: (click to enlarge)
That’s it for this tutorial! Hope you enjoy this tutorial and find it useful! Till next time, have a great day!







16 Comments
awesome :)
Like a war manipulation tutorial, thanks for this tutorial.
great tut, thx
Great tutorial and techniques well explained.
Thanks for sharing…
Bookmarked!
interesting work, it’s like a mix of 3D and 2D, very detailed
Awesome tutorial. Makes me wanna work harder to become better.
It’s really great post.Thanks for shearing it. It’s great tutorial and techniques well explained.
Thank You for tut…Nice work
Love this tut, love how you did the mood, by changing the color of the sky, very nice.
Great manipulation very usefull tks for sharing!
Perfect, detailed, well explained… This entry was a master piece, now with the tutorial this is priceless…well done
bad tytorial, this is not for anyone who is new to photoshop. You are only giving generic tutorial and expect us to use clipping tools but where the heck do you expect us to find that.
pleaseprovide a more detail tutorial and steps
very bad.
why don’t you give free download link for images?????
if you want to earn money then find other idiots. I’am not going to pay you.
@Arman: I do like that image so I bought it myself. Plus that stock image site is not run by me :)
Try another tutorial if you don’t like this one.
I love this tut and i think it’s a pretty explicit one,at least for some one who knows more than basics in ps,maybe you should start with an entry lvl tut first .
lovely tutorial….!! thankyou so much….