Close Menu
PSD VaultPSD Vault
  • VIP Area
  • Photoshop Basics
  • Photo Effect
  • Text Effect
  • Premium Tuts
  • Resources
  • Drawing
  • Inspiration
  • Web Graphics
  • Abstract
  • Freebies
  • Advertise
  • Get in Touch
  • About PSD Vault
Facebook Instagram Pinterest YouTube TikTok
Facebook Instagram Pinterest YouTube TikTok RSS
PSD VaultPSD Vault
  • VIP Area
    • Sign Up
    • Log In
  • Photoshop Basics
  • AI
  • Photoshop Error Fixes
  • Video Tutorial
  • Photo Effect
  • Text Effect
  • Premium Tuts
  • Drawing
  • Opinion
PSD VaultPSD Vault
Home»Photo Effect»Create Unique Lady Portrait Manipulation with Flower Patterns in Photoshop
Photo Effect

Create Unique Lady Portrait Manipulation with Flower Patterns in Photoshop

By James QuSeptember 11, 20144 Mins Read
Facebook Twitter Pinterest LinkedIn Tumblr Email
Share
Facebook Twitter LinkedIn Pinterest Email

In this tutorial, I will show you the steps to create this awesome photo manipulation of a lady portrait shot with flower patterns in Photoshop. Have a try!

The PSD file of this tutorial is available via the PSD Vault VIP members area.

This is an intermediate level tutorial so some steps can be challenging.

Here is a preview of the final effect I have for this tutorial: (click to enlarge)

PSD Vault VIP Membership

You can download the PSD File for this tutorial via the VIP Members Area for only $6.95/Month (or less)! You will not only get this PSD File, but also 200+ other PSD Files + Extra Goodies + Exclusive Photoshop tutorials there. Signup now and get exclusive!

OK Let’s get started!

To complete this tutorial, you will need the following stocks:

Model by faestock

Background texture

Flower stock image

Various Crack Brushes and Grunge Brushes (Google and you should be able to find lots of these)

Note: If you have difficulty with Step 3 – 5 of this tutorial, please check out this video tutorial below:

Step 1

Create a new document sized 800px * 1030px with black background. Load the background texture into Photoshop and select the following piece:

Copy and paste the selection over to our document and cover the entire canvas:

Use a combination of grunge and crack brushes as eraser, remove parts of the texture as shown below:

Add the following adjustment layers as clipping masks to this texture:

Black and White

Layer mask for the above black and white adjustment layer:
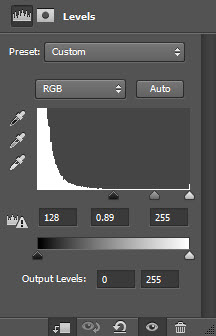
Levels

Curves

and here is the effect so far:

Step 2

We will work on the model in this step. Load the model image into Photoshop and select the following portion:

Copy and paste the selection over to our document, re-size and position it as shown below:

Apply the following layer mask on the model layer (in red), you can use a combination of grunge or splatter brush to achieve this:

And here is my effect after the layer mask:

Add the following adjustment layer as clipping masks to this model layer:

Black and White

Apply layer mask on the above black and white adjustment layer to reveal the lips area:

Levels

and here is my effect so far:

Step 3

We will add some green pattern over the face area in this step. Load the flower image into Photoshop and select the following area with Lasso Tool (40px feather):

Copy and paste the selection over to our document, resize as shown below:

Set it as clipping mask to the face layer (put this layer above the previous adjustment layers):

Use a small, hard eraser, remove the following parts from this green layer and reveal the face below:

Step 4

We will add the flower patterns over to our image. Again we use the Lasso Tool (40px feather) to select a portion as shown below:

Copy and paste the selection over to our document and place it below the model layer. Use a small, hard eraser to remove all parts except the pink flower bits:

Apply the following levels adjustment to this flower layer:

and here is the effect so far:

Duplicate this flower a few times and move them to the top as shown below:

Step 5

We’re almost done! To add some final touch-ups for our design, we can paint some splatters around the flower as shown below:

Add some cloud/smoke effect around the canvas:

Use the blur tool the blur-out some flowers on the top:

We’re then flatten the image, duplicate the background layer and apply the following Accented Edges filter to the duplicated layer:

Add the following layer mask to this duplicate layer:

and this is effect I have so far:

I further added some colours with a number of adjustment layer (selective color, curves, vibrance), I will leave this for you to experiment!

Here is the final effect: (click to enlarge)

That’s it for this tutorial! Hope you enjoy going through it and find it useful. Drop me a comment below if you have any question.

Till next time, have a great day!

flower lady manipulation portrait
Share. Facebook Twitter Pinterest LinkedIn Tumblr Email
James Qu
  • Website

James is a seasoned Photoshop expert with over 25 years of experience, mastering the software since its 5.0 version. As the driving force behind PSD Vault, he authors the majority of its in-depth tutorials and insightful articles.

Related Posts

How to Create Stunning Cityscape Portraits in Photoshop

July 1, 2025

How to Create Epic War Scene in Photoshop

June 30, 2025

Create Fiery Dragon Ravaging Mountain Village Scene in Photoshop

June 27, 2025

2 Comments

  1. Snowboy on September 30, 2014 3:04 AM

    I click on this tutorial only for the special color effect and you tell me to experiment…So sad!

  2. Teaman on November 19, 2014 2:57 AM

    I have a question like a abowe, how did you get that awesome colour effect.

Don't Miss

Why Learning Non-Destructive Editing is a Must for Every Photoshop Beginner

July 5, 2025

Mastering Sky Replacement in Photoshop: A Comprehensive Guide

July 4, 2025

How to Effectively Change Hair Colour in Photoshop

July 2, 2025

For Beginners

Basics

Mastering Sky Replacement in Photoshop: A Comprehensive Guide

By Lana WilsonJuly 4, 20256 Mins Read

How to Effectively Change Hair Colour in Photoshop

July 2, 2025

How to Use “Find Distractions” Feature in Photoshop for Easy Photo Clean-up

June 28, 2025

Photoshop June 2025 Update: Master New Features in Version 26.8

June 21, 2025

You May Also Like

Photo Effect

How to Create Stunning Cityscape Portraits in Photoshop

By James QuJuly 1, 20255 Mins Read
Photo Effect

How to Create Epic War Scene in Photoshop

By James QuJune 30, 20255 Mins Read
Photo Effect

Create Fiery Dragon Ravaging Mountain Village Scene in Photoshop

By James QuJune 27, 20254 Mins Read
Facebook X (Twitter) Instagram Pinterest
  • About Us
  • Get in Touch
  • Advertise
  • VIP Area
  • Privacy Policy
  • Terms & Conditions
© 2025 PSD Vault. All Right Reserved.

Type above and press Enter to search. Press Esc to cancel.

Manage Consent
To provide the best experiences, we use technologies like cookies to store and/or access device information. Consenting to these technologies will allow us to process data such as browsing behavior or unique IDs on this site. Not consenting or withdrawing consent, may adversely affect certain features and functions.
Functional Always active
The technical storage or access is strictly necessary for the legitimate purpose of enabling the use of a specific service explicitly requested by the subscriber or user, or for the sole purpose of carrying out the transmission of a communication over an electronic communications network.
Preferences
The technical storage or access is necessary for the legitimate purpose of storing preferences that are not requested by the subscriber or user.
Statistics
The technical storage or access that is used exclusively for statistical purposes. The technical storage or access that is used exclusively for anonymous statistical purposes. Without a subpoena, voluntary compliance on the part of your Internet Service Provider, or additional records from a third party, information stored or retrieved for this purpose alone cannot usually be used to identify you.
Marketing
The technical storage or access is required to create user profiles to send advertising, or to track the user on a website or across several websites for similar marketing purposes.
Manage options Manage services Manage {vendor_count} vendors Read more about these purposes
View preferences
{title} {title} {title}