In this tutorial, I will show you the steps I took to create this Mysterious “Energy Flow” rock text effect in Photoshop. We will use a rock texture, river flow stock image, and cloud brushes to achieve this effect. The rock texture will form the foundation of the text, whereas the river stock will be used to create the “Energy Flow” around the text. Have a try!
This is an intermediate level difficulty tutorial and require prior knowledge of basic Photoshop commands, as well as using layer masks in Photoshop to complete.
Here is a preview of the final effect I have for this tutorial: (click to enlarge)

PSD File Download
You can download the PSD File for this tutorial via the VIP Members Area for only $6.95/Month (or less)! You will not only get this PSD File, but also 100+ other PSD Files + Extra Goodies + Exclusive Photoshop tutorials there. Signup now and get exclusive :) Find out more about the VIP Members Areas

OK Let’s get started!
To complete this tutorial, you will need the following stocks:
Cloud Brushes (Pick a few from the list)
Step 1
Create a new document sized 1440px * 720px with black background. Use the cloud brushes you downloaded, paint some cloudy pattern over the background. You can choose whatever cloud brush you like, and here is my result after the cloud paint:

Load the rock texture into Photoshop and select the tip of the rock as shown below:

Copy and paste the selection onto our document, rotate and re-size the selection as shown below, and place it on the right side of the canvas:

Use a soft eraser to erase the edge of the rock, so it blends into the cloud background:

Repeat the above process and add another piece of rock on the left side of the canvas:

and here is the effect so far:

Step 2
We will work on the text in this step. Use any font you like, type a letter onto our document:

Again we select a piece of rock texture from the tip with the Quick Selection Tool:

Copy and paste the selection to our document and cover part of the letter as shown below:

Use the chalk brush as eraser, remove parts of the rock texture as shown below:


Repeat the above process, add another two pieces of rock to the letter, again we use the chalk brush to remove parts of the texture:
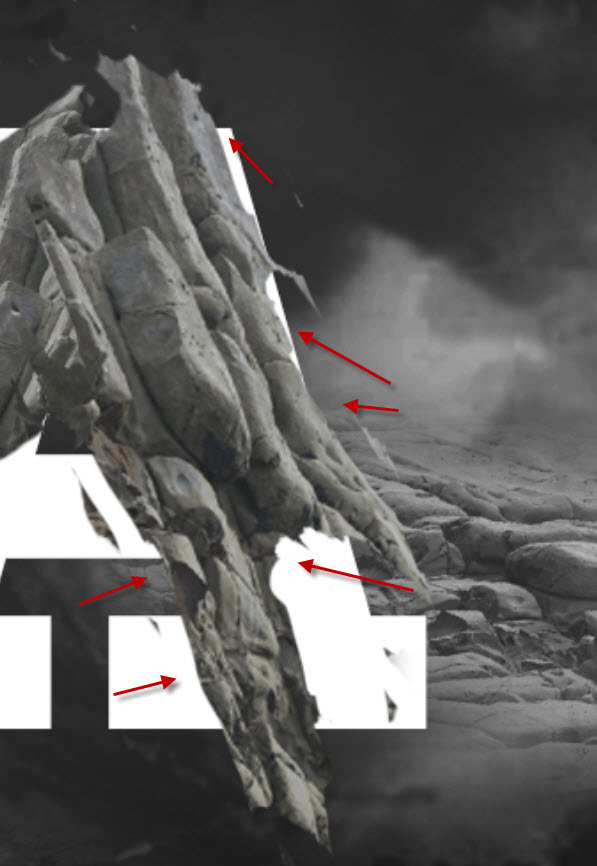

and here is the effect so far:

Step 3
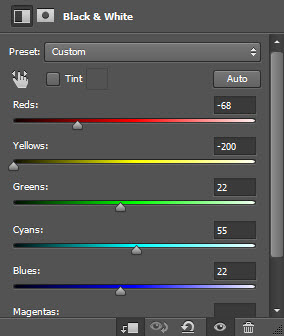
Group all the rock layers for the letter together. Add the following adjustment layers to this group:
Black and white
Levels

Curves

here is the layer sequence:

and here is the effect so far:

Step 4
We will work on creating the mysterious energy flow in this step. Load the river stock image into Photoshop and select the following piece:

Copy and paste the selection over to our document. Use the free transform tool to warp it as shown below:

Apply the following image adjustments to this layer:
Black and White

Levels

Then apply the following unsharp mask filter 3 times:

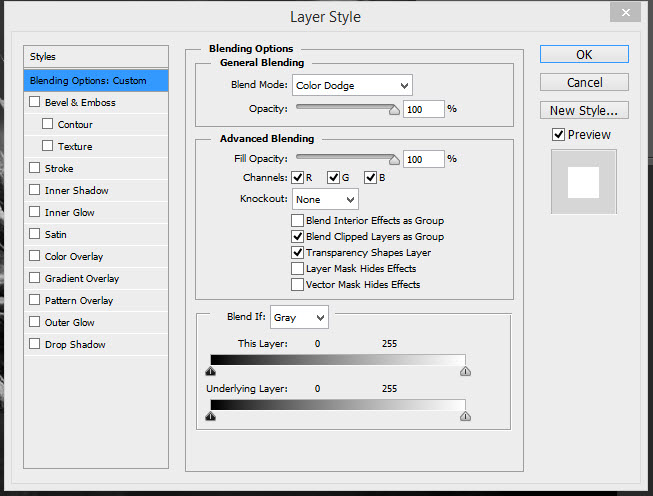
Then apply the follow color balance adjustments to this river layer:


Change the layer blend mode to “Color Dodge” for this river layer:
You will have the following effect – you can use the free transform tool to adjust its shape as you see fit:

Repeat the above process, and add more energy effect around the canvas:

Step 5
We will finalise our effect in this step by adding colour effect for our design. We can do so with the following adjustment layers on top:
Color Balance


Selective Color


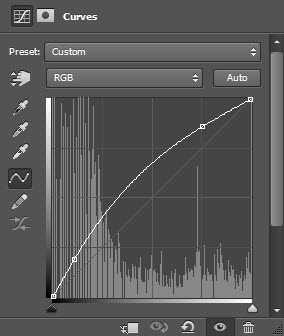
Levels

Curves
Vibrance

This is my final result for this tutorial: (click to enlarge)
That’s it for this tutorial! Hope you enjoy it and find it useful. Till next time, have a great day!
2 Comments
Most essential Text effect, You can change your choice wise
text style by few click most of people love this effect and which is supported
by Photo shop.
photoshop 3d text
effects
I like it when the red water comes out