Close Menu
PSD VaultPSD Vault
  • VIP Area
  • Photoshop Basics
  • Photo Effect
  • Text Effect
  • Premium Tuts
  • Resources
  • Drawing
  • Inspiration
  • Web Graphics
  • Abstract
  • Freebies
  • Advertise
  • Get in Touch
  • About PSD Vault
Facebook Instagram Pinterest YouTube TikTok
Facebook Instagram Pinterest YouTube TikTok RSS
PSD VaultPSD Vault
  • VIP Area
    • Sign Up
    • Log In
  • Photoshop Basics
  • AI
  • Photoshop Error Fixes
  • Video Tutorial
  • Photo Effect
  • Text Effect
  • Premium Tuts
  • Drawing
  • Opinion
PSD VaultPSD Vault
Home»Text Effect»How to Make Concrete Text with Break-Apart Effect in Photoshop
Text Effect

How to Make Concrete Text with Break-Apart Effect in Photoshop

By James QuApril 28, 20222 Mins Read
Share
Facebook Twitter LinkedIn Pinterest Email

In this tutorial, I will show you the processes of making concrete text with break-apart effect in Photoshop. The process involves custom brush painting, layer masking and image adjustments. Have a try!

The PSD file of this tutorial is available to buy on PSD Vault Shop, or via the PSD Vault VIP members area.

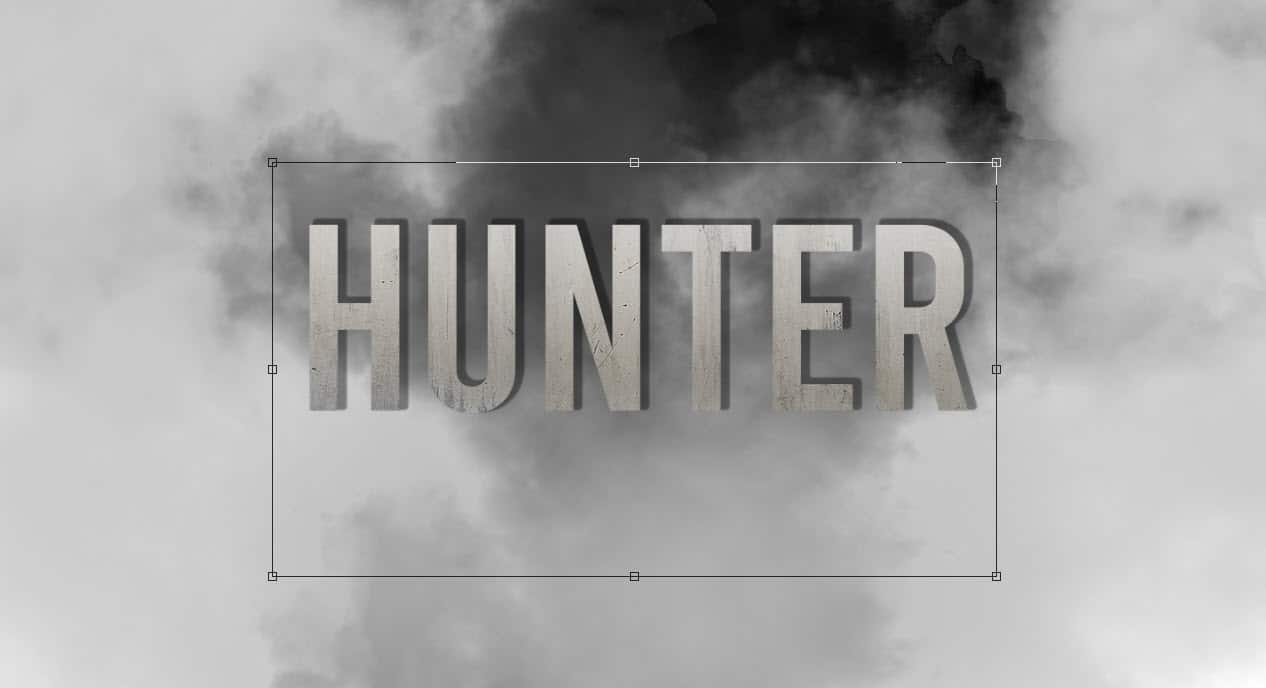
Here is a preview of the final effect I have for this tutorial: (click to enlarge)

Let’s get started!

Resource & Stock Images Required

You will need the following resources & stock images for this tutorial:

  • Font
  • Concrete Texture
  • Dirt Brushes
  • Smoke Brushes

Step 1 – Background Preparation

Create a new document sized 1440px * 800px with grey background:

Use the smoke Photoshop brushes to paint our the grey background:

Step 2 – Working on Concrete Text Effect

Use the font we downloaded, type some letters onto the canvas:

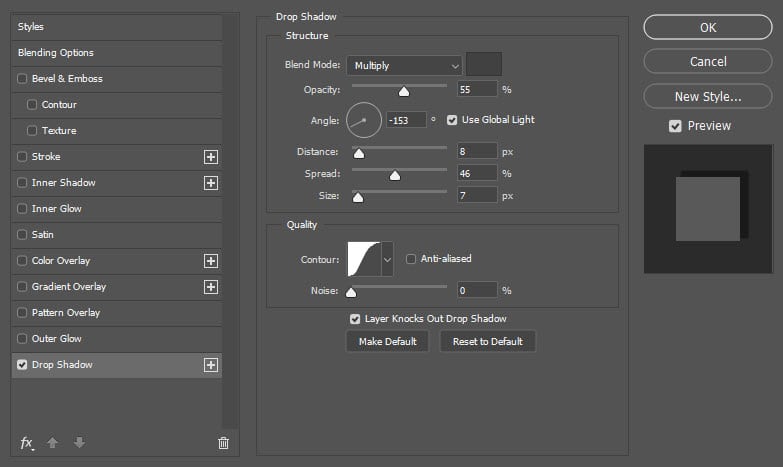
Apply the following “Drop Shadow” setting on the text:

Load the concerte stock image into Photoshop, copy and paste the texture over to our document, set the new layer as clipping mask to cover our text as shown below:

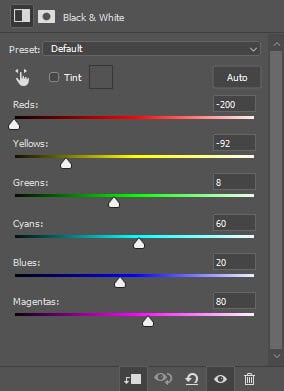
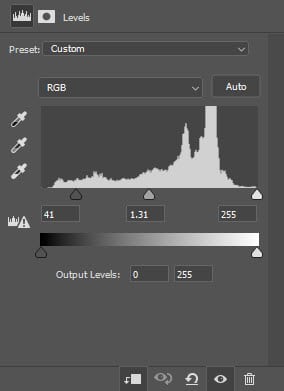
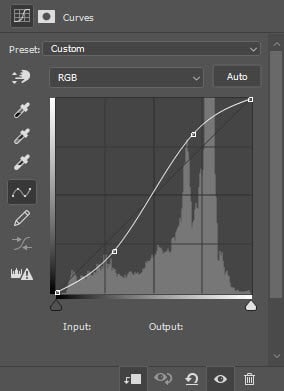
Apply the following image adjustment layer on top of the concrete layer, and set them as clipping masks:

Black and white

Levels

Curves

and here is the effect so far:

Step 3 – Break-apart Effect

Pick a brush from the dirt brushset we downloaded, with the following brush settings:

Duplicate all previous text layer we made in step 2, and merge them into one single layer. Use this brush as eraser, apply it over our texture to remove parts of it:

Create a new layer on top, then use the same brush with grey colour, paint over the text to create the break-apart effect:

and this is the result so far:

Step 4 – Final Touch-ups

We’re almost done! For final touch-ups, I flattened the image and duplicated the background layer, apply the following Angled Strokes filter on the duplicated layer:

As you can see, with this filter we now some extra texture effect for our concrete text:

I further adjusted the contrast of the image, and this is my final result: (click to enlarge)

That’s it for this tutorial! Hope you enjoy going through it and find it useful. Drop me a comment below if you have any question.

Till next time, have a great day!

break-apart concrete text
Share. Facebook Twitter Pinterest LinkedIn Tumblr Email
James Qu
  • Website

James is a seasoned Photoshop expert with over 25 years of experience based in Australia. As the driving force behind PSD Vault, he authors the majority of its in-depth tutorials and insightful articles.

Related Posts

How to Create Realistic Frozen Text with Cracks in Photoshop

December 11, 2025

Create an Electrified Text Effect in Photoshop

November 19, 2025

Create Realistic Neon Text Effect in Photoshop

November 8, 2025

Comments are closed.

Don't Miss

How to Resize Images Without Losing Quality in Photoshop

January 8, 2026

Photoshop Clipping Masks – Everything You Need to Know

January 7, 2026

Neural Filters in Photoshop – A Beginner’s Guide (Updated Jan 2026)

January 7, 2026

For Beginners

Basics

How to Resize Images Without Losing Quality in Photoshop

By James QuJanuary 8, 20265 Mins Read

Photoshop Clipping Masks – Everything You Need to Know

January 7, 2026

Neural Filters in Photoshop – A Beginner’s Guide (Updated Jan 2026)

January 7, 2026

10 Photoshop Blur Gallery Tricks That Will Make Your Photos Look Professional

January 6, 2026

You May Also Like

Text Effect

How to Create Realistic Frozen Text with Cracks in Photoshop

By James QuDecember 11, 20254 Mins Read
Text Effect

Create an Electrified Text Effect in Photoshop

By James QuNovember 19, 20254 Mins Read
Text Effect

Create Realistic Neon Text Effect in Photoshop

By Valentin PetroffNovember 8, 20253 Mins Read
Facebook X (Twitter) Instagram Pinterest
  • About Us
  • Get in Touch
  • Advertise
  • VIP Area
  • Privacy Policy
  • Terms & Conditions
© 2026 PSD Vault. All Right Reserved.

Type above and press Enter to search. Press Esc to cancel.

Manage Consent
To provide the best experiences, we use technologies like cookies to store and/or access device information. Consenting to these technologies will allow us to process data such as browsing behavior or unique IDs on this site. Not consenting or withdrawing consent, may adversely affect certain features and functions.
Functional Always active
The technical storage or access is strictly necessary for the legitimate purpose of enabling the use of a specific service explicitly requested by the subscriber or user, or for the sole purpose of carrying out the transmission of a communication over an electronic communications network.
Preferences
The technical storage or access is necessary for the legitimate purpose of storing preferences that are not requested by the subscriber or user.
Statistics
The technical storage or access that is used exclusively for statistical purposes. The technical storage or access that is used exclusively for anonymous statistical purposes. Without a subpoena, voluntary compliance on the part of your Internet Service Provider, or additional records from a third party, information stored or retrieved for this purpose alone cannot usually be used to identify you.
Marketing
The technical storage or access is required to create user profiles to send advertising, or to track the user on a website or across several websites for similar marketing purposes.
  • Manage options
  • Manage services
  • Manage {vendor_count} vendors
  • Read more about these purposes
View preferences
  • {title}
  • {title}
  • {title}