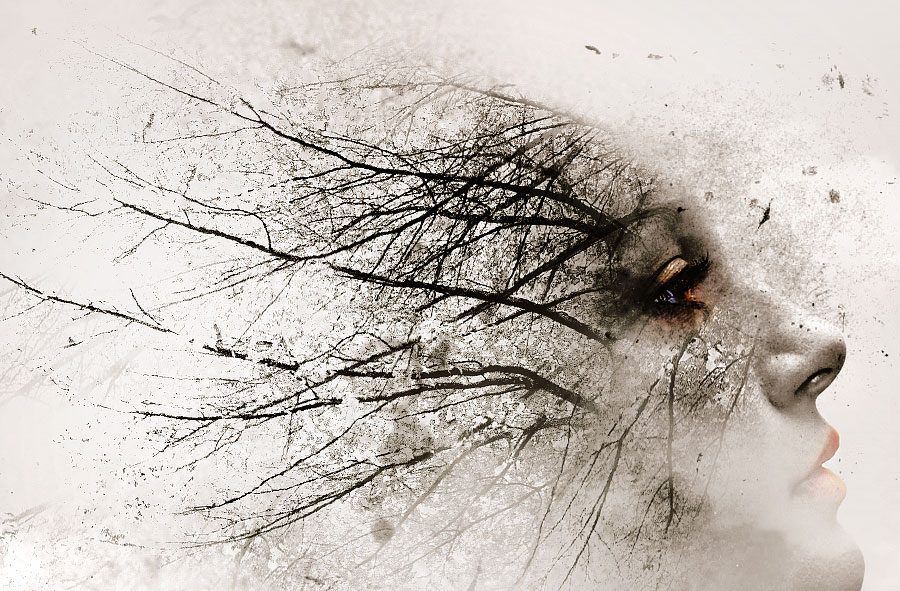
In this tutorial, I will show you the process of creating an artistic portrait photo effect in Photoshop. We will blend a portrait stock image with a few natural elements: tree branches, rocks & birds to create this effect. Have a try!
This tutorial is of intermediate difficulty and I recommend that you have sound knowledge of layer blending, image adjustments & masking, prior to attempting this tutorial.
The PSD file of this tutorial is available via the PSD Vault VIP members area.
Here is a preview of the final effect: (click to enlarge)
PSD Vault VIP Membership
You can download the PSD File for this tutorial via the VIP Members Area for only $6.95/Month (or less)! You will not only get this PSD File, but also 200+ other PSD Files + Extra Goodies + Exclusive Photoshop tutorials there. Signup now and get exclusive!
OK Let’s begin!
To complete this tutorial, you will need the following stocks:
Step 1
Create a new document using 900px width & 1180px height, with a light grey background. Use a white cloud brush, paint some cloud over the background as shown below:
Load the model stock image into Photoshop, select the face area as shown below:
Copy and paste the selection to our document, resize and flip it horizontally as shown below:
Erase the hair and neck portion from the model layer:
Apply the following image adjustment layers as clipping masks for this model layer:
Black and White
Reveal the eye and lips from above Black & White adjustment layer:
Levels
Curves
and here is the effect so far:
Step 2
Load the tree branches image into Photoshop. Copy and paste the entire image onto our document, rotate and place it as shown below:
Use a soft eraser, remove the following area from the tree branches and blend it into the face:
Apply the following image adjustment to this tree branches layer:
Black and White
Duplicate this tree branches layer once, and set the duplicate layer’s blend mode to “multiply”. Move the new duplicate layer to the right and cover part of the model’s face:
and this is the effect you will have:
Step 3
Load the rock stock image into Photoshop and select a portion of the image:
Copy and paste the rock onto our document, use a soft eraser to fade the following area:
Apply the following curves adjustment to this rock layer:
and this is the effect so far:
Step 4
We’re almost done! In this final step, we can use a particle brush to paint some scattered particle effect over the image:
Also, use the bird brushes to paint a few flying brush over the rocks:
I adjusted the colour balance slightly to add some warm colour, and this is my final result: (click to enlarge)
That’s it for this Photoshop tutorial! If you have any questions, simply leave a comment below. Till next time, have a great day!


