")
Inverting a layer mask in Photoshop flips every black pixel to white and every white pixel to black — instantly reversing what is hidden and what is revealed. Here’s how to do it, when to use it, and how it fits into every major masking workflow.
Quick Answer: How to invert a layer mask in Photoshop
Click the layer mask thumbnail in the Layers panel to select it (you’ll see a white highlight border appear around it). Then press Ctrl+I (Windows) or Cmd+I (Mac). The mask inverts instantly — black becomes white, white becomes black, and everything that was hidden becomes visible and vice versa.Alternative: with the mask thumbnail selected, go to Image > Adjustments > Invert. Both methods produce identical results.
| Difficulty | Beginner — the invert operation itself is one keystroke |
| Time Required | 5 seconds to invert · 10–20 minutes to master the surrounding workflow |
| Shortcut | Ctrl+I (Windows) / Cmd+I (Mac) with mask thumbnail selected |
| Works In | All Photoshop CC versions, CS6, and earlier |
| Affects | Layer masks, vector masks, and adjustment layer masks — same shortcut for all |
| Key Concept | Black = hidden (transparent). White = visible. Grey = partially transparent. |
Why inverting a layer mask is one of the most useful things to know
Inverting a layer mask in Photoshop is a single keystroke — Ctrl+I or Cmd+I — but knowing when and why to use it is what separates efficient Photoshop users from those who repeatedly redo work from scratch. The invert operation flips the entire mask: every black pixel becomes white, every white pixel becomes black, and every shade of grey becomes its opposite tonal value.
In practical terms: if your mask was hiding a subject and showing the background, inverting it immediately shows the subject and hides the background. No repainting, no new selections, no starting over. It’s one of the fastest workflow moves in all of Photoshop.
But to use it effectively, you need to understand layer masks properly. This guide covers the invert operation in full context: how masks work, when inverting is the right move, how to create a black mask from the start, and the real-world scenarios where this technique saves significant time.
Layer Mask Fundamentals: Black, White, and Grey
Every layer mask in Photoshop operates on a single principle: black hides, white reveals, and grey partially reveals. This three-value system applies consistently across every type of mask in every version of Photoshop — once you internalise it, masks become intuitive.
| 🔑 Key Rule: Black = hidden (transparent). White = visible. Grey = partially transparent. This rule never changes, regardless of what type of mask you’re using or what layer it’s applied to. |
Here’s how that translates in practice:
| Mask Colour | What You See | What’s Hidden | Opacity Level |
| Pure White (#FFFFFF) | Full layer content | Nothing | 100% visible |
| Pure Black (#000000) | Nothing | Full layer content | 0% visible (transparent) |
| Mid Grey (#808080) | Partial layer | Partial layer | 50% visible |
| Light Grey (#C8C8C8) | Mostly visible | Slight transparency | ~78% visible |
| Dark Grey (#404040) | Faint visibility | Mostly transparent | ~25% visible |
| 🔍 Why this works: The grey values in a mask create smooth, feathered transitions — this is what makes masking superior to erasing. An erased pixel is gone permanently. A grey mask pixel is merely suppressed — you can paint white over it to restore full visibility at any time. This non-destructive nature is the entire point of using masks. |
White mask vs black mask — starting positions
When you add a layer mask in Photoshop, you choose between two starting states:
- White mask (Reveal All): the entire layer is visible. You paint black to hide areas. This is the default when you click the Add Layer Mask button at the bottom of the Layers panel.
- Black mask (Hide All): the entire layer is hidden. You paint white to reveal areas. To create this directly: hold Alt/Opt and click the Add Layer Mask button. Alternatively, add a white mask and press Ctrl/Cmd+I to invert it to black.
| 💡 Pro Tip: The choice between starting with a white or black mask is a workflow decision. If most of the layer should be visible and you only need to hide a few areas, start white and paint black. If most of the layer should be hidden and you only need to reveal specific parts, start black and paint white. Choosing correctly at the start saves significant painting time. |
How to Invert a Layer Mask: Step by Step
Step 1: Select the Layer Mask Thumbnail
In the Layers panel, find the layer whose mask you want to invert. A layer mask appears as a separate thumbnail to the right of the layer’s content thumbnail — it looks like a white or black rectangle.
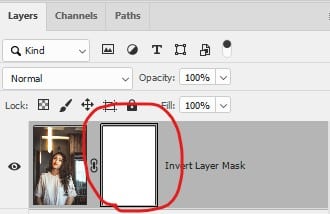
Click directly on the mask thumbnail. A white highlight border appears around it, and in the Properties panel (Window > Properties) you’ll see the mask options appear. This border is your confirmation that the mask is selected — not the layer content itself.
| ⚠ Watch Out: The most common mistake when inverting: pressing Ctrl/Cmd+I without first clicking the mask thumbnail. If the layer content is selected (not the mask), Ctrl+I inverts the actual image pixels — turning colours to their complements, like a photo negative. Always confirm the white border is on the mask thumbnail before inverting. |
Step 2: Invert the Mask
With the mask thumbnail selected, use either method:
- Keyboard shortcut (fastest): Ctrl+I (Windows) or Cmd+I (Mac). The mask inverts instantly. No dialogue, no confirmation — it happens immediately.
- Menu path: Image > Adjustments > Invert. Identical result to the shortcut.
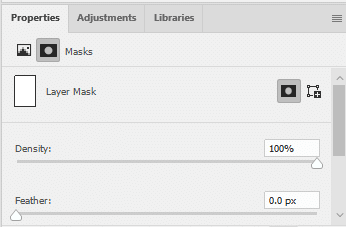
- Properties panel: with the mask selected, the Properties panel shows a small Invert button — click it for the same result. Useful if you’re already in the Properties panel adjusting mask density or feathering.
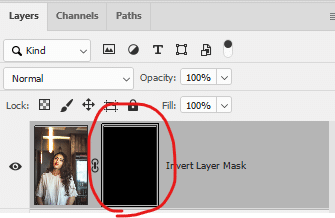
The mask thumbnail in the Layers panel updates immediately to show the inverted state — what was white is now black and vice versa. Any grey gradients or feathered areas also invert to their tonal opposite.
Step 3: Verify the Result
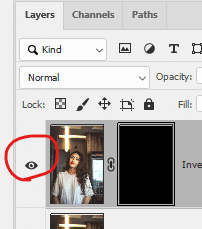
Toggle the layer’s eye icon on and off to compare the before and after states. If the mask has inverted correctly, areas that were previously visible are now hidden, and hidden areas are now revealed.
To view the mask itself directly on the canvas — useful for checking complex masks with fine detail — Alt/Opt+click the mask thumbnail. The canvas switches to showing the mask as a greyscale image. Alt/Opt+click again to return to the normal composite view.
| 💡 Pro Tip: Shift+click the mask thumbnail to temporarily disable it (a red X appears over the mask). This lets you see the full unmasked layer beneath, which is useful for confirming what the mask is hiding before and after inverting. |
When to Invert a Layer Mask: Real-World Scenarios
Knowing the shortcut is the easy part. Knowing when inverting is the right call — versus painting or creating a new mask — is what makes this technique genuinely useful. Here are the most common scenarios:
| Scenario | What Happened | Why Invert Fixes It |
| Selection resulted in the wrong area being masked | Made a selection, added mask — but the background is showing instead of the subject | The selection masked the subject rather than protecting it. Inverting the mask switches which area is protected. |
| Want to reveal specific elements from a hidden layer | Layer is fully hidden (black mask from Alt+click). Need to paint in specific visible areas. | Starting with a black mask and painting white is correct — but if you accidentally started with white, inverting gives you the black start you need instantly. |
| Exploring the opposite of a complex mask | Spent time painting a detailed mask — want to see what the inverse looks like without repainting | Ctrl+I previews the inverse instantly. Ctrl+I again to return. Non-destructive experimentation. |
| Adjustment layer affecting the wrong areas | Added a Curves adjustment but it’s brightening shadows instead of highlights | The adjustment layer’s mask may be inverted from what you intended. Invert the mask to flip which areas the adjustment affects. |
| Quick background removal after Select Subject | Used Select > Subject, added mask — subject is masked out instead of the background being masked | The selection included the background. Inverting the mask keeps the subject and removes the background. |
| 📌 James’ Note: The Select Subject + Invert scenario (last row above) is one of the most frequent uses of mask inversion in modern Photoshop. Select > Subject is excellent at identifying the main subject, but adding a mask directly from that selection sometimes masks the subject rather than protecting it, depending on what was selected and whether the selection was inverted before adding the mask. Inverting the mask after the fact fixes this in one keystroke. |
Creating a Black Mask Directly — The Workflow Shortcut
A common workflow need: you want to add a mask that hides the entire layer, then reveal specific areas by painting white. This is called a ‘Hide All’ mask and it’s the starting point for dozens of compositing and retouching techniques.
Three ways to create a black (Hide All) mask:
- Hold Alt/Opt and click the Add Layer Mask button at the bottom of the Layers panel. This creates a black mask directly — the fastest method.
- Click the Add Layer Mask button (creates white mask), then immediately press Ctrl/Cmd+I to invert it to black.
- Go to Layer > Layer Mask > Hide All. This adds a black mask via the menu — useful if you prefer menu navigation.
| 🔍 Why this works: Many Photoshop effects and compositing workflows start with a black mask because it’s safer. With a black starting mask, the layer is completely hidden until you deliberately paint white to reveal it. This ‘opt-in’ approach means you never accidentally reveal parts of the layer you didn’t intend — you have to actively paint in every visible area. It gives you maximum control over a complex composite from the first stroke. |
Painting on Layer Masks: The Complete Guide
Once you understand black-and-white logic, painting on masks becomes the primary way to refine them. Here’s the complete workflow:
Essential painting controls
- D key: resets foreground/background to black and white (the mask painting colours). Press this before painting on a mask to confirm you’re working with correct colours.
- X key: swaps foreground and background colours. While painting a mask, this instantly switches between painting black (hiding) and painting white (revealing). Use X constantly while refining mask edges.
- Brush opacity: painting at less than 100% opacity on a mask creates grey — which produces partial transparency. Use 20–30% opacity for soft, graduated edges. Use 100% for crisp, hard mask boundaries.
- Brush hardness: 0% hardness for feathered, blended mask edges (portraits, hair, atmospheric effects). 100% hardness for precise, hard mask edges (geometric shapes, product cutouts).
The painting workflow in practice
Here’s the sequence I use for portrait compositing — subject extraction where the mask needs to distinguish skin, hair, and clothing from a complex background:
- Add a mask (white — Reveal All) to the portrait layer.
- Select the mask thumbnail to confirm it’s active (white border visible).
- Press D to reset colours, then paint with a large soft black brush at 80% opacity over the background areas you want to hide.
- Press X to switch to white, reduce brush to a smaller size, and paint back any areas of the subject that were accidentally hidden.
- For hair edges: reduce brush opacity to 15–20% and use very small strokes to gradually build up mask transparency along individual hair strands. Multiple low-opacity passes produce more natural results than one high-opacity pass.
- For skin edges along the face: use Select and Mask (Select > Select and Mask) with the Refine Edge Brush to let Photoshop auto-detect the precise edge. Output to a new mask.
| 💡 Pro Tip: When painting on a mask, hold Shift and click to paint a straight line between two points — exactly like Shift+clicking in the normal canvas. This is useful for masking architectural elements with straight edges along buildings or product packaging. |
Gradient Masks: Smooth Transitions Without Painting
The Gradient Tool applied to a mask is one of the most powerful and underused masking techniques. It creates perfectly smooth tonal transitions that no brush work can match — useful for blending two images together, creating vignettes, fading an element at the edges, or building atmospheric depth.
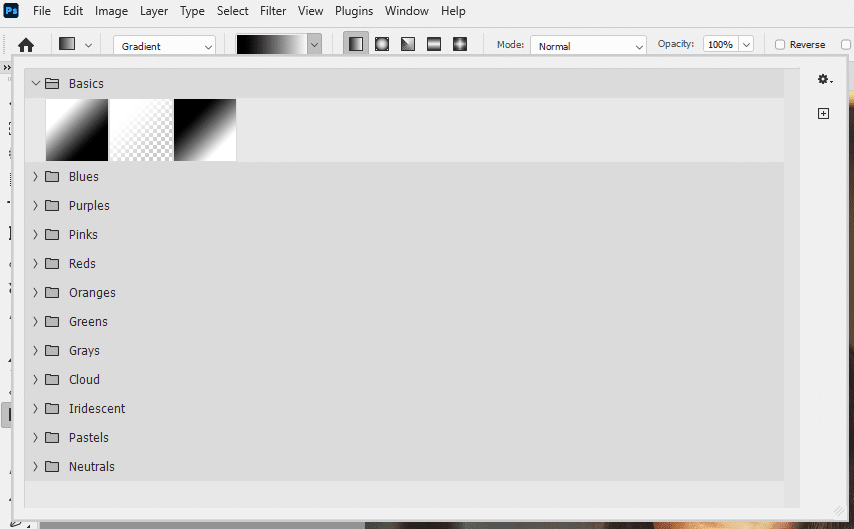
Step 1: Set Up the Gradient on the Mask
Select your mask thumbnail (white border appears). Select the Gradient Tool (G). In the Options Bar, confirm the gradient is set to Black-to-White (or Foreground-to-Background with black foreground and white background). Choose Linear gradient style.
Step 2: Drag to Create the Transition
Click at the point where you want full visibility to begin and drag to where you want full transparency to end. Photoshop draws a gradient on the mask between those two points — white at the start (visible), black at the end (hidden), with a smooth grey gradient between them.
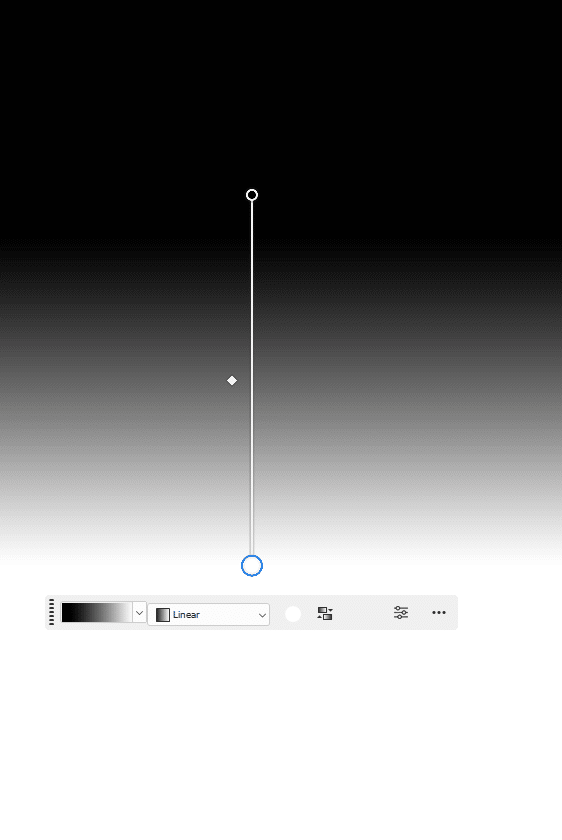
The length of your drag determines the transition width: a short drag creates an abrupt transition, a long drag creates a gradual fade. Hold Shift while dragging to constrain to horizontal, vertical, or 45° angles.
| ⚠ Watch Out: Dragging a gradient onto a mask replaces any existing painting on the mask — it’s not additive. If you’ve already painted a complex mask and want to add a gradient fade, use the Gradient Tool in Multiply or Screen mode in the Options Bar, or make a selection on the mask first to constrain the gradient’s effect to a specific area. |
Step 3: Refine the Gradient Mask
After placing the gradient, switch to the Brush Tool and paint white or black at reduced opacity to refine specific areas. The gradient gives you the smooth overall fade; the brush lets you recover any areas where the gradient was too aggressive or not aggressive enough.
| 📌 James’ Note: For blending two landscape photos together at a horizon line, a horizontal black-to-white gradient mask is the standard technique. Place Photo A as the bottom layer, Photo B above it, add a gradient mask to Photo B that fades from white (top, Photo B visible) to black (bottom, Photo B hidden), revealing Photo A through the bottom. The two images merge seamlessly at the horizon. |
Mask Density and Feather: Refining Any Mask in Properties
Two controls in the Properties panel (Window > Properties, with a mask selected) give you global adjustment over any mask without repainting:
- Density: reduces the maximum opacity of the mask. At 100%, pure black in the mask is fully transparent. Reducing Density to 70% makes even pure black areas only 70% transparent — the rest of the layer becomes slightly visible through the ‘hidden’ areas. Use this to create a ghosting effect, or to blend a heavy-handed mask without repainting it.
- Feather: applies a global blur to the entire mask, softening all edges simultaneously. A Feather value of 3–5px softens a hard mask without individual edge work. Use this as a quick alternative to manually painting soft edges.
| 💡 Pro Tip: Density and Feather are non-destructive sliders — they don’t alter the actual mask pixels, just the way the mask is rendered. You can adjust them at any time without any effect on the underlying mask painting. This makes them ideal for rapid experimentation: push Feather to 20px to see how a very soft mask looks, then return to 0 without losing any work. |
Inverting Masks on Adjustment Layers
Adjustment layers — Curves, Hue/Saturation, Levels, Color Balance — all come with their own built-in mask. This mask controls which areas of the image the adjustment affects. Inverting it is particularly useful for targeted retouching.
Common adjustment layer + inverted mask scenarios:
- Skin retouching: add a Curves adjustment to brighten the overall image. Then invert its mask to pure black (hiding the adjustment everywhere). Paint white with a soft brush only on the skin areas you want to brighten — every other area is unaffected.
- Dodging and burning: add a Curves adjustment layer set to Multiply blend mode (darkening). Invert the mask to black. Paint white on shadow areas to selectively deepen them. Add a second Curves in Screen mode (brightening) with an inverted black mask, then paint white on highlight areas to brighten them selectively.
- Sky colour correction: add a Hue/Saturation adjustment and tune the blues for the sky. Invert its mask to black so the adjustment is hidden. Paint white only on the sky to reveal the colour correction there, leaving the foreground untouched.
| 🔍 Why this works: Using an adjustment layer with an inverted black mask is the professional alternative to painting dodge/burn directly on pixels. Direct pixel painting is destructive and unpredictable. An adjustment layer with a mask is fully editable — you can reduce the adjustment’s opacity, repaint the mask, change the curve, or delete the layer entirely with zero impact on the underlying pixels. |
Complete Layer Mask Keyboard Shortcut Reference
| Action | Windows | Mac |
| Invert selected mask | Ctrl+I | Cmd+I |
| Add white (Reveal All) mask | Click mask button | Click mask button |
| Add black (Hide All) mask | Alt+click mask button | Opt+click mask button |
| View mask on canvas | Alt+click mask thumbnail | Opt+click mask thumbnail |
| Enable/disable mask | Shift+click mask thumbnail | Shift+click mask thumbnail |
| Apply/delete mask | Right-click mask thumbnail | Right-click mask thumbnail |
| Reset foreground/background colours | D | D |
| Swap foreground/background colours | X | X |
| Refine mask edges | Select > Select and Mask | Select > Select and Mask |
| Link/unlink mask to layer | Click chain between thumbnails | Click chain between thumbnails |
| Delete mask (discard) | Right-click > Delete Layer Mask | Right-click > Delete Layer Mask |
| Apply mask (merge to layer) | Right-click > Apply Layer Mask | Right-click > Apply Layer Mask |
Troubleshooting — Common Layer Mask Problems
| Problem | Cause | Fix |
| Ctrl+I inverted the image colours, not the mask | Layer content was selected, not the mask thumbnail | Click directly on the mask thumbnail (white border must appear). Press Ctrl+Z to undo the accidental image invert, then select the mask and try again. |
| Painting on mask shows black/white brushstrokes on canvas instead of masking | Painting on the layer, not the mask | Click the mask thumbnail in the Layers panel. Painting on the layer content rather than the mask paints visible pixels. Press Ctrl+Z to remove the brush strokes. |
| Mask inverted but effect looks the same | Mask was already at the mid-point (50% grey overall) | Check the mask thumbnail — if it was mostly grey before inverting, the visual difference will be subtle. View the mask with Alt+click to inspect the actual greyscale state. |
| Layer disappears completely after adding mask | A black mask was added to a layer that was already correctly masked | Check if a black (Hide All) mask was added accidentally (Alt+click). The layer is still there — invert the mask to white to reveal it, then repaint as needed. |
| Brush painting grey instead of pure black or white | Brush foreground colour is not pure black or white | Press D to reset to default black/white. Check the foreground colour swatch at the bottom of the toolbar — it should be pure #000000 or #FFFFFF. |
| Adjustment layer affecting the entire image despite mask | Mask is white (Reveal All) when it should be inverted | Select the adjustment layer’s mask thumbnail and press Ctrl/Cmd+I to invert to black. Then paint white only on the areas the adjustment should affect. |
| Can’t see the mask thumbnail in Layers panel | Layer panel thumbnail size may be set to None | Right-click in an empty area of the Layers panel and choose Panel Options. Set Thumbnail Size to a visible size. If masks still don’t show, the document may have vector masks rather than pixel masks. |
Frequently Asked Questions
Does inverting a layer mask affect the original layer content?
No. Inverting the mask only changes what is visible and what is hidden — it never touches the actual pixels or adjustments on the layer itself. The original content is always preserved intact under the mask, regardless of how many times you invert, paint, or modify the mask.
Can I invert a mask on a Smart Object?
Yes. Smart Object layers support layer masks and the invert shortcut works identically. Click the mask thumbnail on the Smart Object layer and press Ctrl/Cmd+I. The Smart Object’s internal content is not affected.
What’s the difference between inverting the mask and inverting the layer?
Inverting the mask (mask thumbnail selected → Ctrl+I) flips black and white values in the mask, reversing visibility. Inverting the layer content (layer thumbnail selected → Ctrl+I) inverts the actual image colours — turning a photo into its colour negative. Two completely different operations triggered by the same shortcut depending on which thumbnail is selected.
Can I partially invert a mask — only a section of it?
Yes. Make a selection on the canvas (Lasso, Marquee, or Select and Mask), then with the mask thumbnail selected, press Ctrl/Cmd+I. Photoshop inverts only the mask pixels within the selected area, leaving the rest of the mask unchanged. This is useful for complex masks where you want to flip a specific region without affecting the whole mask.
Is there a way to invert a mask when creating it — not after?
Yes — two ways. First, invert your selection before adding the mask: Select > Inverse (Shift+Ctrl/Cmd+I) flips the selection, then add the mask. Second, if adding a mask without a selection, hold Alt/Opt and click the Add Layer Mask button to create a black (fully inverted) mask directly.