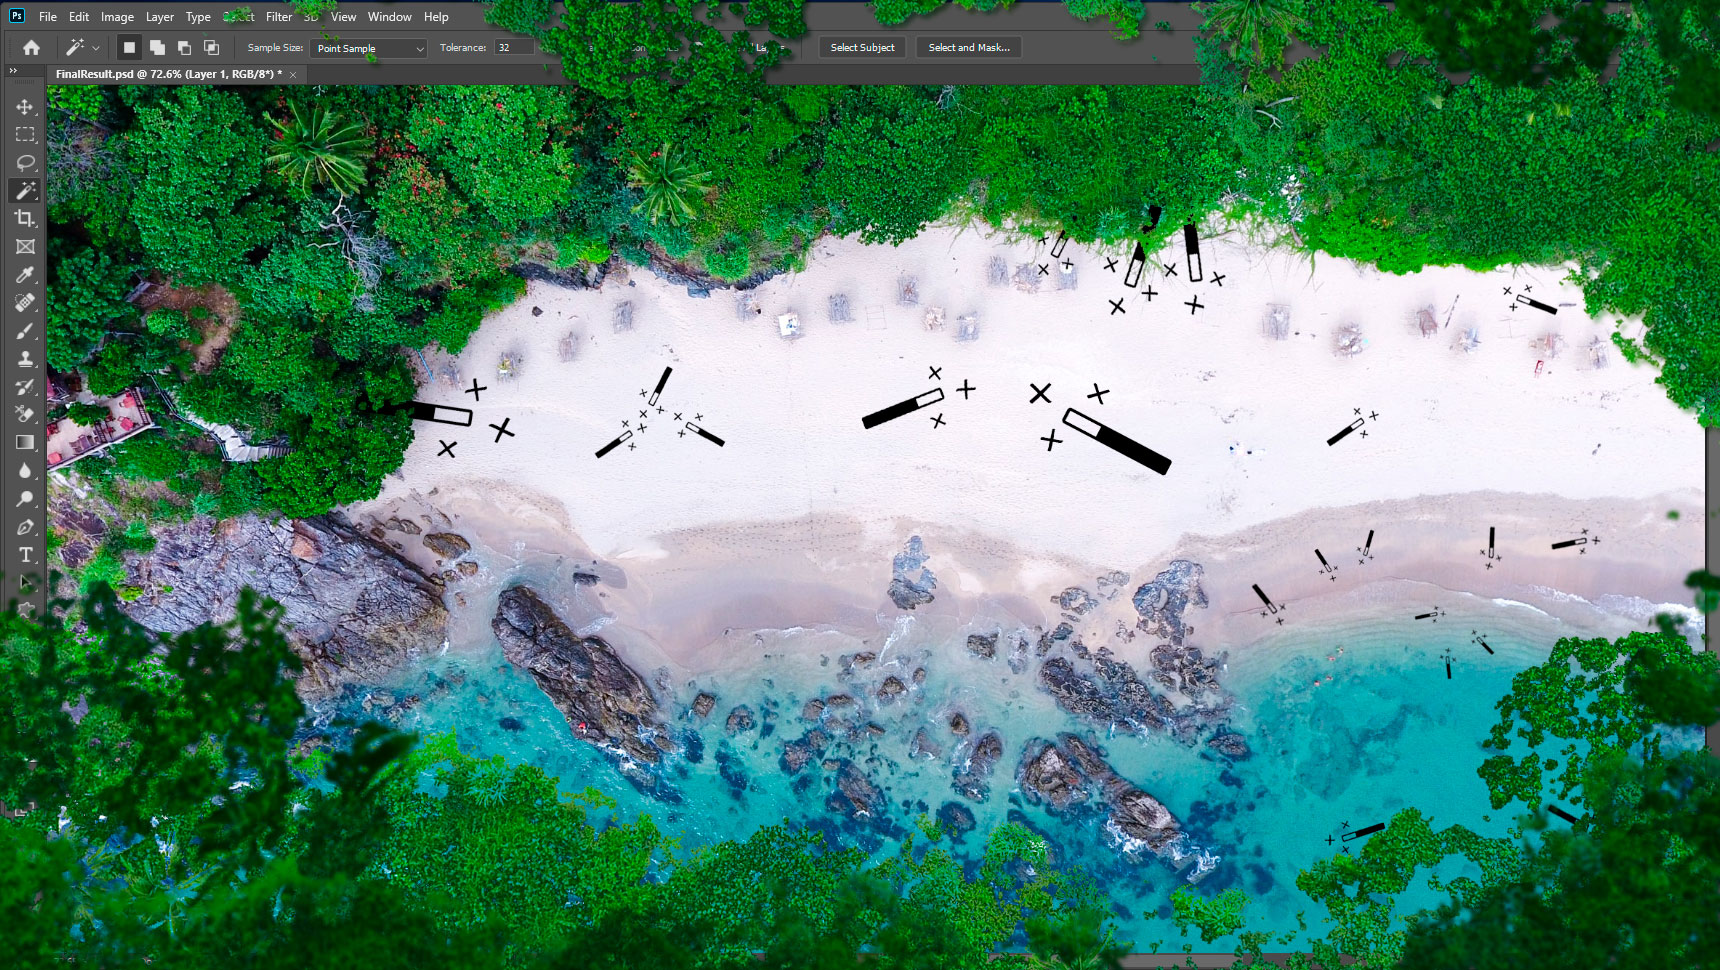
Magic Wand Tool is the easiest and fastest selection tool. It is pretty easy to use – pick this tool from the toolbar or via the shortcut “W” key on the keyboard. Click on the desired area to select – you’re done! In one click, you get a huge area of one tone captured. Let’s raise the curtain a bit and figure out what this magic consists of and how to tame it.

How Exactly Does Magic Wand Tool Work?
This tool creates selections that share the same color and brightness values. These tool algorithms look at the tone and value of the area we clicked on and selects pixels that are most similar to what we specify.
The thing is that color, and especially in photographs, is deceiving. It seems to you that you took a sample of one tone and next to it the same color. This is far from the case – this is a completely different shade. Fine details in the photo are everywhere. Our eye can’t distinguish micro-shades. Especially, if there are no contrast or distinctive peaks along.
From which we can orient ourselves darker or lighter in one shade or another. The same thing with the Magic Wand Tool algorithm. It is not always able to determine what you need to capture. It based its judgments on the exact values of colors.
Consequently, adds unnecessary objects to your selection, or does not capture what seemed to be captured. For some unknown reason, this tool may leave a wide and noisy edging around the selection. Even though it’s the same color.
Often it comes from lighting effects and chromatic aberrations. Which are almost invisible to the eye but they are present in almost every photo. All this appears for a variety of reasons – camera, lenses, weather, lighting, etc… Fine-tuning will help Photoshop to navigate how to perceive what you want to select. And where to stop so as not to add too much.
Tutorial Resources
- Bird’s-eye Landscape Photo by Humphrey Muleba on Unsplash
Settings Overview
You can control this magic by using the settings at the top of the working window. The first group changes modes. With this, you can set the behavior of the tool. Whether it will add or remove everything that you click over.
- Single-Selection: new selection each click. The default behavior of the tool.
- Add To Selection: grow or add to existed selection new areas. Shortcut: hold down SHIFT.
- Subtract from Selection: remove pixels from your selection when clicking on the unwanted area. Shortcut: hold down Opt(Mac)/Alt(Win).
- Intersect with Selection: this creates a new selection that only includes pixels from a previous selection. Shortcut: hold down SHIFT + Opt(Mac)/Alt(Win).
The next group of settings handles how Photoshop’s Magic Wand selects pixels based on tone and color. These parameters are responsible for how to think about the pixels of the adjacent color. These settings help to restrict or improve the precision of the selection.
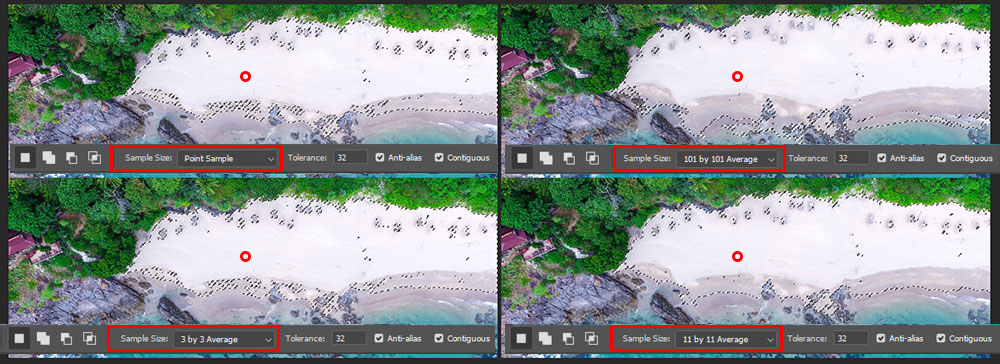
Sample Size
The size of the area averaging the colors of the pixels around the sample. The original image comprises pixels. Imagine a small invisible circle at the tip of the pointer and when you click to select one color/pixel.
You select many pixels with different colors. Everything within this invisible circle will consider as an initial sample and averaged all colors inside it. This selection criterion uses to compare with other colors all over the image.
By default, the Magic Wand Tool is select only one pixel’s color at a time. An increase or decrease can affect the average shade, on the accuracy of the tool. This feature has appeared in new versions of Photoshop.
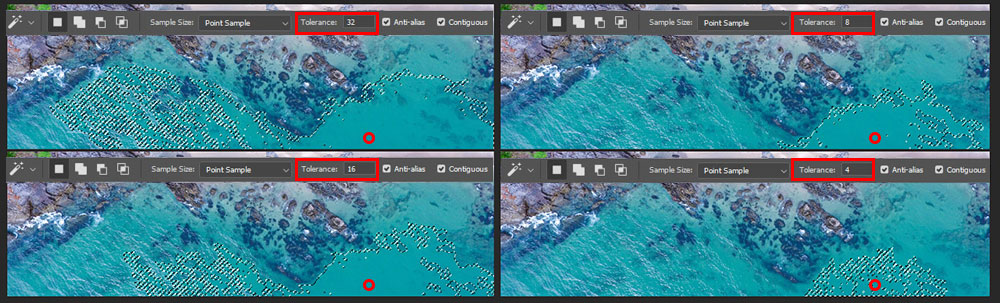
Tolerance
Determines the color range of selected pixels. A low value selects a few colors very similar to the initial sample. A higher value selects a broader range of colors. You can set values in pixels, ranging from 0 to 255. If the defaults select too much, decrease that value to half or less.
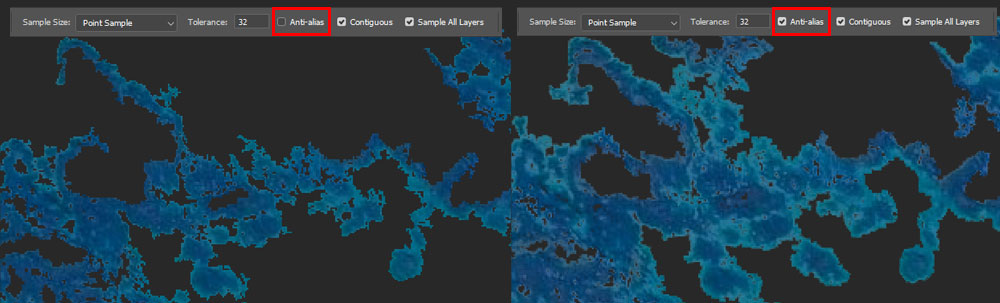
Anti-aliased
Creates a smoother-edged selection. This function leaves a very thin soft band around the selection, like a margin. Useful for photo editing/manipulation, digital art. Extremely harmful in graphic design and pixel art where need greater clarity and precision. Without blurry edges, noise, and stripes.
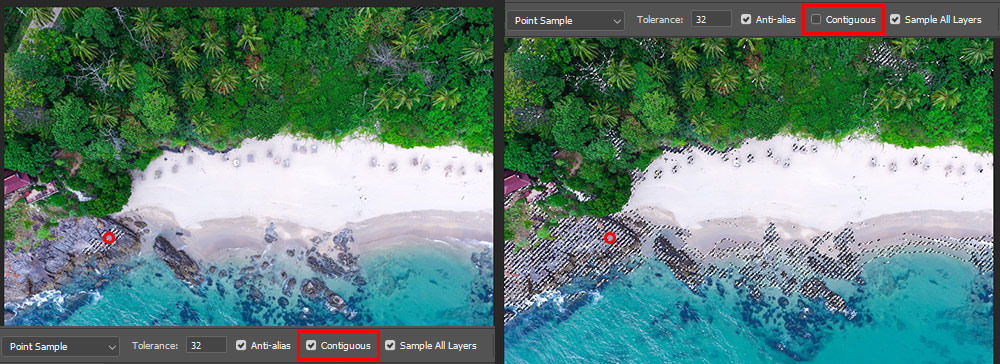
Contiguous
Selects only adjacent areas/islands within the tolerance range using the same colors. Otherwise, all pixels in the entire image that have exactly the same color value (see Sample Size above) selected.
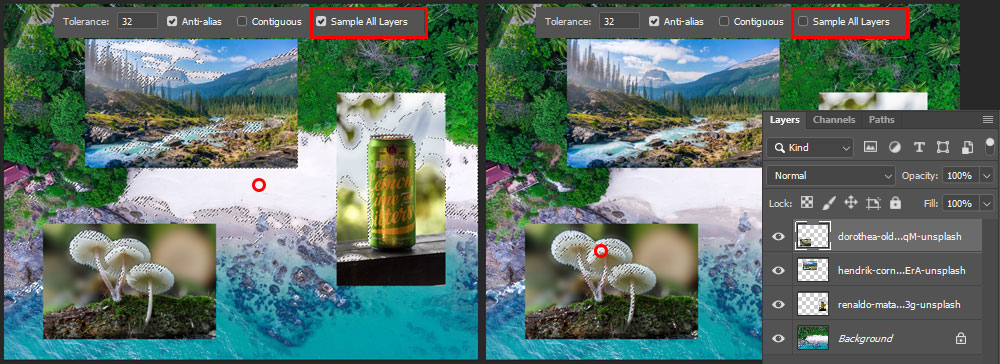
Sample All Layers
Selects colors using data from all the visible layers. Otherwise, the Magic Wand tool selects colors from the active layer only.
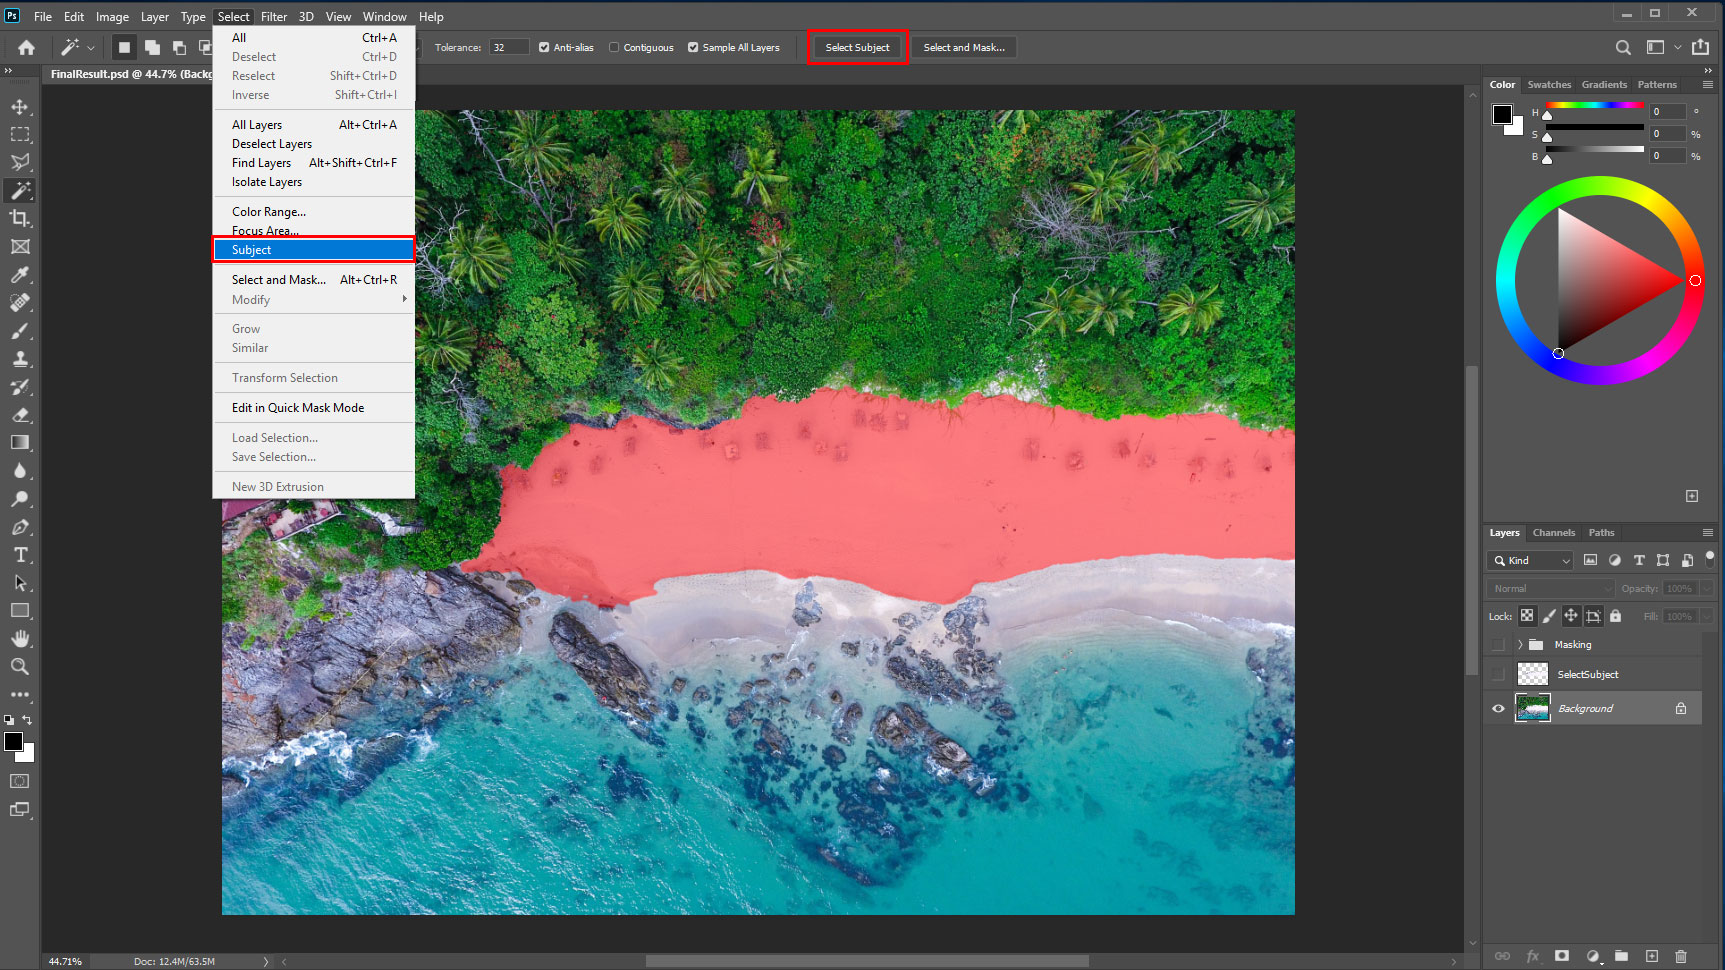
Select Subject Option
Magic Wand Tool has recently got an even more mysterious magic trick in its arsenal – the Select Subject option. If you take the Magic Wand Tool (W) and press the button Select Subject (You can find it under Select > Subject) without doing anything else. Then it selects the main subject in the entire image on their own beliefs.
Select and Mask Tool
After creating a selection, it can and should be improved in several ways. One of these is with a Select and Mask tool (formerly Refine Edge Tool). It also can be found at Select > Select and Mask or via shortcut Cmd/Ctrl + Opt/Alt + R. This is a feature of the Photoshop CC version and above. That helps to make the selection more precise, smoother and also automates tasks regarding masks and layers.

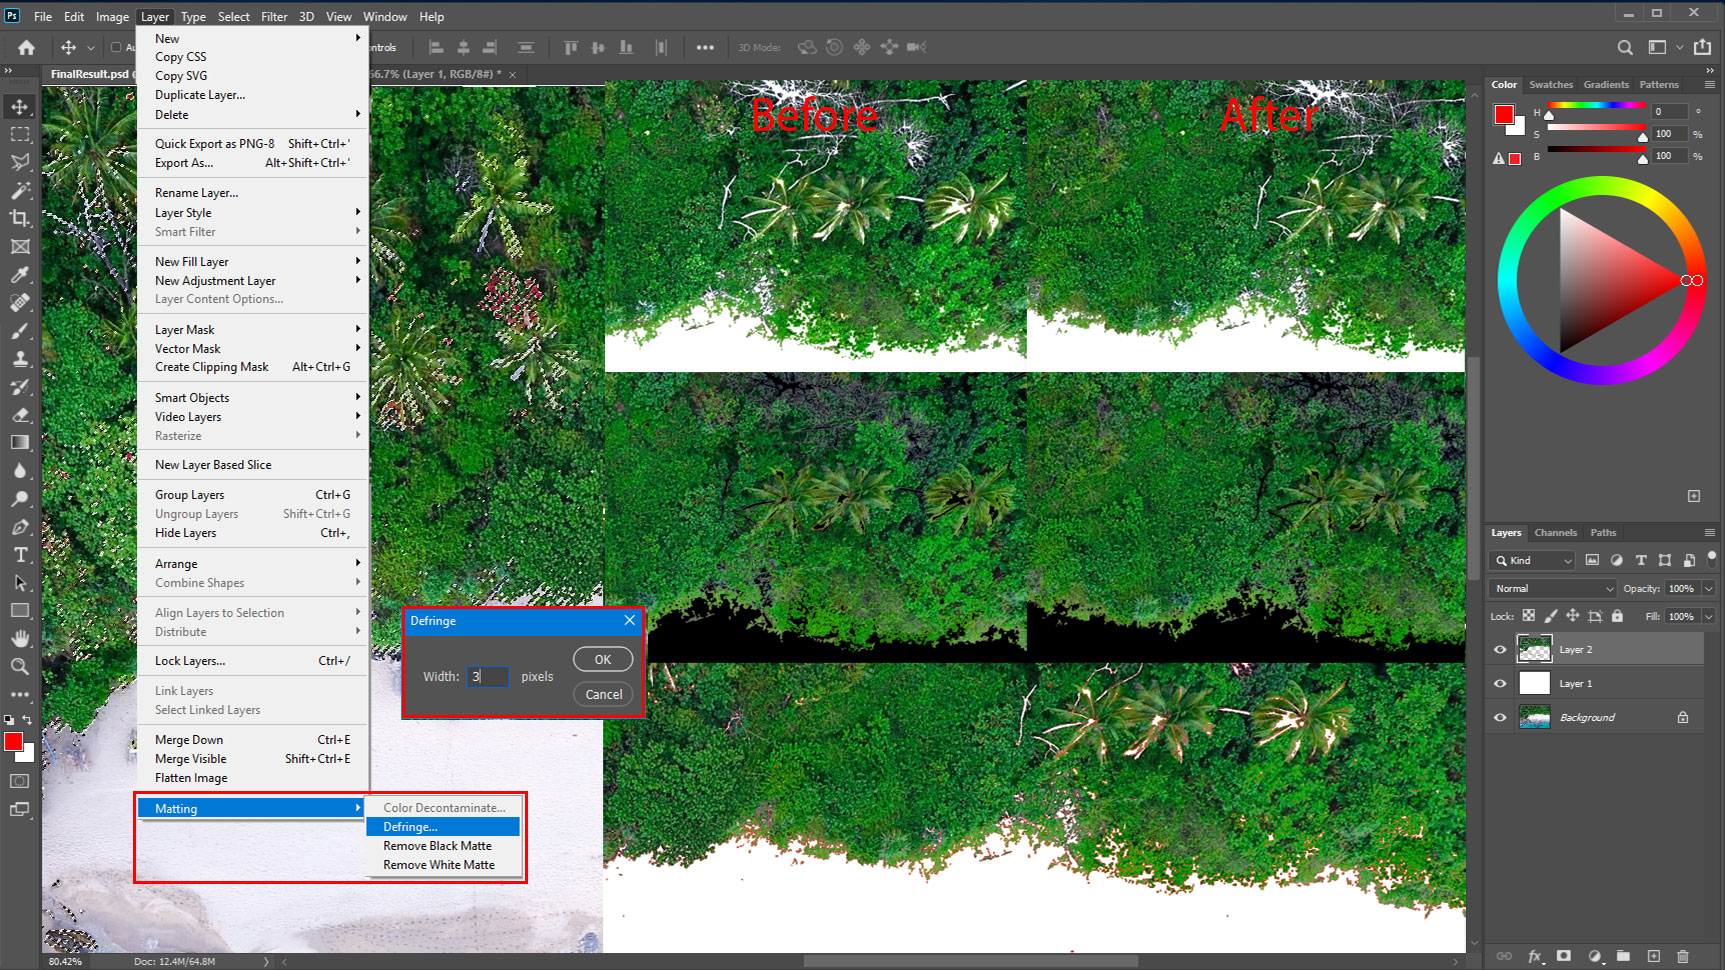
Defringe
The most common issue – if you look closely at the result of such selection, you can find a white edge along with the silhouette of a fragment separated from the photo. Beginners are often faced with this, not paying attention to small details.
Ignoring such an artifact has a dramatic effect on photo-realism and appearance. And most likely, you need to remove it yourself or with the Select and Mask tool. There are also alternative methods like Layer > Matting > Defringe or Remove Black/White Matte commands.
Useful Keyboard Shortcuts and Tricks
- When the selection is very dense or noisy, it can be useful to hide the marching ants. Shortcut: Cmd/Ctrl + H or View > Extras.
- You can combine selections with multiple tools. Without removing the selection, switch to the desired tool and use with one of the operations.
- To deselect – Cmd/Ctrl + D. To Reselect – Cmd/Ctrl + Shift + D. To invert the selection – Cmd/Ctrl + I.
- Detach selection to a new empty layer – Cmd/Ctrl + J. Even though this is for the duplicate option it helps a lot.
- Frequent keyboard shortcuts can be the same in different Photoshop modules. Pay attention to this if you use Select and Mask tool often. This will speed up your workflow.
Summary
Despite the beautiful name, this magic is a bit tricky. In most cases, these settings remain unchanged. So users often encounter inaccuracies in the default settings when creating a selection. Although, in the latest versions of Photoshop, the selection algorithms have become much smarter. But some problems remain and can cause trouble.
For neater and more accurate selections, use advanced techniques. Thank you for your attention and good luck to you in your creative projects! Have something to add or ask? Use the comment section below!