Close Menu
PSD VaultPSD Vault
  • VIP Area
  • Photoshop Basics
  • Photo Effect
  • Text Effect
  • Premium Tuts
  • Resources
  • Drawing
  • Inspiration
  • Web Graphics
  • Abstract
  • Freebies
  • Advertise
  • Get in Touch
  • About PSD Vault
Facebook Instagram Pinterest YouTube TikTok
Facebook Instagram Pinterest YouTube TikTok RSS
PSD VaultPSD Vault
  • VIP Area
    • Sign Up
    • Log In
  • Photoshop Basics
  • AI
  • Photoshop Error Fixes
  • Video Tutorial
  • Photo Effect
  • Text Effect
  • Premium Tuts
  • Drawing
  • Opinion
PSD VaultPSD Vault
Home»Basics»How to Change Background with Photoshop Background Eraser Tool
Basics

How to Change Background with Photoshop Background Eraser Tool

By Matteo Della ChiesaOctober 17, 20244 Mins Read
Share
Facebook Twitter LinkedIn Pinterest Email

In this tutorial, I will demonstrate how to change photo background with Photoshop background eraser tool. The example we have here is an image full of tree branches, we will turn it from a daylight photo into a beautiful sunset photo.

The Photoshop Background Eraser Tool is a fantastic tool to remove background colours from the rest of the image, especially when the image contains complex objects such as tree & hair.
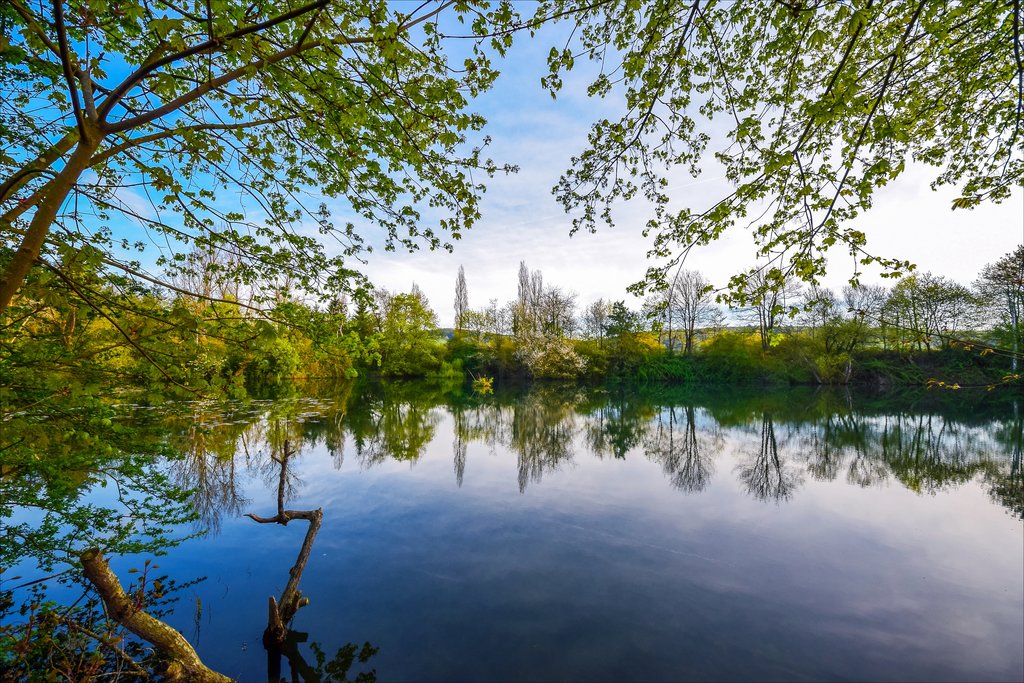
Result Preview

Before

After

To complete this tutorial, you will need the following stocks:

Waterscape

Sunset Clouds

Brief Intro of Background Eraser Tool

To explain the Background Eraser Tool in a simple way – it’s a tool that takes out unwanted colours, while leave the rest of the photo unaffected.

This tool by itself is not 100% perfect, and you might still need to do some minor adjustments after applying it. However, it is the quickest way of taking out colours from an complex image, and  very easy to master for beginners.

Background Eraser Tool Options

To find the Background Eraser Tool, click and hold your mouse over the Eraser Tool, it’s the second option as shown below:

After selecting the tool, you will see its options appearing on the top bar. You can adjust the size, hardness, spacing, etc. via the window below:

We also have some extra options for the background eraser tool – simply hover your mouse over the text and you will see the name of the option appearing:

The options are:

  • Continuous: continuously sample the colour on the image as you drag your cursor;
  • Once: grab the sample of the initial color only. When you drag your mouse, no other colour will be sampled. This is the most used option;
  • Limits – Contiguous: this option erases pixels in areas that are connected to your sample pixel, and ignore pixels that match the sampled color but are separated by a different colour;
  • Limits – Discontiguous: this option simply erase any pixels that match the sampled color regardless their connection. I normally use this option as it’s the quickest;
  • Limits – Find Edge: same as continuous but more accurate – when you need a sharp edge, use this mode;
  • Tolerance: the higher the tolerance, the more colours you will erase;
  • Protect Foreground Color: Tick this option if you want to protect a certain colour from being erased. You can hold the “Alt” key and set a colour on the image as foreground color.

Let’s have some fun with the Background Eraser Tool!

Step 1

Load the waterscape photo into Photoshop, double-click the background layer to unlock it.

The objective is to replace the clear day sky with a sunset cloud sky. We can see on the photo there are a lot of trees, making it difficult to use the normal selection tool to remove the sky.

Therefore, our best option is to use the background eraser tool.

Let’s use the background eraser tool with the following settings:

Go over the sky area as shown below – you will see as you erase the sky, the tree remain intact:

Keep erasing the sky until it’s all gone:

Step 2

We can now simply add the sunset cloud image below the original photo (fade the bottom part of the sunset photo):

Place the sunset photo layer below the original photo’s layer, and change the original photo layer’s blend mode to “Multiply”, you will see the tree are darkened:

Apply the following colour balance adjustment layer on top to fine-tune the colours:

and this is my final result: (click to enlarge)

That’s it for this tutorial. Hope you learn a thing or two about the Photoshop Background Eraser Tool! You can also try this tool on human portraits and see how you go.

Till next time, have a great day!

background change before and after
Share. Facebook Twitter Pinterest LinkedIn Tumblr Email
Matteo Della Chiesa
  • Website

Matteo is a digital artist from Italy. He has worked with companies like Sony, 20th Century Fox, Time Warner - Warner Bros, Lions Gate Entertainment, WWF & Blizzard Entertainment,

Related Posts

How to Create Relistic Burning Car Effect in Photoshop

October 17, 2025

How to Pixelate an Image in Photoshop

October 16, 2025

How to Stay Ahead of Every Photoshop Update & Unlock Their Full Power

October 11, 2025

Comments are closed.

Don't Miss

Create Surreal Motorbike Racing Scene in Photoshop

October 18, 2025

How to Create In-Water Text Effect with Displacement Maps in Photoshop

October 17, 2025

How to Create Relistic Burning Car Effect in Photoshop

October 17, 2025

For Beginners

Basics

How to Create Relistic Burning Car Effect in Photoshop

By James QuOctober 17, 20251 Min Read

How to Pixelate an Image in Photoshop

October 16, 2025

How to Stay Ahead of Every Photoshop Update & Unlock Their Full Power

October 11, 2025

Curves or Levels: Choosing the Right Tool for Stunning Edits

September 28, 2025

You May Also Like

Basics

How to Create Relistic Burning Car Effect in Photoshop

By James QuOctober 17, 20251 Min Read
Basics

How to Pixelate an Image in Photoshop

By Lana WilsonOctober 16, 20254 Mins Read
Basics

How to Stay Ahead of Every Photoshop Update & Unlock Their Full Power

By James QuOctober 11, 20253 Mins Read
Facebook X (Twitter) Instagram Pinterest
  • About Us
  • Get in Touch
  • Advertise
  • VIP Area
  • Privacy Policy
  • Terms & Conditions
© 2025 PSD Vault. All Right Reserved.

Type above and press Enter to search. Press Esc to cancel.

Manage Consent
To provide the best experiences, we use technologies like cookies to store and/or access device information. Consenting to these technologies will allow us to process data such as browsing behavior or unique IDs on this site. Not consenting or withdrawing consent, may adversely affect certain features and functions.
Functional Always active
The technical storage or access is strictly necessary for the legitimate purpose of enabling the use of a specific service explicitly requested by the subscriber or user, or for the sole purpose of carrying out the transmission of a communication over an electronic communications network.
Preferences
The technical storage or access is necessary for the legitimate purpose of storing preferences that are not requested by the subscriber or user.
Statistics
The technical storage or access that is used exclusively for statistical purposes. The technical storage or access that is used exclusively for anonymous statistical purposes. Without a subpoena, voluntary compliance on the part of your Internet Service Provider, or additional records from a third party, information stored or retrieved for this purpose alone cannot usually be used to identify you.
Marketing
The technical storage or access is required to create user profiles to send advertising, or to track the user on a website or across several websites for similar marketing purposes.
Manage options Manage services Manage {vendor_count} vendors Read more about these purposes
View preferences
{title} {title} {title}