Close Menu
PSD VaultPSD Vault
  • VIP Area
  • Photoshop Basics
  • Photo Effect
  • Text Effect
  • Premium Tuts
  • Resources
  • Drawing
  • Inspiration
  • Web Graphics
  • Abstract
  • Freebies
  • Advertise
  • Get in Touch
  • About PSD Vault
Facebook Instagram Pinterest YouTube TikTok
Facebook Instagram Pinterest YouTube TikTok RSS
PSD VaultPSD Vault
  • VIP Area
    • Sign Up
    • Log In
  • Photoshop Basics
  • AI
  • Photoshop Error Fixes
  • Video Tutorial
  • Photo Effect
  • Text Effect
  • Premium Tuts
  • Drawing
  • Opinion
PSD VaultPSD Vault
Home»Basics»10 Photoshop Blur Gallery Tricks That Will Make Your Photos Look Professional
Basics

10 Photoshop Blur Gallery Tricks That Will Make Your Photos Look Professional

By James QuApril 26, 20253 Mins Read
Share
Facebook Twitter LinkedIn Pinterest Email

Are you ready to take your Photoshop skills to the next level? Let’s dive into the world of Blur Gallery!

This powerful tool can transform your images in amazing ways. Here are 10 pro tips to help you become a Blur Gallery master.

A bit about Photoshop Blur Gallery

The Blur Gallery was first introduced in Photoshop CS6 and has been continuously improved in subsequent versions. Initially, the Blur Gallery included three types of blurs: Field Blur, Iris Blur, and Tilt-Shift. In later Creative Cloud (CC) versions, Adobe expanded the gallery to include additional blur types like Path Blur and Spin Blur.

For the most current and feature-rich version of the Blur Gallery, users should have:

  • Photoshop CC (Creative Cloud)
  • Latest version as of January 2025
  • Recommended to have GPU acceleration enabled
  • Ensure graphics card drivers are up to date

Let’s dive into the tips:

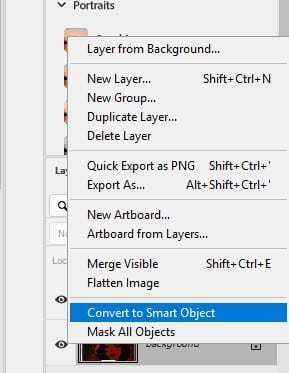
1. Smart Objects are Your Friends

First things first, always convert your layer to a Smart Object. This way, you can edit your blur settings anytime. Plus, it’s a non-destructive method, so you can always go back to your original image.

Smart Objects are Your Friends

2. Keyboard Shortcuts Save Time

Next, learn these handy shortcuts. Press “H” to hide the Blur interface. Also, hold Shift while rotating to move in 15-degree steps. These tricks will speed up your workflow.

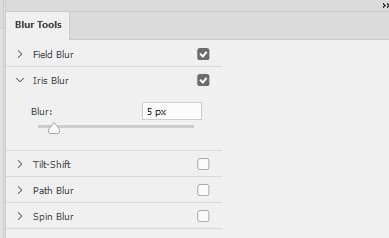
3. Explore Different Blur Types

Don’t stick to just one blur type. Try Field Blur for variable effects, or Iris Blur for depth. Furthermore, Path Blur creates motion, while Spin Blur adds radial movement. Each type offers unique possibilities.

Explore Different Blur Types

4. Use the Effects Panel

The Effects Panel is your secret weapon. You can brighten blurred areas with Light Bokeh. Moreover, you can control Bokeh Colour saturation. Lastly, adjust Light Range for precise bokeh placement.

Use the Effects Panel

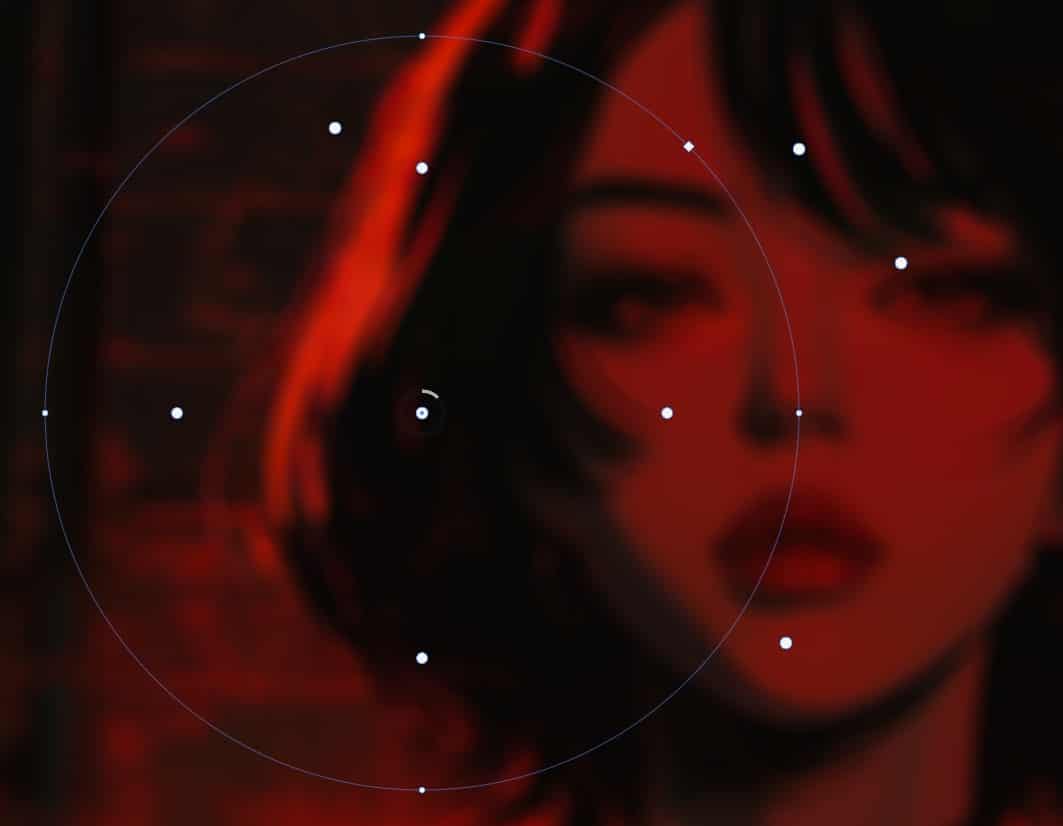
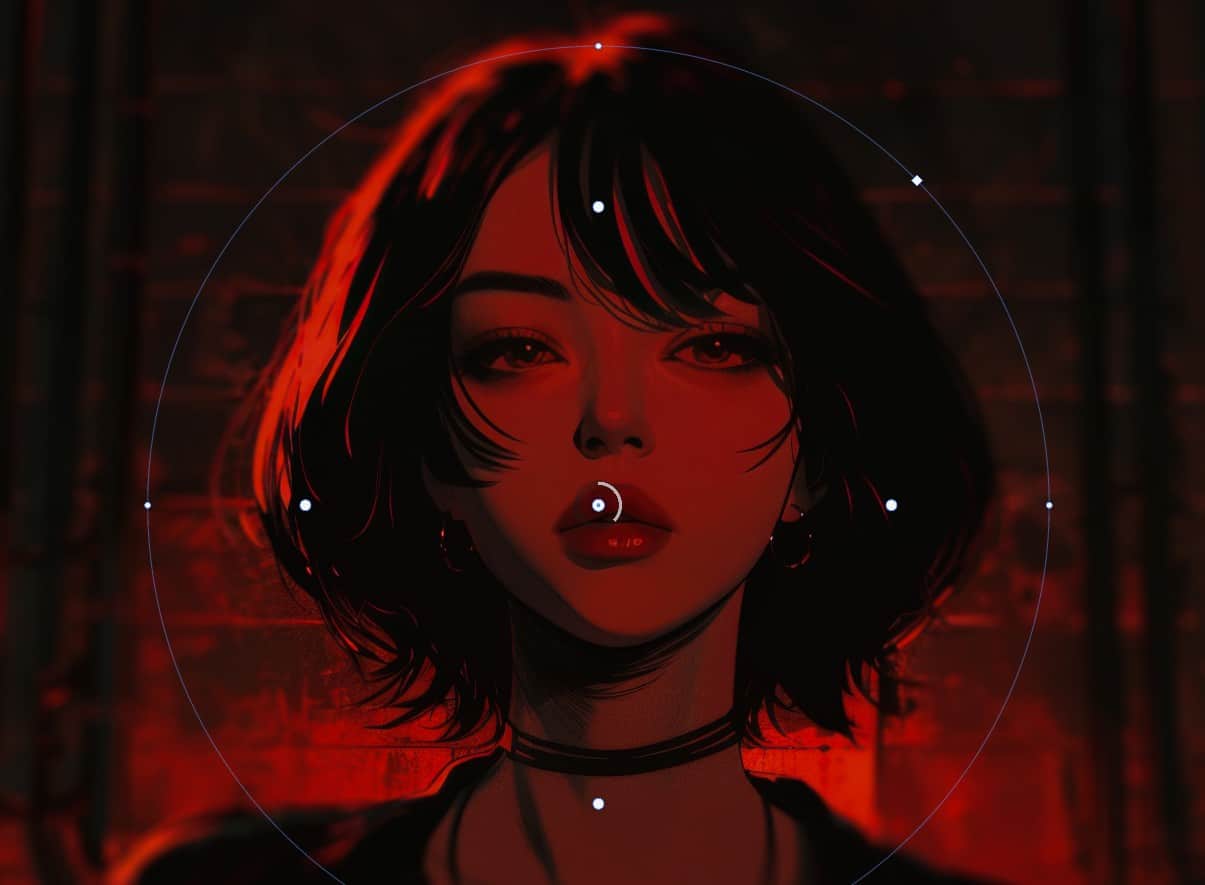
5. Multiple Blur Pins for Complex Effects

Want more control? Add multiple blur pins. This technique allows you to create complex, layered blur effects. It’s like painting with blur!

6. Layer Masks for Selective Blur

Layer masks are your best friends for selective blur. Paint with black to remove blur from specific areas. This method gives you precise control over your image.

7. High-Quality Rendering

For smoother bokeh effects, turn on High Quality rendering. However, keep in mind this might slow down your computer a bit.

High-Quality Rendering

8. Simulate Depth of Field

Iris Blur is great for creating a shallow depth-of-field effect. This technique can make your photos look more professional and eye-catching.

Simulate Depth of Field

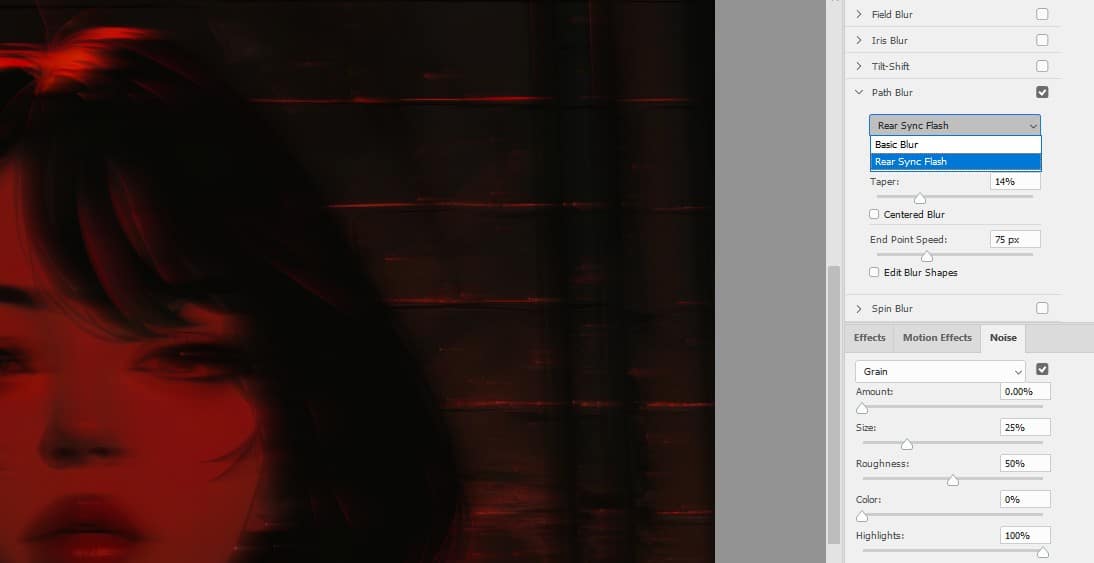
9. Create Dynamic Motion

Try Path Blur’s Rear Sync Flash to simulate strobe effects. This tool can add exciting motion to your still images.

Create Dynamic Motion

10. Save Your Blur Mask

Finally, don’t forget to save your blur mask as a channel. This step allows you to reuse your blur effect later, saving you time on future projects.

    Remember, practice makes perfect. Don’t be afraid to experiment with these tips. The more you play with Blur Gallery, the better you’ll become at creating stunning effects. So go ahead, open Photoshop, and start blurring!

    Further Readings

    Mastering Precision Editing: A Comprehensive Guide to Layer Masks in Photoshop

    blur gallery photoshop tips
    Share. Facebook Twitter Pinterest LinkedIn Tumblr Email
    James Qu
    • Website

    James is a seasoned Photoshop expert with over 25 years of experience based in Australia. As the driving force behind PSD Vault, he authors the majority of its in-depth tutorials and insightful articles.

    Related Posts

    Curves or Levels: Choosing the Right Tool for Stunning Edits

    September 28, 2025

    How to Create Double Exposure Photos in Photoshop (Easy Tutorial 2025)

    September 27, 2025

    How to Use Reference Image AI Feature in Photoshop

    September 26, 2025

    Comments are closed.

    Don't Miss

    Curves or Levels: Choosing the Right Tool for Stunning Edits

    September 28, 2025

    How to Create Double Exposure Photos in Photoshop (Easy Tutorial 2025)

    September 27, 2025

    How to Use Reference Image AI Feature in Photoshop

    September 26, 2025

    For Beginners

    Basics

    Curves or Levels: Choosing the Right Tool for Stunning Edits

    By Lana WilsonSeptember 28, 20255 Mins Read

    How to Read Photoshop Histograms for Beginners

    September 19, 2025

    How to Master Auto-Blend Layers in Photoshop for Stunning Image Blending

    September 13, 2025

    10 Genius Tips to Master Photoshop’s AI Object Selection Tool

    August 30, 2025

    You May Also Like

    Basics

    Curves or Levels: Choosing the Right Tool for Stunning Edits

    By Lana WilsonSeptember 28, 20255 Mins Read
    Photo Effect

    How to Create Double Exposure Photos in Photoshop (Easy Tutorial 2025)

    By James QuSeptember 27, 20254 Mins Read
    AI

    How to Use Reference Image AI Feature in Photoshop

    By Mario TeodosioSeptember 26, 20254 Mins Read
    Facebook X (Twitter) Instagram Pinterest
    • About Us
    • Get in Touch
    • Advertise
    • VIP Area
    • Privacy Policy
    • Terms & Conditions
    © 2025 PSD Vault. All Right Reserved.

    Type above and press Enter to search. Press Esc to cancel.

    Manage Consent
    To provide the best experiences, we use technologies like cookies to store and/or access device information. Consenting to these technologies will allow us to process data such as browsing behavior or unique IDs on this site. Not consenting or withdrawing consent, may adversely affect certain features and functions.
    Functional Always active
    The technical storage or access is strictly necessary for the legitimate purpose of enabling the use of a specific service explicitly requested by the subscriber or user, or for the sole purpose of carrying out the transmission of a communication over an electronic communications network.
    Preferences
    The technical storage or access is necessary for the legitimate purpose of storing preferences that are not requested by the subscriber or user.
    Statistics
    The technical storage or access that is used exclusively for statistical purposes. The technical storage or access that is used exclusively for anonymous statistical purposes. Without a subpoena, voluntary compliance on the part of your Internet Service Provider, or additional records from a third party, information stored or retrieved for this purpose alone cannot usually be used to identify you.
    Marketing
    The technical storage or access is required to create user profiles to send advertising, or to track the user on a website or across several websites for similar marketing purposes.
    Manage options Manage services Manage {vendor_count} vendors Read more about these purposes
    View preferences
    {title} {title} {title}