In this tutorial, I will show you the process used to Create a Crispy Pastry Text Effect with Dark Chocolate Background in Photoshop.
This is an intermediate level tutorial and prior knowledge of Photoshop layers, image adjustments, layer masks are required.
The PSD file of this tutorial is available via the PSD Vault VIP members area.
Here is a preview of the final effect I have for this tutorial: (click to enlarge)

PSD Vault VIP Membership
You can download the PSD File for this tutorial via the VIP Members Area for only $6.95/Month (or less)! You will not only get this PSD File, but also 200+ other PSD Files + Extra Goodies + Exclusive Photoshop tutorials there. Signup now and get exclusive!

OK Let’s get started!
To complete this tutorial, you will need the following stocks:
Splatter Brushes (Pick one from the list)
Particle Brushes (Pick one from the list)
Step 1
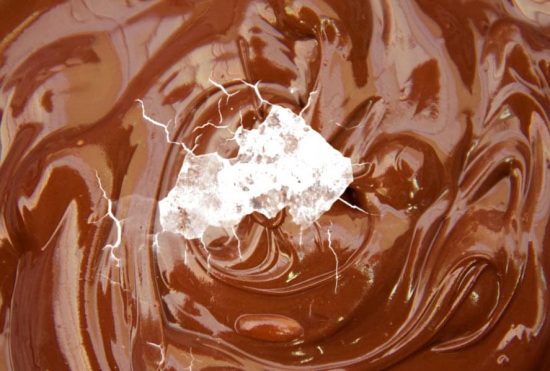
Create a new document sized 1400px * 770px with black background. We will prepare the chocolate b Load the Melted Chocolate image into Photoshop and select it:

Copy and paste the selection onto our document. Set the layer opacity for this new layer to 50%:
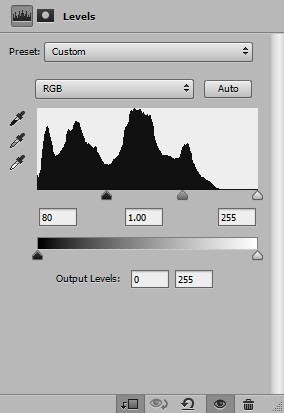
Apply this levels adjustment to this chocolate layer:
Use a soft eraser, remove/fade the following area:

and here is the effect so far:

Step 2
Load the pastry stock image into Photoshop. Select the following piece:

Copy and paste the selection to our document, reduce its size and place it to the position shown below:

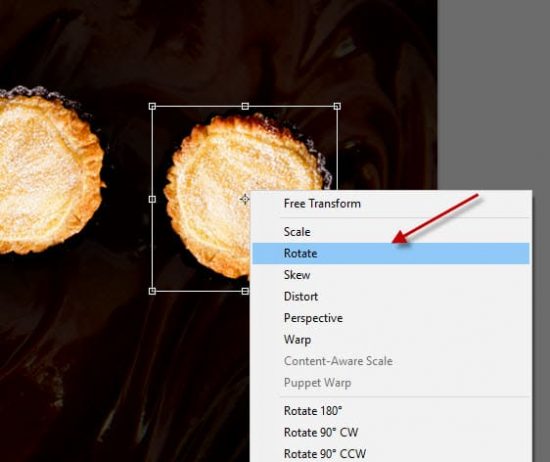
We will duplicate this new pastry layer four times. To add variety to the overall text effect, we can use the following methods:
Use the free transform tool to rotate, distort each duplicated layer:
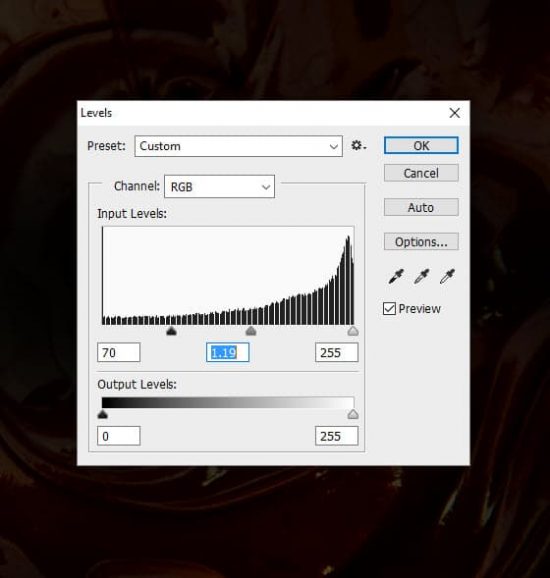
Use the levels image adjustment on each duplicate layer to adjust the contrast:
This is my effect so far:

Step 3
We will add the texts onto the pastry in this step. Create a new layer, use the following chalk brush:

Write the texts onto the pastry:

We will use a particle brush as eraser to break apart the texts:
This creates an effect where the texts blend into the pastry:
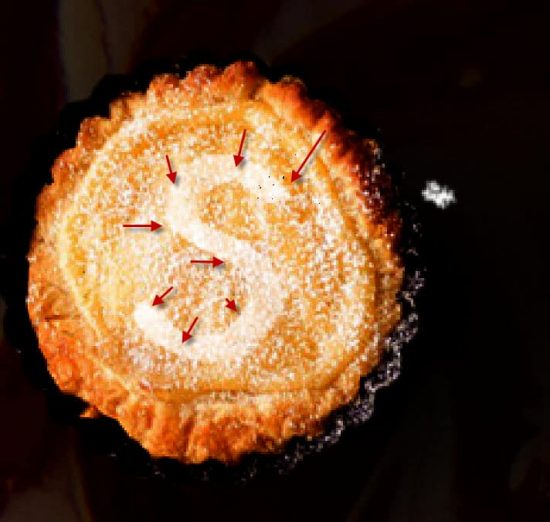
and here is my effect so far:

Step 4
We will add some chocolate splash behind the pastry. Go to the meleted chocolate stock and create a new layer, use a splatter brush to paint a slash on the new layer:
Make a selection on the new layer, go back to the background layer and copy the selection:

Paste the selection behind the pastry, adjust its size to fit the pastry:

Repeat this process and add the chocolate splash for all:

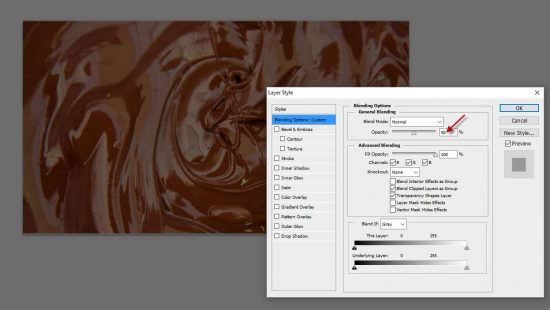
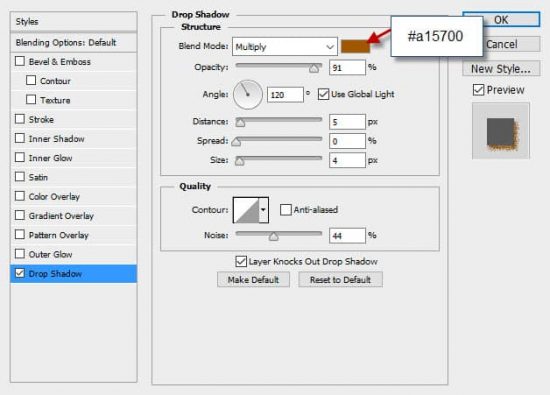
To make the text more visible, I added the following “Drop Shadow” layer blend option to the text layer:
and here is the effect so far:

Use the particle brush to paint some small particles around the texts:

This is my final result: (click to enlarge)
That’s it for this tutorial! Hope you enjoy it and find it useful! If you have any questions about the steps, please contact me or leave a comment below. I will try my best to answer them.
Till next time, have a great day!


