In this tutorial, I will show you the steps I took to Create Awesome Black and White Abstract Text Effect in Photoshop. The main focus of this tutorial is the use of layer masking techniques, plus some interesting drawing skills. Have a try!
The PSD file of this tutorial is available via the PSD Vault VIP members area.
This is an intermediate tutorial so some steps can be tricky – if you’re having difficulty with it, I suggest you go to the basic section of PSD Vault and practice those tutorials first, then come back and do this one.
Here is a preview of the final effect I have for this tutorial: (Click to Enlarge)
PSD Vault VIP Membership
You can download the PSD File for this tutorial via the VIP Members Area for only $6.95/Month (or less)! You will not only get this PSD File, but also 200+ other PSD Files + Extra Goodies + Exclusive Photoshop tutorial there. Signup now and get exclusive!
Ok Let’s get started!
To complete this tutorial, you will need the following stock:
Step 1
Create a new document sized 720*960px, add a Gradient Fill layer on top with a light grey gradient:

Use the cloud brush to paint some cloud on another layer, mainly around the edge: (don’t set the opacity too high, a subtle effect will do)

Duplicate this cloud layer once, compress it down via Free Transform tool and remove the edge with a soft eraser – this will form some ground texture:
Step 2
Use the font you downloaded, type one letter on the centre of the canvas:
Now add a layer mask on the text layer – use a combination of hard and soft eraser to create some abstract pattern on the mask:
This step can be a little tricky. You don’t need to create the same pattern as I have, but the practice the use of soft and hard brush is important and may benefit you in the future.
and here is the effect after the masking:
Paint some shadow under the text via a soft brush, use Free Transfrom tool to compress it down:

Create a new layer under the text layer – we can use the dirt brush you downloaded to paint some dirt texture on the text: (reduce the brush size first)
Also paint some dirt on the top left of the text:
Also use the smoke brush to paint some smoke behind the text:

and here is the effect so far:

Step 3
Now we can draw some lines around the text. Let’s grab a 3px hard brush first:

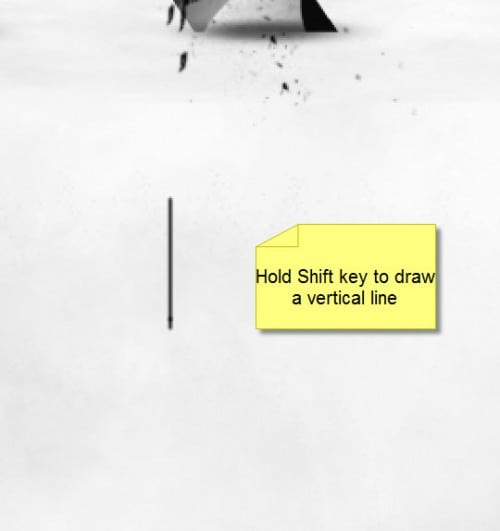
Now if you hold down the Shift key, and draw at the same time, you will find that you can draw a vertical (or horizontal line) through this way:
Now hold your shift key and start painting some random vertical lines around the text: (you can make a brush for it, but I’d rather you go through this painting process manually)

Duplicate this line layer once and resize it to a smaller scale, rotate it 45 degree to the right and place it to the centre of the text:

and here is the effect so far:

Step 4
Load the selection of the text by Ctrl + left-click the thumbnail on the layer palette:

Set the blending mode of new layer to “overlay”, and use the smoke brush to paint some texture over the text:

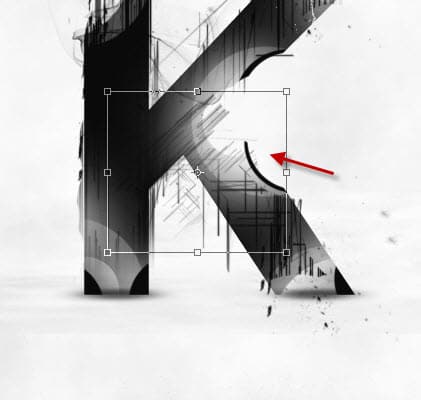
Draw the following path of the top left corner of the text:

Right-click the path and stroke it with a 25-30px soft brush: (use simulate pressure)
and you will have the following effect:

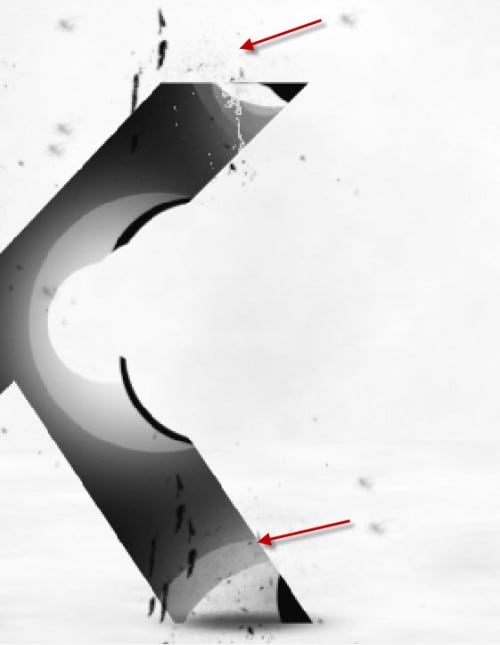
Duplicate this stroke path layer a few times, resize them accordingly and place them around the main stroke:

and here is the effect so far:
Step 5
This is an option step. We can add a few more elements onto the image to make it more vibrant. I added some rain drop on the top with the method described in this tutorial:

I also added a few feather texture using the method described in this tutorial:
and you can paint some crack texture via crack brushes around the edge of the canvas:

Step 6
We’re almost done! The last step is simply to add some details into the text. We can flatten the image, duplicate the background layer and apply the following Reduce Noise filter to the duplicated layer:

Add the following layer mask to this layer to hide some portions that we don’t want to sharpen:

I decided to add some red colour into the text with the following Curves adjustment layer: (choose “Red” from the drop down box)

Layer mask on the Curves adjustment layer:

and you will have the following effect: (we leave only the center of the text red)

Create a new layer and fill it with black colour, render a lens flare in the centre:

Change the layer blending mode of this lens flare layer to “color dodge”:
Duplicate this lens flare layer twice and reduce their sizes, move the lens to the positions shown below: (keep the layer blending mode as “color dodge” for the duplicated layers)

and here is the final effect I have for this tutorial: (click to enlarge)
Hope you enjoy this tutorial and find it useful! Till next time, have a great day!


14 Comments
I will be creating this technique for Minimal Poster :D
Good work. Tweeted and Bookmarked it !
nice tut….
Very interesting design, worked out really well.
This has also inspired me massively towards the creation of my own logo design.
Thanks a lot!
Great Tutorial and Techniques well explained!!
Thanks for sharing…
Featured in Tutorials of the week in http://www.hangaroundtheweb.com
Very detailed and easy to understand which is not the case with quite a few tutorials.,
Very nice and impressive work.
Thank you for sharing.
G8 tut………………..
Someone, please help me! I can’t do the step 2 the layer mask on the text layer :S I do not know why the image of the tutorial is a picture with white background :S please someone help me to do the step 2!! all the other steps aren’t so complicated.. please help me with the step 2!! thx
Hi henry, the screenshot in step 2 is the actual you will be adding to the text layer.
verrrrrrry nice! Thank you so much~~
Which dirt brush did you use for the distressing part during Step 2? I’m trying to recreate a similar effect with the downloaded brushes but I can’t seem to get it quite right. Did you transform and compress the layer after compressing? Did you delete other parts of the brush?
Thanks in advance!!
P.S.-I really am enjoying this tutorial! Thanks for your tips and help!
grate work..
Used it here
http://imageshack.com/a/img19/5456/a8j4.png
Thanks for the tutorial. I used it on my initials
http://s87.photobucket.com/user/slamminuk/media/DT1_zps764404dd.jpg.html