Close Menu
PSD VaultPSD Vault
  • VIP Area
  • Photoshop Basics
  • Photo Effect
  • Text Effect
  • Premium Tuts
  • Resources
  • Drawing
  • Inspiration
  • Web Graphics
  • Abstract
  • Freebies
  • Advertise
  • Get in Touch
  • About PSD Vault
Facebook Instagram Pinterest YouTube TikTok
Facebook Instagram Pinterest YouTube TikTok RSS
PSD VaultPSD Vault
  • VIP Area
    • Sign Up
    • Log In
  • Photoshop Basics
  • AI
  • Photoshop Error Fixes
  • Video Tutorial
  • Photo Effect
  • Text Effect
  • Premium Tuts
  • Drawing
  • Opinion
PSD VaultPSD Vault
Home»Basics»How to Use Face-Aware Liquify to Quickly Adjust Facial Features in Photoshop
Basics

How to Use Face-Aware Liquify to Quickly Adjust Facial Features in Photoshop

By James QuAugust 23, 20244 Mins Read
Share
Facebook Twitter LinkedIn Pinterest Email

In this tutorial, I’m going to run through the new Face-Aware Liquify feature and show you how you can use it to quickly adjust facial features.

Prior to the introduction of this new liquify filter, the only way to manipulate facial features is to use the standard liquify filter, or the selection + free transform tool. Both methods are quite time-consuming. Now, all you need is the this new Face-Aware liquify filter for simple facial feature adjustments.

Before We Begin, Ensure Graphics Processor is Enabled

In order to use Face-aware Liquify, please make sure that the graphics processor is enabled in your Photoshop preferences:

  • Go to Edit > Preferences > Performance.
  • In the Graphics Processor Settings area, select Use Graphics Processor.
  • Click Advanced Settings. Ensure you select “Use Graphics Processor To Accelerate Computation”.
  • Click OK.

Let’s Begin

Download a portrait image from the web (I used this image: Black Summer (18) by FrostAlexis), load the image into Photoshop.

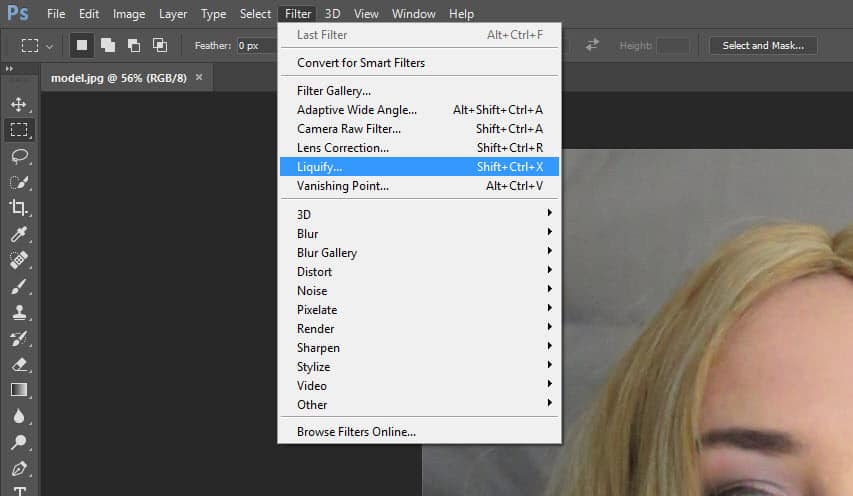
Go to Filter > Liquify:

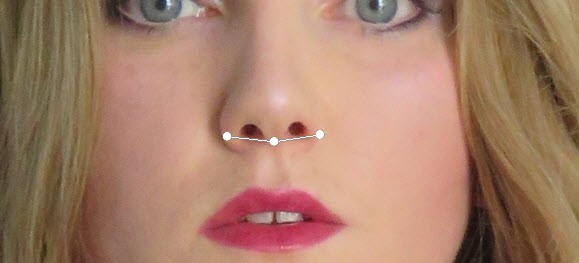
On the Liquify window, you will notice there is a human icon labelled “Face Tool” on the left, click on it:

Once the Face Tool is enabled, move your mouse over any one facial feature (eyes, nose, etc.) – you will see a smart guide appearing. This allows you to Click & Drag and adjust the relevant facial feature:

Eyes

Face Shape

Nose

Mouth

On top of the click & drag, you will also find all the settings on the right pane:

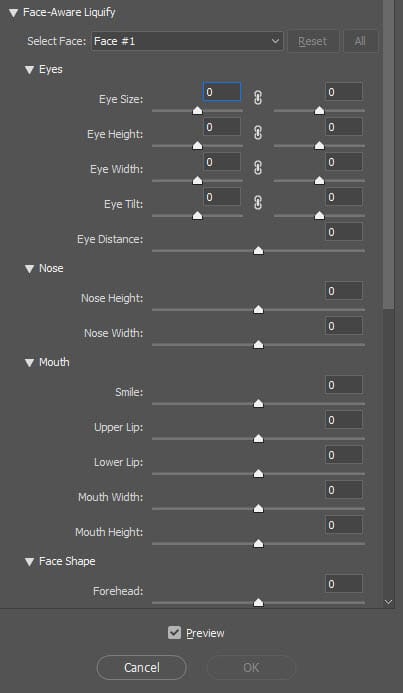
Notice the paper clip icon under the Eyes settings? Click on it and it will automatically apply equal value to the left/right eye setting:

Once you’re happy with the result, click “OK” to apply the filter. This conclude the application of Fare-Aware liquify filter.

One thing I need to mention is that the Face-Aware liquify filter works the best for faces that directly facing the camera. If you have a photo similar to the one below, you can still use Face-Aware, just the outcome may not be as good:

Troubleshooting: “No Face Detected in Photoshop Face-Aware Liquify” Error

In certain instances, Photoshop may encounter difficulty detecting faces in the Liquify tool, leading to the absence of facial features for adjustment. If you encounter this issue, consider the following troubleshooting steps:

  1. Ensure a Frontal View: Face-Aware Liquify is optimised for faces that are directly facing the camera. If the subject’s face is at an angle or partially obscured, Photoshop may struggle to detect facial features accurately. Select images with clear, frontal views for optimal results.
  2. Check Image Quality: The accuracy of face detection can be influenced by the quality and resolution of the image. Choose high-resolution images with well-defined facial features to enhance the detection capabilities of the Face-Aware Liquify tool.
  3. Adjust Facial Feature Size: If the facial features are too small or large in relation to the overall image, Photoshop may have difficulty recognizing them. Experiment with resizing the facial features within the Liquify tool to see if it improves detection.
  4. Increase Image Contrast: Enhance the contrast of the image to make facial features more distinct. This can assist the Face-Aware Liquify tool in accurately identifying and adjusting specific facial elements.
  5. Utilise Manual Liquify Tools: If automatic face detection proves challenging, you can resort to using the standard Liquify tools manually. This involves selecting and adjusting facial features using traditional Liquify options for more precise control.
  6. Update Photoshop: Ensure that you are using the latest version of Adobe Photoshop. Updates often include improvements and bug fixes, which may address issues related to face detection in the Liquify tool.
  7. Check System Requirements: Confirm that your computer meets the necessary system requirements for utilizing advanced features like Face-Aware Liquify. A lack of computational resources can impact the tool’s performance.

That’s it for this tutorial! I would love to hear your opinion about the Face-Aware liquify filter – simply drop me a comment below.

face-aware filter liquify
Share. Facebook Twitter Pinterest LinkedIn Tumblr Email
James Qu
  • Website

James is a seasoned Photoshop expert with over 25 years of experience based in Australia. As the driving force behind PSD Vault, he authors the majority of its in-depth tutorials and insightful articles.

Related Posts

How to Use “Find Distractions” Feature in Photoshop for Easy Photo Clean-up

February 13, 2026

How to Stay Ahead of Every Photoshop Update & Unlock Their Full Power

February 8, 2026

How to Fix Neural Filters Not Working or Greyed Out in Photoshop 2026

February 1, 2026

Comments are closed.

Don't Miss

Unlock the Power of Photoshop’s Generative Expand Tool

February 13, 2026

How to Use “Find Distractions” Feature in Photoshop for Easy Photo Clean-up

February 13, 2026

How to Refine Adobe Firefly Generations Directly in Photoshop with Firefly History

February 12, 2026

For Beginners

Basics

How to Use “Find Distractions” Feature in Photoshop for Easy Photo Clean-up

By James QuFebruary 13, 20265 Mins Read

How to Stay Ahead of Every Photoshop Update & Unlock Their Full Power

February 8, 2026

Dodge & Burn Tool in Photoshop – The Beginner’s Guide

January 24, 2026

How to Pixelate an Image in Photoshop

January 21, 2026

You May Also Like

Basics

How to Use “Find Distractions” Feature in Photoshop for Easy Photo Clean-up

By James QuFebruary 13, 20265 Mins Read
Basics

How to Stay Ahead of Every Photoshop Update & Unlock Their Full Power

By Valentin PetroffFebruary 8, 20265 Mins Read
Photoshop Error Fixes

How to Fix Neural Filters Not Working or Greyed Out in Photoshop 2026

By James QuFebruary 1, 20263 Mins Read
Facebook X (Twitter) Instagram Pinterest
  • About Us
  • Get in Touch
  • Advertise
  • VIP Area
  • Privacy Policy
  • Terms & Conditions
© 2026 PSD Vault. All Right Reserved.

Type above and press Enter to search. Press Esc to cancel.

Manage Consent
To provide the best experiences, we use technologies like cookies to store and/or access device information. Consenting to these technologies will allow us to process data such as browsing behavior or unique IDs on this site. Not consenting or withdrawing consent, may adversely affect certain features and functions.
Functional Always active
The technical storage or access is strictly necessary for the legitimate purpose of enabling the use of a specific service explicitly requested by the subscriber or user, or for the sole purpose of carrying out the transmission of a communication over an electronic communications network.
Preferences
The technical storage or access is necessary for the legitimate purpose of storing preferences that are not requested by the subscriber or user.
Statistics
The technical storage or access that is used exclusively for statistical purposes. The technical storage or access that is used exclusively for anonymous statistical purposes. Without a subpoena, voluntary compliance on the part of your Internet Service Provider, or additional records from a third party, information stored or retrieved for this purpose alone cannot usually be used to identify you.
Marketing
The technical storage or access is required to create user profiles to send advertising, or to track the user on a website or across several websites for similar marketing purposes.
  • Manage options
  • Manage services
  • Manage {vendor_count} vendors
  • Read more about these purposes
View preferences
  • {title}
  • {title}
  • {title}