
Photoshop’s Smart Portrait Neural Filter is a powerhouse for transforming portrait moods with AI—altering lighting, expressions, and gaze in mere seconds. Whether you’re evoking joy from a neutral face or shifting light for dramatic shadows, this filter generates realistic details on the fly. In this tutorial, we’ll take a standard headshot and flip its mood from sombre to sunny, using lighting tweaks as the star. Perfect for quick client proofs or creative experiments!
What You’ll Need
- Adobe Photoshop (2025 version for optimal AI performance and cloud integration)
- A sample portrait image (e.g., a front-facing headshot with clear facial features)
Step-by-Step Guide
Step 1: Open Your Image and Duplicate the Layer
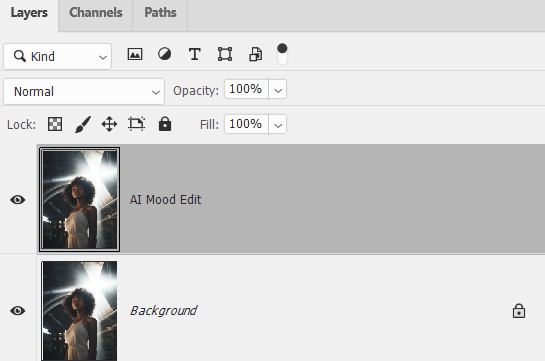
Launch Photoshop and open your portrait. Duplicate the Background layer (Ctrl+J / Cmd+J) to work non-destructively—name it “AI Mood Edit” in the Layers panel.
Step 2: Access Neural Filters
Go to Filter > Neural Filters to open the panel on the right.
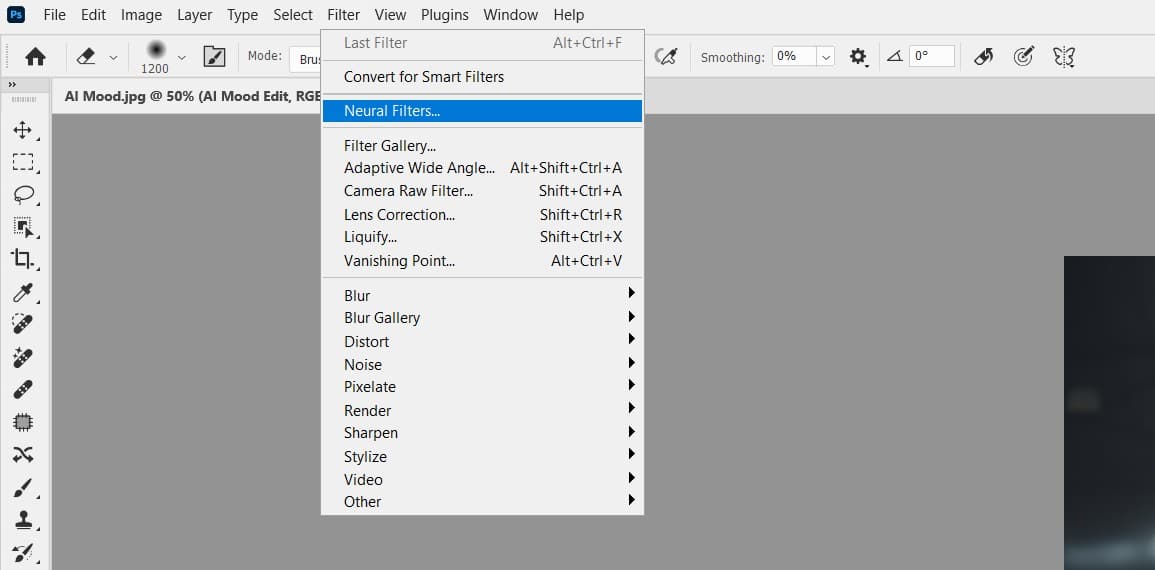
If Smart Portrait isn’t downloaded, click the cloud icon next to it—Photoshop will fetch it via Adobe’s cloud (requires internet). Toggle it on to activate.
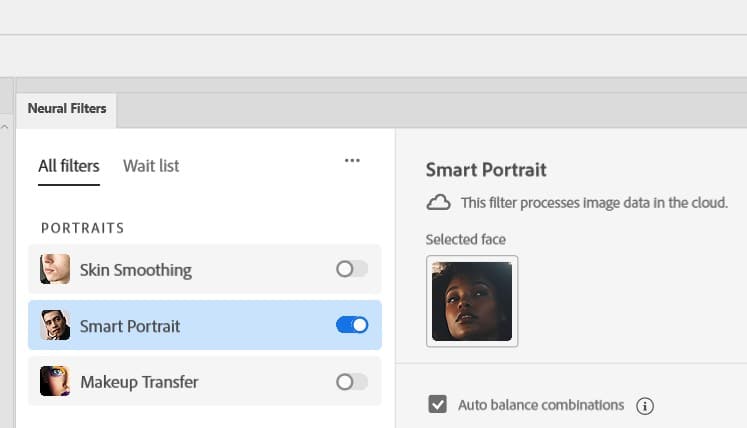
Step 3: Select the Face and Preview the Filter
In the Smart Portrait settings, Photoshop auto-detects the face (if not, click the face icon to select it manually). Preview the original in the central image viewer—drag sliders to see real-time changes without commitment.
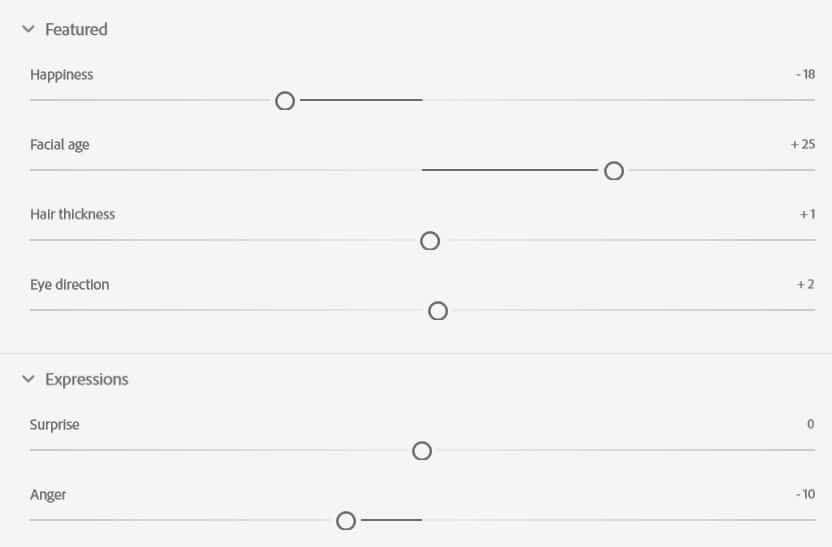
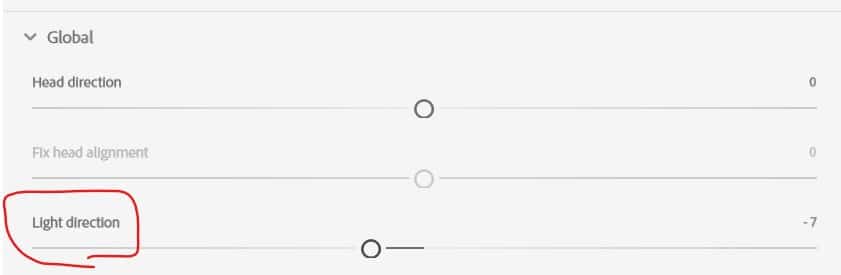
Step 4: Adjust Lighting Direction for Mood Shift
Focus on the Light Direction slider (-50 to +50). For a sombre mood, slide left to simulate side lighting with shadows; for sunny, slide right for warm front light. Watch the AI regenerate shadows and highlights seamlessly.
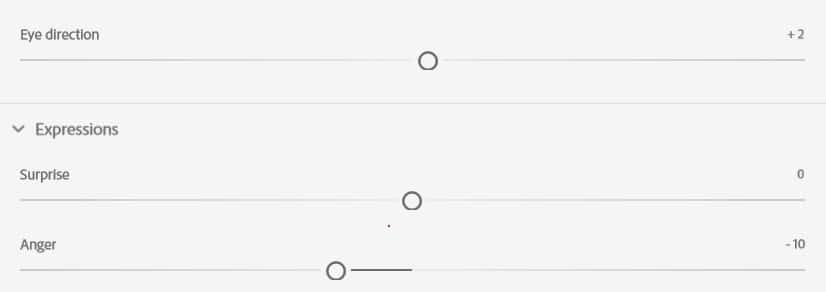
Step 5: Layer in Expression and Eye Direction for Deeper Mood
Enhance the mood: Slide Happiness to +40 for a smile, or Anger to -20 for intensity. Tweak Eye Direction (e.g., +20 for a confident side-eye). The AI blends these with your lighting for cohesive results.
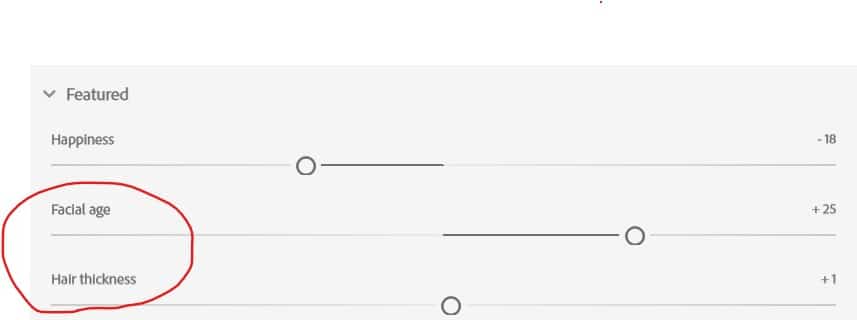
Step 6: Refine and Output the Edit
Fine-tune with Hair Thickness or Facial Age if needed, then click “OK.” In the output options, choose “New Layer” for flexibility. Toggle the layer visibility to compare moods.
Step 7: Finalise and Export
Merge if desired (Ctrl+E / Cmd+E), then save as PSD for edits or export as PNG/JPG. Your mood-swapped portrait is ready—AI made it in seconds!
Before

After (slightly increased happiness)

Pro Tips
- Cloud vs. Local: Use cloud processing (toggle in Neural Filters) for best realism, but local mode speeds up offline work.
- Batch Moods: Duplicate the layer multiple times and apply varied sliders for mood boards.
- Ethical Note: Always disclose AI edits in client work to maintain trust.
- Use Layer mask to fine-tune the edited layer to remove any imperfection.
Why This AI Magic Works
Traditional lighting adjustments take ages with Dodge/Burn tools, but Smart Portrait’s machine learning analyses and regenerates pixels instantly—ideal for mood-driven storytelling. Experiment on your PSD Vault portraits and share your moody masterpieces below!
Why This AI Magic Works
Traditional lighting adjustments take ages with Dodge/Burn tools, but Smart Portrait’s machine learning analyses and regenerates pixels instantly—ideal for mood-driven storytelling. Experiment on your portraits and share your moody masterpieces below!