
In this tutorial, I will show you the process of making an interesting “Rock Riding the Wave” text effect in Photoshop. We will build the text using a rock stock image, add it to an ocean background, and finish off the effect with a custom water splash brushset. Have a try!
The PSD file of this tutorial is available via the PSD Vault VIP members area.
Here is a preview of the final effect I have for this tutorial: (click to enlarge)

PSD Vault VIP Membership
You can download the PSD File for this tutorial via the VIP Members Area for only $6.95/Month (or less)! You will not only get this PSD File, but also 300+ other PSD Files + Extra Goodies + Exclusive Photoshop tutorials there. Signup now and get exclusive!

Let’s get started!
To complete this tutorial, you will need the following stocks:
Step 1
Create a new document sized 1440px * 800px with black background. Load the “Ocean” image into Photoshop and select the following portion:

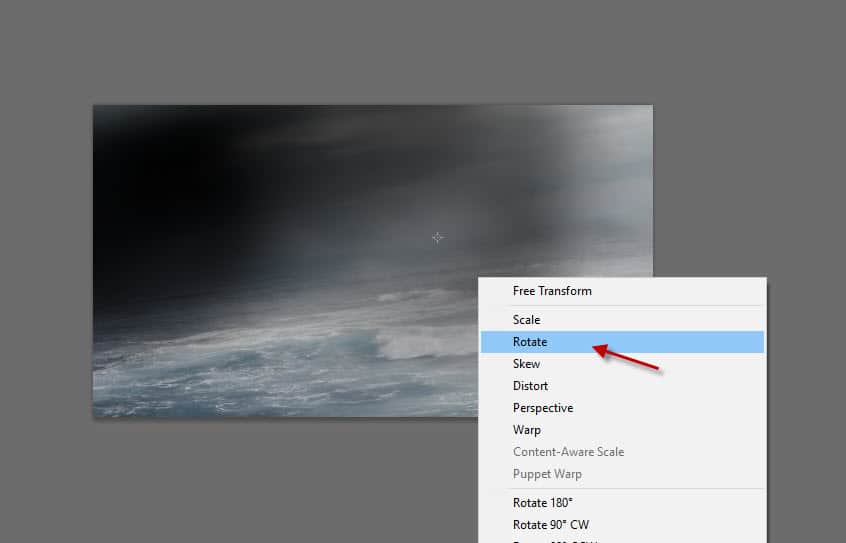
Copy and paste the selection to our document, adjust the position of this new layer so that the ocean part occupies around 1/3 of the canvas. Use the free transform tool to slightly rotate this layer anti-clockwise:
Use a big soft eraser to remove parts of the ocean layer:

Apply the following image adjustment layers as clipping masks to this ocean layer:
Black & White

Levels

Curves

Here is the effect so far:

Step 2
Load the “rock stock 1” image into Photoshop. We want to use this image to form our text – I chose the top portion of the text and made a selection of it:

Copy and paste the selection to our document, place it as shown below:

Use the same process, add more rock texture to our document and form a letter “A”:

Select the 3 rock layers, and merge them into 1 layer:

Use a soft eraser to fade the bottom of the letter, so it blends into the ocean:

Use the “Burn” tool, darken parts of the letter as shown below:

Apply the following image adjustment layers to this letter A layer as clipping masks”
Black and White

Levels

This is the effect we have so far:

Step 3
We will add some splash around the letter in this step. Load the water splash brushset into Photoshop and choose the following brush:

Use the above brush, add some splash around the text as shown below:

Load the “Rock Stock 2” image into Photoshop and select a few rock pieces from the image as shown below:

Add your selection to our document, place them around the ocean as shown below:

Go to the water splash brushset and pick the following brush:

Use the above brush, paint splashes around the rocks as shown below:

Also add this splash to the bottom of the letter A:

Add a larger splash on the right side of the letter A:

Step 4
In this final step, we can add some colours to the image with the following image adjustment layers:
Selective Colour


Hue/Saturation

Level

We can flatten the image and use the Blur tool, blur the elements at the bottom of the image:

Paint some subtle cloud effect around the letter:

This is my final result (click to enlarge):
That’s it for this tutorial! Hope you enjoy it and find it useful! If you have any questions about the steps, please contact me or leave a comment below. I will try my best to answer them.
Till next time, have a great day!