
In this tutorial, I will show you how to make a portrait with city elements in Photoshop. This is a intermediate level difficulty tutorial and can be a bit tricky to complete, but why not have a try!
The PSD file of this tutorial is available via the PSD Vault VIP members area.
Note: The Photoshop tutorial is done in Photoshop CC – therefore some screenshot may have slighting different layout as in the earlier version. Some brushes are exclusive to Photoshop CS6 or above.
Here is a preview of the final effect I have for this tutorial: (click to enlarge)

PSD Vault VIP Membership
You can download the PSD File for this tutorial via the VIP Members Area for only $6.95/Month (or less)! You will not only get this PSD File, but also 250+ other PSD Files + Extra Goodies + Exclusive Photoshop tutorials there. Signup now and get exclusive!
To complete this tutorial, you will need the following stocks:
City Stock 2 by ChrisBeckerArt
Cloud Brushes (Download a few from the list)
Step 1
Create a new document sized 907px*1380px with white background. Load the model into Photoshop. Cut out the model and paste it to our document:

Use a cloud brush you downloaded as eraser, go through the hair, shoulder region of the model as shown below:

Also use a soft eraser to remove the bottom right part of the model – we will place a few elements inside this later on:

Step 2
Apply the following adjustment layers as clipping masks for the model layer created in the previous step:
Black and White

On the layer mask of the black and white adjustment layer, use the splatter brush as eraser, remove some parts around the face and fingers as shown below:


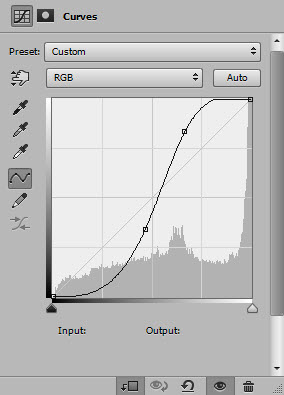
Curves

And here is the effect so far:

Create a new layer below the model layer, use the cloud brush to paint some cloudy effect as shown below:

Step 3
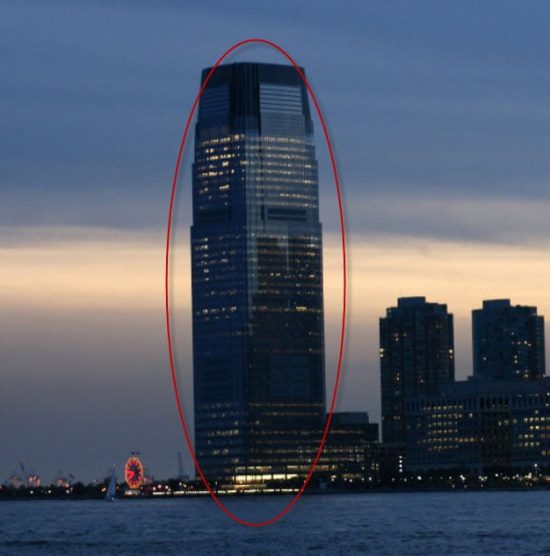
Load the “City Stock 1” image into Photoshop, select the red building from the image:

Copy and paste the building below the in between the model layer and the cloud layer, resize it to fit our canvas size. Reduce its layer opacity to around 80%:

Use the Splatter Brush as eraser, remove some parts of the city building as shown below:

Apply the following image adjustment layers as clip masks for this building layer:
Black and White

Levels

Curves

Here is the effect so far:

Step 4
Load the “City Stock 2” into Photoshop and select the following building:
Copy and paste the building into the following area of our canvas, use free transform tool and eraser tool to fit the building into the model’s body shape:

Apply the following adjustment layers to this building layer:
Black and white

Levels

and here is the effect so far:

Step 5
Load the “City Stock 3” image into Photoshop, select the road part with the direction sign:
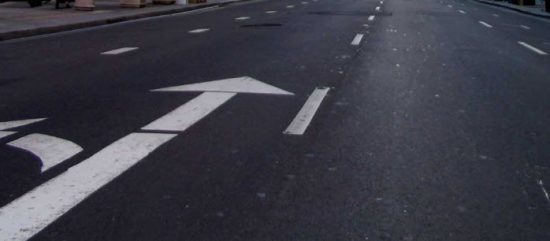
Copy and paste the selection to our document and put it below the model layer, use the free transform to adjust its shape:

Apply the following image adjustments to this road layer:
Black and White

Levels

Curves
and you will have the following effect:

Step 6
We will be adding a couple traffic lights and street signs to our image. Go to “City stock 1” and select the following traffic light:
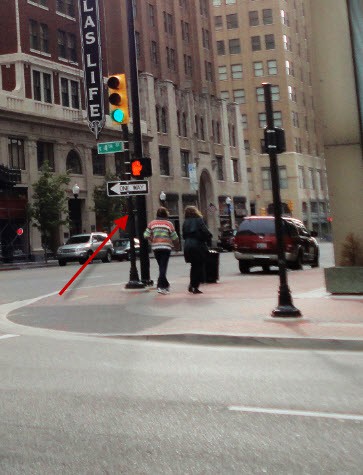
Copy and paste the selection to our document, re-size and place it over to the city street:

Apply the following image adjustments to this traffic light:
Curves

Levels

and here is the effect:

Go to “City stock 3” image and select the following street lamp and advertisement:

Copy and paste it to our document and apply the following image adjustments:
Black and white

Levels

Attach this element to the model as shown below:

Step 7
We’re almost done! To finalise this photo manipulation, I added a couple of image adjustment layers on top to give it some colour:
Selective Color


Vibrance

and here is my final effect: (click to enlarge)
Additional Tips for Photoshop Beginners:
- Start with Layers: Use separate layers for each city element to keep your work non-destructive and easy to edit.
- Master Blending Modes: Experiment with “Overlay” or “Soft Light” for seamless integration of city textures.
- Use Adjustment Layers: Adjust brightness/contrast or hue/saturation to match lighting between portrait and city elements.
- Practice Masking: Refine edges with layer masks for cleaner blends, especially around hair or intricate details.
- Explore Free Resources: Use free stock images from sites like Unsplash to practice adding city elements.
That’s it for this tutorial! Hope you enjoy it and find it useful! If you have any questions about the steps, please contact me or leave a comment below. I will try my best to answer them.
Till next time, have a great day!
2 Comments
Nice use of black and white adjustment. Curious why not layer blends, perhaps in combination with adjustment layers? As a middle school art teacher always looking for ways to let students expand their knowledge, technique, and curiosity. Tutorial reminds me a little of Tim Maars and his compositions.
The selective color realy great..