In this tutorial, I will show you 5 very simple, however very important techniques for Photoshop beginners when it comes to photo retouch. You will discover how easy it is to add more contrast and depths to the image to make it look better. This tutorial is really simple but effective, Have a try!
We will take a random image and apply those 5 techniques to enhance the overall effect of the photo. Here is a summary of the five topics we will cover in this tutorial:
- Remove Black Spots with Spot Healing Brush
- Make Your Eyes Look More Obvious
- Use Surface Blur to Smooth Skin, instead of Gaussian Blur
- Make Her Lips Look Even More Delicious
- Add Colour Depth and Lighting Contrast to Hair
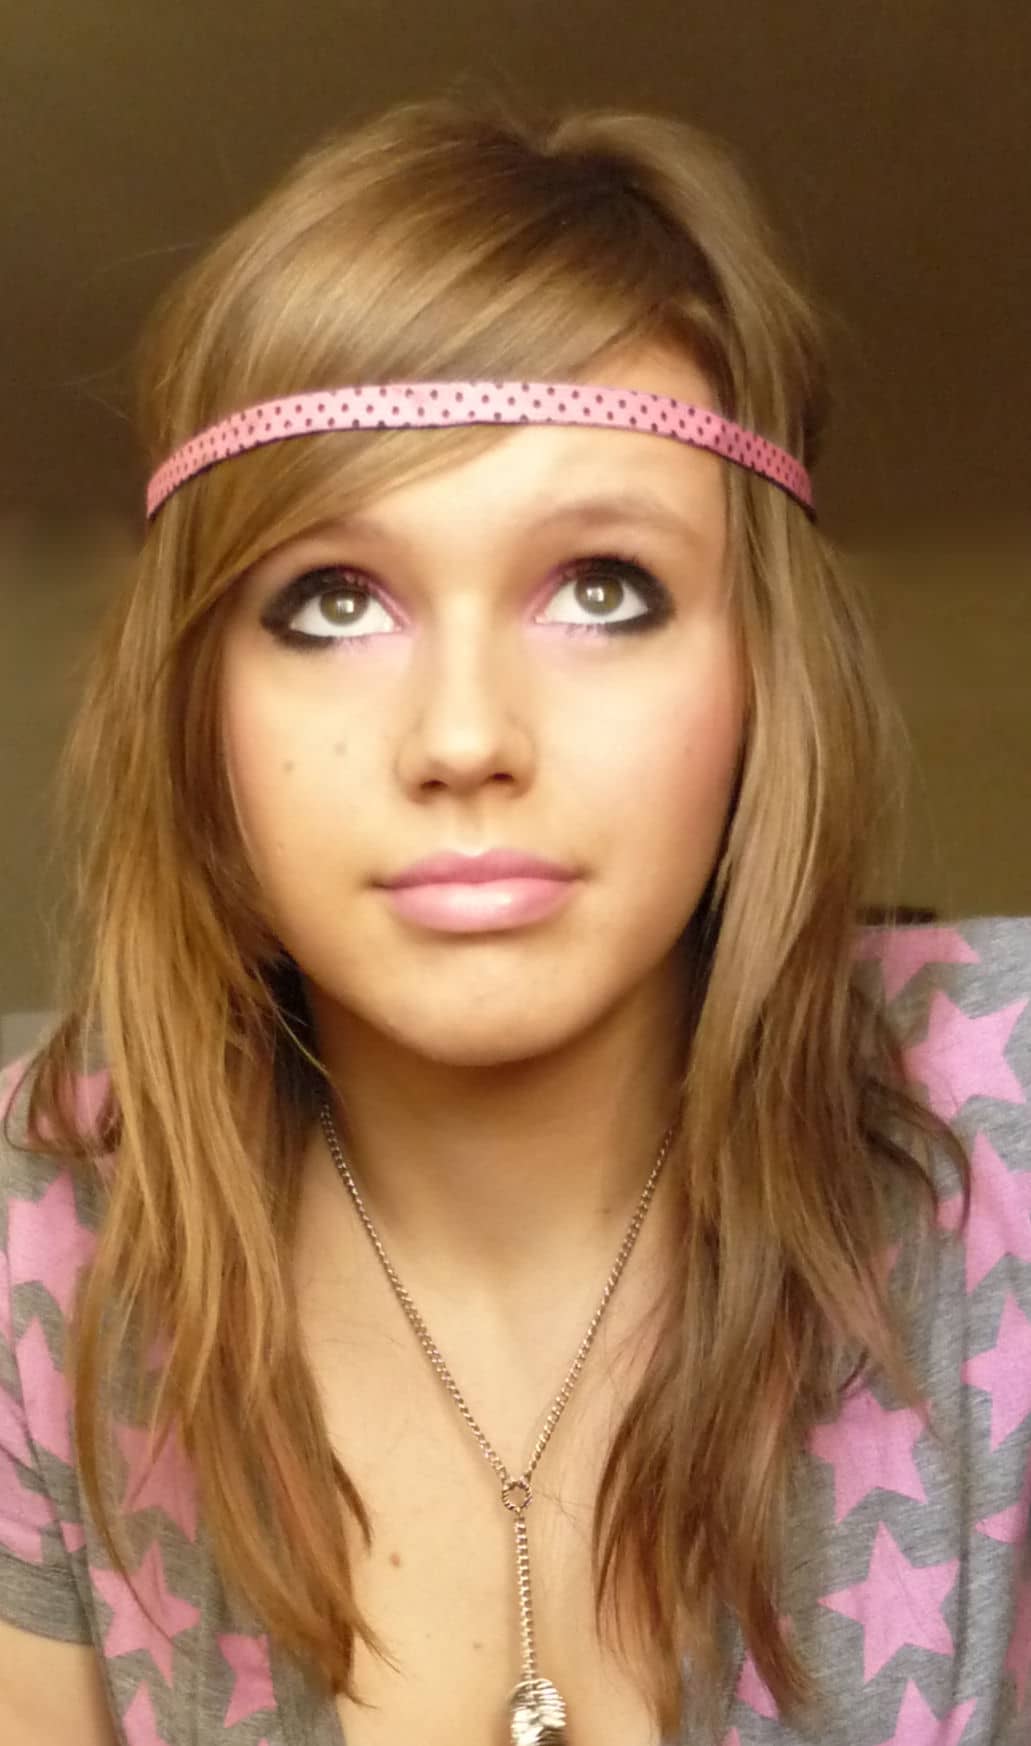
This is a before and after preview of the final result:
Before
After

Need more help? Check out this Video Tutorial below
Ok Let’s get started!
In this tutorial, I use the following stock for demonstration purpose – Self 16. by ~The1stGrape-stock
The reason I chose this particular image is that it doesn’t look too bad from the beginning, however there are still things can be improved, perfect for beginners to get some practices on.
Remove Black Spots with Spot Healing Brush
Firstly if we take a look at the photo, we can see there are several black dots on her skin, as shown below:


To fix these, we can use the Spot Healing Brush tool, as shown below in the toolbox:

Simply grab the Spot Healing Brush, adjust the size of the brush to be slightly large than the black spot, and do a single-click on it:

You can see after the single-click, the black spot disappears:

Basically, what happen is that with the Spot Healing Brush tool, it takes samples of the surrounding skin colour pixels and use them to replace the black spot colour pixel. Magical, isn’t it?
Let’s use the same method to remove all black spots on her face, here is the effect so far:

Make Your Eyes Look More Attractive
Now let’s pay attention to her eyes, which are beautiful even without any retouching :) but, we can give them a bit more depth, here is how:
Duplicate the background layer once, set the blending mode as “Soft Light” for the duplicated layer, you will have the following effect:

You can see by doing so we in fact darken the whole image. However here we only want to add depth the eyes, so we need to hide the rest of the layer. To do so, go to layer > layer mask > hide all, then on the layer mask, use a White Brush to paint inside the eyes, as shown below:

By doing so we reveal the eyes portion of the layer only. Here is the effect after the painting:

Use Surface Blur to Smooth Skin, instead of Gaussian Blur
Now let’s make her skin go smoother a bit. To do so, we use Surface Blur. The reason I chose Surface Blur is because unlike Gaussian Blur (which blurs the whole image), Surface Blur retains the edge details. This eliminate the needs of adding a layer mask on the duplicated layer to reveal the edges.
So let’s duplicate the orginal background layer once, and apply the following Surface Blur settings to it:

Drop the opacity of the duplicated layer to around 70%, and you will have the following effect:

Make Her Lips Look Even More Delicious
To do so, we use the Lasso Tool to make a rough selection of the lips as shown below:

Hit Ctrl + J twice to make two duplicates of the selection, change the blending mode of the first copy to “Multiply“, with 100% opacity. Change the blending mode of the second duplicated layer to “Linear Light“, with 55% opacity.
Use a soft, round eraser to gently erase the edge of the lips, you will have the following effect:

Add another layer on top of all other layers, grab a soft round brush with White colour, gently paint around the lower lip to add some extra light:

Hint: set brush flow and opacity to both around 40%, this way we can gradually apply the brush effect.

Add Colour Depth and Lighting Contrast to Hair
Lastly, we can add some more depth to this girl’s hair. To do this, we can simply add a Curves Adjustment layer with the following settings:

Add the following layer mask to the Curves adjustment layer:

Here is our final effect: (You can see by adding the layer mask, we leave only the hair portion highlighted)

Optionally we add duplicate the orginal background layer and set the blending mode of the duplicated layer to “overlay”, reduce the opacity to 45%, you will have the following final effect: (click to enlarge)
That’s for this tutorial! Hope you enjoy it and find it useful, drop me a comment if you have any question, I will try my best to help you out.
Cheers and have a nice day!
30 Comments
Thank as always, your tutorial are great but in this case i’m sure you could have done a better work, this girls seems a “paint” picture not a real one :(
Remembering to keep a little of the sharpness/clarity of the hair is good in making it still look like a photo..with some awesome artists out there this looks borderline digital painting..
@Melody: yeah, i guess I should’ve reduce the opacity of the surface layer a bit lower.
Or, perhaps I should re-name this tutorial as “turn photo into realistic digital painting” :)
great tutorial
thanks
I agree with melody. the end result seems like a painting. Anyway very nice tuts.
your site is looking nice now and all tutorials r look great now.in dark background all tutorials look not clear.
Nice tutorial
Yes I agree.. too much detail taken away but very nice tutorial.
Tutorial’s Very Nicely Done!
i love your tuts but this one is tricky when u work with it on an mobilphone-photo like me! xD
Thanks a lot for much help, greetz!
mine didnt work, dont know why but learned alot todday
Hey James are you the owner of this website? Nice TUT BTW!! :-)
@Dhaval: yes I am. and thank you for liking my tutorial!
hi james i tried this tut with the picture of mine.i dunno how to do with my hair. turned out with my lips instead.had i been missing something?
i love your tuts so much, that is so cool
Awesome tutorial! Thanks for sharing!
Thanks for the tutorial James! I learned a lot with this one. I’m a beginner and this finally helped me to understand layer masks and the different ways to use them. Thanks again!
This girl does not need to be photoshopped. Little dark spots and other irreguliaities on the skin is what make people different and what make them familiar to relatives and best friends.
Nothing against this tutorial. it’s very useful when there are disturbing elements in someones face. In this case playing with contrast and lightness would be sufficient.
Nice, Thanks. Good article dude. Can you please write a article for hair color?
Great tutorial. The surface blur was a little too strong, but I just reduced the opacity a little. Problem solved. Use you imagination people! also, if you don’t like an effect one of the layers has, try using a different layer type. the surface blur looks a lot less plastic in luminosity.
As a beginner to photoshop I love this tutorial, it’s quick and easy to do. The surface blur on the face looks a bit cartoonish so I decided to look for another way on the web. The best one I’ve found was here: http://tuto.iza.co.za/2010/07/29/photoshop-tutorial-how-to-reduce-or-clear-oily-and-shiny-skin-easily-and-realistically/ . It’s used for oily or shiny skin but it also works for skars, blemishes or getting a make-up look.
Anyway, thanks for the tutorial and thanks for the site, it’s absolutely awesome!
nice effect… so cute…..
Its great tutorial artical. thanks for the tutorial and thanks for the site, it’s absolutely awesome!. it’s very useful when there are disturbing elements in someones face.
very nice job
well done ,easy and effective.
Nice Tips
Nice tutorial, I might give a couple of these techniques a whirl. Thanks.
To much blurring. I use gaussian blur with a radius 1px and after i use highpass 10-15px radius Her can you view this technique http://cythux.deviantart.com/gallery/25694762#/d4fbq4k
Great tut!
nice tutorial, anyone can learn every step you create witout mistake.