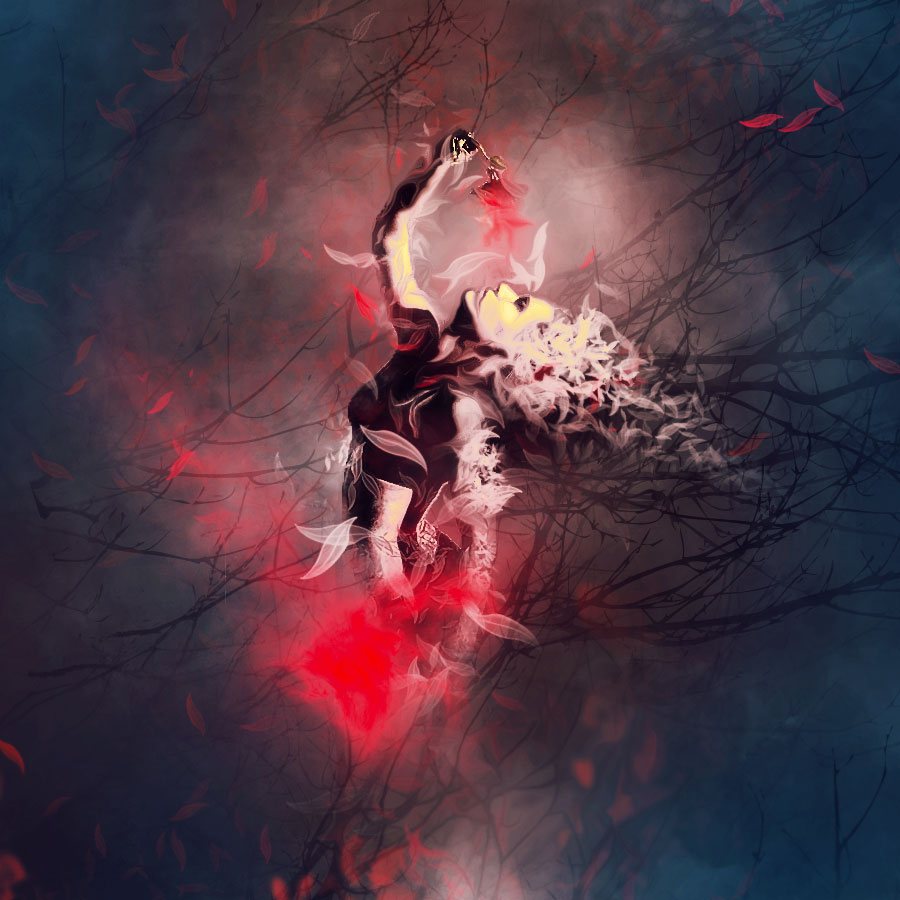
Dark photo manipulation in one of my favorite genres. In this tutorial, I will show you the steps for the making of the “Flower Dancer” dark photo manipulation in Photoshop. We will use a dancer stock image, plus flower & tree branch Photoshop brushes to construct the effect.
This will be a great tutorial for those who wish to learn and improve custom brush painting techniques in Photoshop.
The PSD file of this tutorial is available via the PSD Vault VIP members area.
Here is a preview of the final effect I have for this tutorial: (click to enlarge)
PSD Vault VIP Membership
You can download the PSD File for this tutorial via the VIP Members Area for only $6.95/Month (or less)! You will not only get this PSD File, but also 200+ other PSD Files + Extra Goodies + Exclusive Photoshop tutorials there. Signup now and get exclusive!
OK Let’s get started!
To complete this tutorial, you will need the following stocks:
Step 1
We will begin this dark photo manipulation by creating a portrait document sized 900px * 1200px, with black background. Use a dark grey soft brush, paint a big dot on the background layer:
Then, use a cloud brush or the cloud filter, add some cloud/smoke effect around the canvas, as shown below:
Step 2
Load the model stock image in Photoshop, cut out the model and place it to the centre of the canvas:
Use a soft eraser, fade the following portion of the model:
Step 3
We will add some flower pattern over the model for our dark photo manipulation. Load the flower brushes into Photoshop, pick one brush and open up the brush options window. Set the following brush options:
Shape Dynamics
Scatter
Transfer
Use this custom brush as eraser, apply it all of over the model, as shown below (this will form a tattoo style effect):
Apply the following adjustment layers as clipping masks to this model layer:
Black & White
Levels
Curves
and here is the effect so far:
Step 4
Use the tree branch brushes, paint the following area – use a soft eraser to fade the following portion to create more depth:
Keep adding more branch patterns:
and this is the effect so far:
Step 5
Use the flower brush defined in step 3, paint some flower pattern as hair for the model:
Also add the following pattern around the model’s body:
Apply some red cloud painting to the following position, just below the following bud that the model is holding:
Use the Warp tool to adjust the shape of this red cloud for best effect:
Step 6
Load the tree branch stock image into Photoshop. Copy and paste a few of this image onto our canvas, use the free transform tool to adjust the size and shape of them:
Merge all the branch layers into a single layer, use a soft brush to fade the bottom edge of the branches as shown below:
Apply the following Hue/Saturation adjustments to this branch layer to turn the leaves into red:
 Apply the following Gaussian Blur filter:
and change the layer blend mode of this branch layer to “Lighten”:
You will have the following effect:
Use the flower brush defined in the previous step, paint some extra flying flowers to add some motion into the image:
I further applied a few colour adjustment layers to give the overall image a blue/red colour scheme, and this is my final result: (click to enlarge)
That’s it for this dark photo manipulation tutorial in Photoshop! If you have any question about the steps, drop me a comment below and I will try my best to answer it.
Till next time, have a great day!


