In this tutorial, you will learn how to create a stunning leafy face photo manipulation in Photoshop. You will learn how to combine a portrait photo with leaves and other natural elements to create a unique and eye-catching image.
The PSD file of this tutorial is available via the PSD Vault VIP members area.
This is an intermediate level tutorial and some steps can be tricky.
Here is a preview of the final effect I have for this tutorial: (click to enlarge)

PSD Vault VIP Membership
You can download the PSD File for this tutorial via the VIP Members Area for only $6.95/Month (or less)! You will not only get this PSD File, but also 250+ other PSD Files + Extra Goodies + Exclusive Photoshop tutorials there. Signup now and get exclusive!
To complete this tutorial, you will need the following stocks:
Step 1
Create a new document sized 800px * 995px with white background. Load the background texture image into Photoshop and select the following portion:

Copy and paste the selection over to document and resize it to fit our canvas:

Apply the following “Watercolor” filter to this texture layer:

Use a big soft eraser to remove the following portions of the texture layer to create some depths:

Step 2
We will work on the face part of the manipulation in this step. Load the model image into Photoshop and cut out the head and neck part and paste it over to our document. Re-size and place it to the centre as shown below:

Use a rough eraser (grunge or splatter), remove the edges as shown below: (Make sure you set the eraser flow and opacity to around 30%, so you can gradually work through the edges without overdoing them, also make sure you adjust the eraser size)

Add the following adjustment layers as clipping masks to this face layer:

Layer mask on the black and white adjustment layer:

Levels

Layer mask on the levels adjustment layer:

Curves

and here is the effect so far:

Step 3
We will start adding the leaves in. Load the left stock 1 image into Photoshop and use the lasso tool to select the following portion:

Copy and paste the selection to our image and resize it as shown below:

Change the layer blending mode to “Screen” for this new leaf layer:

Repeat this process and add some more leaves to the areas shown below:

Step 4
Load the leaf stock 2 into Photoshop and select the following piece:

Copy and paste the selection over to our document, and apply the following Paint Daubs filter:

Change the layer blending mode of this leaf layer to “Multiply”. Repeat this process and add 2 leaves on both sides of the face:

Go back to the leaf stock 2 image and select another different piece. Again we copy and paste the selection to our document and reduce its size, then apply the following black and white adjustment to this layer:

And change the blending mode to “screen” for this leaf layer:

And here is the effect you will have:

Step 5
We will duplicate the new leaf layer we created in the previous step a few times. Keep their blending mode as “screen” and use the free transform tool to rotate, resize the layers, to form a line as shown below:

Add a few more transparent leaf layers to the top as shown below:

You can change the layer blending mode to “overlay” for those leaf layer and see what effect that brings you:

Step 6
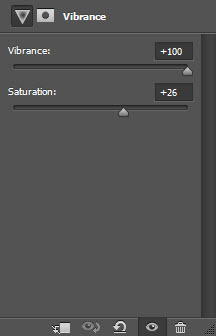
We’re almost done! We will fine-tune the colours of the image by adding a new Vibrance adjustment layer on top:
And this is the final effect I have for this image: (click to enlarge)
Here are some additional tips for creating a leafy face photo manipulation:
- Use high-quality images for the best results.
- Experiment with different combinations of leaf and natural element images.
- Use layer masks to blend the different elements together seamlessly.
- Add adjustments to the image to improve the overall look.
I hope this tutorial helps you create your own stunning leafy face photo manipulation!
That’s it for this tutorial! Hope you enjoy going through it and find it useful. Drop me a comment below if you have any question.
Till next time, have a great day!
9 Comments
Now this was helpful. I knew their was a better way of doing it, just couldn’t figure out how.
Thanks.
thanks for the tutorial its really interesting I love it
Hi James this is excellent, and what I want to and print on aluminum at http://www.bayphoto.com/metalprints/ Have you done this, and do you think that the watercolor filter will take away from the print’s vibrancy? Does the tutorial download from PSD point to required materials and what bit size does the Face photo need to be? I’ve read that Filter Gallery in CS6 only works with a 8-bit image. I’d like to re-create and print a photo like yours on aluminum but not sure how to best do this or what constraints I’ll face when submitting to bayphoto. Thanks!
Hi James, this is excellent and the look I what to create and print on aluminum at http://www.bayphoto.com/metalprints/
Have you done this, and do you think that the watercolor filter will take away from the print’s vibrancy? Does the tutorial download from PSD point to required materials and what bit size does the Face photo need to be? I’ve read that Filter Gallery in CS6 only works with a 8-bit image. I’d like to re-create and print a photo like yours on aluminum but not sure how to best do this or what constraints I’ll face when submitting to bayphoto.
Thanks!
I love helpful tutorial
hi James Qu,
thanks for your very good manipulation tutorials and step by step process.I like this and learn lots from here .this is very helpful for beginner…..!!!
http://www.graphicexpertsbd.com/image-manipulation
I really wanted to do this tutorial, but your explanations were difficult..actually impossible to follow in places. I’m not new to Photoshop, but you skipped over some things that you might have been a little more clear about such as: ” Add the following adjustment layers as clipping masks to this face layer:” and then followed by “Layer mask on the black and white adjustment layer:” No explaination about what you were actually doing and you were painting stuff that you never mentioned. It is a nice final image.
wow!!.. great tutorial.
Sorry but you’re missing vital steps in this tutorial and it lacks detailed directions even for an intermediate tutorial. This should be removed.