
Welcome to an in-depth tutorial on how to draw realistic lips using Adobe Photoshop. Whether you’re a novice or an experienced artist, this step-by-step guide will help you achieve lifelike results. Follow along with the detailed instructions and tips to enhance your digital drawing skills.
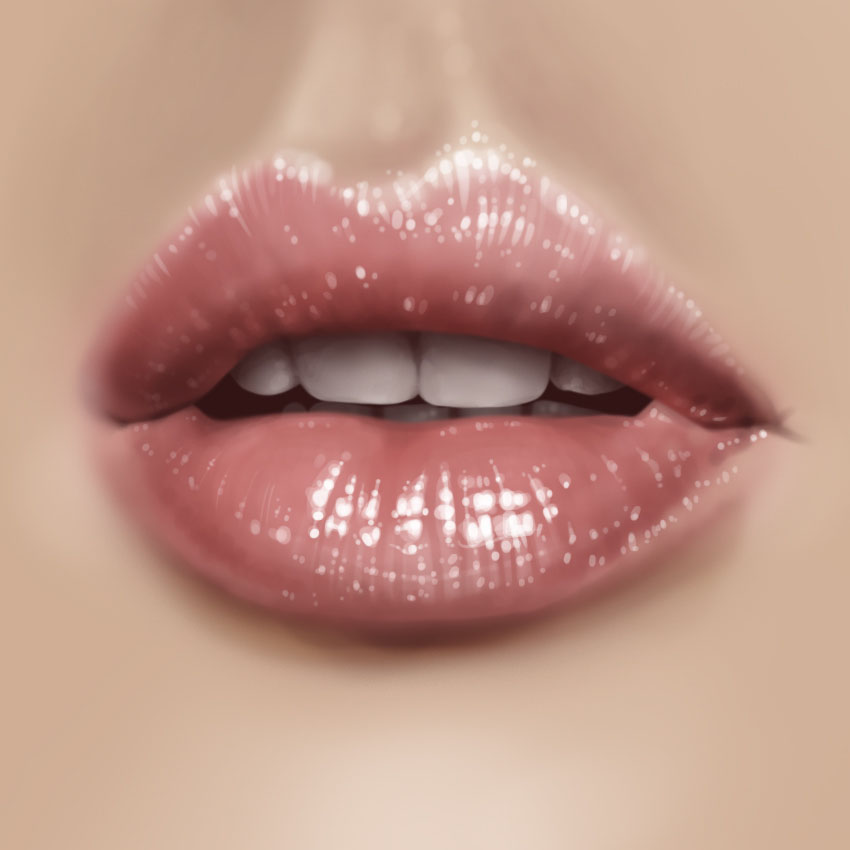
We will use this photo as a reference.

Let’s start.
Step 1: Setting Up Your Canvas
Open Photoshop, and go to File > New to create a new document. In dialog box set Width and Height to 850 px, Resolution to 300 Pixels/inch.
Then fill the background with a skin tone. To do that choose the relevant foreground color (it’s #dfc6b3 in my case) then press Alt and Backspace together.

Step 2: Sketching the Lips
Now create a new layer. We’ll be drawing our sketch on it. Select the Brush from the Tools Panel (or use the keyboard shortcut B). I’m used to switch on brush Shape Dynamics and Transfer while drawing sketches. You can configure this settings in Brush Panel (this panel is available using the keyboard shortcut F5).

At the first stages of drawing comlex forms are usually simlified, to catch the basics, which then can be clarified and detalized.
Upper lip can be conditionally imagined as three basic shapes right in the middle of it (they create a cupid’s bow) and another two shapes by it’s sides. Lower lip can be imagined as two central shapes (usually there’s a visible crease at the point of their contact right in the middle of lower lip).
Try to understand and transfer lip volume, not just repeat the contour of what you’re drawing. At the beginning I mark this volume shapes as ellipses and circles – the simpliest geometric figures.

Then, basing on this ellipses and circles I draw the lips sketch:

You can erase this auxiliary shapes from now on:

Step 3: Drawing the Lips
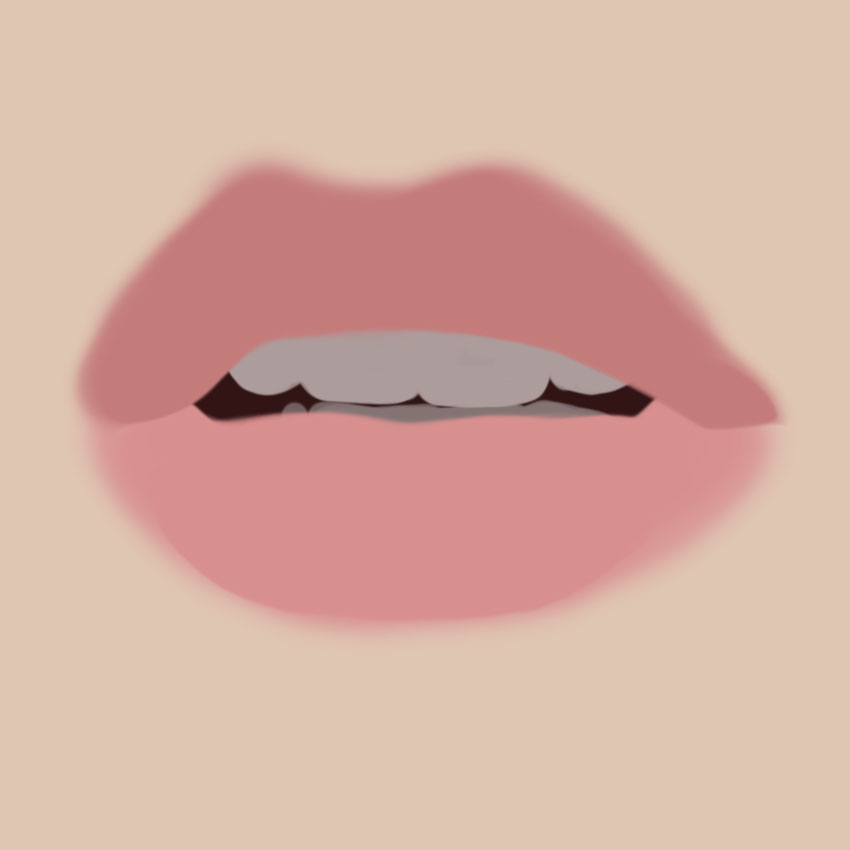
Create a new layer and place it right under sketch layer in Layers Panel by dragging it. We’ll be drawing the lower lip on this layer. Use a standard round brush, but vary the brush hardness, to show hard and soft boundaries. Brush hardness settings can be found in Brush panel. Go to Brush Tip Shape and then set Hardness to the value you need.

Inner part of the lips will have hard boundaries, while outer part will have soft boundaries. To give you a better view I’ve temporarily hidden my sketch:

This time сreate another layer for the upper lip and draw the upper lip in the same way, changing the hardness of the brush:

Please note that drawing the upper lip I selected a darker color, because under the light from above the upper lip is in the shadow.
Step 4: Adding Volume
Also draw the upper and lower teeth on separate layers. On an additional layer paint the visible oral cavity with a dark color (close to black).
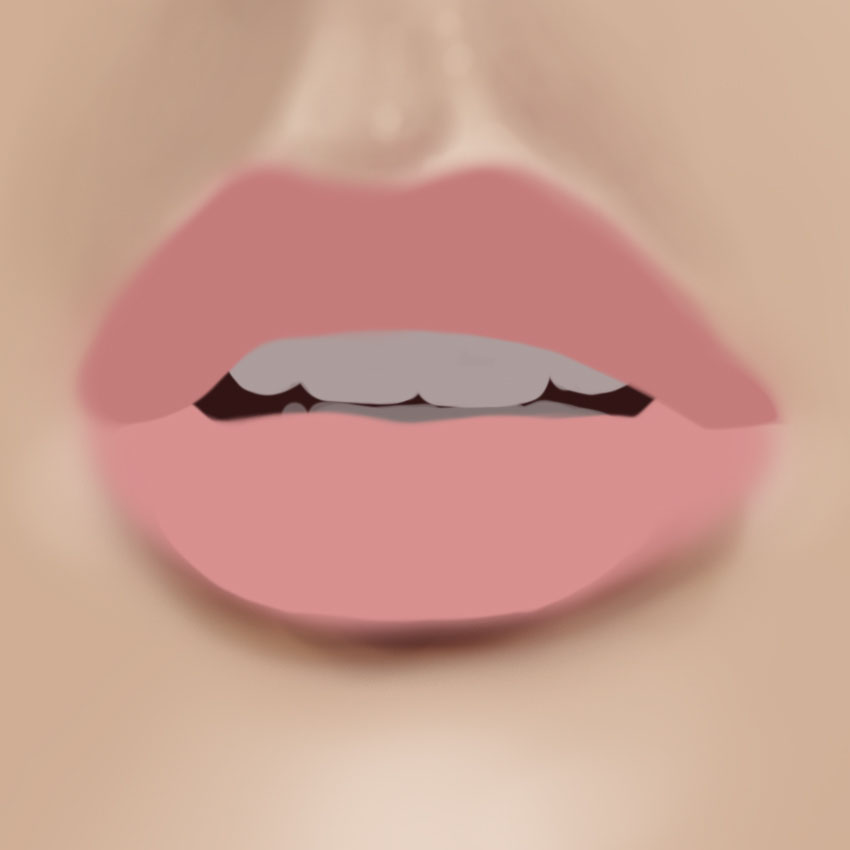
Step 5: Refining Shadows and Colours
Let’s start adding volume. Create a new layer above the background. Choose the softest possible (Hardness 0%) and semi-transparent brush, then set it to a fairly large size. You can quickly adjust the size and softness of a brush using keyboard shortcuts. To change brush size, press the left [ and right bracket ] keys. To adjust brush softness, press the Shift + [ and Shift + ] keyboard shortcuts.
This brush will allow you to avoid sharp edges and transitions of light and shade.
Choose a color that is slightly richer and darker than the background and shade the left and right sides of the face. Show the volume of the chin and outline philtrum (the philtrum is the vertical groove between the nose and upper lip).

Continue picturing the volume around the mouth, working with a light color now. Highlight the center of the chin, the border of the upper lip, then add some light to the corners of the mouth.

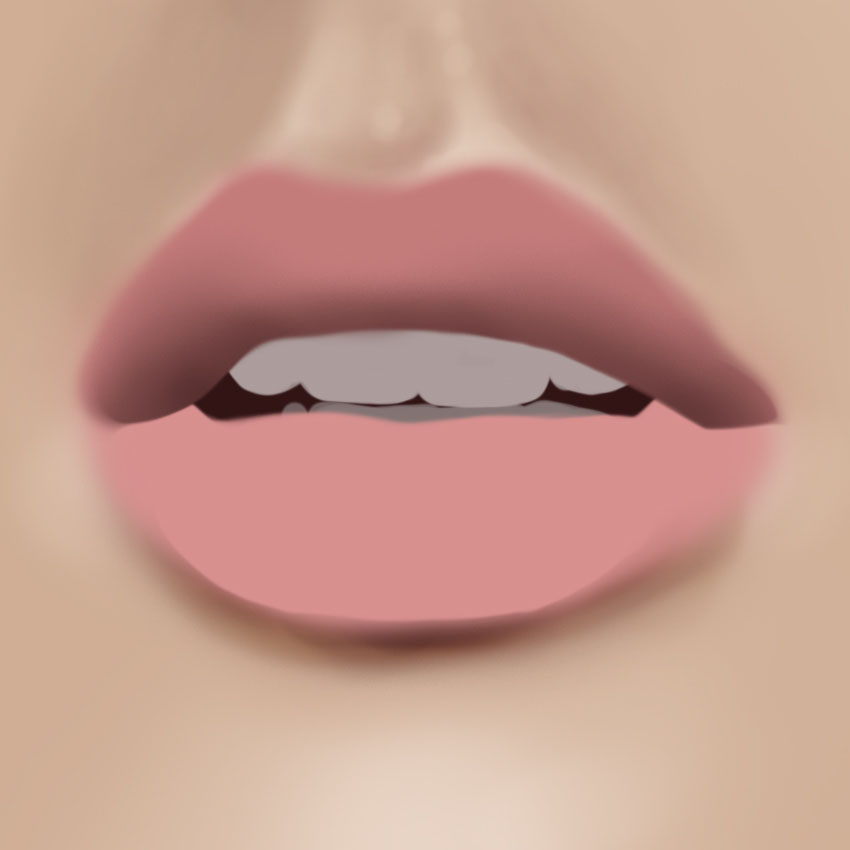
Step 6: Clipping Mask for Detailed Work
Choose a darker color and draw a shadow under the lower lip.
Use grayish and brown (closer to orange or red) shades. Also add more detail to philtrum.

Step 7: Texturing the Lips
You can also add a couple of light strokes at the corners of the lips (with the color we used to draw the lips) to further soften the border between the skin and the lips in this area.
Step 8: Adding Highlights
Now let’s add some basic volume to our lips.
To start switch to the upper lip layer in Layers Panel and press the keyboard shortcut Shift + Ctrl + N (or go to Layer > New > Layer). In the window that appears check the box “Use Previous Layer to Create Clipping Mask” and click OK.

Now everything that we draw on this layer will be framed by the borders of the main layer.

So we divided our work into stages — at first we focused on the form and now we don’t have to worry about it. At the same time, we can always go back to the form layer and edit it if necessary.
The darkest area is the lower part of the upper lip. Let’s continue to work with a soft brush to darken this area.
Just like for the upper lip, create clipped layer for the lower lip. Darken the bottom of the lower lip.

Step 9: Add Touches on Teeth
Now the shadows look pretty monotonous, let’s fix it by adding color. Choose a reddish or even ginger shade (I chose this one: #911a16) and work with a transparent brush. I like to use this brush – it allows you to draw in the glazing technique (previous layers shine through the new ones, creating a smooth mix of colors).

Let’s continue to form the volume, now working with a light color. Create a new clipped layer for the upper lip and lighten the contour of the upper lip as shown below.

I’ve used a color close to the lightest skin color in the central part and more of a gray shade at the edges.
Since the light source is located to the right on the reference, the left part of the face is more darkened. Respectively, the lightening on the left side should be made more neutral than on the right.
Now use the eraser to give the lip border a more natural look. Use the same eraser as the brush — soft and translucent.

Let’s do the same for the lower lip. Create a new layer clipped to the layer with the lower lip. Then highlight the edges of the lower lip as shown below.

Lighting on the right will be brighter than on the left, as we discussed before.
Use an eraser to make the lip border look more natural like before.

Step 10 – Add More Light
Let’s add even more light. The right part of the upper lip and the central part of the lower lip are well lit. I also lighten the right part of the lower lip a little.

Step 12: Building Up the Tone
Now we’ll continue to show the volume by building up the tone, but more detailed. At the same time, we’ll begin to form the texture of the lips. To do this, reduce the size of the brush, and also make it more hard (somewhere in the range from 50 to 75 percent). Also create some strokes by the shape of the lips. And one more recommendation — while drawing, you can hold down the Alt key to switch to the Eyedropper Tool and select the desired color directly in the drawing.

There are a lot of creases on lips, but since in this case we do not have the goal to draw hyperrealistically, let’s try to simplify and generalize them when drawing.
Continue to work in the same technique until you get a result that satisfies you.

Pay attention to the main areas of light and shadow. Taking into account the light is falling from the top right, we will get a very bright area in the upper right part of the upper lip. The darkest area is at the bottom of the upper lip, but don’t forget about the reflex (the base of the upper lip will be slightly lighter in this area, but not lighter than the illuminated part). This area’d be better shown in a more saturated color, additionally the reflexes should be marked very subtly. You can also show the main crease in the center of the lower lip with brighter color.
Step 13: Mouth Cavity
Draw the corners on the new layer on top of all the existing ones. Mark them with a dark color (I’ve used the same color that we used to fill the mouth cavity, you can choose it with the Eyedropper Tool).

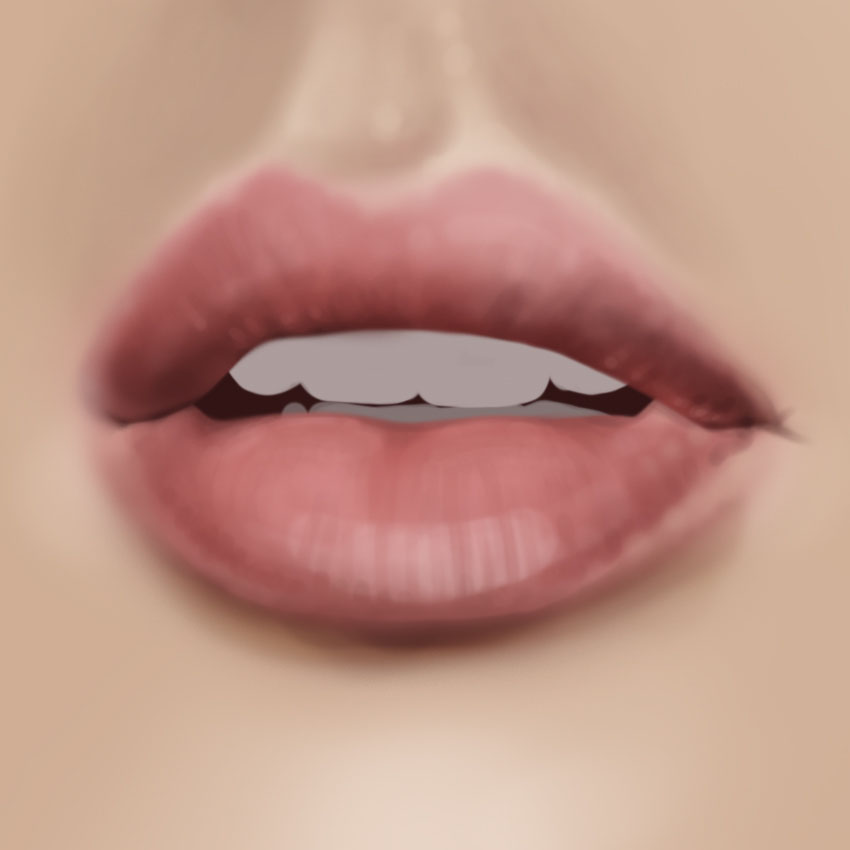
Step 14: Add Highlights
Let’s start adding highlights. On the new layer, draw a spot of very light pinkish hue in the bottom of the lower lip.

Select a soft and very transparent eraser and draw vertical lines that follow the shape of the lip to show the creases.
Reduce the size and increase the hardness and transparency of the eraser when adding new creases.

Create a new layer, then click on the thumbnail of the layer you just worked on holding down Ctrl (by doing this you’ll create a selection of a highlight, which we’ve just drawn). Select a very hard brush of a small size, choose a color even lighter than the one you worked with before and draw a line that repeats the contour of the lower lip.

Deselect the selection by pressing Ctrl + D. Then add even more little highlights.

Step 15: Lower Lip
Now let’s draw the main highlights on the lower lip. We’ll be relying on the shape of the lips while drawing, leaving some space between the spots to show the creases.
I’m used to draw this highlights in several stages — at first I create a certain base with a light pink color:

And then I add details with a white color:

Step 16: Upper Lip
In the same way draw highlights on the upper lip (they are located on the boundary and repeat the contour of the lips).

Now we’ll continue showing the texture of the lips with the help of highlights: let’s draw vertical strokes that would imitate our texture. You can enable Shape Dynamics for the brush to get suitable strokes for this step.

Step 17: Add Main Highlights
We’ve already added the main brightest highlights, now we’ll add more nuanced ones. Use a less bright color or just lower the transparency of the layer on which you’ll be drawing them, also draw them with a smaller brush.

Step 18: Lower Teeth
Let’s work on the teeth. We’ll start with the lower ones. Switch to the lower teeth layer and create a clipped layer for it.
Shade the areas around the edges with a soft brush.

Now draw the junctions of the teeth.

Also add a little light (literally a few small slightly perceptible strokes) to convey the volume.

As you can see, since the lower teeth are in dense shadow, there is no need to work on them very carefully; the light and shadow will also be weakly pronounced.
Step 19: Upper Teeth
Now we’ll repeat the same steps for the upper teeth. The only difference is the contrast and accuracy of the image.
Draw the upper lip shadow, then mark the volume of each tooth.

Draw the junctions of the teeth.
Add highlights.

We’re done! I hope this tutorial will be of use to you. Till next time, have a great day!
Extra Tips and Tricks on How to Draw Lips
1. Study Reference Images:
- Before you start drawing, gather a collection of high-quality reference images showcasing various lip shapes, angles, and lighting conditions. Analyze these references to understand the natural variations in lip anatomy.
2. Start with a Solid Foundation:
- Ensure a strong foundation by sketching the basic shapes and proportions of the lips. Use simple geometric forms initially to capture the essential structure before adding intricate details.
3. Pay Attention to Lighting:
- Understand the direction of light in your reference image. Consistent lighting is crucial for creating realistic shadows and highlights on the lips. Adjust the light source in your drawing accordingly.
4. Experiment with Brush Settings:
- Take advantage of Photoshop’s brush settings. Experiment with brush hardness, opacity, and flow to achieve the right balance between soft transitions and defined edges. Adjusting these settings can greatly enhance the texture of the lips.
5. Use Clipping Masks for Precision:
- Utilize clipping masks when working on specific lip features. This technique allows you to focus on details without affecting other layers, providing a more controlled and precise workflow.
6. Observe the Natural Lip Lines:
- Pay close attention to the natural lines and creases of the lips. While realism is the goal, it’s acceptable to simplify and stylize these lines to maintain a balance between detail and artistic interpretation.
7. Create Depth with Shadows and Highlights:
- Build depth by strategically placing shadows and highlights. Darken areas where shadows naturally fall, such as beneath the lower lip and along creases. Highlight areas that catch more light, like the center of the upper lip.
8. Blend Colors Seamlessly:
- Achieve smooth color transitions by blending colors seamlessly. Use a soft brush and experiment with different blending modes to create a natural transition between lip tones and surrounding skin.
9. Add Subtle Texture:
- Introduce subtle texture to the lips by incorporating fine lines, tiny highlights, and variations in color. Mimic the natural texture of lips without overwhelming the overall drawing.
10. Refine with Layers:
- Work non-destructively by utilizing multiple layers. Keep your base layers intact and create new layers for additional details, highlights, or adjustments. This allows for easy modifications without compromising the entire drawing.
11. Regularly Zoom Out:
- Periodically zoom out to view your work at a smaller scale. This helps you assess the overall composition and ensures that the lips integrate seamlessly with the rest of the facial features.
12. Use Filters Sparingly:
- While filters can be helpful, use them sparingly to avoid an overly processed look. Manual detailing and shading often yield more realistic and personalized results.
13. Seek Feedback:
- Don’t hesitate to seek feedback from peers or online communities. Constructive criticism can provide valuable insights and help you identify areas for improvement in your lip drawings.
14. Practice Regularly:
- Like any skill, drawing realistic lips in Photoshop improves with consistent practice. Set aside dedicated time to refine your techniques, experiment with different styles, and push the boundaries of your creativity.
15. Stay Inspired:
- Stay inspired by exploring the works of other digital artists. Analyze how they approach lip drawing and incorporate elements that resonate with your style. Inspiration can come from various sources, so keep an open mind.
By incorporating these tips and tricks into your digital art practice, you’ll be well-equipped to create stunning and realistic lips in Photoshop. Remember, each drawing is an opportunity to refine your skills and develop your unique artistic voice.
Conclusion
Mastering the art of drawing realistic lips involves a combination of technique, observation, and creativity. By following this comprehensive step-by-step guide, you’ve gained valuable insights into creating lifelike lips using Adobe Photoshop. Continue practicing and experimenting with different styles to further refine your digital drawing skills.