
In this tutorial, we are going to learn how to customise the Photoshop Toolbar, plus learning the basic of Options Bar.
Photoshop provides than 50 tools at your disposal. Some tools are rarely used. In fact, you may never and will never use some of those tools. The good thing is, you can customise the toolbar to suit your need.
Photoshop Toolbar Customisation
We will work through some very useful Photoshop toolbar customisation techniques in this section.
Enable Two Columns, Show/Hide Toolbar
By default, the Toolbar is presented as an one column panel. But, you can turn into two columns panel like in previous versions of Photoshop by clicking on the double arrow on top of the Toolbar.

You can also hide all the panels in Photoshop except the Toolbar and the Option Bar by hitting the Shift + Tab key. Hit Tab to hide all the panels, including the Toolbar and the Option Bar. Repeat this again to reveal the hidden panels.
Reveal All Available Tools in Photoshop Toolbar
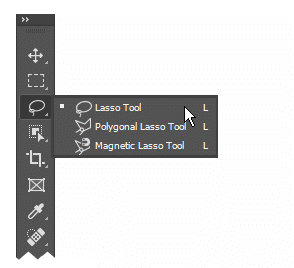
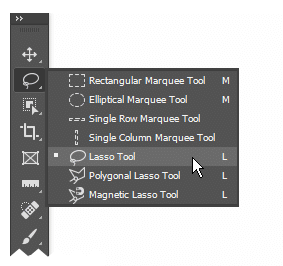
Some tools are located at the same slot. This is indicated by the small triangle at the corner of the tool slot. Click and hold to reveal all the available tools inside the correspondent slot.
Next to the tool name, sometime there is a keyboard shortcut for the tool. In the image below, all the Lasso Tool have the same shortcut, L. Hit the L key to activate the Lasso Tool. To scroll to the next tool that has the same keyboard shortcut, add Shift. So, to select the Magnetic Lasso tool hit Shift + L twice.
How to Change Photoshop Toolbar Position
By default, the Toolbar is positioned at left side of the interface. If you don’t like it for whatever reason, you can change its position.
Click and drag upper part of the Toolbar and snap it to the right.


Turn Off Tooltips on Photoshop Toolbar
When you hover your cursor on top of the tool slot, a small animation pops up showing short introduction on how to use the tool, its name and shortcut key, and its brief introduction.

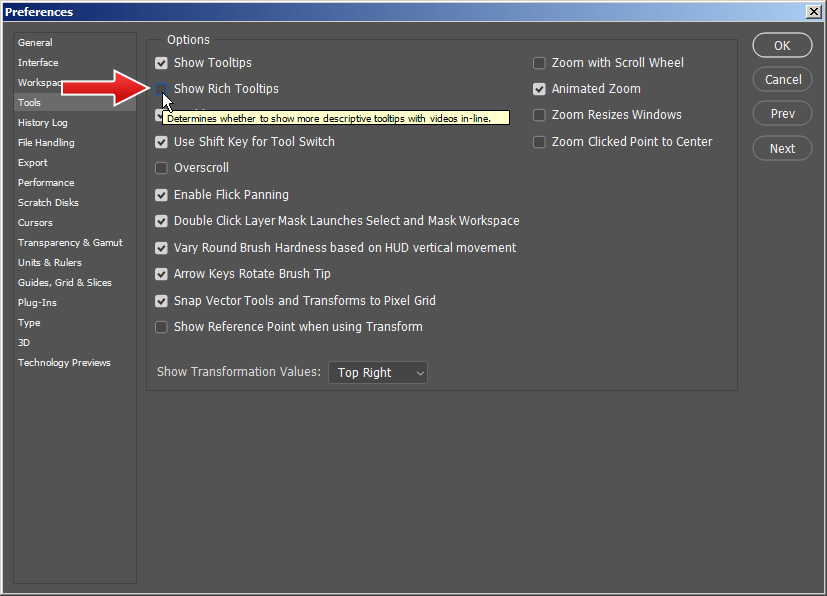
The tool quite handy for a beginner, but for most seasoned user, it is just plain annoying. If you’re part of the latter, you can shut it down by clicking on Edit > Preferences > Tools or hit Ctrl + K and select Tools. Deselect Show Rich Tooltips to stop the animation from popping up and covering the work area.
After this, no more animation. Only a simple tooltips showing its name and keyboard shortcut. Don’t like that too? That’s easy. Deselect Show Tooltips in the same Preferences dialog box.

How to Edit The Toolbar
To edit the Toolbar and make your own custom Toolbar, you can click on the three dots icon at the Toolbar or clicking Edit > Toolbar.

A big dialog box will shown up. This is where you can organize all the tools and make your own version of Toolbar.

How to Change Toolbar Slot Order
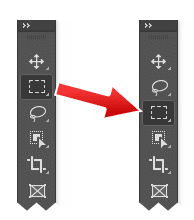
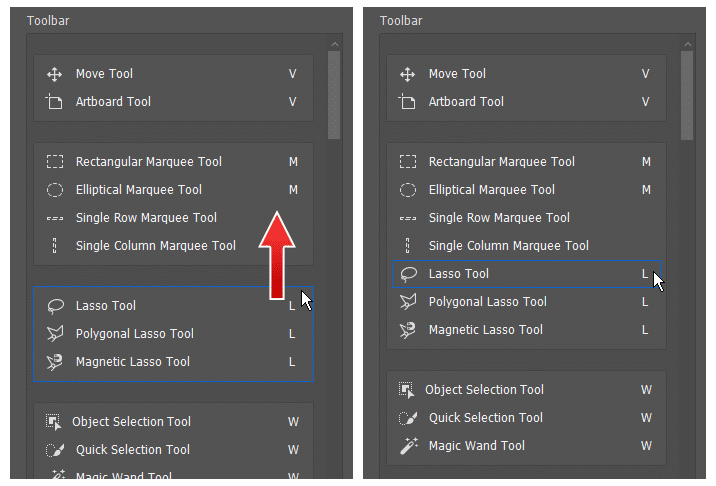
By default, the Marquee tool is positioned above the the Lasso tool. You can change this by dragging the Marquee tool group to underneath the Lasso tool group. Click Done to confirm the customization.

As seen in the image below, the marquee tool is now placed underneath the lasso tool.
Clever Use of Separate Tool
Using the Customize Toolbar dialog box, we can separate tool and place it in its own slot. You might want to do this to give you easy access to the tool. Let’s try give the Elliptical Marquee tool its own slot, separating it from the other marquee tool. Drag the Elliptical Marquee tool from its group and place it in its own group.

As you can see now, the Elliptical Marquee tool is now freely on its own slot.

How to Combine Tools into the Same Slot
Using the Edit Toolbar dialog box, we can combine the tools into the same slot. You might want to do this to shorten the Toolbar or making it less crowded. As you see below, by default the Lasso tool and the Marquee tool is placed in separate slot. Let’s put them all on the same slot since they have same function, making manual selection.

In the Customize Toolbar dialog box, drag the Lasso tool group into the Marquee tool group to combine them into one big group of Lasso and Marquee tools.
Click Done to confirm to changes. Now we have them all in the same slot.
Add Shortcut to Tool
Some tools have no shortcut because they tend to be rarely used. Such as the Single Row and Single Column Marquee tools. But, who knows? Maybe unlike the rest, you use them a lot. Using the Edit Toolbar you can add shortcut to your tool. Click the space in front of the tool’s name and click to add its shortcut. Here. I use same shortcut as the other marquee tools, M.

Click Done to confirm the changes. You will find that a shortcut is now added to both tools.

How to Hide Tools that You Don’t Really Use
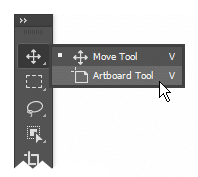
Never use that tool? Why don’t you hide it and give room to the frequently used tool. Let’s try with the Artboard tool. It is by default located at the same slot as the Move tool.
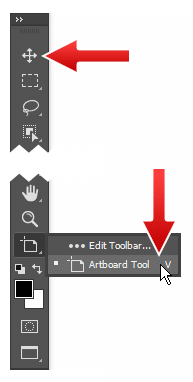
Click Edit > Toolbar and then drag the Artboard tool from the Toolbar column to the Extra Tools column.

The tool is now removed from its original slot. You can find it hidden inside the three dots slot at the bottom of the Toolbar.
Disable Shortcut for Extra Tool
We can disable shortcut for tools that we have hid as extra tool to prevent them from selected accidentally. Magnetic Lasso tool dosn’t make accurate selection, most of the time it’s useless. Let’s hide it from the Toolbar.

Click Edit > Toolbar. In the Customize Toolbar dialog box drag the Magnetic Lasso tool to the Extra Tools column.

The Magnet Lasso tool is now hidden and can be found from the extra slot. As you can see, it still has its shortcut. If you keep on hitting Ctrl + L, it will be activated.

To disable its shortcut, activate Disable Shortcuts for Hidden Toolbar Extras in lower part of the dialog box.

Now, all the extra tools can not be selected from their shortcut .

Compact Toolbar
You can hit the Clear Tools buttons and move all the tools to Extra Tools column. You can hit Done to accept the changes.

The result might seems silly, Toolbar without the tools. All the tools are shown as flyout menu. But, if you want to really maximize the workspace area this might seems like a good idea.

Hide Extras
At the bottom of the Customize Toolbar dialog box there are some icons to show or hide extra feature at the bottom of the Toolbar. You can hide the three dots slot which contains all the hidden tools, the foregound and background color box, Quick Mask mode, and screen mode. The screen mode can be accesed easily using shortcut F and the Quick Mask mode can be accesed using Q. It seems we don’t need them in the Toolbar. Click their icons to hide them.

As seen below, they are now missing from the Toolbar.

Save and Load The Custom Toolbar
When you have made your own custom Toolbar, you can save its configuration as a TBR file. Use Load Preset button to load the file and apply its configuration.

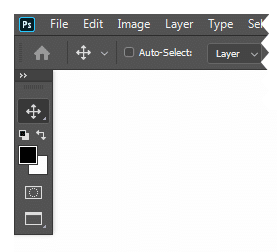
The Options Bar in Photoshop
The Options Bar is the long horizontal bar located under the menu bar. It is context sensitive. Its content is changing according to the current active tools. Below you can see the content of Options Bar while the active tool is Rectangular Marquee, Lasso, and Object Selection. Inside the Options Bar there are options that control how the active tool works.

Narrow Options Bar
If you use small screen, there is possibility the Options Bar will not fit. You can fix it by clicking Edit > Preferences > Workspace or hit Ctrl + K and select the Workspace section. Activate Enable Narrow Options Bar and then click OK button. You need to restart Photoshop to enable the option to take effect.

Below is the difference between the standard and the narrow Options Bar for Crop tool. Notice that the text option is shown as icons without text, reducing the length of the Options Bar.

Restore and Reset Toolbar
You may have gone too far and made a mess. Don’t worry, why don’t just click the Restore Defaults button to return the Toolbar to its default configuration.

To revert your Photoshop interface to the standard appearance, click Workspace > Essentials (Default) and then Workspace > Reset Essentials.

Photoshop Toolbar Missing?
If you run into the issue of missing Photoshop Toolbar, use this method to restore toolbar to default.
Conclusion
Most of us don’t bother to change the Photoshop interface and use it as is, straight out of the box. However, its always nice to know that we can change many of its interface to suit our need and who knows, maybe it can help us work faster. Thank you for reading. I hope you learn new information from this tutorial.
As always, stay strong, stay home, stay safe, and keep on social distancing.
Enjoy this tutorial? Check out more beginner tutorials on PSD Vault here.