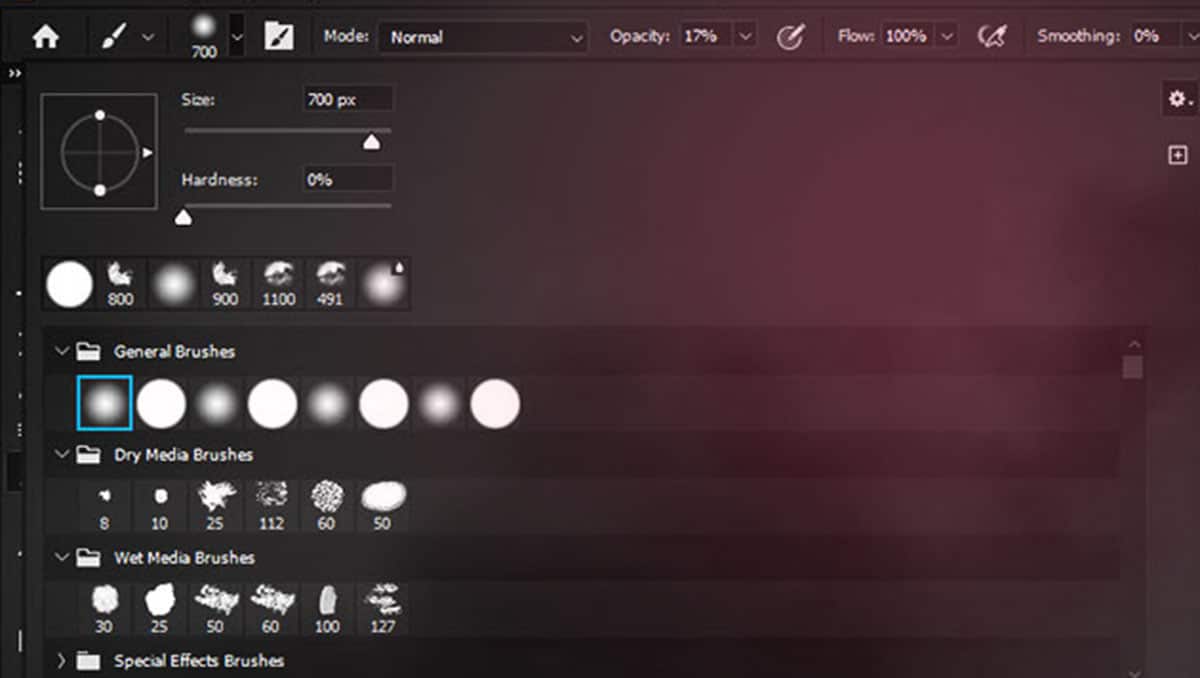
The Brush tool in Photoshop is your digital paintbrush, allowing you to add, modify, and retouch elements in your images with precision and creativity. In this beginner’s guide, we’ll explore the Brush tool step by step, so you can start painting and retouching your images like a pro.
Let’s get started!
Step 1: Preparation
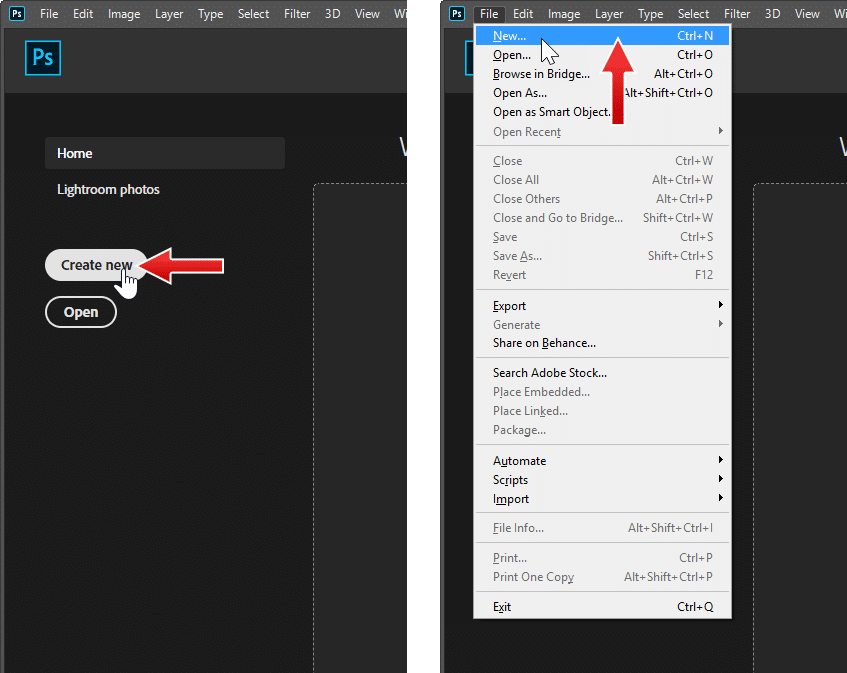
The best way to learn Photoshop is by practicing. Don’t just read it, apply it directly. So, make a new file by clicking on the Create new button in the home screen or click File > New.
Step 2
In the New Document dialog box, you can use any size. Click the Create button.

Step 3: Start Using The Brush Tool
Before we’re moving on, I’d like to remind you to the basic principle of image editing. Do not destroy the original image!. We don’t want to paint on the original image. It’s a big no-no. To keep the original image safe, hit Ctrl + J to duplicate it. This way, we are going to paint on the duplicated image. If anything goes wrong, we can simply hit Delete key to remove the image and we can go back to the original unedited image.

Step 4
To activate the Brush tool, hit the B key on your keyboard. You can also use the Toolbox panel. When the Brush tool is active, the Option Bar — horizontal bar that runs underneath the Menu Bar — shows some options that related to the tool.

Step 5
Click and drag to start applying the Foreground color which can be found at the lower part of the Toolbox.

Step 6
In the Option bar, you can change the brush Opacity to make it transparent.

Step 7
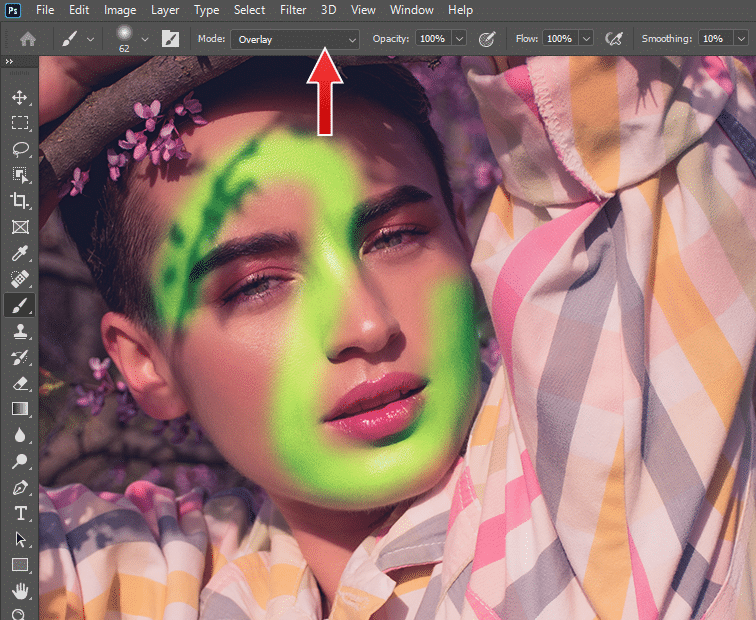
You can also apply blend mode to change how the color from the brush strokes interacts with the existing pixels.
Step 8
There is also option to simulate an airbrush. If you hold the mouse down long enough, the brush stroke spreads much lke an actual airbrush.

Step 9: The Basic
While the Brush tool is active, right click anywhere on the canvas to open up the Brushes panel. From the panel, you can select one of the available brush type.

Step 10
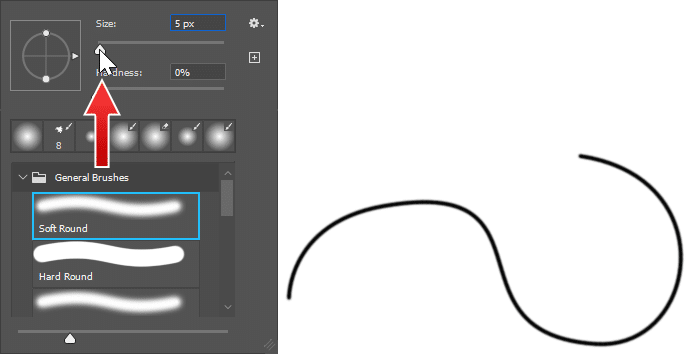
To change the brush size, drag the Size slider.

Step 11
The Hardness slider control the fuzziness of the brush stroke’s edges. Hardness 0% is a completely feathered edge and 100% is a crisp edge.


Step 12: Stroke Color
The brush stroke color is controlled by the foreground color. To change the foreground color click on the top color box on the Toolbox. A color Picker dialog box will pop up asking for the color you want to use.

Step 13
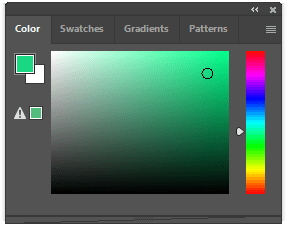
You can also use the Color panel. If you can’t find the panel, click Window > Color.
Step 14
You can also select predefined sets of colors in the Swatches panel.

Step 15
at a time, you can save two colors in Photoshop, foreground and background color. To set the background color click on the color box behind the foreground color.

Step 16
You can easily switch the foreground and background using the X key.


Step 17
While the Brush is active, you can hold Alt to temporarely switch to Eyedropper tool and click to select new foreground color.

Step 18
The interesting thing is you can select pixel outside the Photoshop interface as long as you keep on Alt + clicking your mouse button.

Step 19: Load Legacy Brush
Starting in CC 2018, Adobe introduces new sets of brushes and old additional brushes from previous versions of Photoshop seem to be missing. You still can find it using the Brushes panel menu. Open up the Brushes menu by right clicking the canvas and click the menu icon in its upper right corner. Select Legacy Brushes.

Step 20
A dialog box pops up. Confirm that you do want to load the old brushes by clicking the OK button.

Step 21
You will find the old brushes inside Legacy Brushes group.

Step 22: Calligraphic Brush
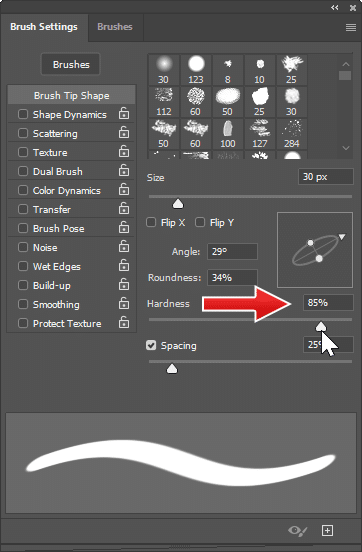
A more thorough settings for brushes can be found in the Brush Settings panel. You will find lots of settings to customize the behaviour of your brush. Let’s use it to make a calligraphic brush. Open up the Brush Settings panel by pressing F5. Select the first brush tip.

Step 23
Decrease the Roundness settings. You can also click and drag the dots on the brush tip preview to turn its shape into an ellipse.

Step 24
Add some angle to the brush tip. You can drag the arrow to rotate the brush tip. Make sure to keep an eye on the brush preview at the bottom of the panel, it updates in real time to every changes you make.

Step 25
Increase the brush Hardness to achieve crisp edge on the brush stroke.
Step 26
Test it by making a curvy line. Here is what I get.

Step 27: Make Your Own Custom Brush
Don’t delete the drawing you make earlier, we are going to turn it into a custom brush. Select it and then click Edit > Define Brush Preset. Give it a suitable name in the dialog box.

Step 28
A new brush tip will appear at the list. Select it.

Step 29
Set the Size and increase the Hardness. Try the brush to see its result.


Step 30
Activate Shape Dynamics and increase Size Jitter to randomize the brush size.

Step 31
If you use graphic tablet, the size variation can be controlled by the pressure you apply to the tablet and create more natural drawing process.

Step 32
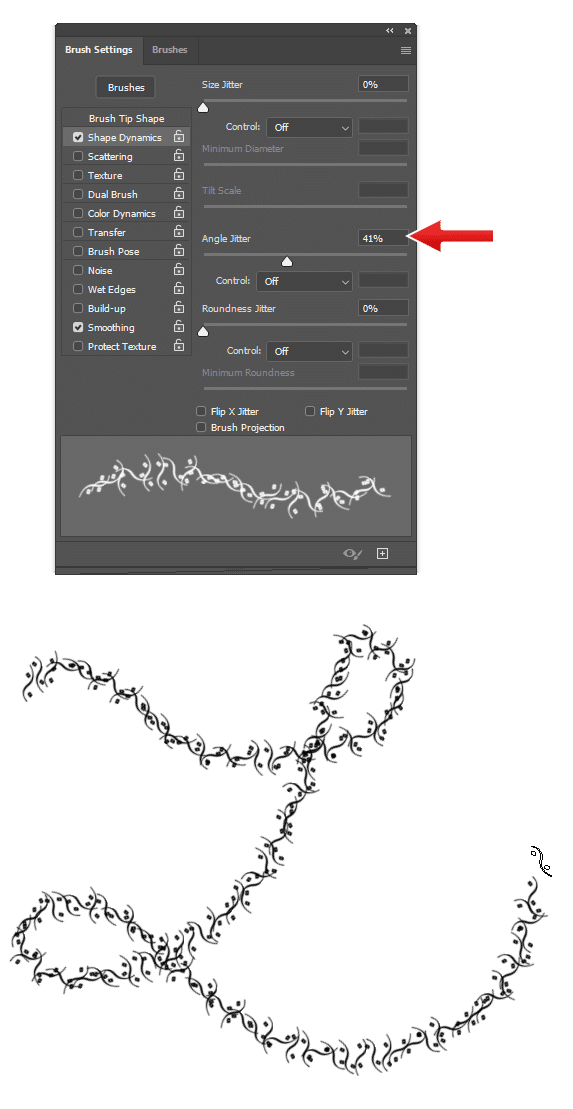
You can add random rotation to the brush tip by adding Angle Jitter.
Step 33
You can also spread position pf the brush tip and increase its number by adding Scatter and Count.

Step 34
Activate Color Dynamics and increase Hue, Saturation, or Brightness Jitter to randomize the color of each brush tip.

Step 35
Next to each set of parameters, there is a small lock icon. If you lock it, the selected set parameters will stay when you applied different brush presets. Let’s try it out, click on the Color Dynamics lock icon.

Step 36
Select different brush tip. If you try it, the color variation feature still works.

Step 37: Symmetry Painting
Photoshop’s brush has symmetry painting feature that can turn your drawing, in fact any drawing, into an interesting abstract painting. No artistic skill is required, random brush stroke will do just fine. Activate brush tool and click on the butterfly icon in the Option Bar. Select Vertical. This is the most basic symmetry painting.

Step 38
A straight line appears. It acts like a mirror. Everything you paint on one side will be reflected on its opposite side.

Step 39
You can also paint across the line.

Step 40
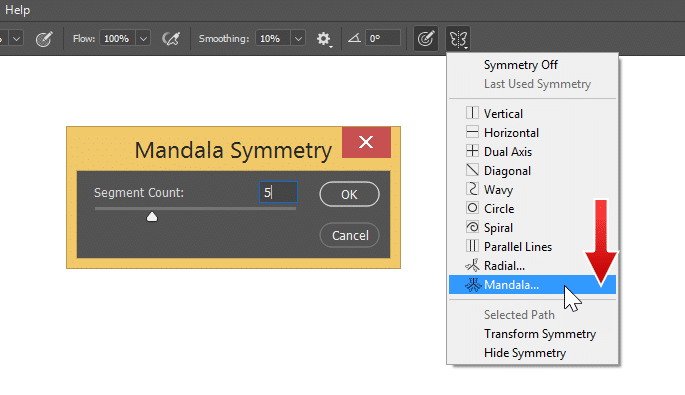
There are other type of symmetry. The most interesting type is Mandala. Select Mandala and select your number of mirror, Photoshop calls it segment.
Step 41
Click and drag to position the mirror.

Step 42
You can just simply draw.

Step 43
Just go wild. I promise you, anything will eventually looks cool. Here, I use custom calligraphic brush made earlier.

Step 44
To stop the symmetry painting, click on the butterfly icon and then select Symmetry Off.

Step 45: Precise Brush Stroke Using Path
Drawing a perfect curvy stroke might not be easy, especially if you use mouse. You need to have a steady hand. You can fix this using path.

Step 44
Open up Paths panel and then click Create new path icon to make a new path.

Step 45
Fire up the Pen tool and select Path in the Option Bar. Click and drag to make first anchor point. Continue adding another anchor point until we have the desired curve.

Step 46
Right click the path and select Stroke Path. Make sure you have prepared the brush and all its settings.

Step 47
In the Stroke Path dialog box, select Brush in the Tol option. Click OK to start painting along the path.

Step 48
You can also activate Simulate Pressure to simulate pen pressure.

Step 49
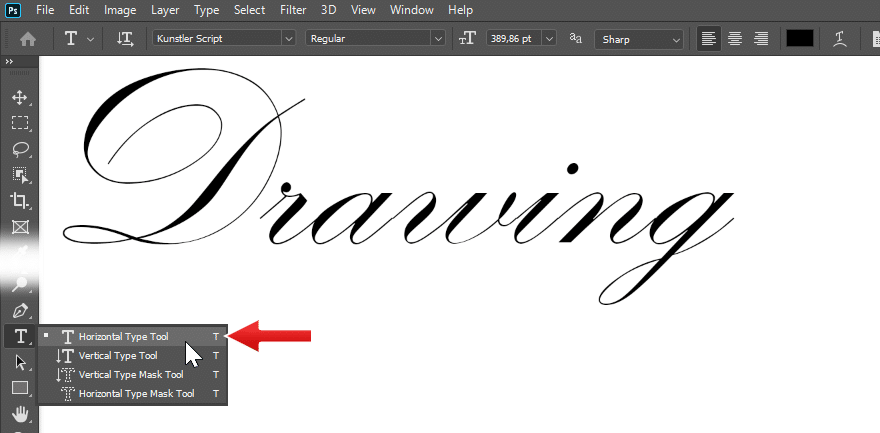
Using this technique, you can make brush stroke along a text. Let’s try it. Activate Type Tool and then write a text.
Step 50
In the Layers panel, right click the text layer and select Create Work Path.

Step 51
The text will be converted into a path. We won’t need the text, so let’s make it hidden by clicking on its eye icon. Add a new layer.

Step 52
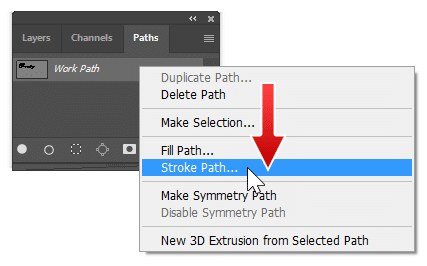
In the Paths panel, right click the path and select Stroke Path.
Step 53
In the dialog box, select Brush and activate Simulate Pressure.

Step 54
This is what we have from the brush stroke.

Step 55: Pencil Tool
Next to the brush tool, Photoshop has Pencil tool. It has the same settings and capabilities of a brush tool. The difference is a pencil will always produce hard edge stroke, even with 0% Hardness. Below is the difference between brush and pencil stroke, both using same brush tip size with 0% Hardness.

Conclusion
The digital pencil and brush tool is definitely a great to draw directly in Photoshop. But, this shouldn’t make you lose touch with the real world pencil and brush. I hope you enjoy the tutorial and thank you for reading. Stay home, stay safe, and don’t forget to wash your hand.

