Welcome to the 6th volume of the Mini PS Tutorial series here on PSD Vault! I created this series focusing on providing some easy and fun Photoshop tutorial for all Photoshop beginners.
In this tutorial, I will show you as a beginner, how to use self-made brush to create some nice abstract effect, plus having fun with the cloud filter and warp tool in Photoshop. I combined all these into making this abstract text effect, hopefully you will find it useful :)
Spicing up business cards with logos and design elements can have a lasting effect.
Here a preview of the final effect for this tutorial: (click to enlarge)

PSD File Download
You can download the PSD File for this tutorial via the VIP Members Area for only $6.95/Month (or less)! You will not only get this PSD File, but also 70+ other PSD Files + Extra Goodies + Exclusive Photoshop tutorials there. Signup now and get exclusive :) Find out more about the VIP Members Areas
OK Let’s get started!
To complete this tutorial, you will need the following stock:
Step 1
Create a new document (size doesn’t really matter) with light grey background, create a new layer and use a big soft white brush to paint a spot light from the top:

Load the crack brush into Photoshop, paint some crack pattern around the canvas (with a white colour brush) as shown below:

Step 2
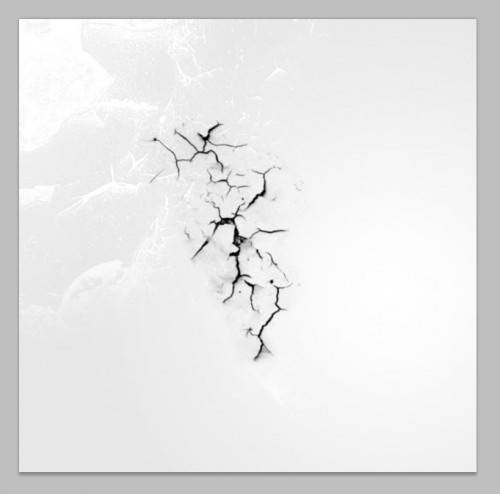
Use the Crack brush downloaded, select one from the pack:

Adjust the brush size to fit our canvas, paint crack pattern as shown below with a black brush:

Perspective it with free transform tool (Ctrl + T and right-click) as shown below:

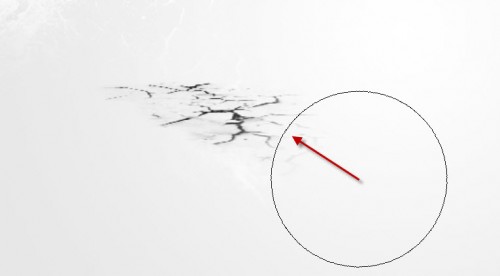
Use a soft eraser to remove its edges so it blends into the background:

Drop the layer opacity to around 20%, duplicate the crack layer once and link it with the original crack layer, you will have the following effect:

Use a Lasso Tool with 40px feather to draw a selection, and render some cloud in it with the cloud filter:

As you can see, because the feather setting we have on the lasso selection tool, the cloud will have a fade effect around its edge, making it easier to manipulate:

Drop the layer opacity for this cloud layer to around 20%, compress this cloud layer down with free transform tool:

Duplicate this cloud layer a few times and move them around the ground – adjust their shape, layer opacity as you go
and here is the effect you will have so far:

Step 3
Now we can have a play with the text layer. Use the Type Tool to type a letter on to the canvas – I will show you two ways to warp its shape:
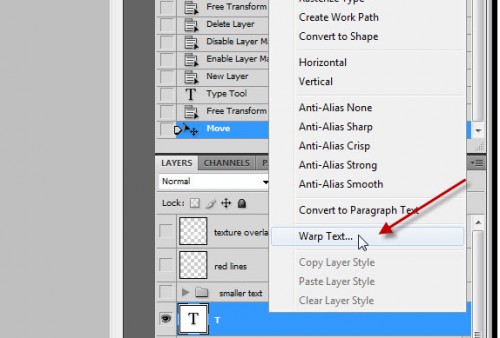
Method 1: Right-click on the text layer, and choose “Warp Text … ” option:

You will be prompted with the following window, which you then select the style you want, and adjust the Bend, Horizontal and Vertical Distortion:

This method will maintain the type layer as it is – however, you can not paint on it as it’s not a rasterized layer.
Method 2: You can Rasterize the text layer by right-clicking the layer and choose Rasterize Type:

Then hit Ctrl + T, then right-click on the text to select “Warp”:

Please note that for method 2, once you rasterize the text, you will turn this layer into a flat layer.
Repeat this process on a few more letters, make a combination of those as shown below:

Create a layer under the text and use a soft black brush to paint some shadow under the text, use soft erase tool to remove unnecessary bits as you paint:
Hint: set the layer opacity to around 20% for a subtle effect, don’t over paint the shadow.

Step 4
Now we can make a custom brush and use it as an eraser. Firstly, let’s create a new document sized 80px * 80px with transparent background, create a new layer and grab the polygon tool:

Set sides to “3* for a triangle shape on the tool option bar:
![]()
Draw a triangle as shown below:

Then go to “Edit > Define Brush Preset”:

Give this brush a name and click on “OK” – you have finished making a new brush :)

Apply the following brush options to this newly-defined brush:
Shape Dynamics

Scattering

and tick the “Airbrush”, “Smoothing” and “Protect Texture” options.
Use this brush as eraser, erase some parts of the layer as shown below: (adjust the brush size as you see fit)

Step 5
OK we’re almost done! For some final touches, we can duplicate the text layer a few times, reduce their sizes and rotate them with free transform tool, scatter them around the canvas as shown below:

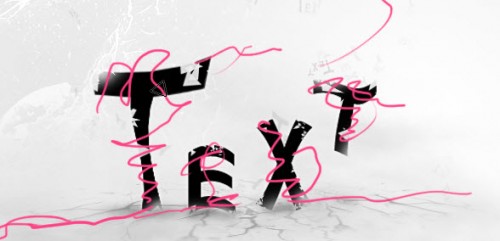
I also drew some lines around the text on a new layer:

and erased some parts of the lines with the triangle brush that was made earlier:

and here is the effect so far:

I added Some further colouring and lighting effect, and here is the final effect I have for this tutorial: (click to enlarge)

Meanwhile, you can check out this tutorial here on psdvault.com if you wish to learn some lighting effect tricks.
That’s it for this mini Photoshop tutorial! Hope you enjoy this tutorial and find it useful :)
Till next time, have a great day!


