Close Menu
PSD VaultPSD Vault
  • VIP Area
  • Photoshop Basics
  • Photo Effect
  • Text Effect
  • Premium Tuts
  • Resources
  • Drawing
  • Inspiration
  • Web Graphics
  • Abstract
  • Freebies
  • Advertise
  • Get in Touch
  • About PSD Vault
Facebook Instagram Pinterest YouTube TikTok
Facebook Instagram Pinterest YouTube TikTok RSS
PSD VaultPSD Vault
  • VIP Area
    • Sign Up
    • Log In
  • Photoshop Basics
  • AI
  • Photoshop Error Fixes
  • Video Tutorial
  • Photo Effect
  • Text Effect
  • Premium Tuts
  • Drawing
  • Opinion
PSD VaultPSD Vault
Home»Text Effect»Create Cold Winter Night Text Effect in Photoshop
Text Effect

Create Cold Winter Night Text Effect in Photoshop

By James QuDecember 18, 20244 Mins Read
Facebook Twitter Pinterest LinkedIn Tumblr Email
Share
Facebook Twitter LinkedIn Pinterest Email

In this tutorial, I will show you the steps I took to create this interesting cold winter night text effect in Photoshop. We will go through some texturing techniques, as well as an interesting method of creating break-apart effect. We will also use image adjustment layers to fine-tune the final effect.

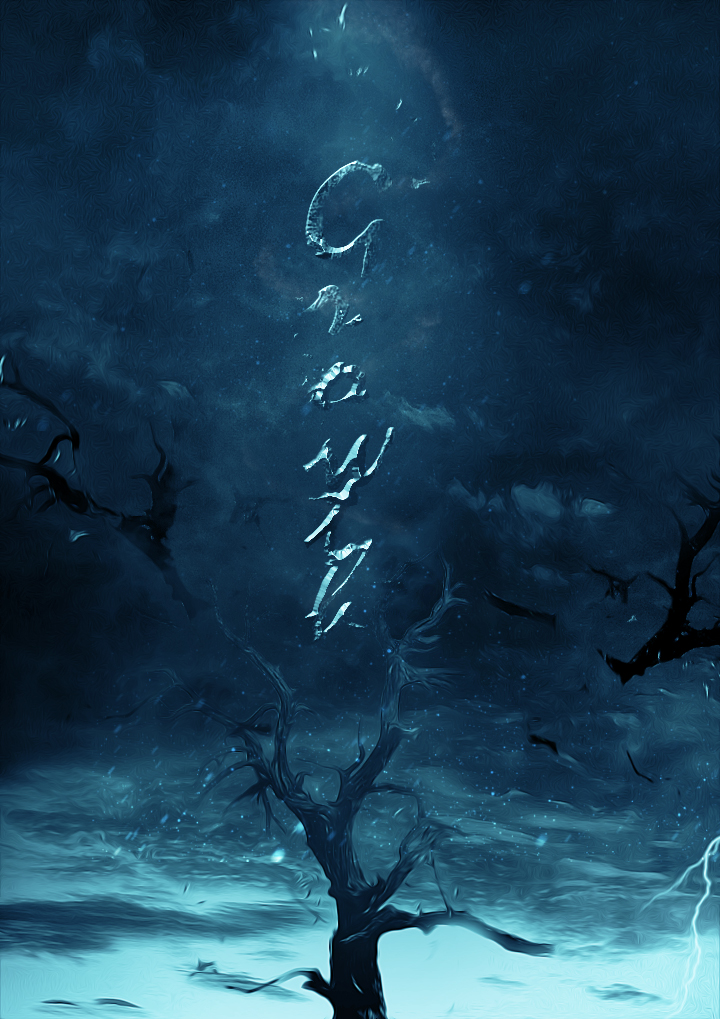
Here is a preview of the final effect I have for this tutorial: (click to enlarge)

PSD File Download

You can download the PSD File for this tutorial via the VIP Members Area for only $6.95/Month (or less)! You will not only get this PSD File, but also 300+ other PSD Files + Extra Goodies + Exclusive Photoshop tutorials there. Signup now and get exclusive :) Find out more about the VIP Members Areas

OK Let’s get started!

To complete this tutorial, you will need the following stocks:

Background

Tree Stock 1

Tree Stock 2

Step 1

Create a new document sized 720px * 1019px with black background. We will begin working on the background image.

Select the following image from the Background pack you’ve downloaded, copy and paste it over to our document:

Use a soft eraser to remove the following area from this layer:

Add the following image adjustment layers on top:

Black and White

Levels

Curves

and you will have the following effect so far:

Step 2

We will add a dying tree into the image in step 2. Load the tree stock 1 image into Photoshop and use the quick selection/magic wand tool to select the tree as shown below:

Copy and paste the selection over to our document, resize and position it to the bottom of the canvas:

Add the following image adjustment layers as clipping masks to this tree layer:

Black and White

Levels

Layer mask on the leves adjustment layer:

Curves

Layer mask on the curves adjustment layer:

and you will have the following effect so far:

Step 3

We will add some flying tree branches around the canvas to add some motions into our image. To do this, we can group all the tree layers from step 2 into a folder, duplicate this folder to merge the folder content. Then use the eraser tool to break the trees apart, as shown below:

We want to add them to both side of the canvas, as shown below:

Let’s start working on the text. Use any font you like, type some texts vertically onto the canvas as shown below:

Load the “tree stock 2” image into Photoshop. Select the text layer and move the selection to the tree stock image as shown below:

Copy and paste the selection over to our document, you will see the tree texture cover the text layer as shown below:

Make sure you hide the original text layer after pasting the texture.

Step 4

We will add some layer blending options for this new text layer we created in step 3:

Bevel and Emboss

Gradient Overlay

Add the following image adjustment layers as clipping masks to this text layer:

Black and White

Levels

Curves

and you will have the following effect:

Step 5

We will work creating some break apart effect for our text. To do this, we use the same method as we did in step 3 – group all the text layers we created in step 3 and 4 into a folder, merge the contents in this folder, then use a eraser tool to break text apart, as shown below:

Resize this layer to a smaller scale:

Duplicate and scatter the layer around the canvas:

Use a cloud/smoke brush to paint some cloud around the text:

Step 6

We’re almost done! For final touches, we can use a particle brush to paint some particle effect around the tree:

We can add a colour balance adjustment layer on top to add a cold effect for our text:

and here is my final effect: (click to enlarge)

That’s it for this tutorial! Hope you enjoy going through it and find it useful. Drop me a comment below if you have any question.

Till next time, have a great day!

cold effect night text winter
Share. Facebook Twitter Pinterest LinkedIn Tumblr Email
James Qu
  • Website

James is a seasoned Photoshop expert with over 25 years of experience, mastering the software since its 5.0 version. As the driving force behind PSD Vault, he authors the majority of its in-depth tutorials and insightful articles.

Related Posts

How to Create Rainy Night Scene in Photoshop

June 21, 2025

How to Create a “Black Widow” Movie-Inspired Text Effect in Photoshop

May 30, 2025

How to Create a Stunning Flying Jellyfish Photo Effect in Photoshop

May 26, 2025

Comments are closed.

Don't Miss

Why Learning Non-Destructive Editing is a Must for Every Photoshop Beginner

July 5, 2025

Mastering Sky Replacement in Photoshop: A Comprehensive Guide

July 4, 2025

How to Effectively Change Hair Colour in Photoshop

July 2, 2025

For Beginners

Basics

Mastering Sky Replacement in Photoshop: A Comprehensive Guide

By Lana WilsonJuly 4, 20256 Mins Read

How to Effectively Change Hair Colour in Photoshop

July 2, 2025

How to Use “Find Distractions” Feature in Photoshop for Easy Photo Clean-up

June 28, 2025

Photoshop June 2025 Update: Master New Features in Version 26.8

June 21, 2025

You May Also Like

Photo Effect

How to Create Rainy Night Scene in Photoshop

By Lana WilsonJune 21, 20253 Mins Read
Text Effect

How to Create a “Black Widow” Movie-Inspired Text Effect in Photoshop

By James QuMay 30, 20255 Mins Read
Photo Effect

How to Create a Stunning Flying Jellyfish Photo Effect in Photoshop

By James QuMay 26, 20255 Mins Read
Facebook X (Twitter) Instagram Pinterest
  • About Us
  • Get in Touch
  • Advertise
  • VIP Area
  • Privacy Policy
  • Terms & Conditions
© 2025 PSD Vault. All Right Reserved.

Type above and press Enter to search. Press Esc to cancel.

Manage Consent
To provide the best experiences, we use technologies like cookies to store and/or access device information. Consenting to these technologies will allow us to process data such as browsing behavior or unique IDs on this site. Not consenting or withdrawing consent, may adversely affect certain features and functions.
Functional Always active
The technical storage or access is strictly necessary for the legitimate purpose of enabling the use of a specific service explicitly requested by the subscriber or user, or for the sole purpose of carrying out the transmission of a communication over an electronic communications network.
Preferences
The technical storage or access is necessary for the legitimate purpose of storing preferences that are not requested by the subscriber or user.
Statistics
The technical storage or access that is used exclusively for statistical purposes. The technical storage or access that is used exclusively for anonymous statistical purposes. Without a subpoena, voluntary compliance on the part of your Internet Service Provider, or additional records from a third party, information stored or retrieved for this purpose alone cannot usually be used to identify you.
Marketing
The technical storage or access is required to create user profiles to send advertising, or to track the user on a website or across several websites for similar marketing purposes.
Manage options Manage services Manage {vendor_count} vendors Read more about these purposes
View preferences
{title} {title} {title}