In this tutorial, I will show you the steps I took to Create Awesome Particle Flame Text Effect in Photoshop. This is an intermediate level tutorial so some steps can be tricky, but why not have a try :)
Along the way, we will using lots of selection, layer blending, and custom brush effect. We will manipulate the fire texture with the liquify filter, and learn how to use adjustment layers to fine-tune the final effect.
The PSD file of this tutorial is available via the PSD Vault VIP members area.
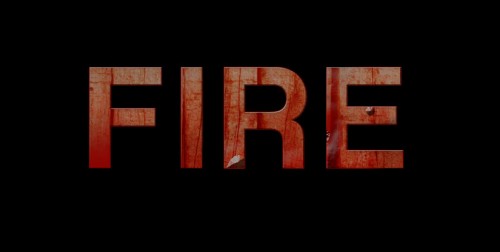
Here is a preview of the final effect I have for this tutorial: (click to enlarge)
PSD Vault VIP Membership
You can download the PSD File for this tutorial via the VIP Members Area for only $6.95/Month (or less)! You will not only get this PSD File, but also 200+ other PSD Files + Extra Goodies + Exclusive Photoshop tutorials there. Signup now and get exclusive!
OK Let’s get started!
To complete this tutorial, you will need the following stocks:
Step 1
Create a new document with black background (canvas size doesn’t really matter for this tutorial), create a new layer and use the font we downloaded, type some text on the new layer with a dark red colour:
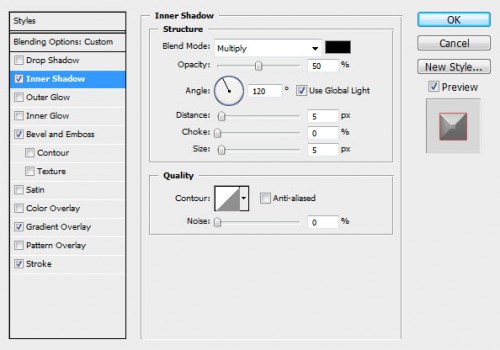
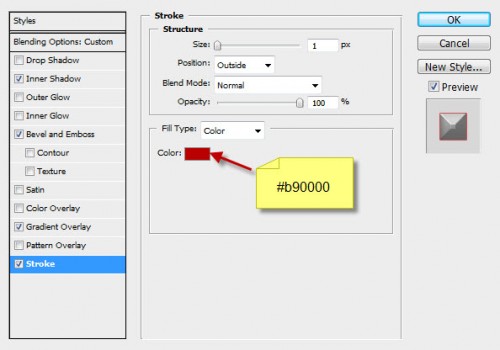
On this text layer, apply the following layer blending options:
Inner Shadow
Bevel and Emboss
Gradient Overlay
Stroke
and you will have the following effect:
Step 2
Now let’s add some wooden texture onto the text. Load the wood texture image into Photoshop, load the selection of the text layer from our document and drag it onto the wooden texture:
Copy and paste the selection onto our text, then reduce the layer opacity to around 65%:

Then, duplicate this wood layer once and set the blending mode of the duplicated layer to “Overlay”, increase its layer opacity to 100%. You will have the following effect:
Optionally, you can add a colour balance adjustment layer as clipping mask to this wood texture layer to tune the colour a bit:
and here is the effect so far:
Step 3
If you’re having trouble with this step, check out this video Photoshop tutorial I have below:
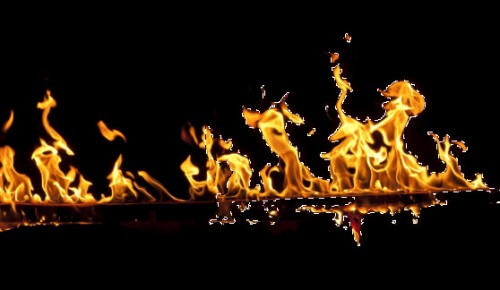
Let’s add the fire texture onto the text. Load the fire image into Photoshop and use the Quick Selection Tool select a portion of the fire as shown below:
Hint: Hit Ctrl + Alt + R and bring up the Refine Edge tool to adjust the edge of the selection to get better result.
Copy and paste the fire selection to our document, put it above all previous layer and change the blending mode to “overlay”:

Duplicate the fire layer once and change the blending mode to “Screen” – by doing so, you can add more fire texture onto the text and give it more depth:
Go back to the fire texture image, use the quick selection tool to select another piece of the fire, copy and paste it onto our text: (adjust the blending mode of the fire texture accordingly, you can try “color dodge”, “soft light” and “screen”, have some experiments :)

You can also use the Liquify filter to warp the fire texture and create a flowing effect for the fire texture:

and here is the effect you would be aiming to achieve:
Step 4
We can add some smoke behind the fire with the cloud filter or a smoke brush:

Let’s create the triangle particle brush – create a new document with a rectangular shape, add a new layer on top and use the Pen Tool to draw a shape as shown below:
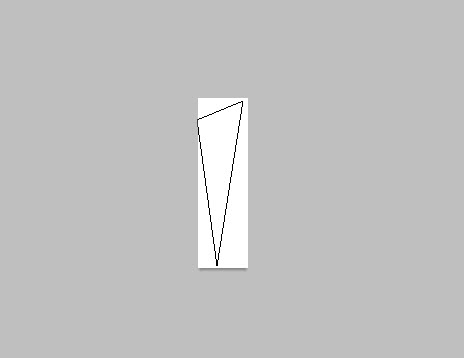
Right-click and fill this path with black colour:

Turn off the background layer, and go to “Image > Trim” and trim the transparent pixel off:

Go to Edit >Define brush preset and define a new brush:

Once you’ve done adding this new brush, press F5 and bring up the brush options window, apply the following settings:
Shape Dynamics
Scattering
Other Dynamics
Now you can use the newly created brush to paint some red particles around the text:
Hint: adjust the brush size as you paint to add more depth to the image. also remember to save this brush so you can reuse it in the future.

Step 5
We’re almost done! For some final adjustments, we can flatten the image, duplicate the background layer and apply the following Reduce Noise filter settings:
As you can see, after the noise reduction, we have a clearer, more fiery text effect with warmer colour:
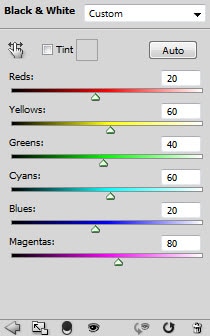
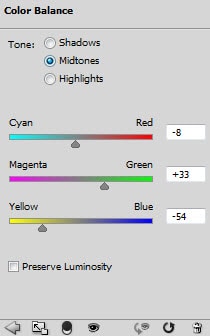
Add the following 2 image adjustment layers to the image:
Black and White (Important: set blending mode this layer to “color dodge”)
Color Balance
As you can see, we added some brighter colour to the image by having those 2 image adjustment layers:

and here is the final effect I have for this tutorial: (click to enlarge)
That’s it for this tutorial! Hope you enjoy it and find it useful :) Till next time, have a great day!











14 Comments
cool effect :) thanks for sharing!
thanks friends it is very use full tips for me……and think all of all photoshop user
Nice, that was cool :-)
How do you put the wooden image into the text can you make a vid or describe it to me? Please comment back here thank you ( Step 2)
@7040da39814bd272a6a9440211dd3ea2:disqus : Check out this video tutorial: http://youtu.be/t8MEu2orNSI, the technique is similar
Wow, this is really good effect. Thanks for this tutorial.
You, My Friend…….SUCK at this tutorial ! Everything you said in here is wrong ! from the beginning til the damn end ! I did everything you said in here and It’s not even 1% close to what’s yours !! man, Either you say everything you know about it, or just keep it for yourself, but spare us the damn puzzles for us to try find things out on our own.
you’re good, I admit, but you’re not at teaching I guess…
hey, i cant seem to get the wooden texture to mask the font. please help me out.
LOL, i think this is for the moderate user users cause i see all the beginner don’t understand much from this tutorial…
by the way, thx for the post and it’s awesome!!!(^_^)
Excellent tutorial,I love this!
thanks the file.
very nicely explained sir ……. an awesome job …thanks !
The contents of the lecture, I hope. Blend entering the stage 1 does not go a little understanding.
As a result I will never be given out much layer styles. Please answer.T^T….
Yeah… no. I followed this tutorial in another edition of PS, and I have GREAT results despite everything having been changed. I didn’t use it on text, but for an icon of a flaming hammer,. and I love it. :D
It’s really important to know how to do this. So thanks for sharing.