In this tutorial, I will show you the steps I took to create this Flowing Water Stream Metallic 3D Text Effect in Photoshop. The main focus of this tutorial is the combination of water stream brushset and warp tool, plus some texturing practices. Have a try!
Here is a preview of the final effect I have for this tutorial: (Click to Enlarge)
Version 1
Version 2
PSD File Download
You can download the PSD File for this tutorial via the VIP Members Area for only $6.95/Month (or less)! You will not only get this PSD File, but also 70+ other PSD Files + Extra Goodies + Exclusive Photoshop tutorial there. Signup now and get exclusive :) Find out more about the VIP Members Areas
Ok Let’s get started!
To complete this tutorial, you will need the following stock:
Metal Texture (you need to create an account first before downloading)
Step 1
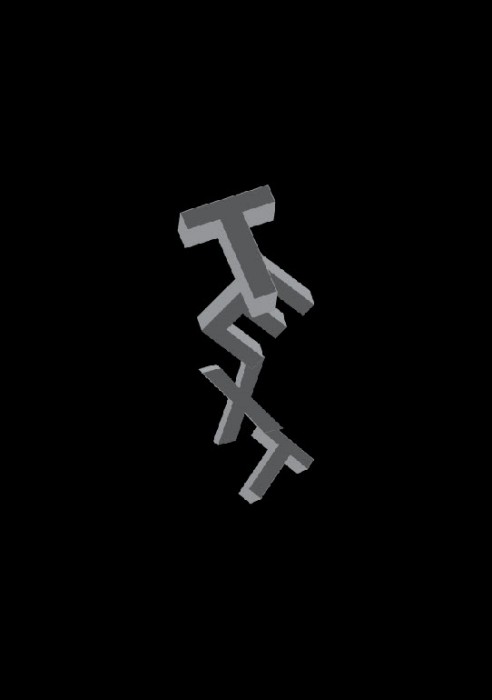
Load the 3D Text PSD File into Photoshop (I created those letter in Illustrator) – you will have four letters, each on a separate layer:
Apply the following layer blending options to each letter:
Drop Shadow
Gradient Overlay

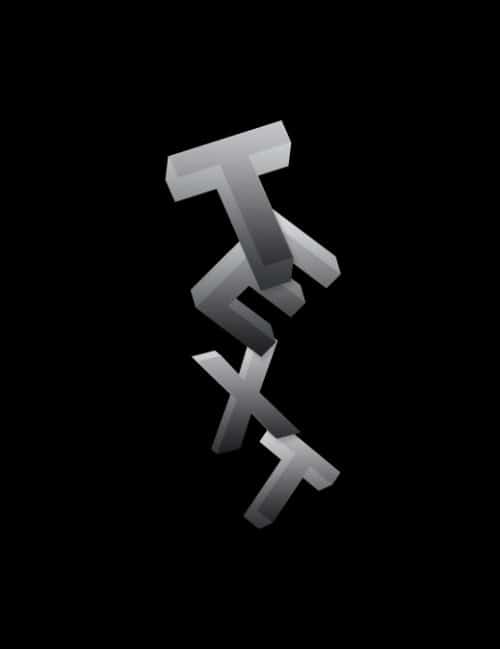
Merge all texts into one layer, and you will have the following effect:

Step 2
We’re now onto the texturing part. Add then following layer mask on the text layer with a soft eraser tool:

here is the effect after applying the layer mask on text layer:

Load the selection of the text layer, then move the selection onto the metal texture you downloaded: (see screenshot below for instruction)

Copy a portion of the metal texture with our selection:

Copy and paste the texture onto the text, set the layer blending mode of this texture layer to be “overlay”. Then duplicate this texture once and you will have the following effect:

As you can, because we add the layer mask on the original text layer, we now have some shadows under the text:

Add a black and white image adjustment layer on top of all previous layer:

and here is the effect so far:
Step 3
Create a new layer and use a soft black brush to paint some dark parts around the text: (set layer blending mode to color burn, with layer opacity 50%)

Load the water splash brush into Photoshop, paint some water around the text on a new layer:

You can use the Warp Tool to warp the water splash and create a flow/stream effect:

After warping, use a soft eraser to remove unnecessary bits around the edge:

Duplicate the warped water stream layer a few more times, scatter them around the canvas, make sure you alter their layer opacity to create some depth for the overall image:
Step 4
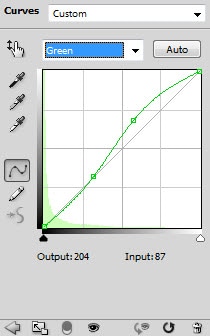
I decided to give the text a bit of dark brown effect, similar to the color scheme of “Heavy Rain” game cover. So go ahead and add the following Curves adjustment layer on top of all previous layer:


and here is the effect so far:

Step 5
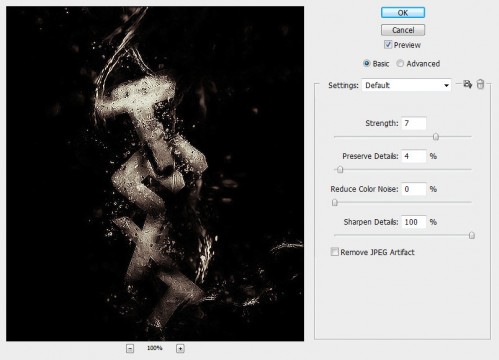
We’re almost done! For some final touch-ups, flatten the image and duplicate the background layer, apply the following smart sharpen filter to it:

Add the following layer mask on this sharpened layer to hide some part of it: (we don’t want the whole text image to be sharpened)

Duplicate this sharpened layer once and apply the Liquify Filter (Forward Warp Tool) on the text, just go crazy with it and create some random pattern as shown below:

Change the blending mode of this liquify layer to “color dodge”, and you will have the following effect:

I further added some colours on top with color balance adjustment layer and some soft brushes. I decided not to show the exact colour here and instead, I would like you to experiment with different colour scheme, and see what sort of results that will bring you.
Here are my two versions of final effect: (click to enlarge)
Version 1
Version 2
Hope you enjoy this tutorial and find it useful! Till next time, have a great day!


12 Comments
Great Tutorial and Techniques well explained!!
Thanks for sharing…
Featured in Tutorials of the week in http://www.hangaroundtheweb.com
I am sorry about the noob question, but step 2 is not explained very well. Can someone please explain it in more detail.
Could you please elaborate more on step 2? and put a bit more elaboration after step 2? i received a product FAR different from the end result.
@Elm: sure. For step 2 you need to first apply the layer mask, then copy and paste the texture onto the text. Make sure you change this texture layer blending mode to “overlay”.
You need to understand the basics such as masking, selection, and layer blending.
Hope this helps.
i can understand it if you simplify it. I’m not incompetent in Photoshop but it sure helps when you walk someone step by step instead of skipping ahead and assuming you know what your on about.
Could You Please Ellaborate On Step 2 Its Not A Very Good Explanation..Seriously i Understand That I Need to Know More On How To Mask But You Could Atleast Just Show..The Steps On How You Used The Black Soft Brush Around The Text..Thanks
can you help me, i would like to use this for our wrestling site but need to change the text. do you have a tutorial on the 3d text?
Perfect your water effect on text. Thanks.
my outcome:)
http://www.flickr.com/photos/43572428@N03/5625412694/sizes/l/in/photostream/
Amazing post!! Great resource. Thanks!
Absolutely lovely! Fab tutorial. Thank you for posting.
Nice tutorial … great work, man! Thanks for sharing.